


Carolyn J. Braden • 3 Minute Read
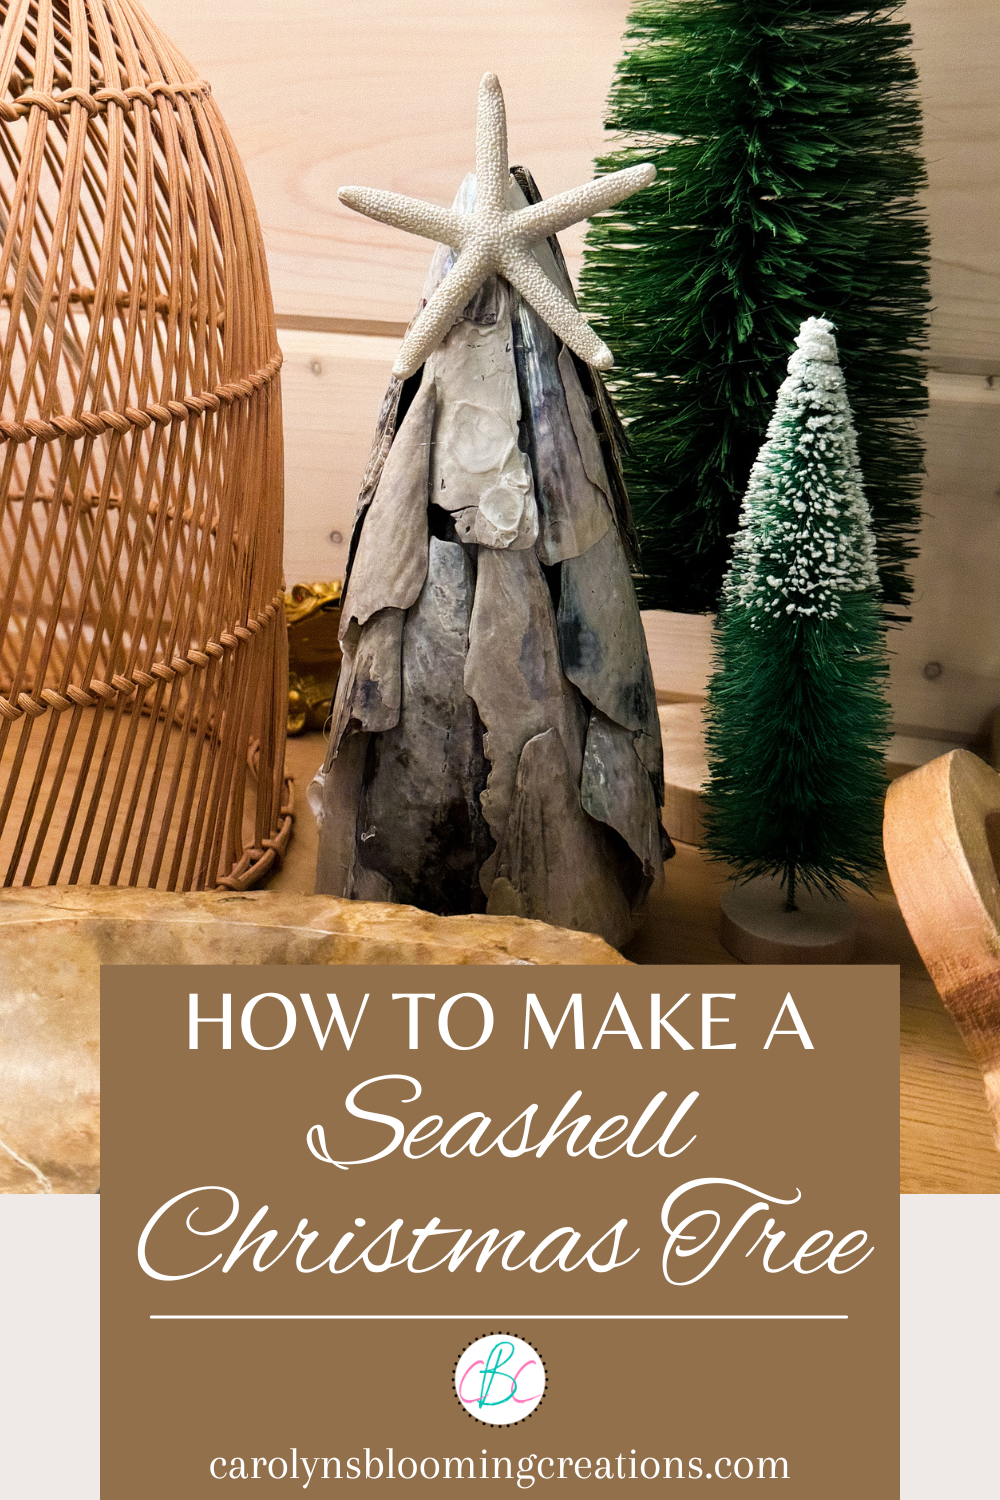
How To Make a Seashell Christmas Tree
Years ago, I was browsing Etsy and came across some beautiful Christmas trees made out of seashells. They were quite expensive to purchase, and like I do with many things, I wondered if they were expensive to make. I dissected what it would take to create one myself, and I came up with my own seashell Christmas tree project that is affordable and super cute! Read on to learn how to make a DIY seashell Christmas tree.

The shell trees go great with our bottle brush trees
There are many versions of seashell Christmas trees out there. You can truly create one with a variety of shells. If you don’t live close to a seashell filled beach like I currently do (I live on Sanibel Island in Florida, which is a well-known seashell finding destination), you can purchase some online. I only select shells that are not live, as it’s illegal in Florida to take shells from the beach that have living creatures in them still.

I love how my shell tree turned out!
I saw some seashell trees that were made from oyster shells and they were beautifully adorned with gold leafing and pearls. This was a beautiful combination, but I wanted to make mine original and different.
See another cute Christmas craft I created, a tulle wreath ornament! See it below or via my YouTube channel @carolynjbraden:

My coastal Christmas decor is minimal, but I like it
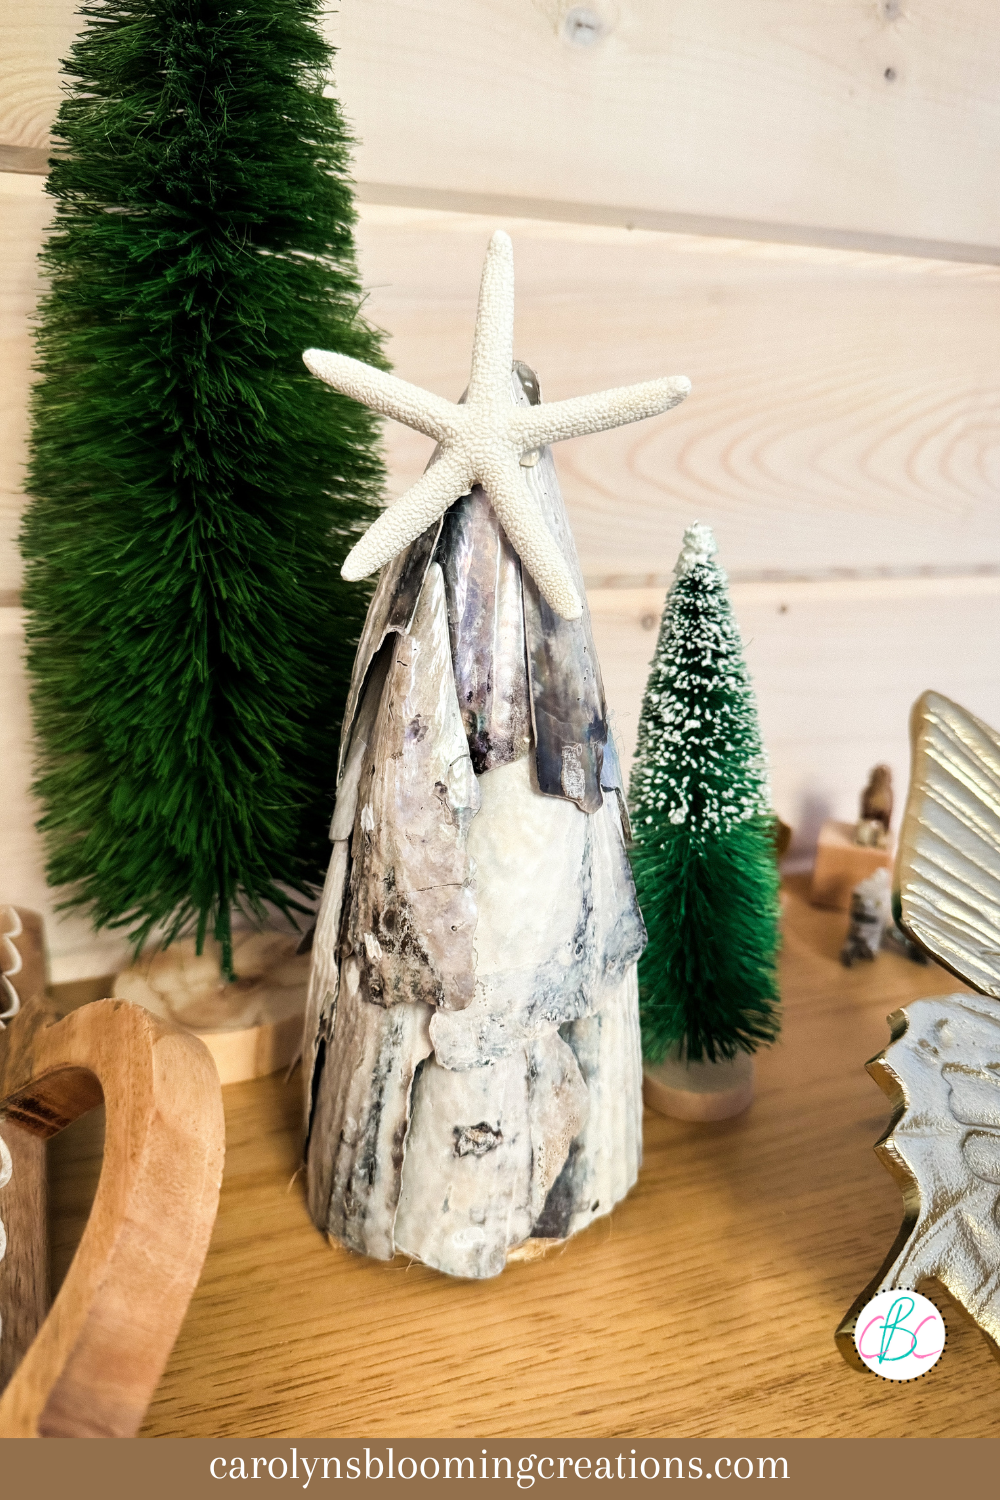
I choose to use the delicate Pinnidae shells for my seashell Christmas tree creation. I fell in love with this shell when I first visited Sanibel, as they have an iridescent coloring on their shell, which sometimes looks like a beautiful oil and water rainbow.
See the whole project tutorial in one minute in my video below!

The shell trees also match my full size silver Christmas tree
Pinnidae shells are very fragile, have a triangle shape and can take on an iridescent white tone over time. I wanted the whitish ones so my trees looked “snowy”. I went to a local Sanibel beach and collected many Pinnidae pieces that I felt would work best for my overall design concept. Most were broken, but because I’ve worked with this shell type before to make earrings and a hair barrette, I knew they could be sanded to have smoother edges.

My completed shell tree
After collecting my seashells, I took them home and rinsed them with soap and water to remove the “beachy” smell. I then allowed them to dry completely. I then started selecting the shells I wanted to work with, choosing a mixture of large and small pieces. Then I laid out my supplies and started to create my seashell Christmas trees.
Pinnidae Seashell Tree
Here are the steps I took to make a completed shell tree, including buying links to products I used from Amazon.
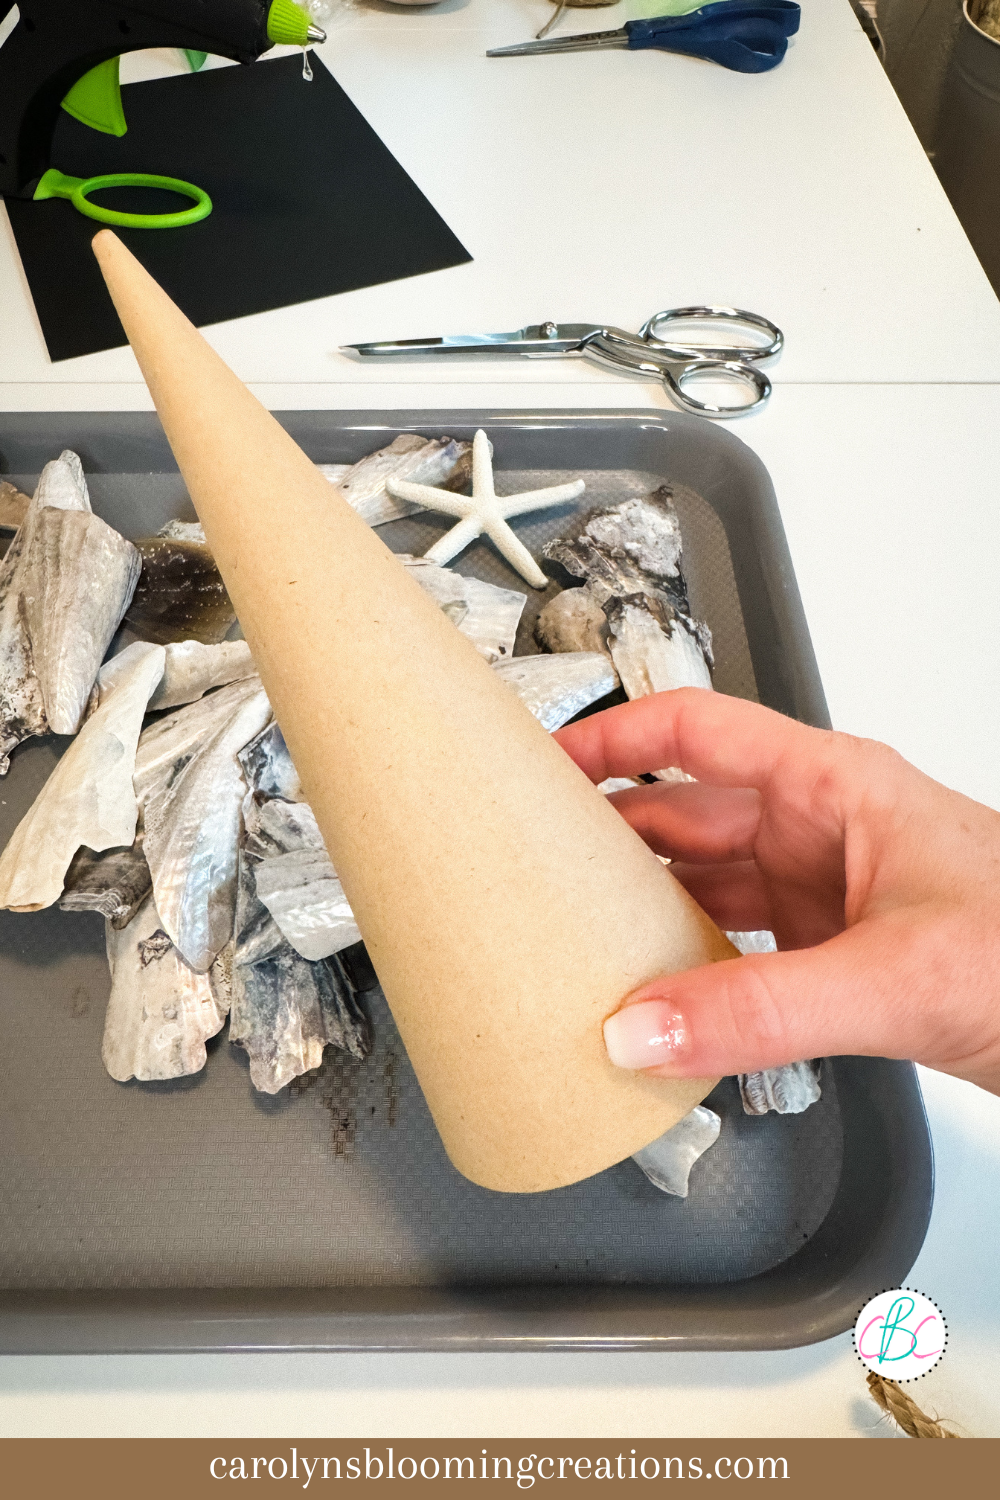
My seashell christmas tree supplies
Supplies for 2-5 Seashell Christmas Trees:
10-40 clean and dry seashells of your choice (I used Pinnidae, which are a larger shell, the smaller shell you use, the more you will need and vice versa for larger shells)
Paper Mache cones (mine were 7.87” in. tall and 3.15” in. wide at the base)
Hot glue gun (I used a low heat setting as the shells can get very hot!)
Faux starfish (I chose to use faux as I couldn’t find any dried starfish that were definitely sustainably or humanely harvested)
How to:
1—First I cleaned and selected my shell pieces.

The rope can help your shell tree not scratch a table
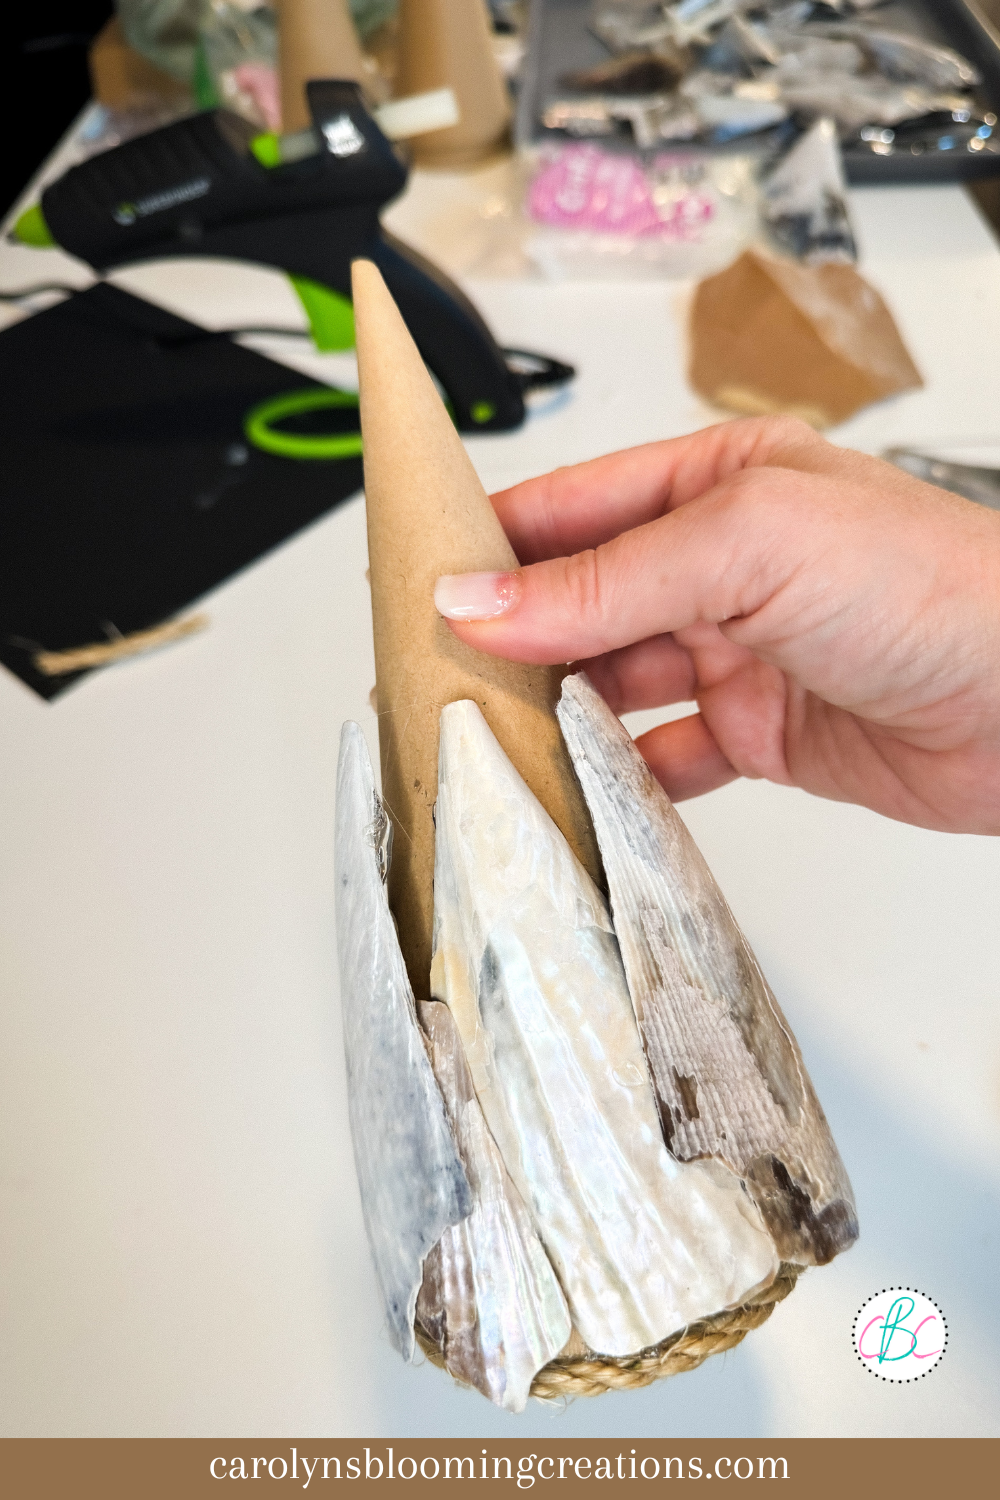
2—Next, I hot glued a piece of rope to the bottom of my paper mache cones. This adds a little height so you can glue longer shells just below the base of the cone AND it adds protection from scratchy shells harming a table.
I started at the bottom and worked my way up
3—I practiced laying out a few shells on the tree without gluing. I thought about starting from the top, but I ended up starting from the bottom and working my way up. You should do whatever works for the type of shell you use.
4—I started hot gluing shell pieces to my paper mache cones using a low heat temp (the shells can heat up and burn your hands if you are not careful).

5—If you need to break a shell to fit or have any with sharp edges, use a fine grit sandpaper to lightly sand it. I had to do this with a few shells.
6—Glue the shells all over the paper mache cone until you cover it completely. I tucked in a few small shells and glued them to fill any gaps once my trees were covered.

I used a resin faux starfish
7—Lastly, I figured out which side I wanted to be the front and then hot glued a starfish onto the top of that side of the tree.

The finished DIY shell tree
If you make this project, let me know in the comments section below! I’m excited to try more shell tree designs using different shells. These seashell trees make great gifts for the beach lover in your life! It cost much less to make than it did to buy, but if you aren’t crafty, check out some shell Christmas trees on Etsy to support the artists that make them.
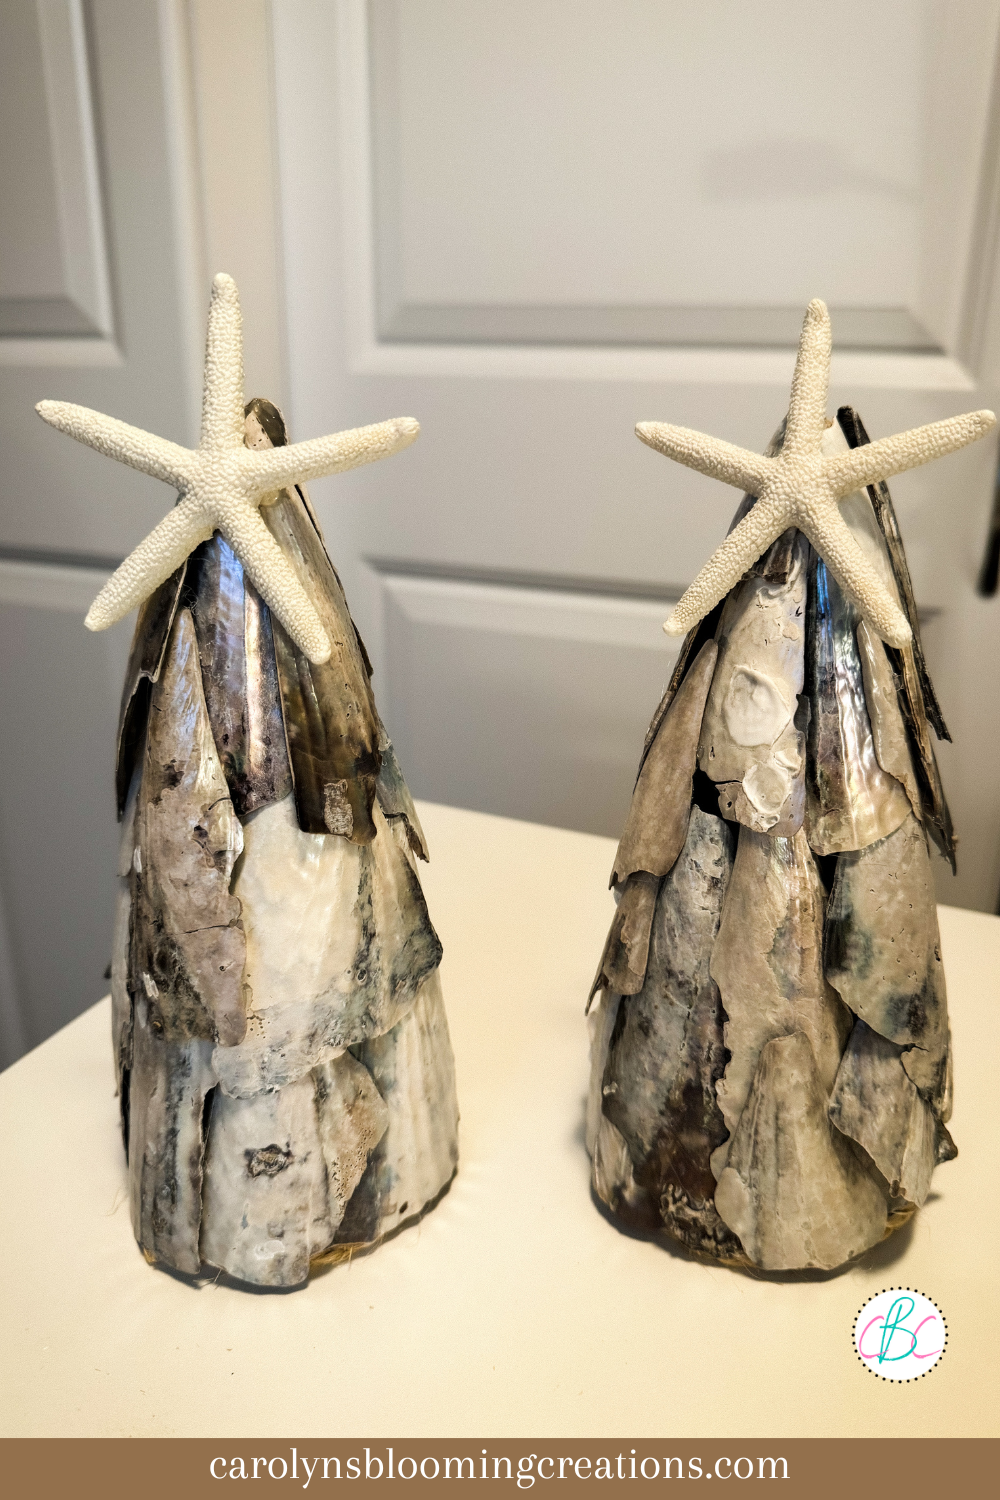
I made two seashell trees
If you loved this article, we know you’ll love this one too: How To Make a No Sew Tug Toy
Carolyn J. (C.J.) Braden is a regular contributor and editor for Carolyn’s Blooming Creations. She has been featured in numerous media publications such as InStyle Magazine, on HGTV, on Bustle.com, and more. She is the author of the books Georgia McMasters in Amethyst Lake Cemetery, How To Be Yourself: 3 Ways To Help You Being You, and the illustrator for the children’s book Bridging Connections. She is a former classroom teacher that now dedicates her life to educating others on how to live their most healthy, creative and happy life. Learn more about her visiting our About Us page.