


Carolyn J. Braden • 3 Minute Read

DIY Black and White Bathroom Makeover + The Smoothest Chalk Painted Bath Vanity
Updated: 2/24/26
While gut remodels can bring your home into current style, they often times are very expensive, take quite a while to complete and are messy. Sometimes it’s okay to complete a simple makeover by only painting your walls and trim. Just painting walls or chalk painting cabinets can make it look fresh and new, and that can be a quick fix when you need an update in your home.
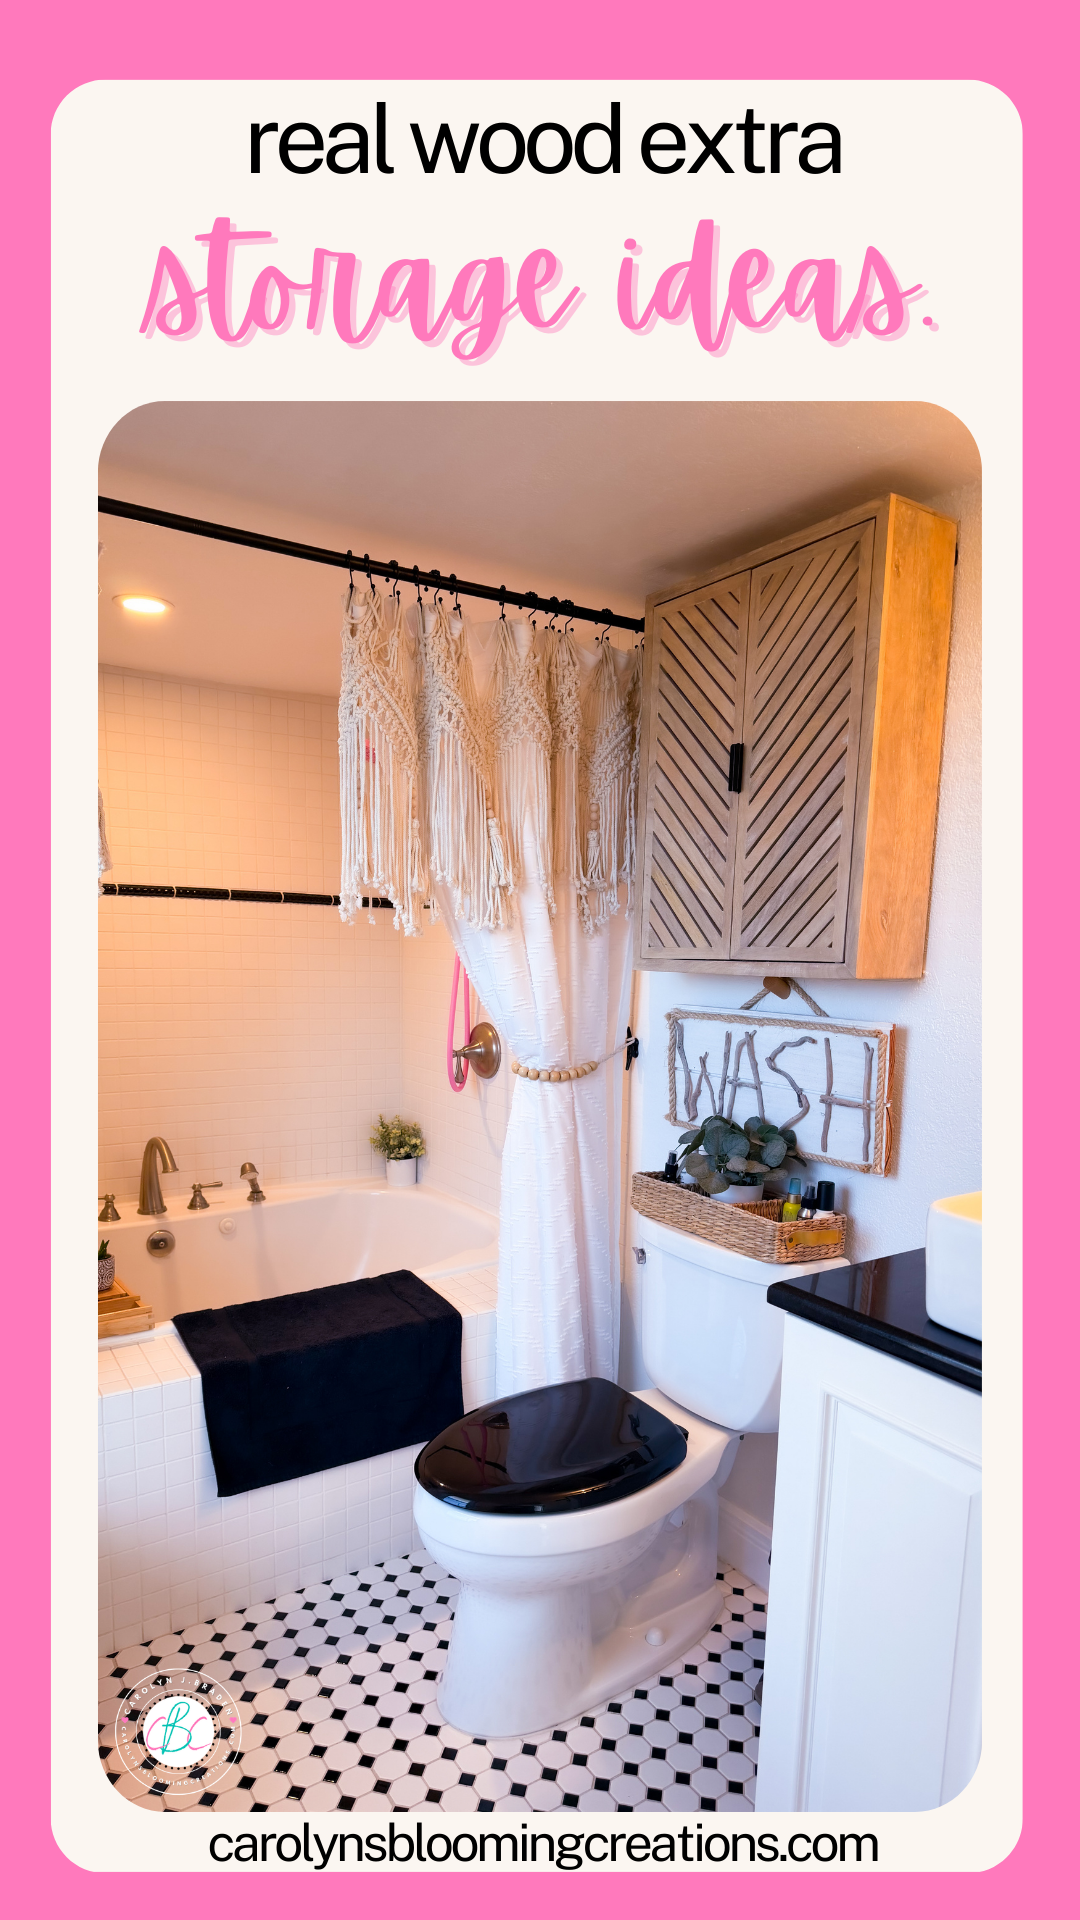
We love this mango wood storage cabinet…would buy again and again!
Shop the Post
Support me as a creator and shop my links with no extra cost to you! See my 2026 update to a real wood cabinet storage solution (above) via my Amazon Shop plus get buying links at affordable prices!
Get my favorite shower filter system by Sproos! below too for an easy and quick bathroom update that is also sooo great for your hair and skin! Get a Sproos discount code only in my Sproos review article here.
We also love shopping CVS (the ExtraCare card savings stack helping you to save!) and here are some of our CVS finds to stock up on (especially when you get that 40% off coupon!) and love Walmart (Walmart+ gets you free shipping and delivery on many items)!
Bookmark or pin this one by clicking the Pinterest SAVE button on the images in this article for bathroom decor magic in an instant.
More Product Loves
You can also get the products and more of my product loves via my Target shop here or my CVS Store here (use your ExtraCare card to double up on savings!) or via my shop my store here or below:
When we purchased our most recent Sanibel Island home, I knew the bathrooms were eventually going to need complete and total renovations, but those were going to have to wait. We placed our thoughts on gut remodeling into our 5-10 year plan, but needed to make them look nice in the mean time.
Read on to see what we did to refresh our 2nd floor bathroom in our simple island bungalow. This has been an ongoing project for 5 years and our next plan is either to move or do a full renovation. These are great ideas to do until that full renovation is due.
Boho Modern Bathroom

Black and White Bathroom Makeover: Before
When we purchased the house, the bathroom walls were painted purple and the ceiling wasn’t all the way painted. We think a repair had been done to the ceiling prior to us purchasing it and for whatever reason, it had not been painted.

Old Towel Rack Before the Makeover
I remember looking at the photos of the bathroom in the house listing when we were searching for homes. Based on the photos and the order they were in on the listing, I thought the towel rack was something you hung laundry on.
See our one minute or less video tour of the bathroom below or via our YouTube channel @carolynjbraden:
It was an old Restoration Hardware piece, but when seeing it in person, it was pitted, cracked and missing pieces. It also wasn’t very functional and it was way too large for the space. It also completely broke when my husband removed it, so we had to find a new one.

Our Bathroom Vanity Before the Makeover
There was no vanity mirror and the light fixture was rusting and missing crystals. The air vent was propped up by the light. The cabinets were still in decent shape though they were stained, yellowing and had some paint rubbing off on the door faces. The toilet paper roll holder was broken and the cabinet knobs began falling off after our first shower.

Our old bathroom purple walls
Per the usual in all our home renovations, the space needed more work than we originally thought. But, that’s how it goes in the world of being a homeowner sometimes.
The first thing we did was change out the light fixture, add new handles to the cabinets, and add a mirror. Then we painted the ceiling, walls and trim in shades of white.

Black matte vanity handles and new modern vanity light
Next, I got out my trusted Annie Sloan Chalk Paint in the color “Pure”. In my past chalk paint adventures, I’ve brushed it on, which gave it a brush texture look. This time, however, I wanted the cabinets to look very smooth, so I rolled it on. I used a small paint roller with a sponge roller for the large areas (which I purchased at Lowe’s), but used a brush for the trim and any small crevices.

Smooth chalk painted bathroom vanity
I watered the paint down just a teeny bit in the paint tray and stirred it well before using it. You don’t have to do this, but because the paint is so thick, I felt it rolled on the cabinets a little bit easier. Using the white chalk paint over the white cabinets still had me painting on 3 coats for full coverage as there were lots of stains. You may not have to do so many layers if you were using a darker chalk paint color.

Using a sanding brick to lightly sand the chalk painted cabinets
After the paint dried, I used a fine grit sanding block to lightly sand the cabinets. I pressed very lightly so I didn’t take off too much of the paint. I was only removing the little amount of texture the roller left behind, and not trying to give the cabinet a distressed look. If you want a distressed look, sand more aggressively or use a heavier grit sanding block.

Before and after sanding the chalk painted cabinets
Sanding helped to get rid of most of the texture. You could only see the remaining texture if you got very close to the cabinets. Otherwise, they looked super smooth.
I used chalk paint because I’ve found it stays on furniture and cabinets better than traditional house paint. I’ve painted kitchen cabinets in chalk paint and in regular paint and the chalk painted cabinets held up much better. I’ve used Behr chalk paint and Annie Sloan, and I like the Annie Sloan better. It’s thicker and provides better coverage than the Behr. I also like the look and feel of her chalk paint. It reminds me of the glazes I used when making pottery. It even smells like it.

Using white wax on the chalk painted cabinets
I usually use clear wax with my chalk paint, but this time I used white wax. It was a little creamier than the clear wax. I brushed it on and also used a cotton cloth. As the packaging states, I rubbed it in like you would smooth lotion into your skin.

I used a cotton cloth and a brush for the chalk wax
I felt it helped my white paint look even smoother. The wax also waterproofs the paint.

The look of the cabinet doors with wax and without wax
After the waxed dried (about 24 hours), I used a cotton sock to buff it. This made the cabinets have a bit of a shiny finish.

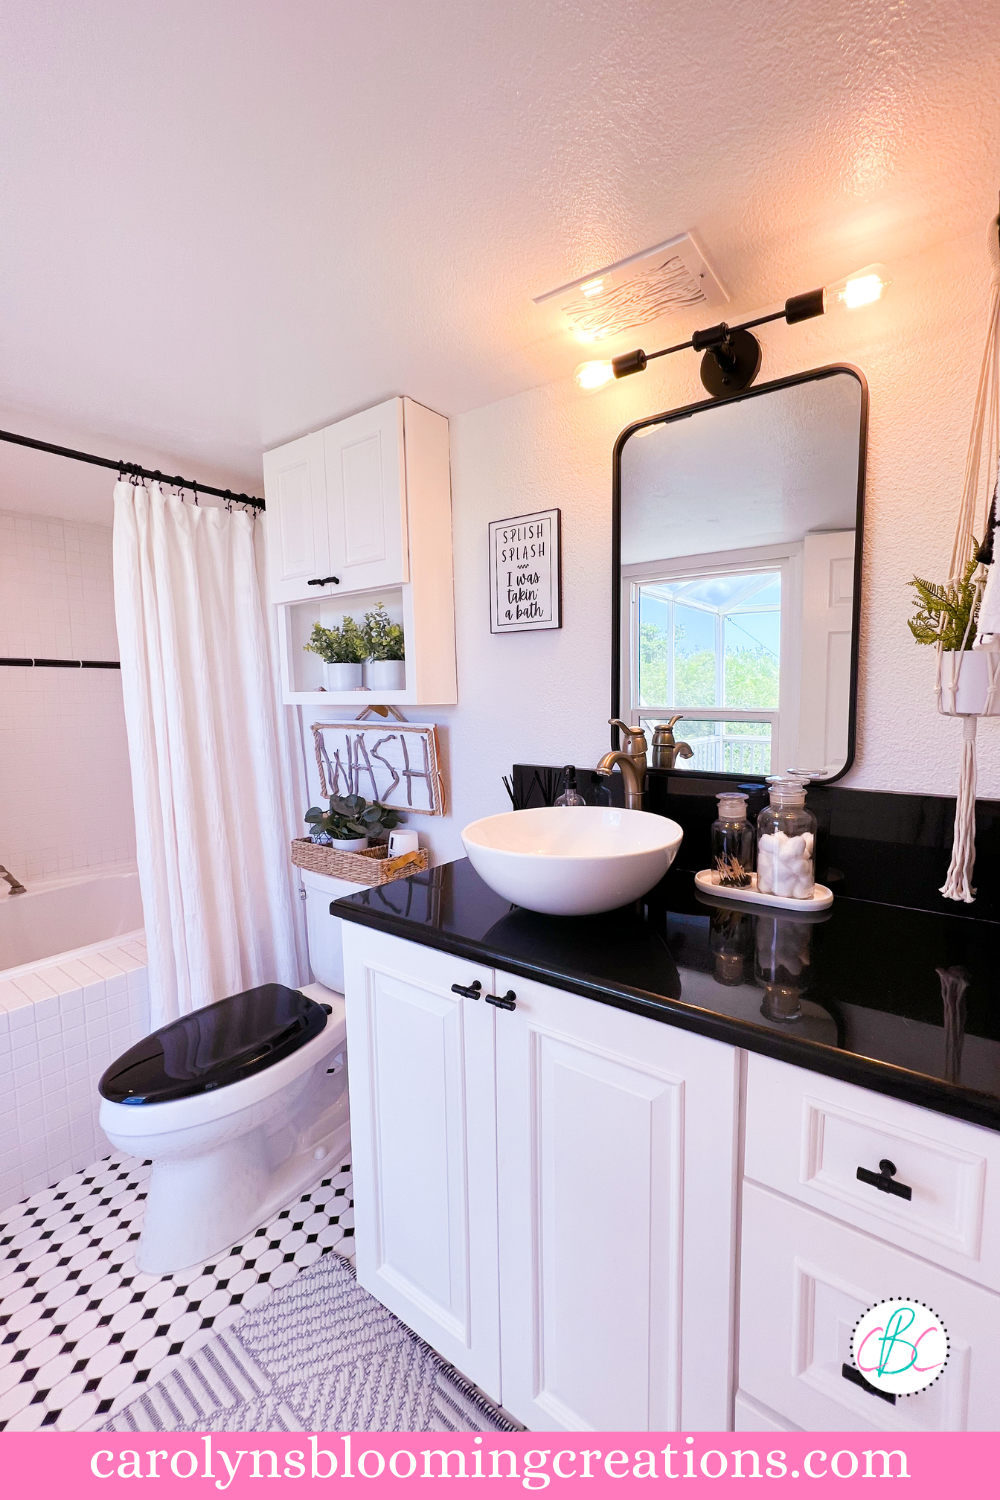
The completed black and white bathroom makeover 2021
After all the painting, we changed out the air vent (from Amazon) to a new one with a bit more design and style. The old one had been painted and was peeling, so this seemed like a good time to change it out.
Then got to do the part I like the best-the decorating! When I decorate, I scour the internet and lots of stores looking for the best prices as well as well-made items.

Our tank tray design
The “tank tray” is from Target, as well as the faux plants. The jar in the tank tray (which holds sanitary items) was a clearance find from T.J. Maxx. It was $6.00 and contained lots of mini nail files, so it was a double great find.
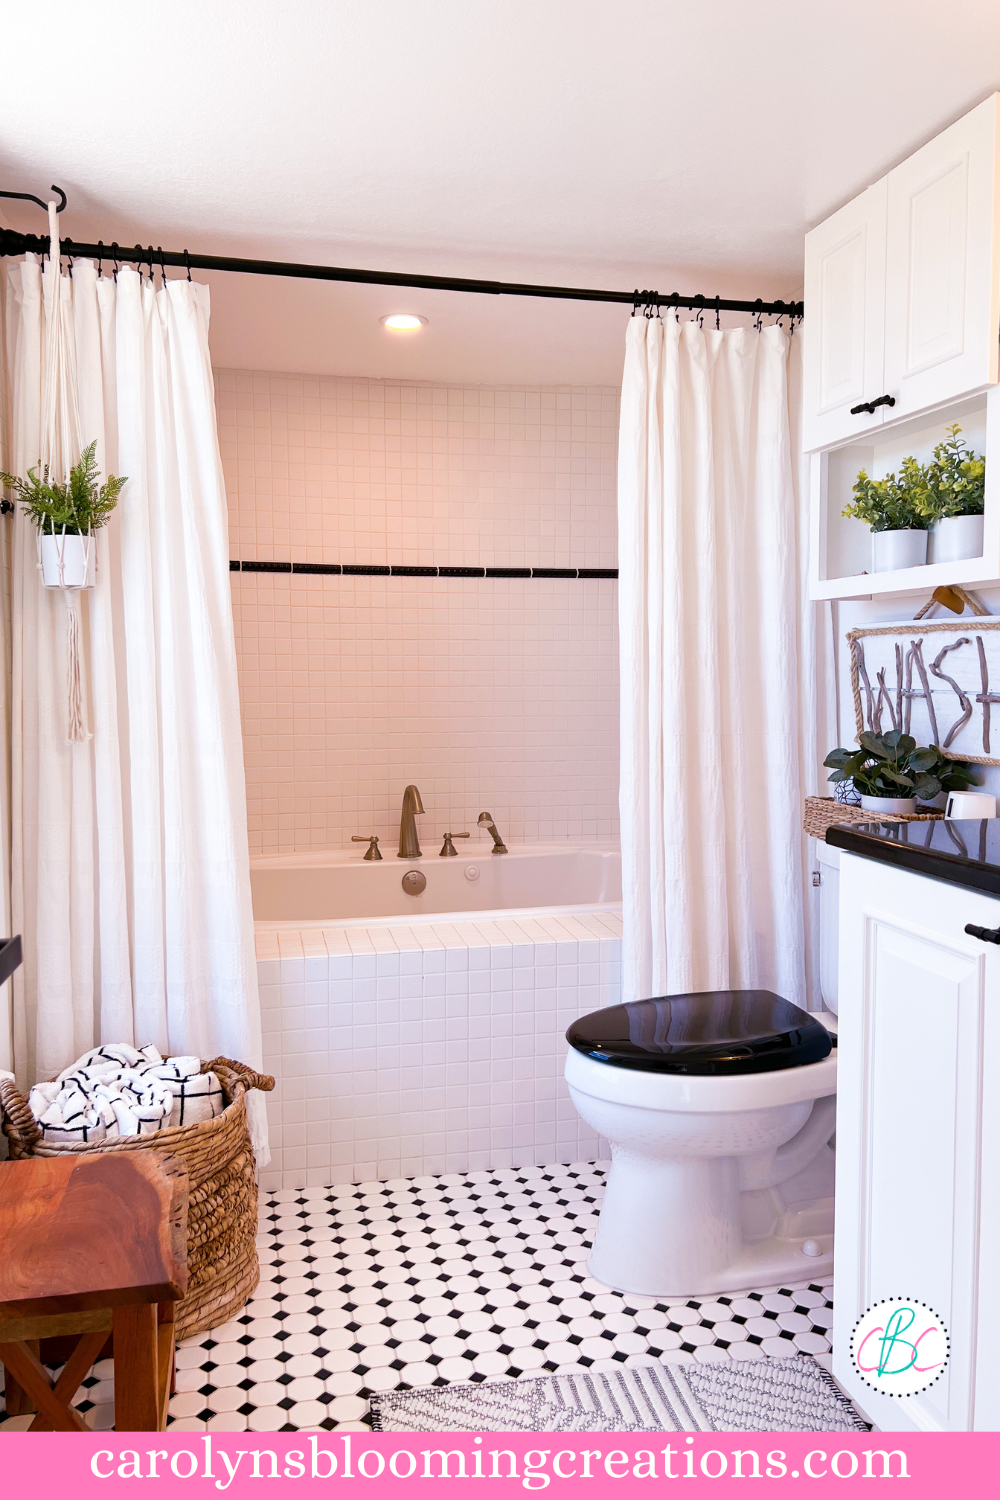
Black and White Bathroom
The rug is a great buy from Target. I changed out the white shower curtain rod to a black one, which mimicked the lines of the black shower tile. I used shower curtain liners and double hooks from Amazon. The white textured shower curtains were from Target.

Modern Bathroom Shelf
My husband changed out the old towel rack to a new one I found on Room & Board’s website. They had a great price on it, and it was made specifically for a bathroom. This was important because I didn’t want to buy a shelf that was immediately going to rust. I also love the one I chose because it gets all my products off the tub tile, making the space look more organized. I also ordered a soap dish from Room & Board too.

Black Bathroom Shelf
It was a little smaller than the original shelf, so my husband filled in the old screw holes with caulk and used a tile drill bit to drill new holes. We mounted it in the grout lines so we would be less likely to crack the tile.
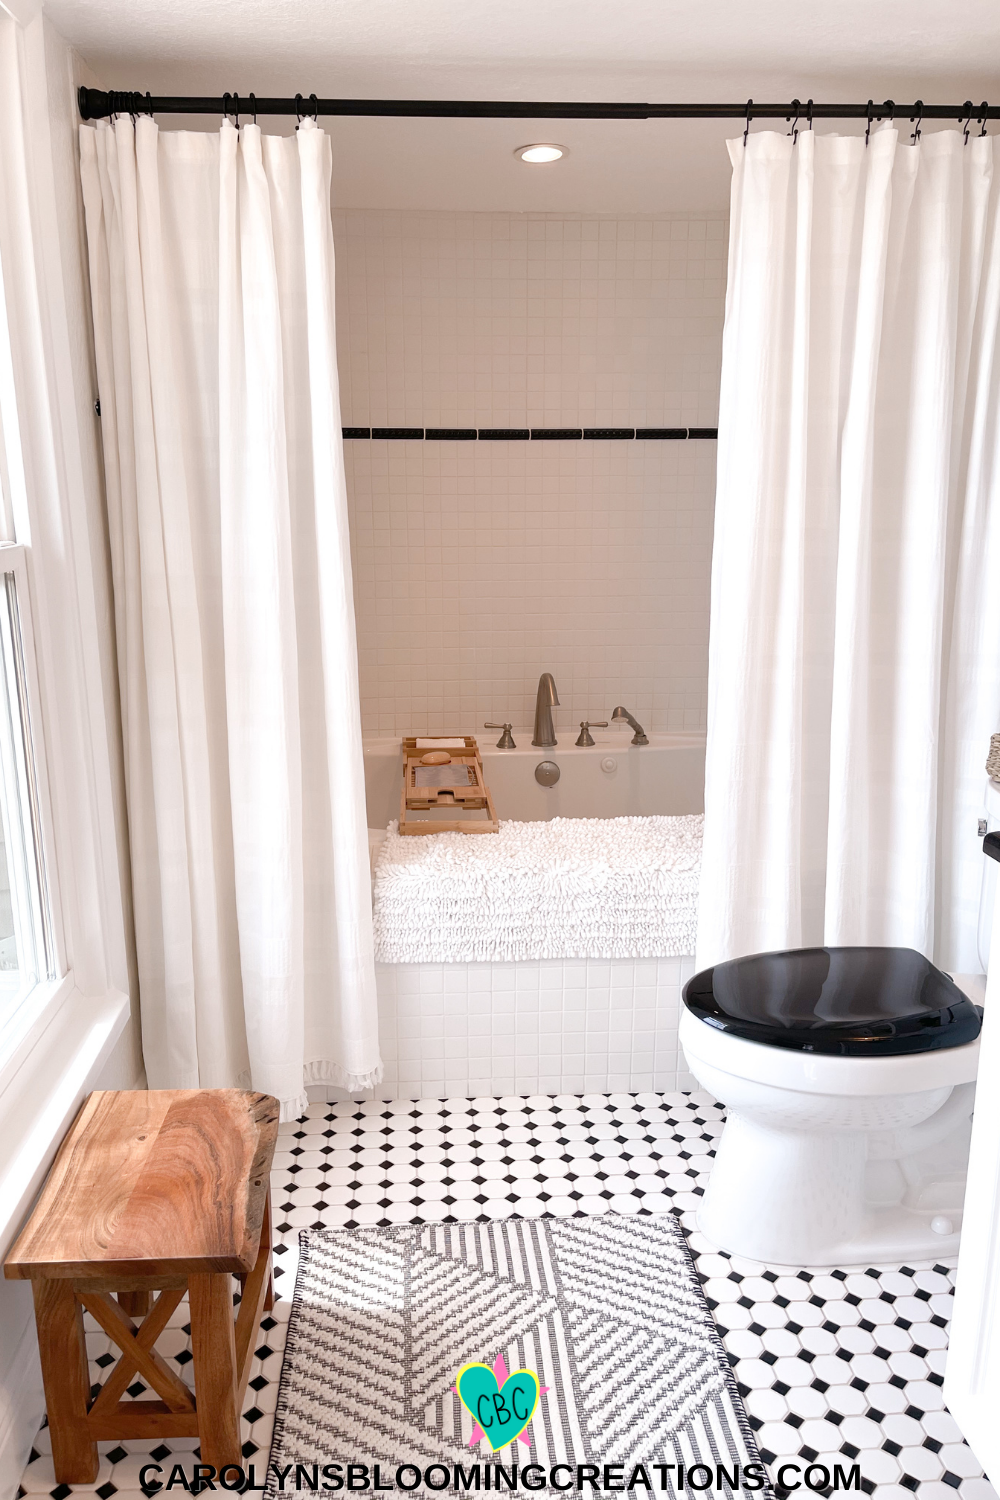
I added a bamboo bath tub caddy, which was one I had used and loved in my previous home. While our large jetted tub is nice, I’ve learned I do not like it. My husband has had to replace the switch to make it work (something we knew we would have to do before purchasing the house) and the jets get incredibly dirty.
We fill the tub water and powder dishwasher soap about once a month to give it a deep cleaning. It’s fine for now, but my next tub will not be jetted. Due to the hard water in our area, my husband had to replace the pitted drain and overflow cover as well.

Black Toilet Seat
I’ve always been a fan of colored toilet seats. I know it’s just a toilet, but why not dress it up? While it may not work in every bathroom, I knew a black toilet seat would work in ours as it matched the vanity’s black countertop. We ordered ours from Home Depot. I also have updated the toilet handle in a previous bathroom makeover, but the one I wanted for this bathroom was quite pricey, so it may be something I do in the future.
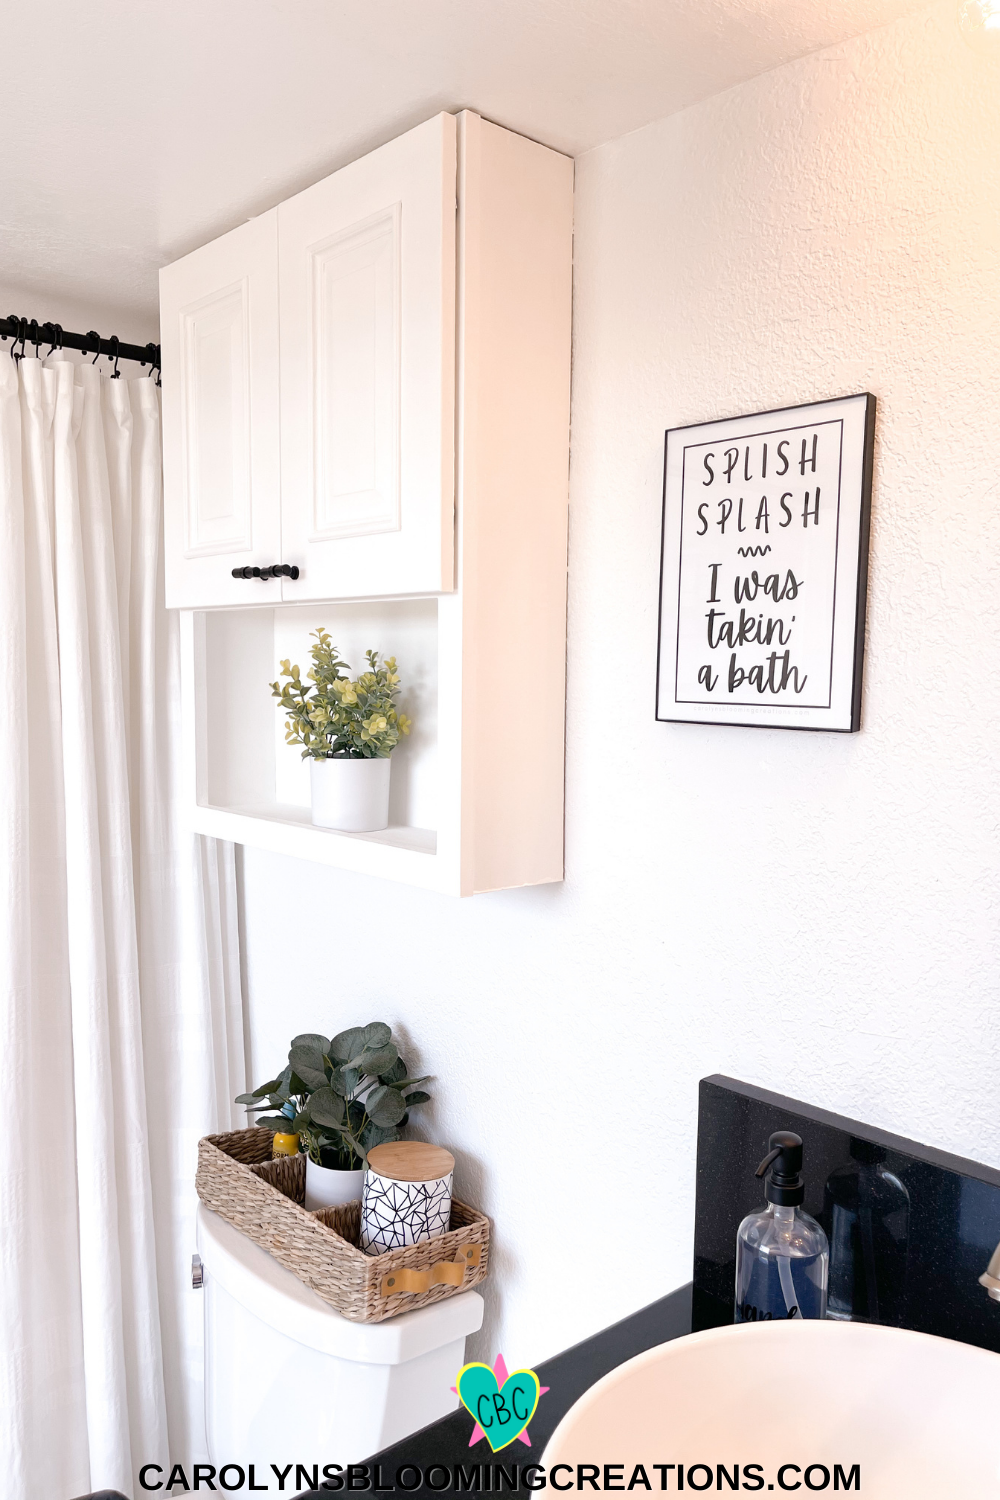
Canva Wall Art
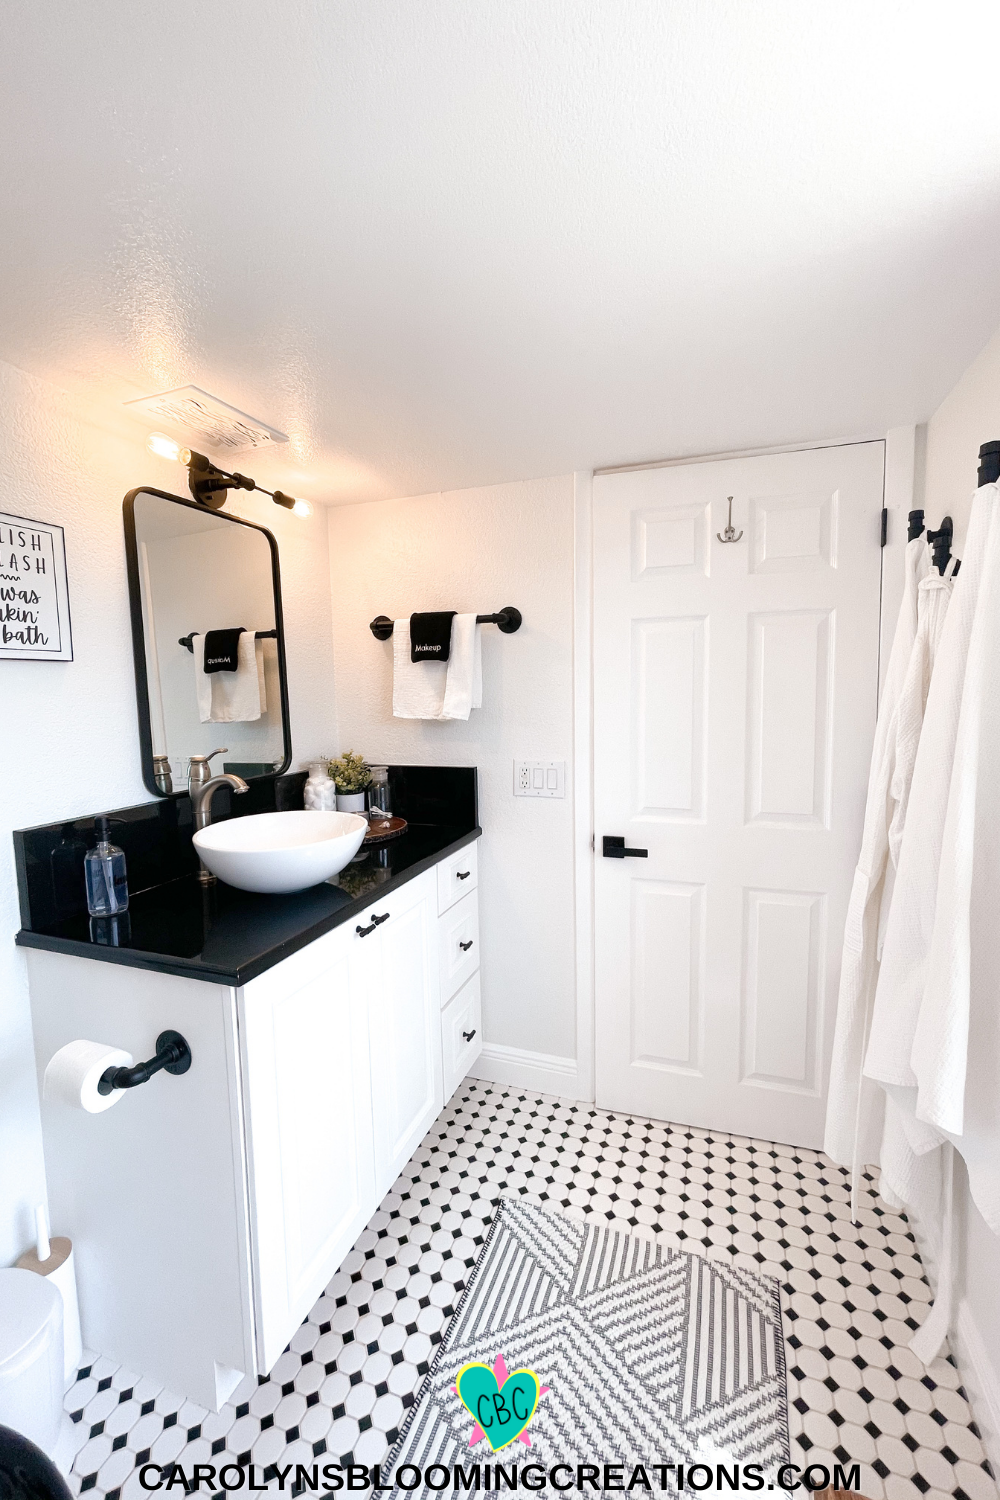
I ordered a black matte and glass soap dispenser from Amazon and “Hand Soap” vinyl stickers on Etsy (via Jen Cuts Vinyl). I fell in love with vinyl stickers when I used them on our washer and dryer. I love how they look.

DIY Hand Soap Bottle
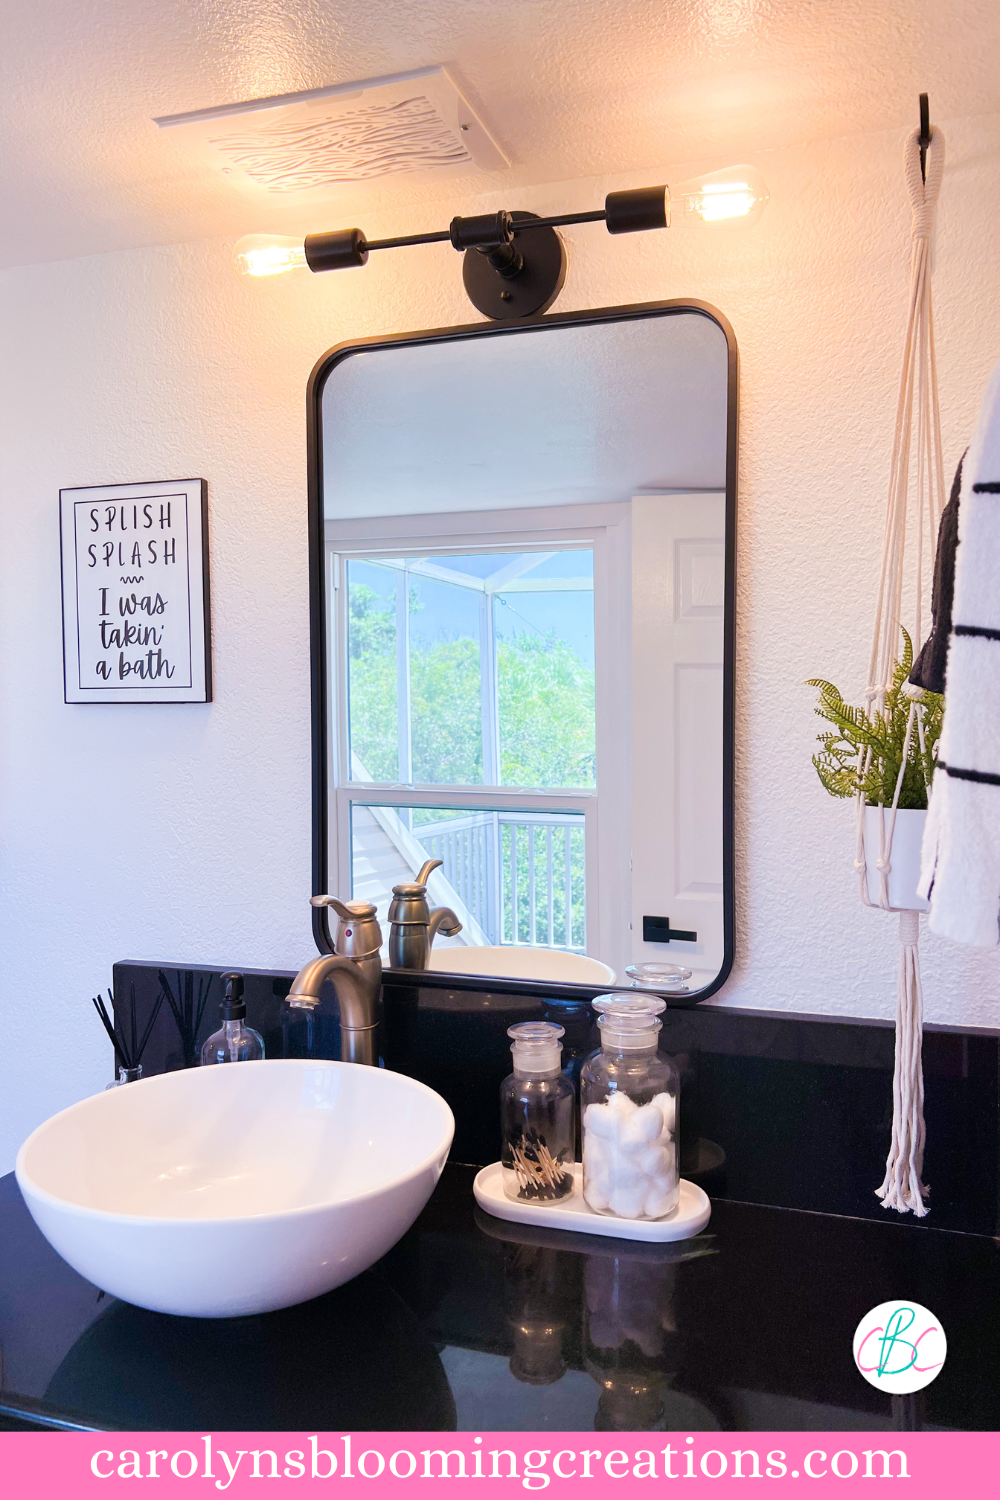
Our vanity light and mirror were both Amazon finds.

Modern Bathroom Light
I made my own bathroom sign printable and hung it up in an inexpensive plastic and glass frame that I found on Amazon.

Modern Bathroom Tray
The wood tray that holds some decor is a cake plate I found at Target. I used apothecary style glass containers from Target to hold our cotton balls and cotton swabs. I added seashells that I found on one of our local beaches. I’ve added shells to every room of the house, as they make sense with living on an island.

Makeup Towels
The microfiber makeup remover cloths were Amazon finds. I’ve also put some in our guest bath so all my white towels don’t get stained with makeup when our guests visit. This was request by my mother-in-law and it was a great idea!
Modern White and Black Bath
We added new black matte door handles and hinges. We are working to update all our doors with the same handles and hinges. I added a black matte “industrial” pipe-style toilet paper holder as well as matching towel racks and hooks. We already owned the cute “His and Her” robes.
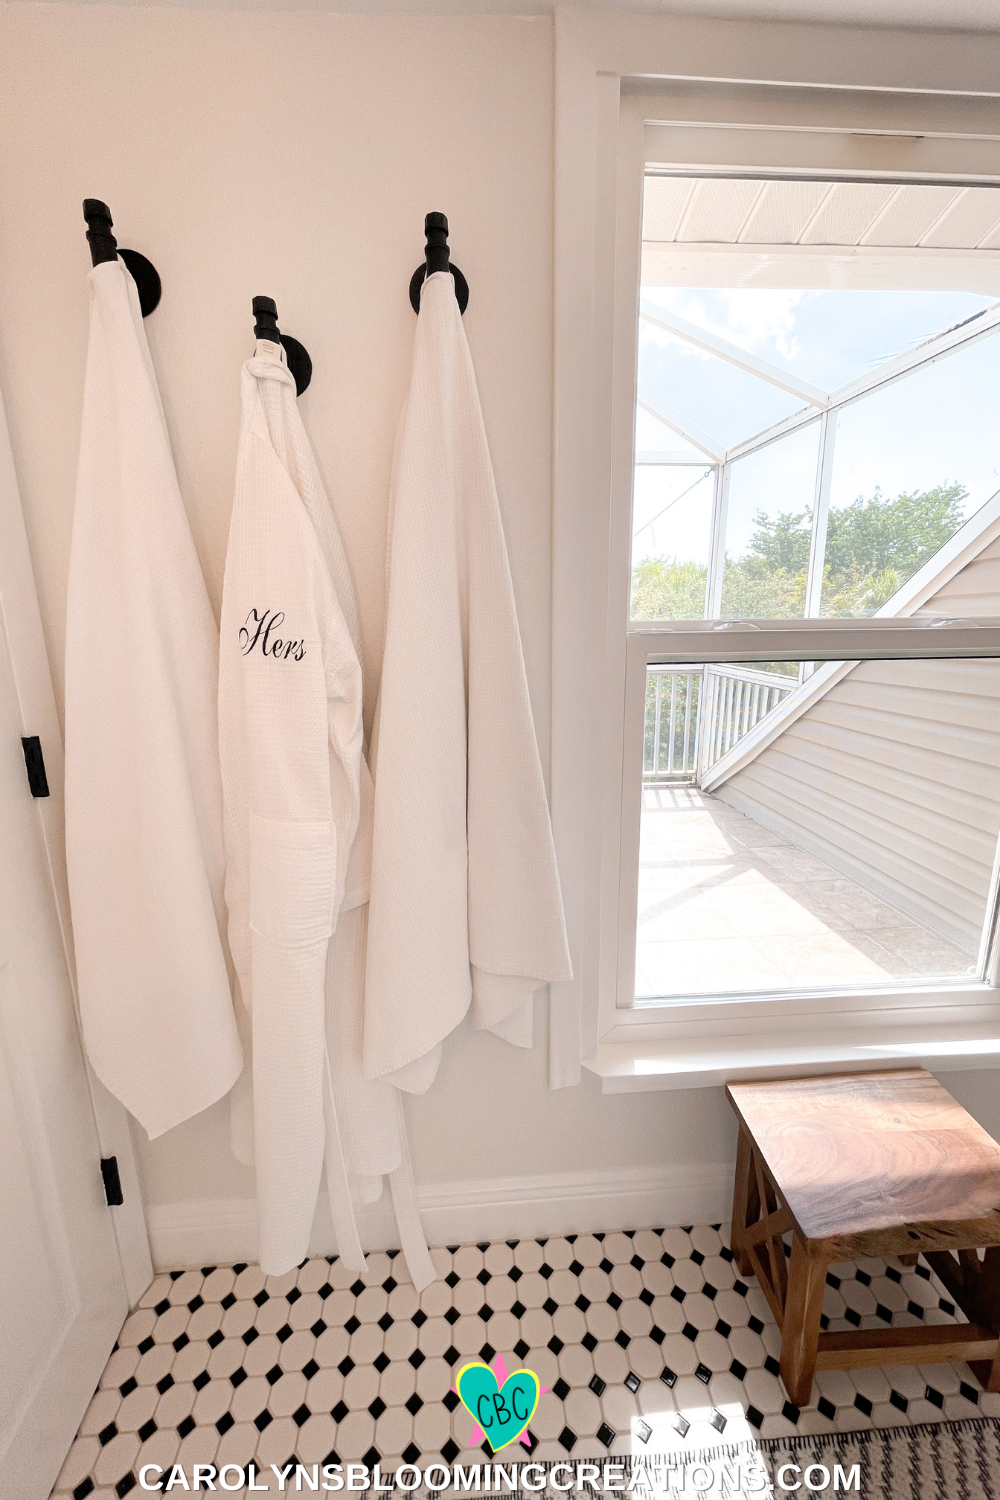
His and Hers Robes
I used a Bissell Steamshot to clean all our tile grout. Some of the stains (from the previous owner) did not come out, even with using a bleach spray too, but the Steamshot made them look much better. The grout was a shade of white that looks dirty very easily, so this has taught me not to use that color grout in any future bathrooms.
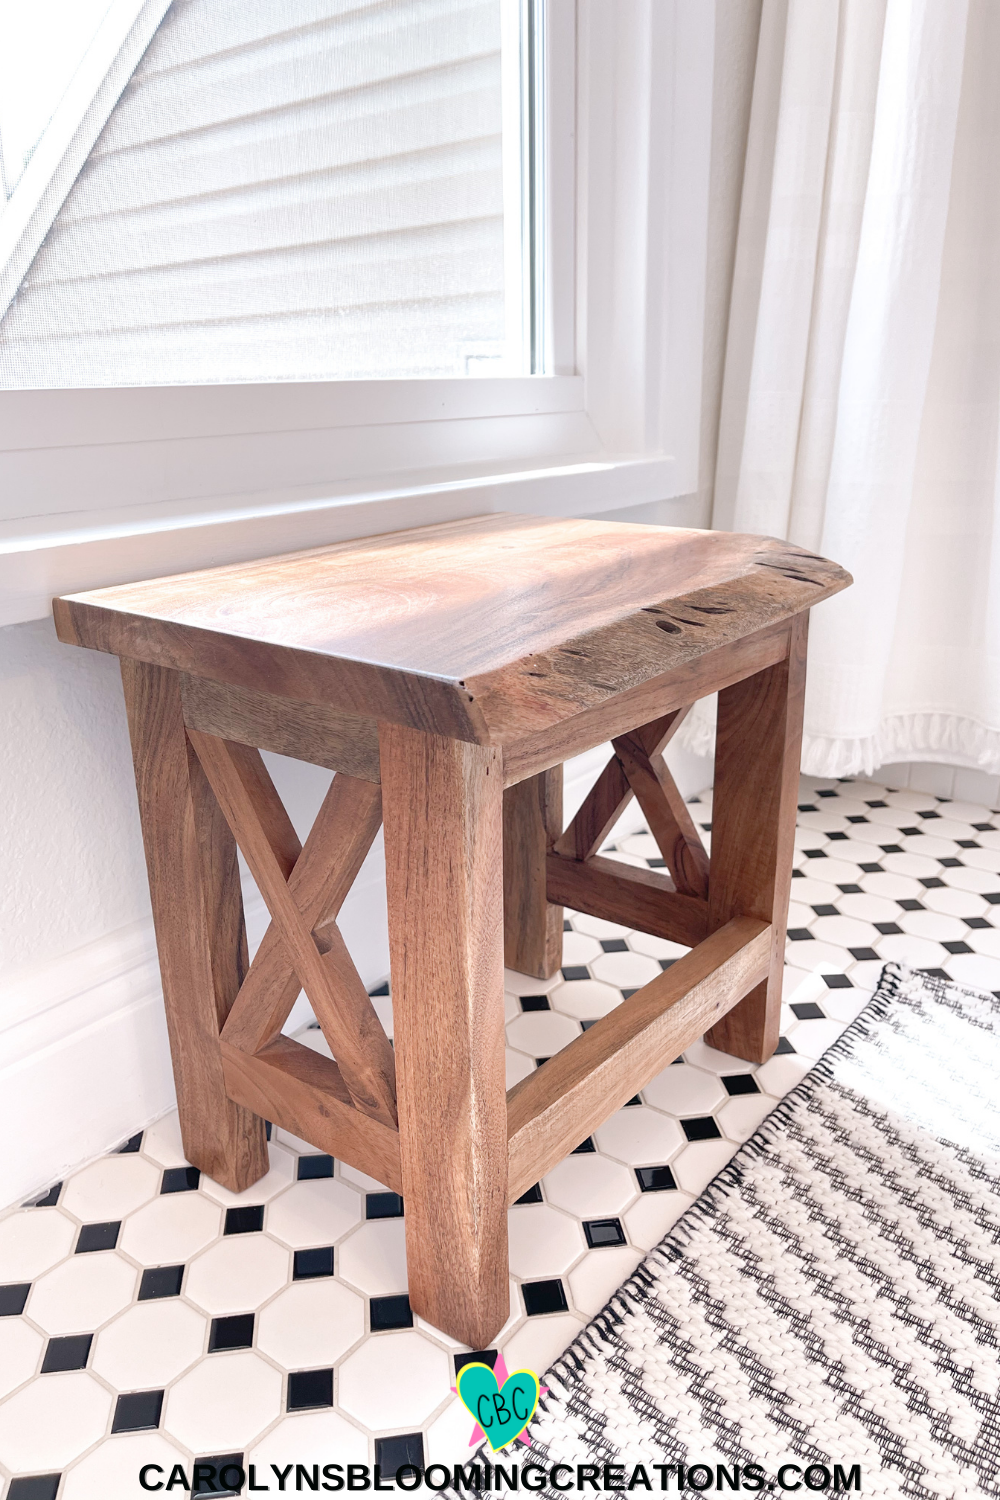
Farmhouse stool
I found the coated wood stool at T.J. Maxx. It was $30.00, which was quite a bit less expensive than ones I found online. I was very happy with this purchase!

A Bathroom to love
Overall, I am incredibly happy with the way our bathroom turned out. It was not a weekend project as there were so many little things we did. The painting, cleaning and decorating ended up taking a couple of weeks, with only working on it in the evenings and weekends. Everything I purchased for the space was done so over a 6 month time period (or the items were ones I brought with me from my previous home), so it wasn’t such a huge expense all at once.
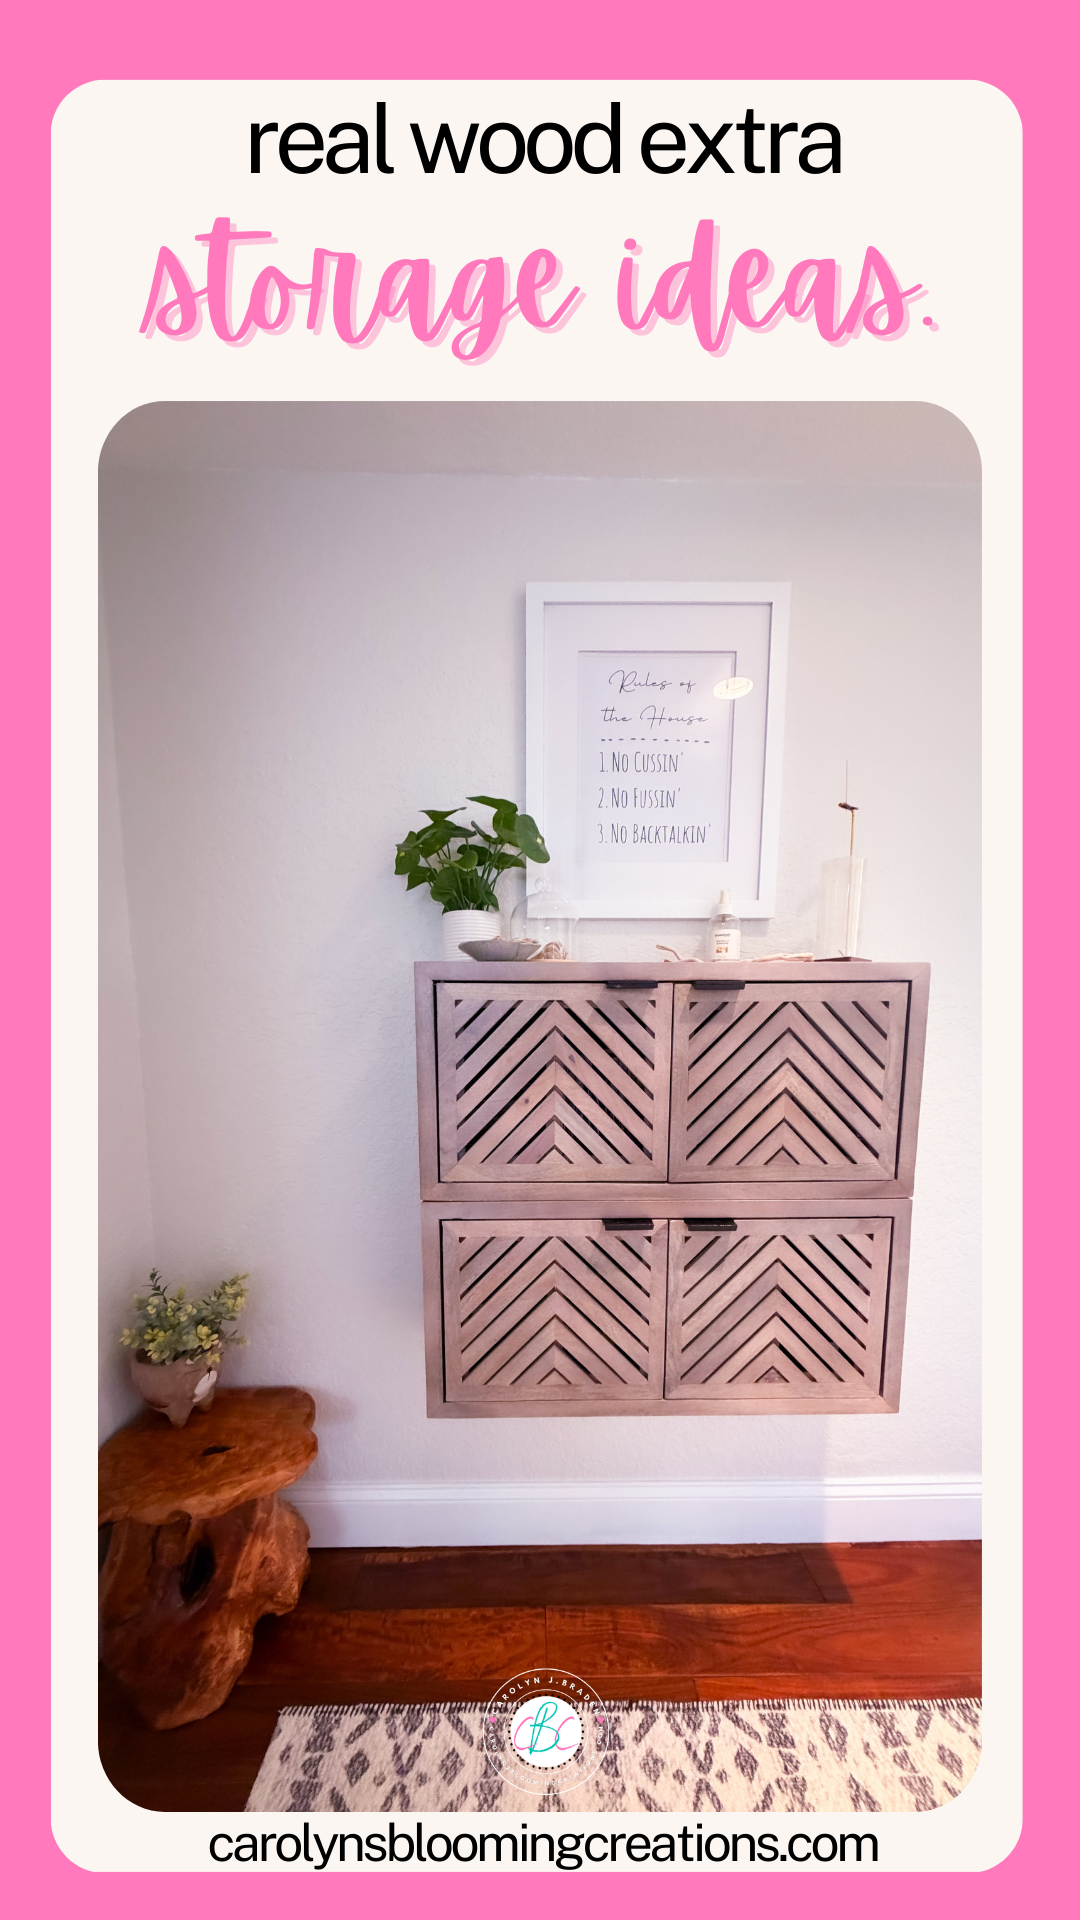
This is another storage solution we use in a hallway in our home and we love it!
I would love to change out our faucets to black matte, but that was not quite in our current budget. I figure we’ll update all faucets as well as the tile, vanity and tub as part of our 5-10 year plan. This is the story of my life, but I like it.
2022 Bathroom Updates:

Black and White Bathroom Ideas
Here are some quick updates to our black and white DIY bathroom makeover that we made in 2022 and 2023….by the way, the chalk painted cabinets still look fabulous!

DIY Driftwood Sign
I added a DIY driftwood sign I created myself. See how to do it in our less than one minute tutorial below or via our Pinterest account @carolynjbraden :
Chalk Painted Bathroom Cabinets
I added white ceramic trays under the soap and apothecary jars for some added style.

DIY Driftwood Bathroom Sign
The driftwood sign added just a bit more character to the bathroom. I stored some extra towels in a large basket I found at Target.

Small Bathroom Ideas
I also added some faux plants and hung them with some black plant hooks.
Bathroom with Black Accessories
In 2023 we added wood bead curtain tiebacks. We are so fortunate to even have a house with Hurricane Ian hitting Sanibel Island and our home in September 2022. This room received some wall damage from a roof leak.

2023 Curtain tiebacks update
I also added a fluffy new black bath mat as my white one kept getting dingy.

2023 Black and White Bathroom
I still want to add maybe some greenery around the bathtub and I definitely would like to see some black faucets in this room.

Our bathroom post Hurricane Ian
I’ll never be done with a room….I am always looking to improve! We updated the vessel sink to a more modern rectangle one. See it here in our short YouTube video via our channel @carolynjbraden.
If you love this article, we know you’ll love this one too: Beach House Main Bedroom Makeover
Carolyn J. Braden is the owner of Carolyn’s Blooming Creations is a regular contributor and editor for CBC. She has been featured in numerous media publications such as InStyle Magazine, on HGTV, on Bustle.com, and more. She is the author of the books Georgia McMasters in Amethyst Lake Cemetery, How To Be Yourself: 3 Ways To Help You Being You, and the illustrator for the children’s book Bridging Connections. She is a former classroom teacher that now dedicates her life to educating others on how to live their most healthy, creative and happy life. Learn more about her visiting our About Us page.