


Carolyn J. Braden • 3 Minute Read
How to Fix Flat Lipstick and Use Every Last Drop
Have you ever twisted up your favorite lipstick only to think it's completely gone? Don't toss it just yet! One of my favorite money-saving beauty hacks is rescuing that "finished" lipstick and giving it a whole new life.
As Problem Solution Girl, I love finding simple solutions that save money, reduce waste, and make life easier. This lipstick hack does all three!
The Best Money-Saving Lipstick Hack Every Makeup Lover Should Know
Problem: My Favorite Lipstick Looked Empty
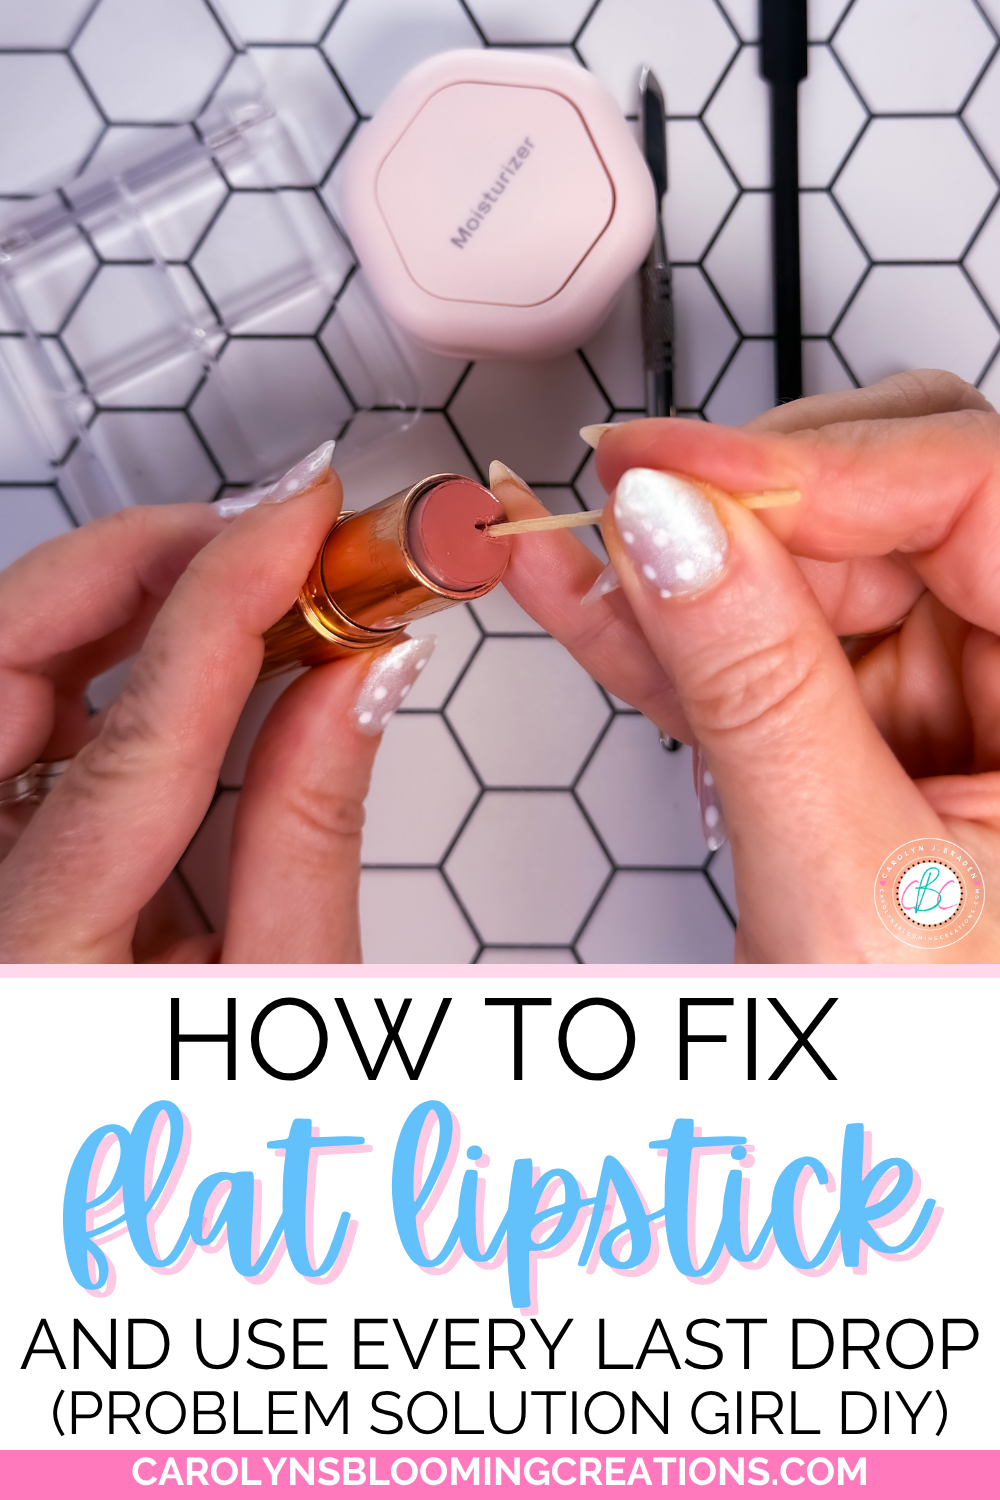
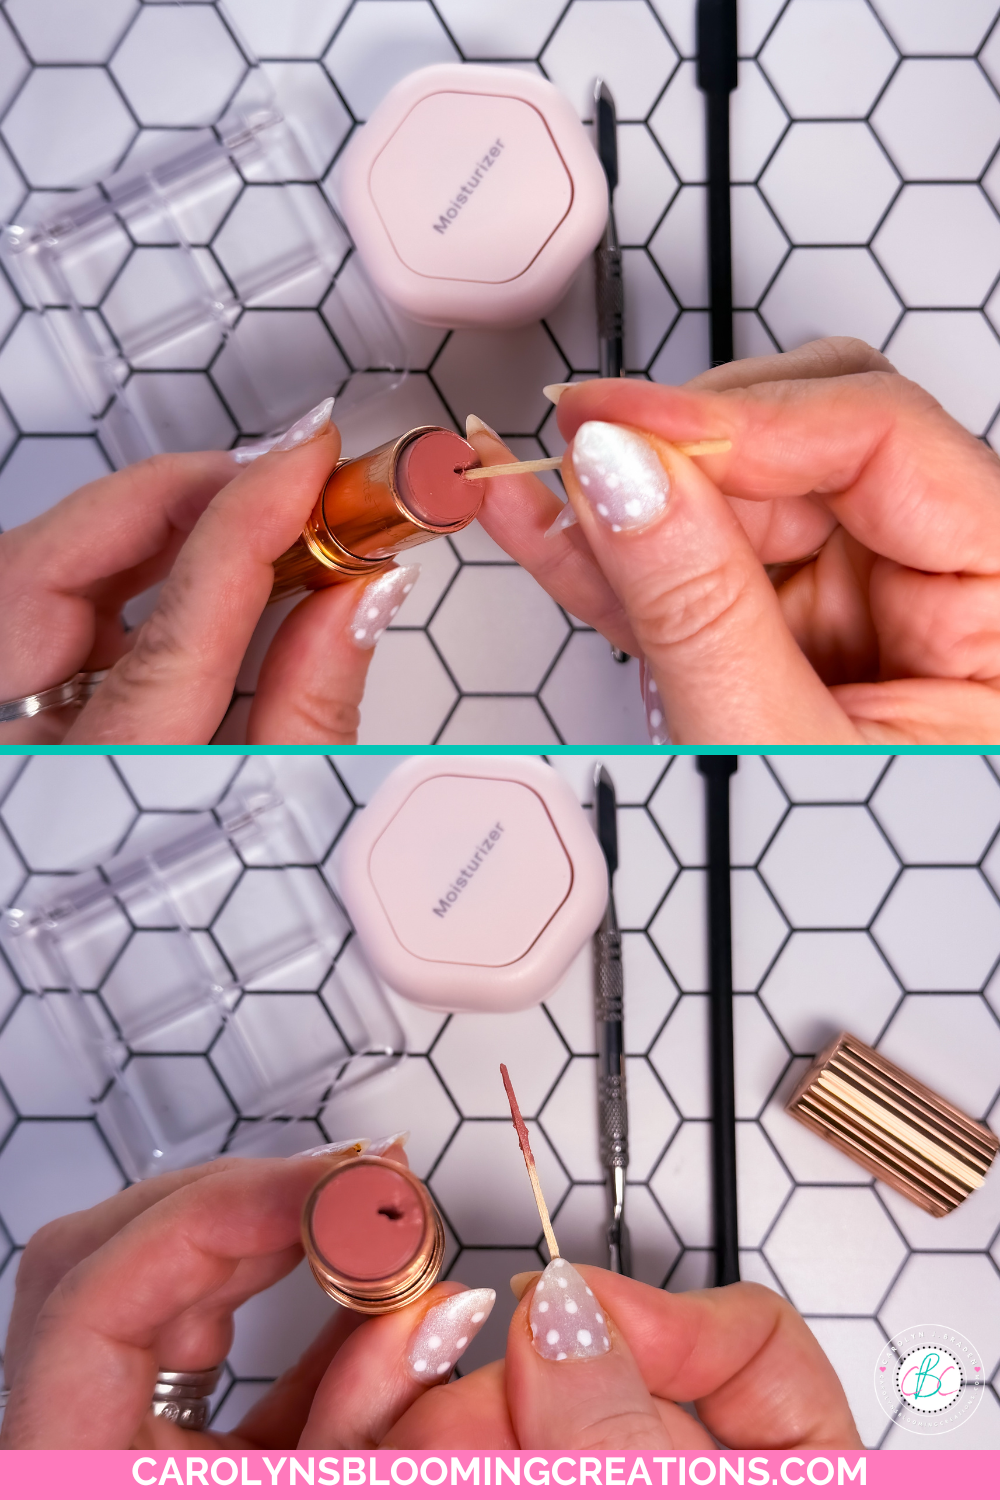
When lipstick gets too flat to apply straight from the tube, there's usually plenty of product left inside. I stuck a toothpick inside my flat lipstick and was amazed at how much more was in the tube.
Most of it is stuck along the sides and bottom of the tube, which means you're throwing away makeup you've already paid for. This is especially not fun if you like premium lipsticks like my favorite daily lippy, Charlotte Tilbury Pillow Talk lipstick and her matching Lip Cheat Lip Liner.
🛍️Shop the Post
Support me as a creator and shop my links with no extra cost to you! See my creations come together via my Amazon Shop plus get buying links at affordable prices!
We also love shopping CVS ❤️ (the ExtraCare card savings stack helping you to save!) and here are some of our CVS finds to stock up on (especially when you get that 40% off coupon!) and love Walmart (Walmart+ gets you free shipping and delivery on many items) and Sam’s Club for extra savings on beauty, fashion and we love their furniture too!
🛠️We also love Lowe’s (see our Lowe’s storefront here) for all our home improvement projects and gardening loves (and animal lover loves too!).
📕Bookmark or pin this one by clicking the Pinterest SAVE button on the images in this article for creative magic in an instant.
How to Get Every Last Bit of Lipstick Out of the Tube
👉More Product Loves❤️
You can also get the products I’ve featured and more of my product loves via my Target shop here or my CVS Store here (use your ExtraCare card to double up on savings!) or via my shop my store here or below:
Why This Lipstick Hack Is Worth Trying
Save Money
Lipstick isn't cheap! Repotting lets you use every last bit instead of throwing away perfectly good product. Over time, this simple habit can save you money while helping you get the full value from your favorite beauty products.
Create Your Own Custom Lipstick Palette
Instead of carrying several lipstick tubes, combine your favorite shades into one compact palette. You can organize everyday colors, seasonal shades, or even create your own custom lip color collection that's easy to grab and go.
See a beauty hack I love using 2 colors of Fazit glitter freckles here in my Amazon shop or below in my YouTube video via my channel @carolynjbraden:
The Ultimate Travel Beauty Hack
Traveling with multiple lipstick tubes takes up valuable space in your makeup bag (love this jelly makeup bag by Case-Mate..my link gets you a discount). A single sealed palette or magnetic capsule can hold several shades, making packing lighter, more organized, and much more convenient. Stack them in a Hulken Carry On and Schlep Stack and you’ll make it through the airport in a breeze!
DIY Lipstick Palette for Easy Travel and Organization
Reduce Beauty Waste
Using every last bit of your lipstick helps reduce unnecessary waste and makes your makeup collection more sustainable. It's a simple way to stretch your beauty budget while keeping products out of the trash before they're truly empty. I was made fun of by someone for turning my lotion bottles upside down to get all the product out. I said…there’s tons still in there…I’m not the crazy one here, lol!
My Favorite Storage Solution
I love using Cadence Magnetic Capsules because they seal securely, help keep my lipstick fresh, and are perfect for travel. They're also great for organizing small beauty products.
I have an affiliate link to Cadence Magnetic Capsules, plus a dedicated blog post sharing why I love Cadence and a discount code to help you save. Be sure to check it out before you buy!
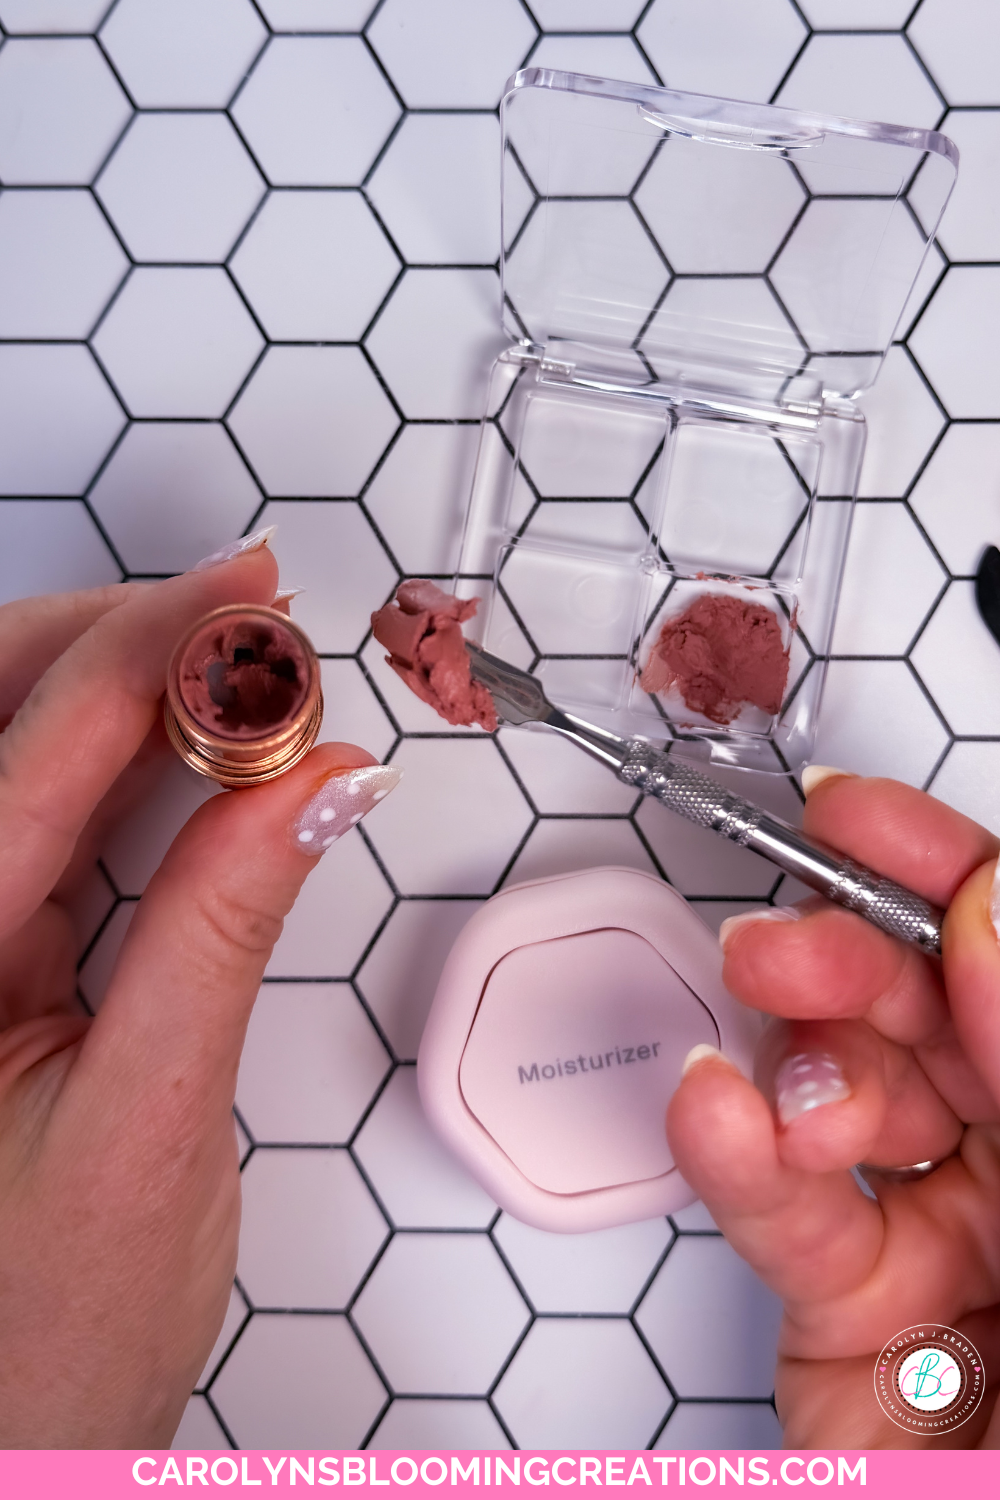
For this post, I choose a 4-pan makeup palette I had so I could show a budget friendly option too.
👀Check out my 1-minute 📹 video tutorial for this project on my TikTok now or via my YouTube channel @carolynjbraden!

My lipstick got flat…but I knew it still had enough in it for 20 more selfies!
Solution: Repot Your Lipstick
🔗Links go out to either the brand website, Amazon, CVS, Walmart, Sam’s Club, Target, or Lowe’s where we source our supplies based on discounts, budget and pricing.
Cost: Can be under $5, depending on the container you choose.
Get my list of what I used here in my Amazon storefront.
Here's exactly how I rescue mine:
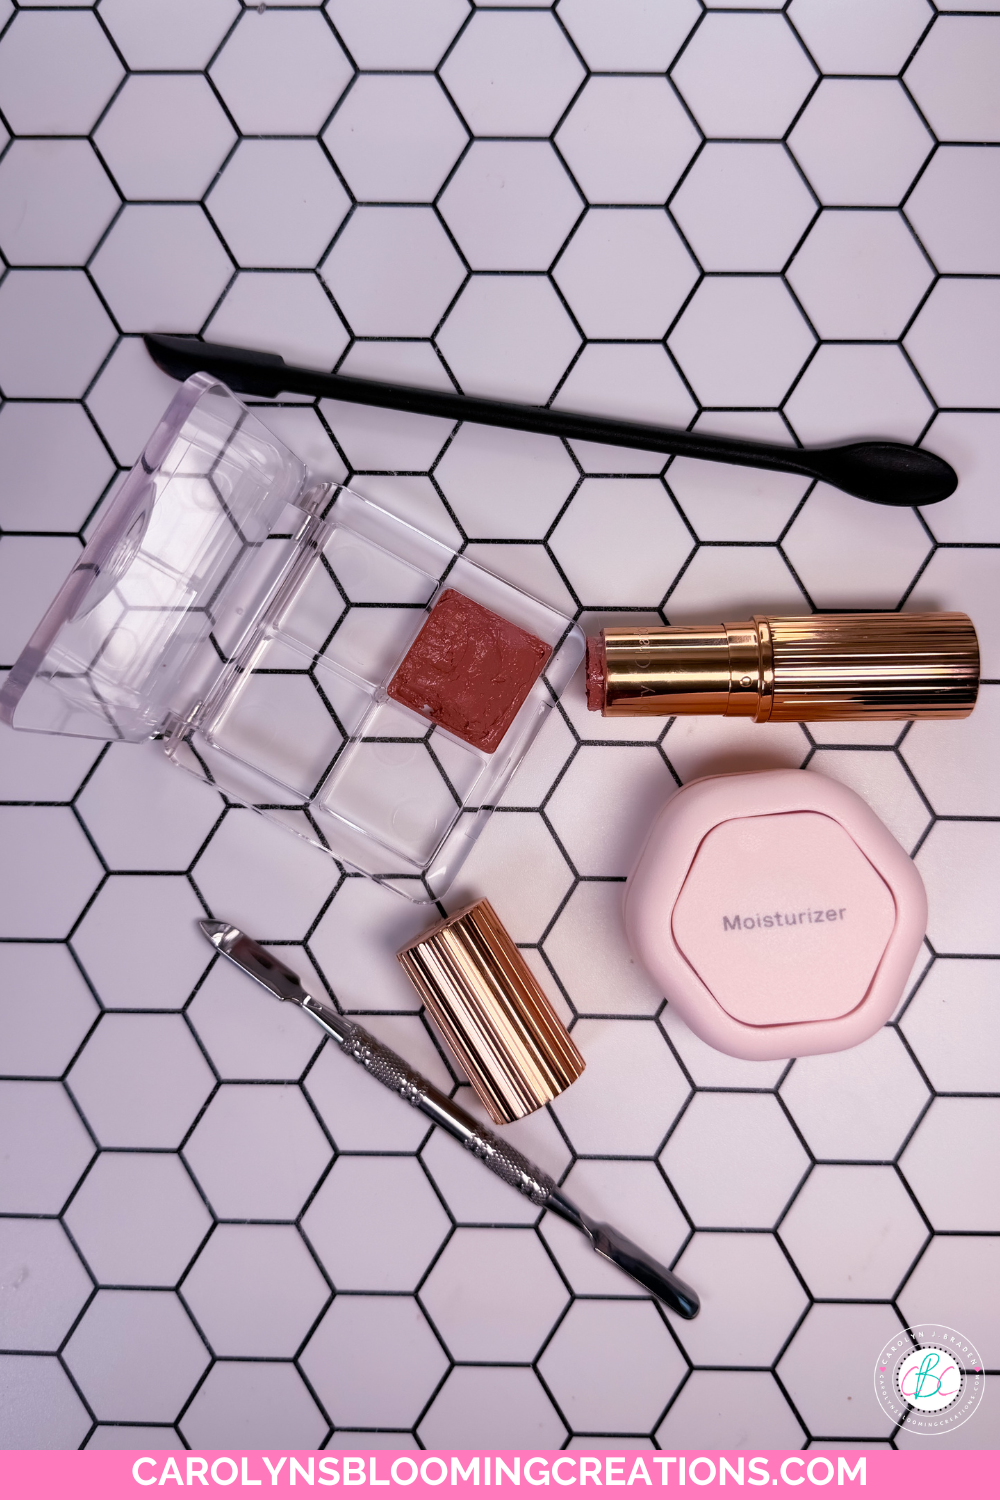
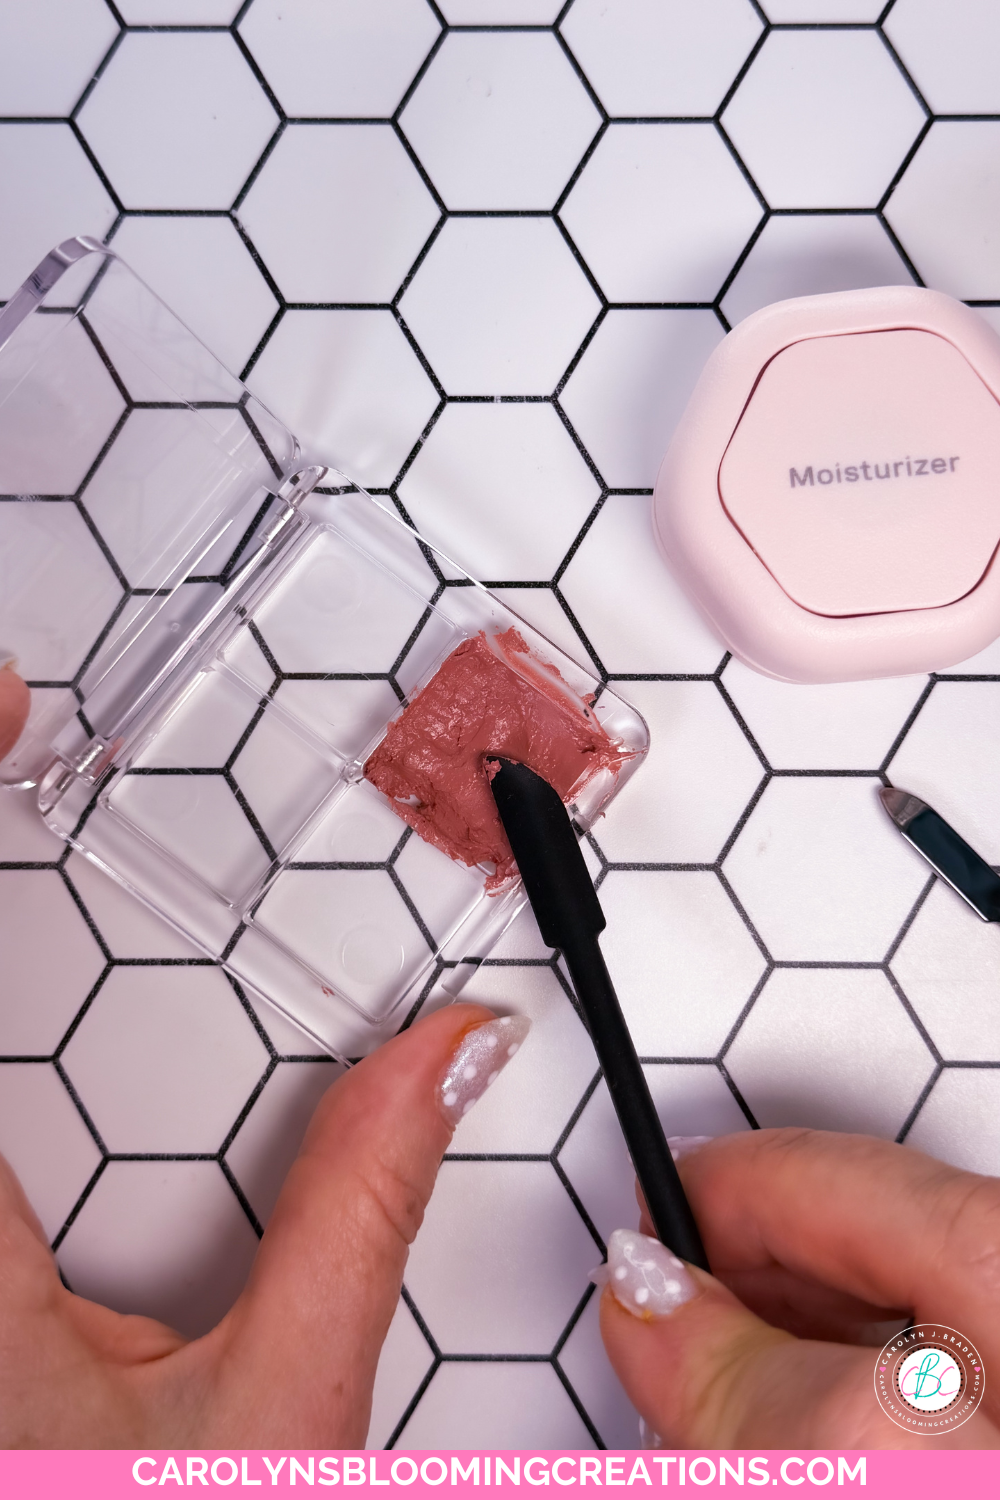
Use a small makeup spatula to carefully scrape the remaining lipstick from the tube.
Transfer it into a sealable container, like a Cadence Magnetic Capsule or a blank makeup palette with a lid.
Apply it with a lip brush whenever you're ready to wear it. I had my old school retractable lip brush from Clinique that is very travel friendly!
Repot Your Lipstick to Save Money and Reduce Makeup Waste
It's quick, easy, and you'll be surprised by how much lipstick is actually left!
If you love easy beauty hacks that save money and make life simpler, this Problem Solution Girl DIY is definitely one to try. You might be amazed by how much lipstick you've been throwing away!
How to Create a Custom Lipstick Palette with Cadence Magnetic Capsules
🎬Take Action
If you try any of my ideas, let me know how it turned out—or tag me when you try them because I LOVE seeing your posts💖 If you tag me using @carolynsbloomingcreations or @carolynjbraden, I’ll see it! Or tell me about it in the comments below.
If you loved this article, we know you’ll love this one too: Why Is My Hair Thinning at the Front? Problem Solution Girl Shares What Helped
Carolyn J. Braden is the owner of Carolyn’s Blooming Creations is a regular contributor and editor for CBC. She has been featured in numerous media publications such as InStyle Magazine, on HGTV, on Bustle.com, and more. She is the author of the books Georgia McMasters in Amethyst Lake Cemetery, How To Be Yourself: 3 Ways To Help You Being You, and the illustrator for the children’s book Bridging Connections. She is a former classroom teacher that now dedicates her life to educating others on how to live their most healthy, creative and happy life. Learn more about her visiting our About Us page.