


I LOVE creating cool and unique cakes. I used to make them as a “side hustle” when I was an art teacher. I’d teach during the day and then make cakes every weekend. These cakes are what started Carolyn’s Blooming Creations.
While making cakes was fun, I knew I didn’t want to do it full-time. I stepped back from cakes when my husband and I moved to a fixer-upper that needed a ton of work. That became our new “side hustle”, which helped Carolyn’s Blooming Creations branch off into other creative areas.

Chocolate cake with gelatin bubbles
While I don’t make cakes as often as I used to, I still love making them occasionally. My mom’s birthday this year gave me an excuse to make a really cool one. I saw gelatin bubbles start popping up all over Pinterest and thought they looked cool.
My mom LOVES the beach (and all the things that wash up on the shoreline). I thought these bubbles looked like something you’d see washed up on the shore or in the ocean, so I paired them with some white chocolate seashells (I created them with white chocolate chips and chocolate shell molds), a chocolate chip cake (I used this recipe via Liv for Cake, who creates amazing cake recipes!) with my own chocolate ganache filling and chocolate buttercream and created a cake I call “She Sells Sea Shells”.

She Sells Sea Shells Cake Design
The bubbles weren’t as hard to make as you’d think. I found some tutorials online, but being the teacher that I am, I came up with my own method and decided to teach others how to make them here in this space.
Here’s my GELATIN BUBBLE creation method (see below).
You’ll need the following to create approximately 13-15 bubbles in various sizes (which is more than enough for a 6 or 8 inch cake)
4 tablespoons unflavored powdered gelatin (I bought a small box of KNOX Unflavored Gelatin, which contained 4 packets. Each packet contained 1 tablespoon of gelatin. I used the whole box. I found it in the baking supply aisle of my local grocery store.)
8 tablespoons of cold water
Paper straws (You could also use lollipop sticks or skewers)
Small heatproof bowl
Spoon
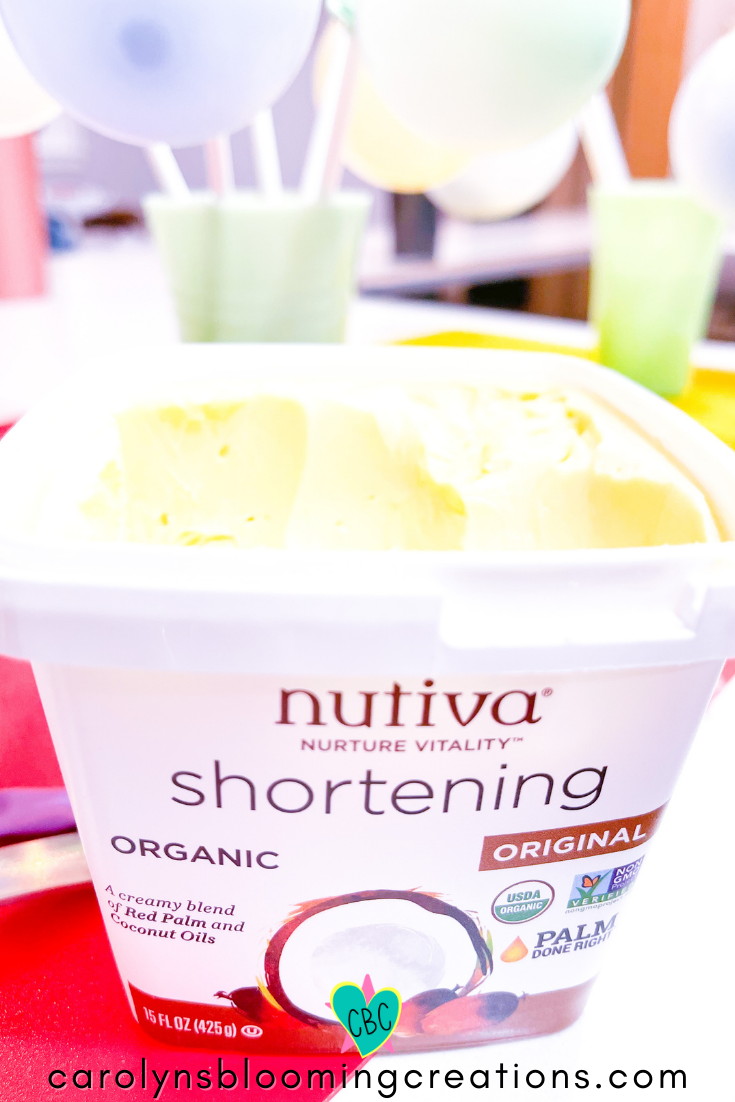
Shortening (I used Nutiva)
Paper towels
Petal dust, luster dust or edible glitter (optional)
Cup or flat piece of styrofoam
Scissors


She Sells Sea Shells Cake Design, Execution and Photography by Carolyn J. Braden
Graphic by Carolyn J. Braden via Canva
Pin me! carolynsbloomingcreations.com
I purchased some very small balloons on Amazon. You should use “food safe” balloons if you can find them. I could not, so I just wiped down each balloon with a wet paper towel before using them. You probably won’t want to eat the gelatin bubbles anyways, so I wasn’t super concerned with this.

She Sells Sea Shells Cake Design, Execution and Photography by Carolyn J. Braden
Graphic by Carolyn J. Braden via Canva
Pin me! carolynsbloomingcreations.com
I had a VERY hard time blowing these tiny balloons up even slightly, so I got out my electric balloon inflator to help me. I purchased it years ago when I made my balloon garland tutorial.

She Sells Sea Shells Cake Design, Execution and Photography by Carolyn J. Braden
Graphic by Carolyn J. Braden via Canva
Pin me! carolynsbloomingcreations.com
I inflated the balloon just a little bit, then let out air until it was a small “bubble”. Some balloons inflated kind of strangely, so I worked to push them into a “ball” shape as I tied the knot. Balloons are quite malleable, so work with them, not against them.
After blowing it up: TIE IT IN A KNOT! (Trust me, you must knot it before placing it on a straw or stick).

She Sells Sea Shells Cake Design, Execution and Photography by Carolyn J. Braden
Graphic by Carolyn J. Braden via Canva
Pin me! carolynsbloomingcreations.com
I blew some up to about 3 inches, some smaller and some teeny tiny, with barely any air. I was experimenting, yet all sizes worked. I then knotted the end of the balloon again and slid the straw through the knot. This took a little practice, but eventually got very easy and went quickly.
She Sells Sea Shells Cake Design, Execution and Photography by Carolyn J. Braden
Graphic by Carolyn J. Braden via Canva
Pin me! carolynsbloomingcreations.com
Next I coated the balloons with teeny-tiny bit of shortening and used paper towel to wipe off any excess. If you don’t wipe off the excess, the gelatin won’t stick to your balloon. If you don’t use the shortening at all, the balloon will be much harder to remove from the bubble when dry.
I placed my shortening-coated balloons in several juice glasses and set them aside to prep the gelatin.

She Sells Sea Shells Cake Design, Execution and Photography by Carolyn J. Braden
Graphic by Carolyn J. Braden via Canva
Pin me! carolynsbloomingcreations.com
I mixed all four packets (four tablespoons) of the gelatin with 8 tablespoons of gelatin. I allowed the gelatin to absorb the water for about 3 minutes.

She Sells Sea Shells Cake Design, Execution and Photography by Carolyn J. Braden
Graphic by Carolyn J. Braden via Canva
Pin me! carolynsbloomingcreations.com
I then used a spoon to stir them together. This made a smooth, yet pasty and sticky combination.
Check out my quick video tutorial below or via my Pinterest page @carolynjbraden:

She Sells Sea Shells Cake Design, Execution and Photography by Carolyn J. Braden
Graphic by Carolyn J. Braden via Canva
Pin me! carolynsbloomingcreations.com
Next, I microwaved it for about 10 seconds. This “melted” it into a smoother and more runny mixture.

She Sells Sea Shells Cake Design, Execution and Photography by Carolyn J. Braden
Graphic by Carolyn J. Braden via Canva
Pin me! carolynsbloomingcreations.com
I added in just a sprinkle of edible luster dust for a bit of pearl-y color and shimmer. You could use any kind of edible powdered color/shimmer.

She Sells Sea Shells Cake Design, Execution and Photography by Carolyn J. Braden
Graphic by Carolyn J. Braden via Canva
Pin me! carolynsbloomingcreations.com
Dip a balloon into the gelatin and swirl around to coat. You need to work fast or the gelatin will start to cool and become sticky and pasty again. I worked kind of slow at first and learned to work quicker. My first couple of balloons didn’t turn out super great (and that’s okay!). Practice makes perfect.

She Sells Sea Shells Cake Design, Execution and Photography by Carolyn J. Braden
Graphic by Carolyn J. Braden via Canva
Pin me! carolynsbloomingcreations.com
After coating the balloon (I only did one coating of gelatin per balloon and this worked very well), I “swirled” the balloon around for about 30 seconds while it dried to prevent the gelatin from dripping. Then I placed it in a juice glass to dry.

She Sells Sea Shells Cake Design, Execution and Photography by Carolyn J. Braden
Graphic by Carolyn J. Braden via Canva
Pin me! carolynsbloomingcreations.com
I had to re-melt the gelatin every couple of balloons as it started to cool and get too sticky to dip balloons into. Each time, I melted it for 8-10 seconds.

She Sells Sea Shells Cake Design, Execution and Photography by Carolyn J. Braden
Graphic by Carolyn J. Braden via Canva
Pin me! carolynsbloomingcreations.com
I just kept melting, dipping and coating balloons until they were all done.

She Sells Sea Shells Cake Design, Execution and Photography by Carolyn J. Braden
Graphic by Carolyn J. Braden via Canva
Pin me! carolynsbloomingcreations.com
Sometimes I got some gelatin on the balloon knot, but this was okay.

She Sells Sea Shells Cake Design, Execution and Photography by Carolyn J. Braden
Graphic by Carolyn J. Braden via Canva
Pin me! carolynsbloomingcreations.com
I allowed the balloons to dry 12-15 hours. You’ll know if they are completely dry because they will no longer be sticky, they will be warmer to the touch (non-dry gelatin bubbles feel a bit cool and sticky) and they will be a bit “crispy” (but not brittle).
I used a small pair of sharp scissors to pop each balloon. Some balloons peeled immediately out from the bubble, while some I had to tug on a bit.

She Sells Sea Shells Cake Design, Execution and Photography by Carolyn J. Braden
Graphic by Carolyn J. Braden via Canva
Pin me! carolynsbloomingcreations.com
The dry gelatin bubbles are very sturdy, yet lightweight. If any were dented during the popping process, I was able to pop the dent right out. I also dusted on a bit more shimmer dust before adding them to the cake for even more shine.

She Sells Sea Shells Cake Design, Execution and Photography by Carolyn J. Braden
Graphic by Carolyn J. Braden via Canva
Pin me! carolynsbloomingcreations.com
Because these are so light and airy, I piped a bit of buttercream at the base of each bubble to act as a “glue” to attach them to the cake. I didn’t want them flying off the cake as I presented it to my mom.

She Sells Sea Shells Cake Design, Execution and Photography by Carolyn J. Braden
Graphic by Carolyn J. Braden via Canva
Pin me! carolynsbloomingcreations.com
These bubbles can be made several days in advance. I made mine on a Friday, and they were still just as beautiful and sturdy several days later. I stored them at room temperature (inside my pantry) in a bowl without anything covering them.