


Carolyn J. Braden • 3 Minute Read

My Nani, my maternal grandmother, made a chocolate sheet cake frequently for me and my sister for our birthdays and we loved it. While a stacked or layered cake is beautiful, sometimes a homemade sheet cake is really all you need, especially when you are short on time. Her chocolate sheet cake recipe is very easy, super moist, not too sweet, and simply delicious. Read on to learn how to make Nani’s Chocolate Sheet Cake with Magic Icing.

I loved the cake sparklers I found!
Why is the Icing “Magic”?
I call her icing “magic” because it’s really, really easy and you don’t even have to use a knife or an icing spreader to put it on the cake. You simply put the ingredients into a saucepan, bring them to a boil and pour it on the cake. The magic icing compliments the cake because it soaks into it, making it one of the moistest cakes you’ve ever tasted!

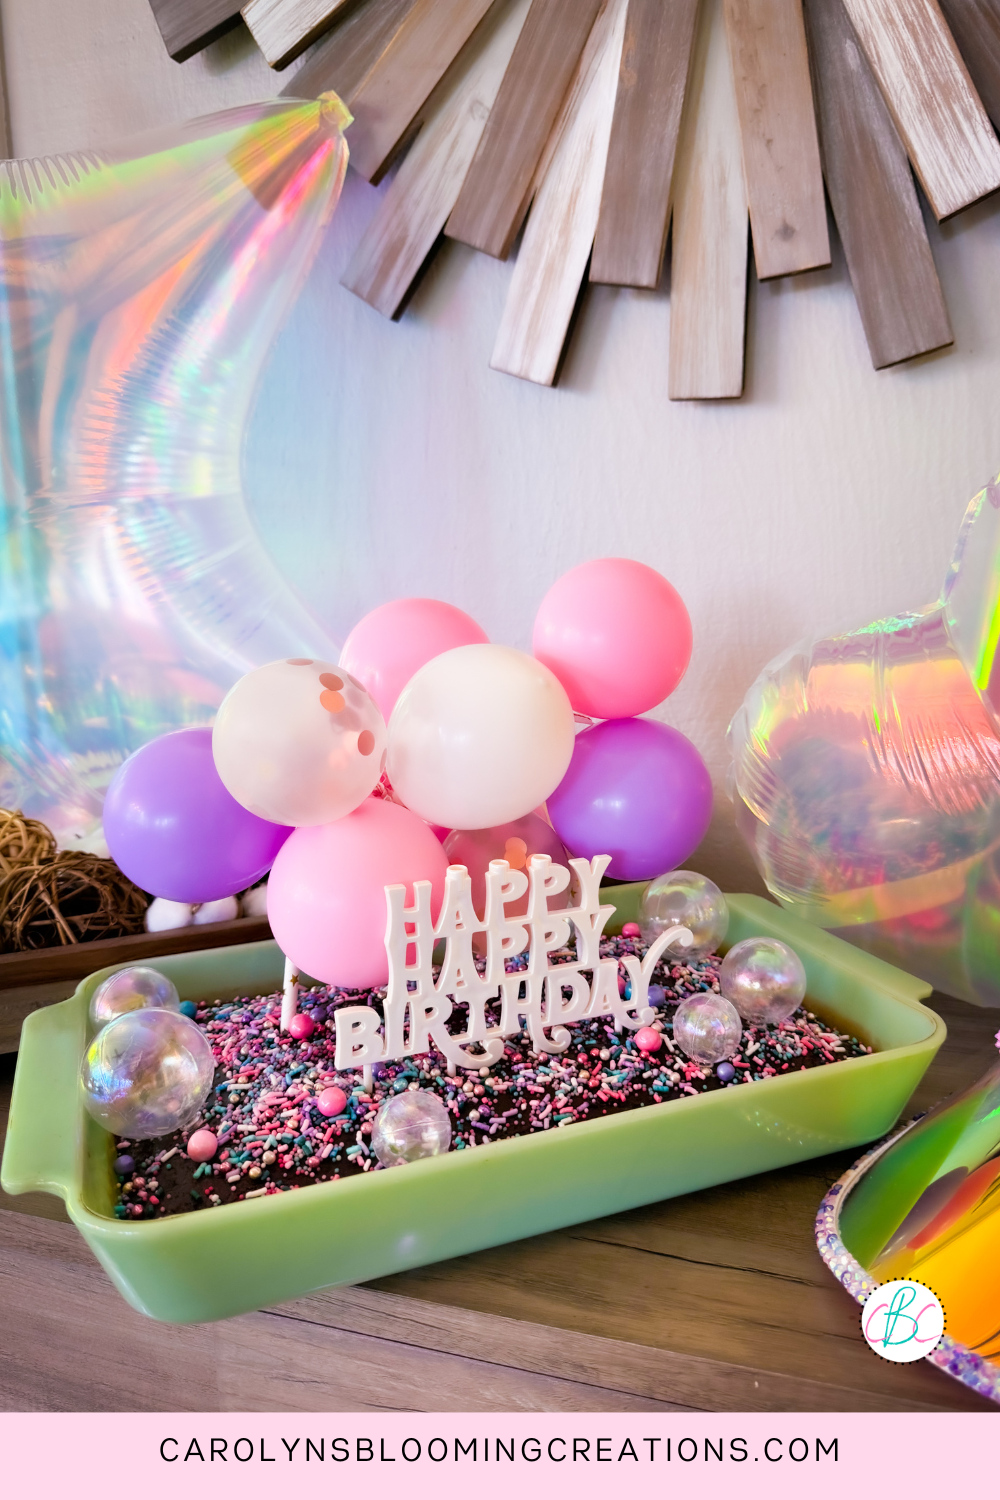
The cutest pink and purple cake
Why Brown Sugar?
The cake itself, is moist on its own, as it has brown sugar as the sweetening ingredient. Brown sugar tends to lend a hand in making many baked goods stay moist for days. It adds a deeper flavor and is often used in chocolate cakes as it helps you taste the chocolate instead of intense sweetness. That’s my experience, at least, as I know brown sugar isn’t as sweet as white sugar.
If you have a hard time preventing your brown sugar from turning into a brick, you can store it with marshmallows or sliced bread to keep it moist. You can even add them to a hardened container of brown sugar and in a day, the sugar will soften. Read more about brown sugar hacks on the Taste of Home’s (one of my Nani’s favorite magazines) website here.
I made my cake while on vacation
How Can I Make a Sheet Cake “Pretty”?
You probably even have most of the ingredients for this simple sheet cake in your pantry, maybe minus the sprinkles. I added some specialty sprinkles by Sprinkle Pop to this cake (their sprinkle sets come with A LOT of sprinkles and are adorable!), but my Nani just picked up some basic rainbow sprinkles from the grocery store.

I loved the “bubbles” as cake toppers
She also added a plastic “Happy Birthday” sign that we reused year after year. You could also use sugar letters like this set from Walmart. Sometimes BASIC and EASY is all you need, especially if making this for a special kid in your life!

My visor matched my cake
I made this cake for my birthday in 2024 while traveling. I simply packed the ingredients and décor and made it at our Airbnb. When I make my Nani’s recipes, it helps me feel like she is still alive in my heart and I think family recipes, like this one, are great things to make and pass down to generations. They keep fun family memories alive, and that’s a good thing to keep alive when you lose people like my Nani, whom I loved very, very much. Read my story about her by clicking here in my “Broken Heart” Taylor Swift inspired visor creation article.
Watch me create a matching birthday visor creation (I love pink, purple and iridescent bubble colors!) in my less than a minute video below or via my YouTube channel @carolynjbraden or below:
Time to Put This Recipe Creation Together: < 50 minutes
Most links link out to Amazon or Walmart. You can also find some of the items on TEMU. If you shop TEMU, use my link or my discount code afe55197 for 30% off (new users only)
Suggested kitchen tools: stand mixer or hand mixer, large mixing bowl/mixing bowl set, measuring cups, flour sifter, measuring spoon set, spatula, medium saucepan, 9”x13” glass or metal baking pan, baking spray, whisk
See me make the cake in a 1-minute video below or via our YouTube channel @carolynjbraden:
Nani’s Chocolate Sheet Cake with Magic Icing Recipe:
Cake Ingredients:
½ cup butter, softened (you can easily soften butter in the microwave for 30 seconds or so on 50% power)
1 ¼ cups brown sugar
2 eggs
3 tablespoons cocoa
2 cups flour
1 teaspoon baking soda
1 cup milk (I used almond milk, which worked great)
1 teaspoon vanilla
Optional: The sprinkle sets I used: Mermaid Glam by Sprinkle Pop (Amazon.com) and Unicorn Sprinkles Mix by Sprinkle Pop (Amazon.com)
Optional: pink and purple balloon cake topper (Amazon.com or TEMU)
Optional: bubble cake toppers (Amazon.com)
Optional: I added this Packed Party Iridescent cake topper from Walmart. I also LOVE their letter board cake topper.
Optional: Cake sparklers (Walmart)
Baking spray, butter, or oil for the cake pan
Chocolate Magic Icing Ingredients:
1 cup powdered sugar
1 tablespoon cocoa
¼ cup butter
1/3 cup milk (again, I used almond milk, and it worked well)
Directions:
Quick tip: This is best when made and stored covered overnight and eaten the next day, as it gives the icing a chance to soak into the cake. The flavors really blend well and the cake will be the moistest ever!

Softened butter
Preheat the oven to 350 degrees. If you are using a convection oven as I did, I set my temperature a bit lower (about 25 degrees lower) and baked for about 20 minutes. Convection ovens or air fryers do bake faster and hotter than a regular oven, so keep this in mind when baking and cooking.

The finished creamed butter
In a large mixing bowl, cream the softened butter until smooth. I softened mine in the microwave, and then used the hand mixer on a low setting for this.

Adding the brown sugar
Add the brown sugar and mix on a low setting.

Add the eggs one at at time
Add one egg at a time, mixing on a low setting in between each addition. Set aside.

I combined the cocoa powder, flour and baking soda together
Over a new mixing bowl, add cocoa, flour, and baking soda to a sifter. I sifted mine together to get out the lumps. You don’t have to use a new bowl for this, but I thought it made it easier.

Using a flour sifter
Add the cocoa, flour, and baking soda mixture to the brown sugar mixture. Add the milk and vanilla and blend together until smooth on a low or medium speed.

I sprayed my cake pan with a baking spray, then added the cake batter. Bake for 30 or 40 minutes, or until a toothpick inserted into the middle is pulled out and is clean.

The pre-baked cake
While the cake is baking, add all the magic icing ingredients to a saucepan. Bring to a boil on medium high to high heat. Whisk to incorporate all ingredients and to remove lumps. Pour over the cake while it’s still warm for the best results.

Pouring the boiled icing onto the warm cake
I added the sprinkles while the cake was still slightly warm and the icing was still “wet”. The icing will slightly harden as it cools.

The sheet cake with sprinkles
When it cooled completely, I added the birthday decorations. I removed the balloons to light the cake sparklers so there was no fire hazard.

The completed sheet cake
Keep it covered until you are ready to serve or after eating some, but if you have a crowd for your birthday, don’t expect leftovers as it’s really delicious!

My husband snapped a pic before we devoured it
Tips and Tricks:
You can try adding chocolate chips or white chocolate chips for a new flavor twist too!
This would make a great crowd dessert for special events like weddings, birthdays, holiday events and more!
If you loved this article, we know you’ll love this one too: Quick Strawberry Chocolate Trifle Dessert Recipe
Carolyn J. (C.J.) Braden is the owner of Carolyn’s Blooming Creations is a regular contributor and editor for CBC. She has been featured in numerous media publications such as InStyle Magazine, on HGTV, on Bustle.com, and more. She is the author of the books Georgia McMasters in Amethyst Lake Cemetery, How To Be Yourself: 3 Ways To Help You Being You, and the illustrator for the children’s book Bridging Connections. She is a former classroom teacher that now dedicates her life to educating others on how to live their most healthy, creative and happy life. Learn more about her visiting our About Us page.