


Carolyn J. Braden • 3 Minute Read

How to Make a Team Spirit Pearl-Adorned Beanie (Easy DIY Tutorial)
Updated: 12/5/25
Originally Published: 11/19/25
Create the cutest game-day accessory with this easy DIY team spirit pearl-adorned beanie tutorial! Learn how to style team colors, attach pearls securely, and craft a cozy, Instagram-worthy winter hat that shows off your school pride. Perfect for sports fans, students, cheer squads, and anyone who loves a stylish handmade accessory. This step-by-step guide is beginner-friendly, budget-friendly, and perfect for fall and winter game days!

No beanies for Johnny Cash as he stays warm with his fur coat naturally
Shop the Post
Don’t feel like reading this article? That’s okay! See my craft come together via my Amazon Shop plus get buying links at affordable prices!

My black beanie goes perfectly with my plaid outfit
Get my plaid vest outfit and a similar already made beanie in my Amazon Shop here!

The completed beanie
Or you can pick up a cute beanie in person at your local Nordstrom Rack…they have such cute stuff! Browse my favorite finds below or here via my shop my shop.
The Crafty Inspiration
I made these pearl beanies many years ago and never wrote up how I did it. I made a bunch in many colors, and most recently I thought someone might like to make them in team colors for the winter football season. I made a cute team spirit baseball hat, but it won’t keep your head quite as warm as a beanie. This can be made in an hour or less, especially if you have some hand sewing skills.

My black beanie version
See my team spirit baseball hat here or you can see it being made via my YouTube channel @carolynjbraden below:
Do I Have to Sew This?
No, you do not have to sew on the pearls, but the pom pom probably won’t hold on with some glue. You can buy a beanie with a pom pom already on it like this cute beanie on Amazon, then you could use hot glue to glue on some pearls or rhinestones. I liked sewing on my pom pom so I could customize my own color scheme.
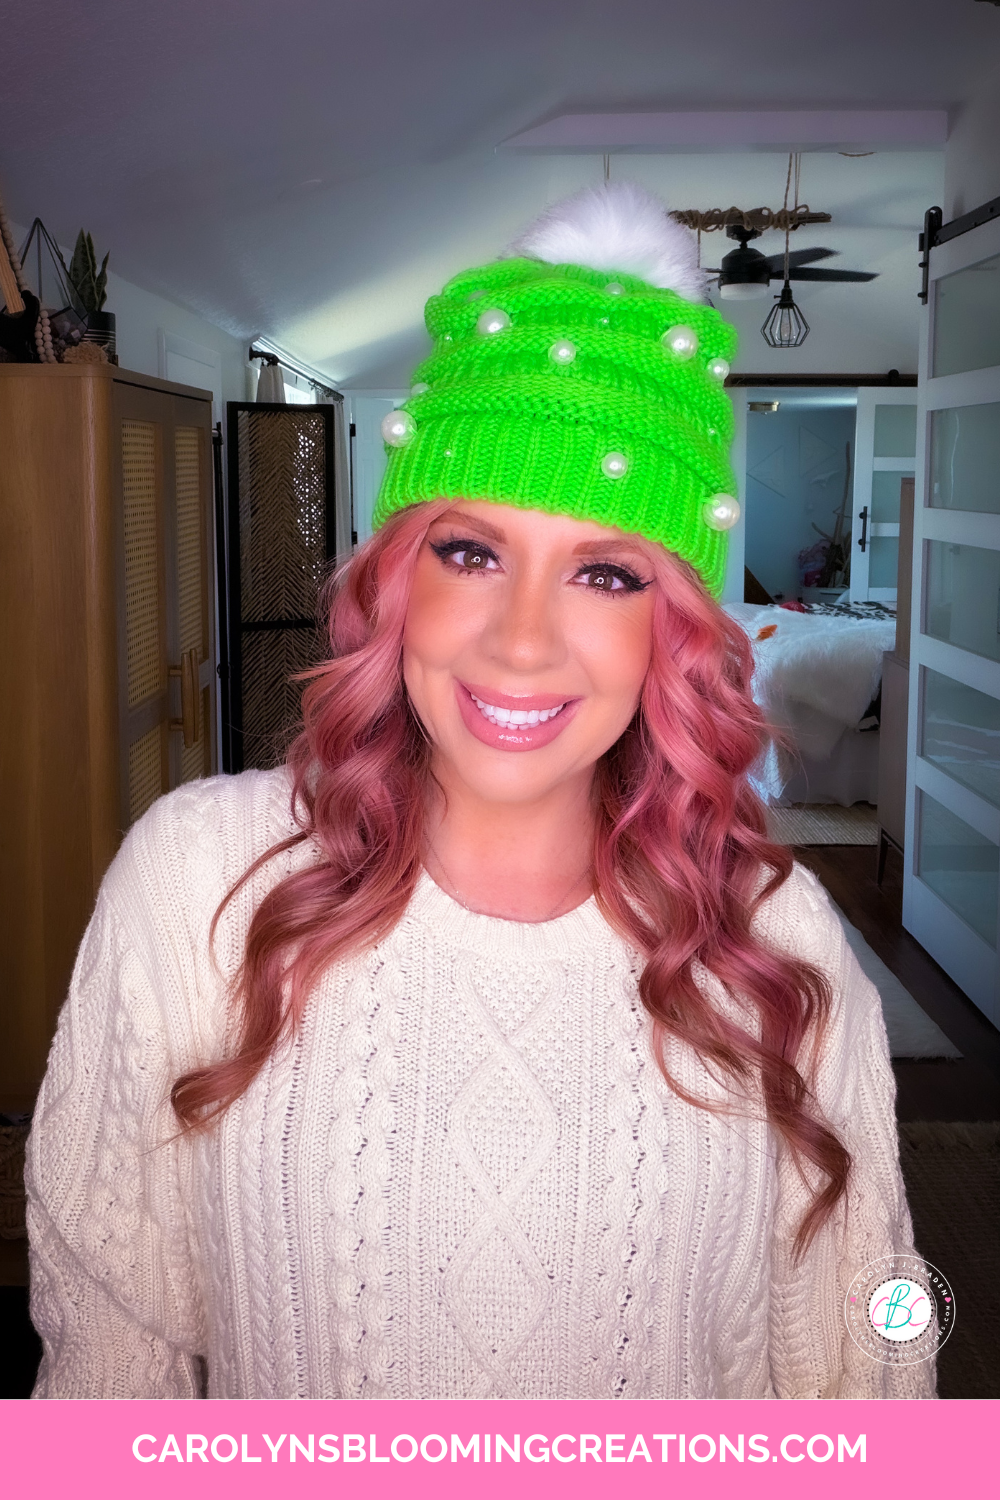
My green beanie
Want to learn some basic hand sewing skills? Check out this article via seamwork.com or find some YouTube videos that teach basic hand sewing techniques.
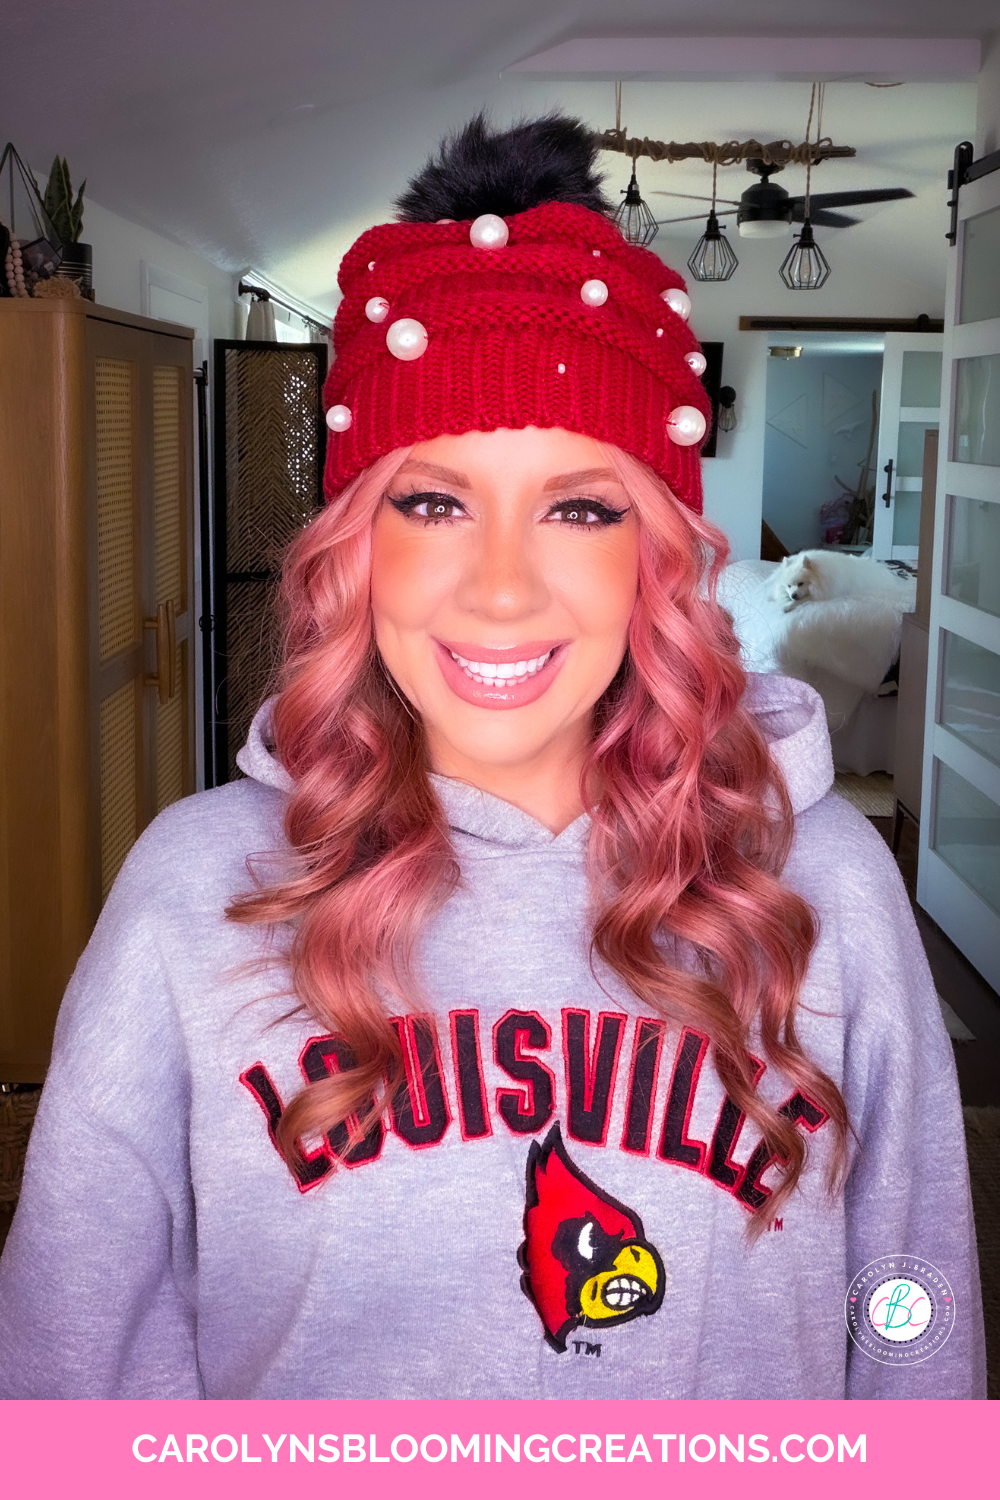
It’s great for winter football season
Do I have to make this beanie in team colors?
No! I’ve made them in many colors. I like my florescent ones the best! Who says winter can’t be colorful?! Make a bright pink one and wear it with a black coat or even a colorful one for lots of winter cheer.

The Winter Beanie Tutorial
How to Make a Team Spirit Pearl-Adorned Beanie
Now for the tutorial. Links go out to either Amazon, Walmart or Target based on where I gathered my supplies. I wrote above about how you could glue on the embellishments if you can’t sew.

An up close look at the black beanie creation I made
Check out my 1-minute video tutorial for this project on my TikTok now, below or via my my YouTube channel @carolynjbraden!
Stitch Remover/Seam Ripper (if removing a label from a hat)
Thread (I chose red to match my hat and this kit via Amazon has all kinds of colors+ needles)
Winter Beanie (Amazon or via Walmart or via Target)
Pearl beads (I used three sizes and this kit via Walmart has many sizes)
Pom Pom (if your beanie does not have one already attached)
Scissors
Optional: Beanie with a pom pom already sewn on if you don’t feel like sewing one on
Optional: custom labels (I had some made to sew in to my creations)

I love the pink one!
How To:
Thread the needle by pinching the thread between your fingers and push the needle over the tip of the thread. I learned this in my Fiber Arts college classes and it save me so much hassle!

Thread the needle
Pull the thread through the needle eye, and double it up, knot the end and you are ready to sew on the pom pom IF you chose a hat without one.

Removing the label
If removing a label from the hat, I used a seam ripper, gently pulling out the threads with the tool, then easily removing the label.
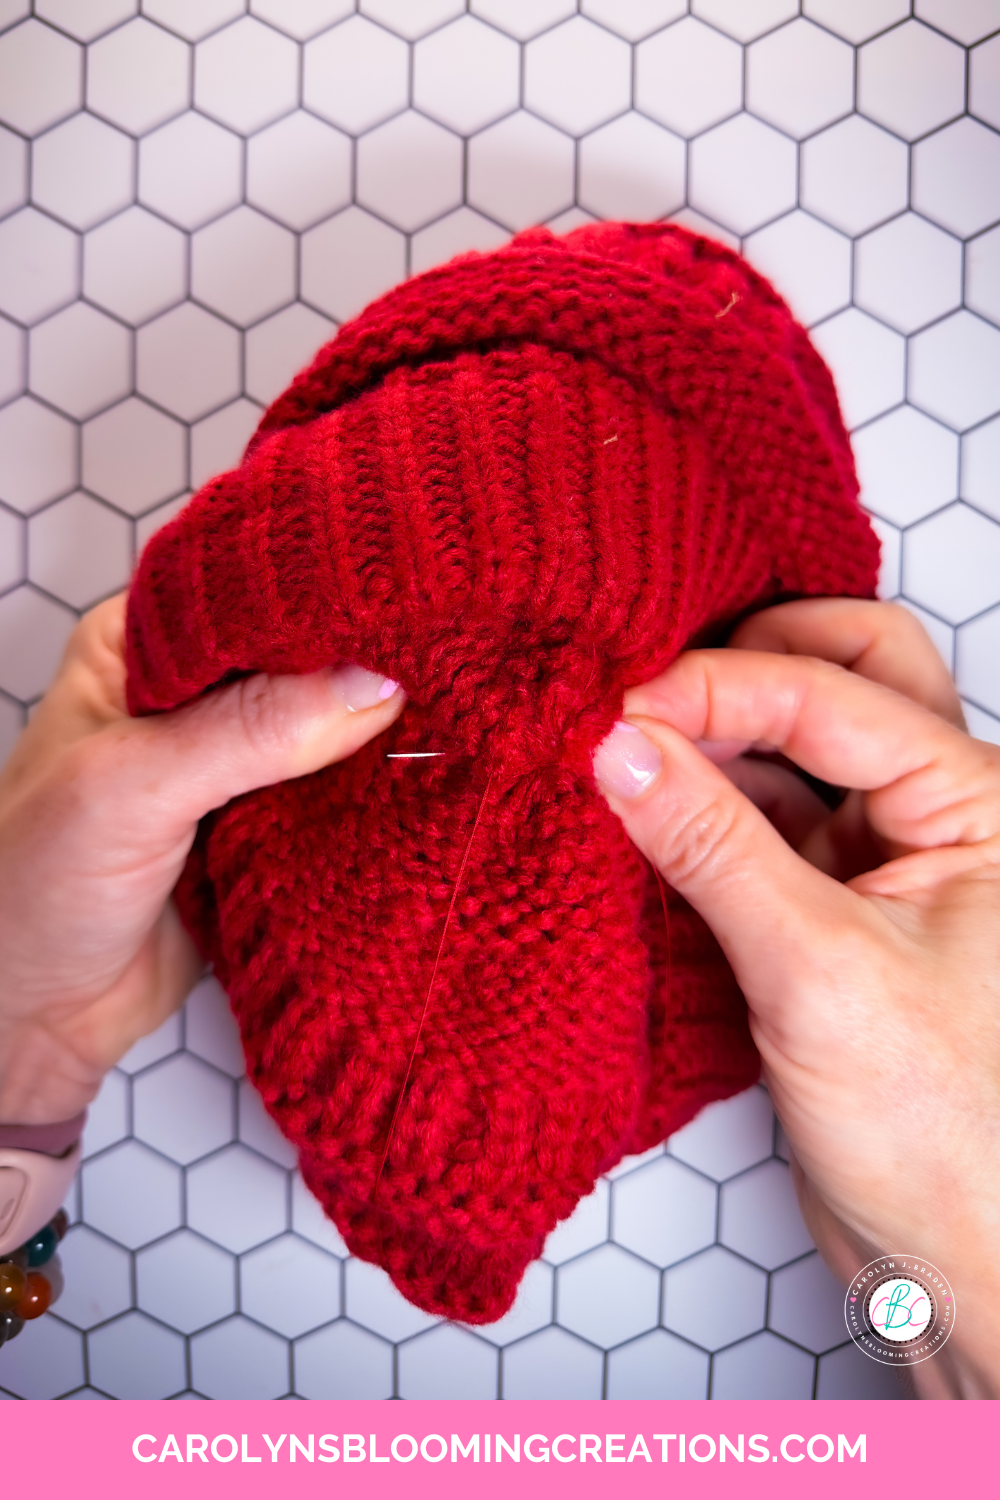
Sewing on the pom pom
I held the pom pom with one hand on the top of the hat, flipped the hat inside out a bit, the put the needle through the hat, making sure it went through the pom pom a bit too.

The pom pom is now attached
If your pom pom is thick like mine, I used a thimble to push it through. I sewed it through the pom pom several times, then knotted the thread and cut the end off. I flipped the hat back right side out.

Sewing on the beads
I rethreaded my needle, and started sewing on the pearl beads. I laid them out first, planning the placement of them all. I stitched from inside the hat, poking the needle through the front of the hat, putting the needle through the bead, then back down through the hat on the other side of the bead. I did this several times to get a good secure stitch on the bead. I added about 5 of three sizes of beads.

Adding the label
Lastly, I sewed on my label in the same manor I sewed on the beads, up through the back, through the label, then knotted it.

Go Cards! (I went to the University of Louisville)
Then the hat is done and ready to wear to support your favorite team OR just make them to look cute and colorful in the gray winter days.

Side view of the hat
Take Action
I encourage you to try the project with your own creative twists and share your creations on your social accounts! If you tag me using @carolynsbloomingcreations or @carolynjbraden, I’ll see it! Or tell me about it in the comments below.
If you loved this article, we know you’ll love this one too: How to Hot Fix Rhinestones on a Winter Beanie Hat
Carolyn J. Braden is the owner of Carolyn’s Blooming Creations is a regular contributor and editor for CBC. She has been featured in numerous media publications such as InStyle Magazine, on HGTV, on Bustle.com, and more. She is the author of the books Georgia McMasters in Amethyst Lake Cemetery, How To Be Yourself: 3 Ways To Help You Being You, and the illustrator for the children’s book Bridging Connections. She is a former classroom teacher that now dedicates her life to educating others on how to live their most healthy, creative and happy life. Learn more about her visiting our About Us page.