


Carolyn J. Braden • 3 Minute Read

How to Make Mermaid Sunglasses
Here I go again with yet another fun DIY sunglasses tutorial! My snow day sunglasses and my sprinkle sunglasses tutorials continue to get saved on my Pinterest page and on my YouTube channel all the time. They are easy to create and really, really cute!
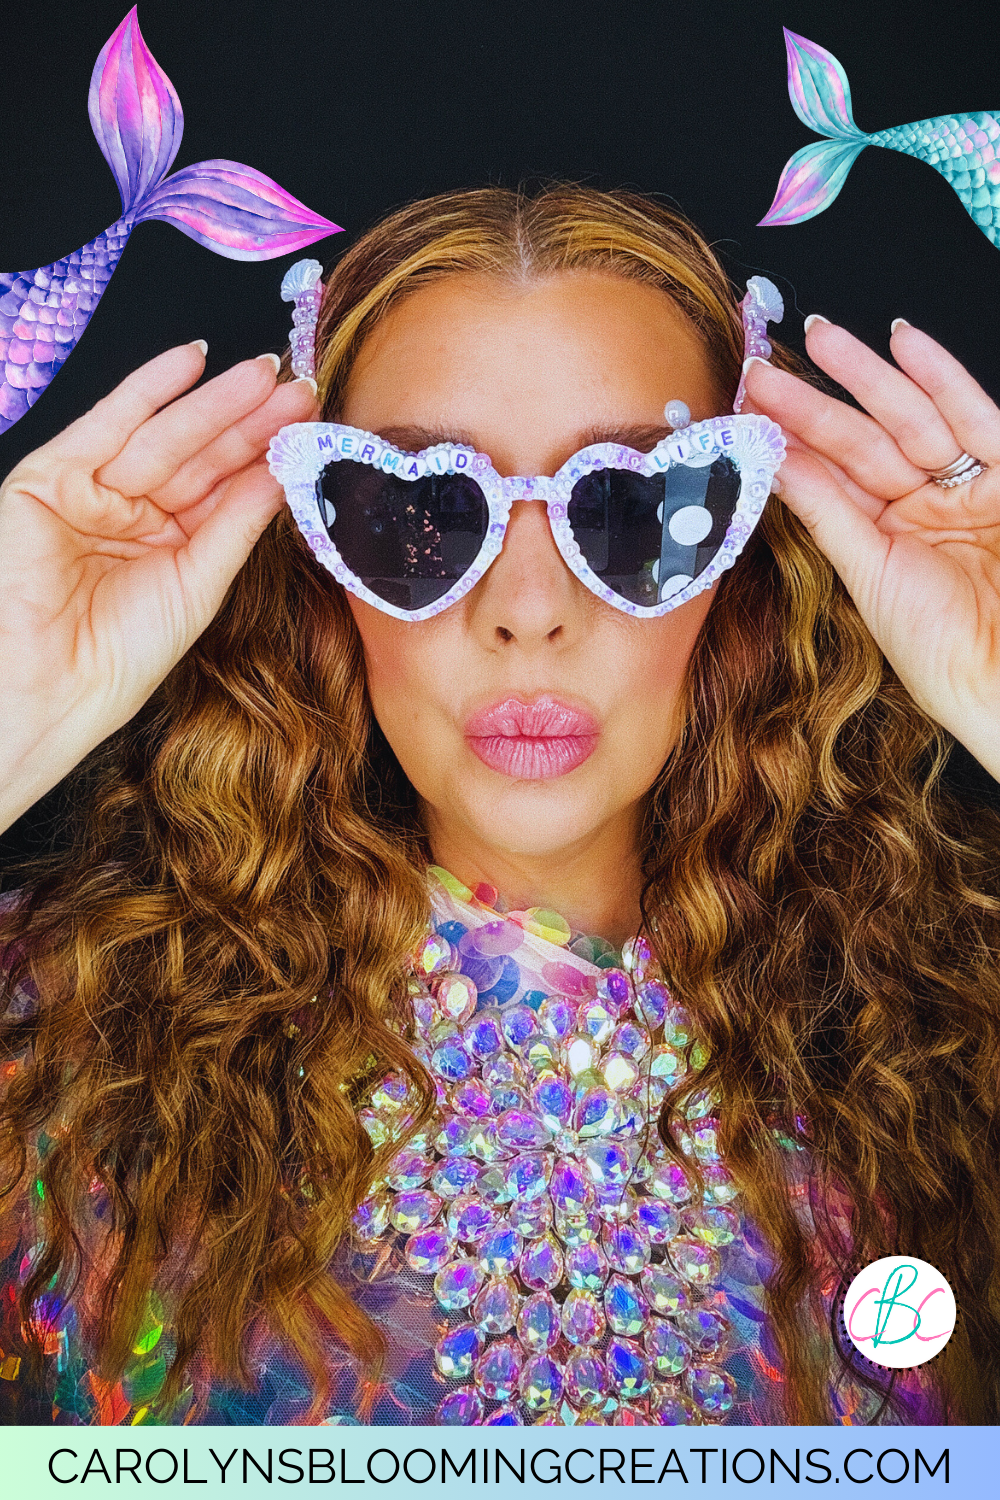
I love mermaid inspired colors
There are so many ways you can decorate sunglasses to fit your personality and since I live on Sanibel Island, I’m always feeling mermaid vibes, which led me to create my DIY mermaid sunglasses. Read on to learn how I made them.

I love this macrame hammock swing I got on Amazon
I love mermaid colors, which are ocean-y blues, greens, pinks and purples. That color combination is one of my favorites. I also love iridescent colors, like when oil mixes with water or what you see in bubbles as they blow through the sky. I turned to this color combination to use in my overall sunglasses design.

Modeling my homemade mermaid dress
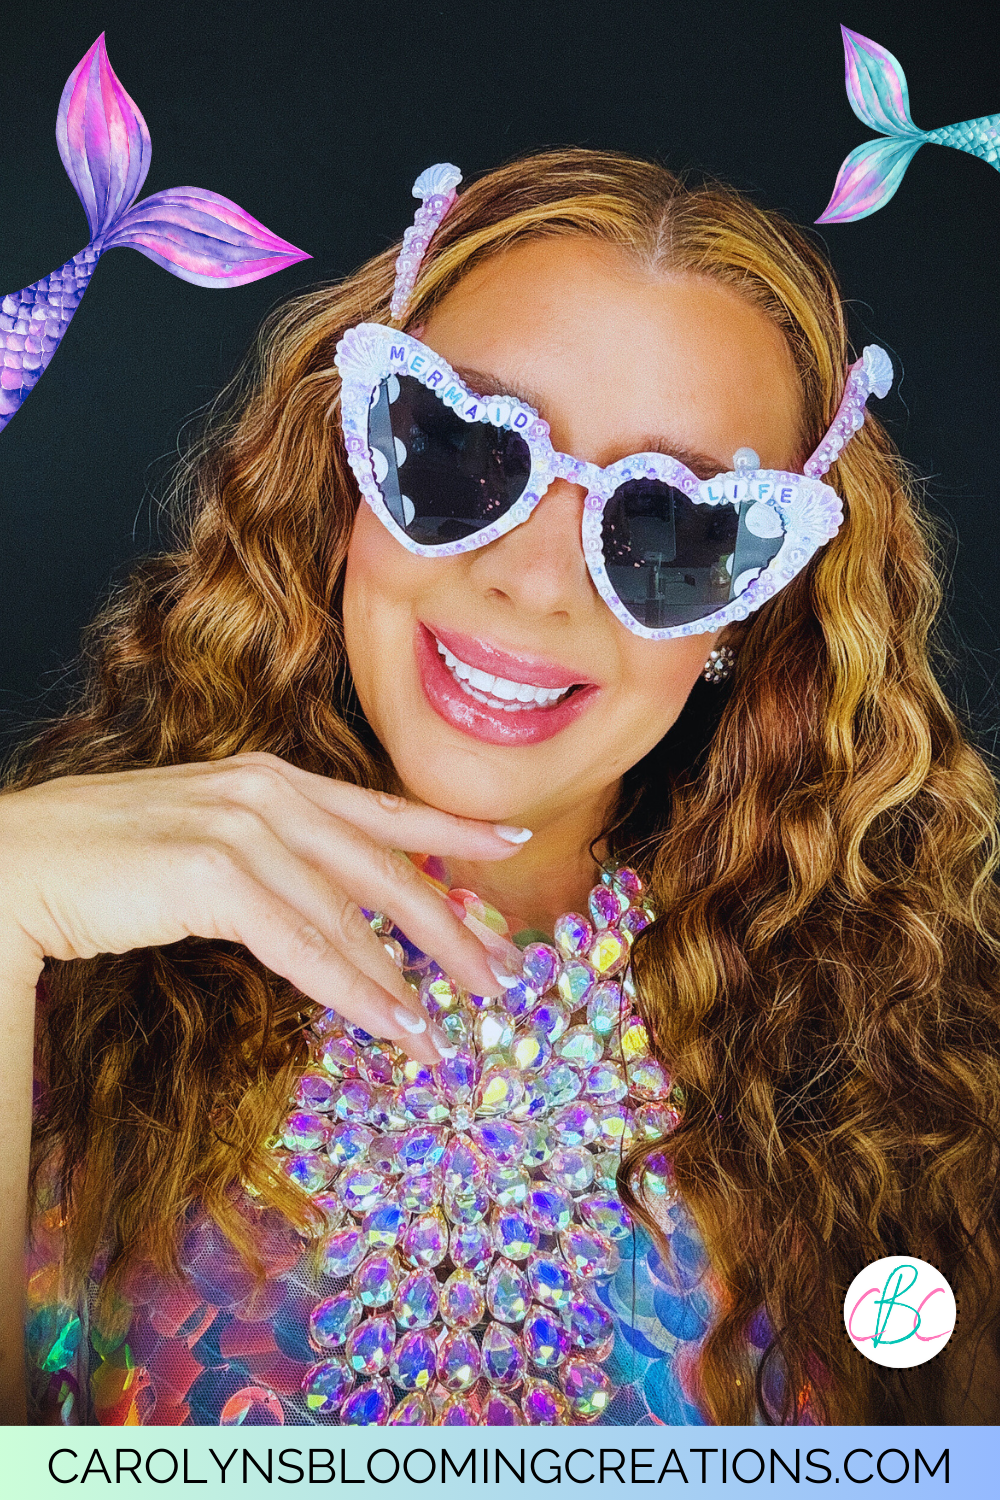
I’ve made lots of mermaid inspired things and will probably continue doing so for a long while. See my cute little mermaid clips that I wear with these sunglasses in the video tutorial below or via my YouTube channel @carolynjbraden.
Mermaid home décor is another way you can bring mermaid vibes into your life. I read this article on Better Homes & Gardens’ website that shows you all kinds of beautiful mermaid-ish home décor that you can incorporate into your home. Even though we will move to a new state at some point, I’ll always be an honorary mermaid after living on Sanibel for four years.

Our pool area makes you feel mermaid vibes for sure
For this DIY mermaid sunglasses project, I relied on some inspiration from a bedspread I saw on the Barbie movie that came out in 2023. I found the same round sequin “mermaid scale” fabric on Amazon that they had on Barbie’s bed and I knew I had to have it. I didn’t want to make it into a blanket….. just yet. I wanted to drape it into a dress for a mermaid photo shoot and that’s exactly what I did.

This fabric was a beautiful bedspread in the Barbie movie
After making my mermaid sunglasses, I took my hair out of braids to create a wavy, mermaid hair look (see me create it using my favorite Braid Balm pre-braid prep in this tutorial on my website), added some pink and purple makeup, draped the mermaid fabric on my body and had my husband help me clamp it in the back using spring clamps. Maybe it’ll become a permanent dress one day, but I’m having fun using it for creative photos for now.

This mermaid scale fabric does shed, so I had to pick up glittery pieces after my photo shoot
I took the photos at my Sanibel home inside in my bedroom/studio, on my porches and by our pool. It was an overcast day, which lent me the light I needed to shoot this glittery look. I have a background in photography (it’s what I received my undergrad degree in) and learned in my college classes that bright sunshine isn’t always the best light for photos. The overcast sky made the dress pop and photographed well.

My mermaid fabric draped nicely as a dress
As for the mermaid sunglasses, they were beautiful in my mermaid inspired photo shoot, but I’ll wear them in everyday life too. They’d make a cute craft to make at a kid’s mermaid themed birthday party or make them for a girl’s trip to the beach. You could also make them for a milestone birthday celebration or for a bachelorette party.

This mermaid fabric made a beautiful dress
If you want a cute photo op idea for the sunglasses, check out my article about how to make a heart shaped beach photo by clicking this link. I gifted a bunch of plain white heart sunglasses to my family and we took a cute heart shaped beach photo with the sunglasses. The picture turned out so cute!
Here is a one minute video tutorial of me making the sunglasses…watch below or via my YouTube channel @carolynjbraden:
How to Make Mermaid Sunglasses:
Tools/Products:
Plastic heart sunglasses (The link will direct you to Temu as I got a pack of 10 there for for $11.99 or you can get some heart sunglasses on Amazon)
Resin seashell charms (I got mine on TEMU, but here is a similar set on Amazon)
White heart acrylic alphabet beads (The link will direct you to the ones I purchased on Amazon)
Mermaid colored Jelly resin flatback rhinestones and pearls in various sizes (I got mine on TEMU, but here is a similar set on Amazon)
Liquid Fusion Glue (I use this for all my rhinestone + plastic or metal art creations as it holds well and is clear, the link will direct you to Amazon)
We love TEMU for their great affordable craft supplies! Click this link to get $100 coupon bundle or use code afe55197 on the Temu App to get 30% off discount!!
Optional:
Toothpicks
Wax Pencil Tool (the link will direct you to Amazon)
Pointy ended cotton swabs (the link will direct you to Amazon)
Hand towel (for keeping the sunglasses even)
Directions:
1—Fold up your towel to the width of your sunglasses and wrap your sunglasses around it. This should help keep it flat.

The mermaid sunglasses supplies
2—Use your fingers or a wax pencil tool (you can pick up the alphabet beads with the wax pencil or your fingers) to lay out the alphabet beads (my spelled-out MERMAID LIFE) around the rim of the sunglasses OR lay them out where ever you want on the glasses. I do this so I can understand what I want my design to look like before gluing.

Laying out the letter beads first helps you understand placement
3—Once you know where you want to place the letter beads, start placing a dot of glue onto the back of each one and glue them onto the sunglasses.
4—If any glue oozes out, use the toothpick or the pointy ended cotton swabs to remove the excess.

I love these glittery mermaid colors!
5—Add some glue (I just carefully squeezed it out of the bottle) around the letter beads and add your seashells, rhinestones and pearls, varying the size and placement of each one. I used the wax pencil tool to grab each one and place them on the glasses.

The almost completed mermaid sunglasses
6—Add some glue around the bottom of the sunglasses on the rim and add some rhinestones and pearls. I added a bunch until the glasses were covered.

Allow to dry for 24 hours before wearing
8—Allow to dry for 24 hours then wear and enjoy!
I love how they turned out!
Did you make this craft or something similar? If so, let me know in the comments below!
If you loved this article, we know you’ll love this one too: How to Make Mermaid Cupcakes
Carolyn J. (C.J.) Braden is the owner of Carolyn’s Blooming Creations is a regular contributor and editor for CBC. She has been featured in numerous media publications such as InStyle Magazine, on HGTV, on Bustle.com, and more. She is the author of the books Georgia McMasters in Amethyst Lake Cemetery, How To Be Yourself: 3 Ways To Help You Being You, and the illustrator for the children’s book Bridging Connections. She is a former classroom teacher that now dedicates her life to educating others on how to live their most healthy, creative and happy life. Learn more about her visiting our About Us page.