


Carolyn J. Braden • 3 Minute Read

How to Use a Wax Seal Stamp to Seal an Envelope
I love a wax seal. I’ve used them to seal gifts, add details to ribbons and bows and most recently, I’ve used a wax seal to seal an envelope. I used a Happy Birthday stamp to add just a touch of elegance to a card I gifted to someone recently and she loved it.
We both love the show Bridgerton and since wax seals show up on the series often, it seemed like the perfect thing to add to a card and it’s really easy! Read on to learn how to use a wax seal stamp to seal an envelope.

The wax seal without the gold marker accent
Can I Mail a Letter with a Wax Seal?
Many people use wax seals to mail wedding invitations and other special mail items. If you are planning to use a wax seal on a wedding invitation envelope, you should place the wax sealed envelope inside another envelope. The wax seal will prevent the envelope from going through the machines smoothly.
You can also have your invitations hand-canceled at the post office, which means each stamp is canceled using a hand stamp instead of a machine. Hand Canceling does require more cost, so keep that in mind when thinking of having this done. Read more about hand-canceling here on Brides.com. You can even have wax stamps custom made and I think they are gorgeous on wedding invitations (which usually need extra postage anyways).
The History of the Wax Seal
Wax seals have been used for many, many years to seal envelopes. It was used to signify the letter had not been opened as it’s difficult to open a letter with a wax seal without messing it up. If you love to understand why certain things were used in history like the wax seal, read more about sealing wax here.
Now for the easy project. You can wax seal an envelope in a matter of minutes with my easy tutorial.
Things You Need:
I ordered my supplies from Temu due to the low prices. If you order from Temu, use my link here and the search term I used below to find it on the app. If you use my link or promo code afe55197 at checkout, you will receive 30% off (new app users only).
Otherwise, I’ve included links to buy similar items on Amazon or Walmart below.
Electric Wax Seal Kit (With everything you need, including warmer, stamps, wax beads and more):
If your kit doesn’t come with a stamp you want, you can order it separately (I also ordered a bee stamp separately on Temu, but Amazon has a similar one) as a set. I used a Happy Birthday stamp for this card project.
Buy a similar Wax Seal Stamp Set at the following retailers:
I gave the recipient a Dessie Inspirational Card and you can get them at the following retailers:
See my 1-minute video tutorial for this wax seal project in the video above or via my YouTube channel @carolyjbraden.
How To:
Add the card to an envelope. You can seal it or not. I left my unsealed as I knew the wax would do all the work. I don’t like licking envelopes anyways!

The inspirational card
I placed my electric wax warmer on a natural stone surface (the warmer gets hot!) but you could place it on a trivet. Then I turned it on.
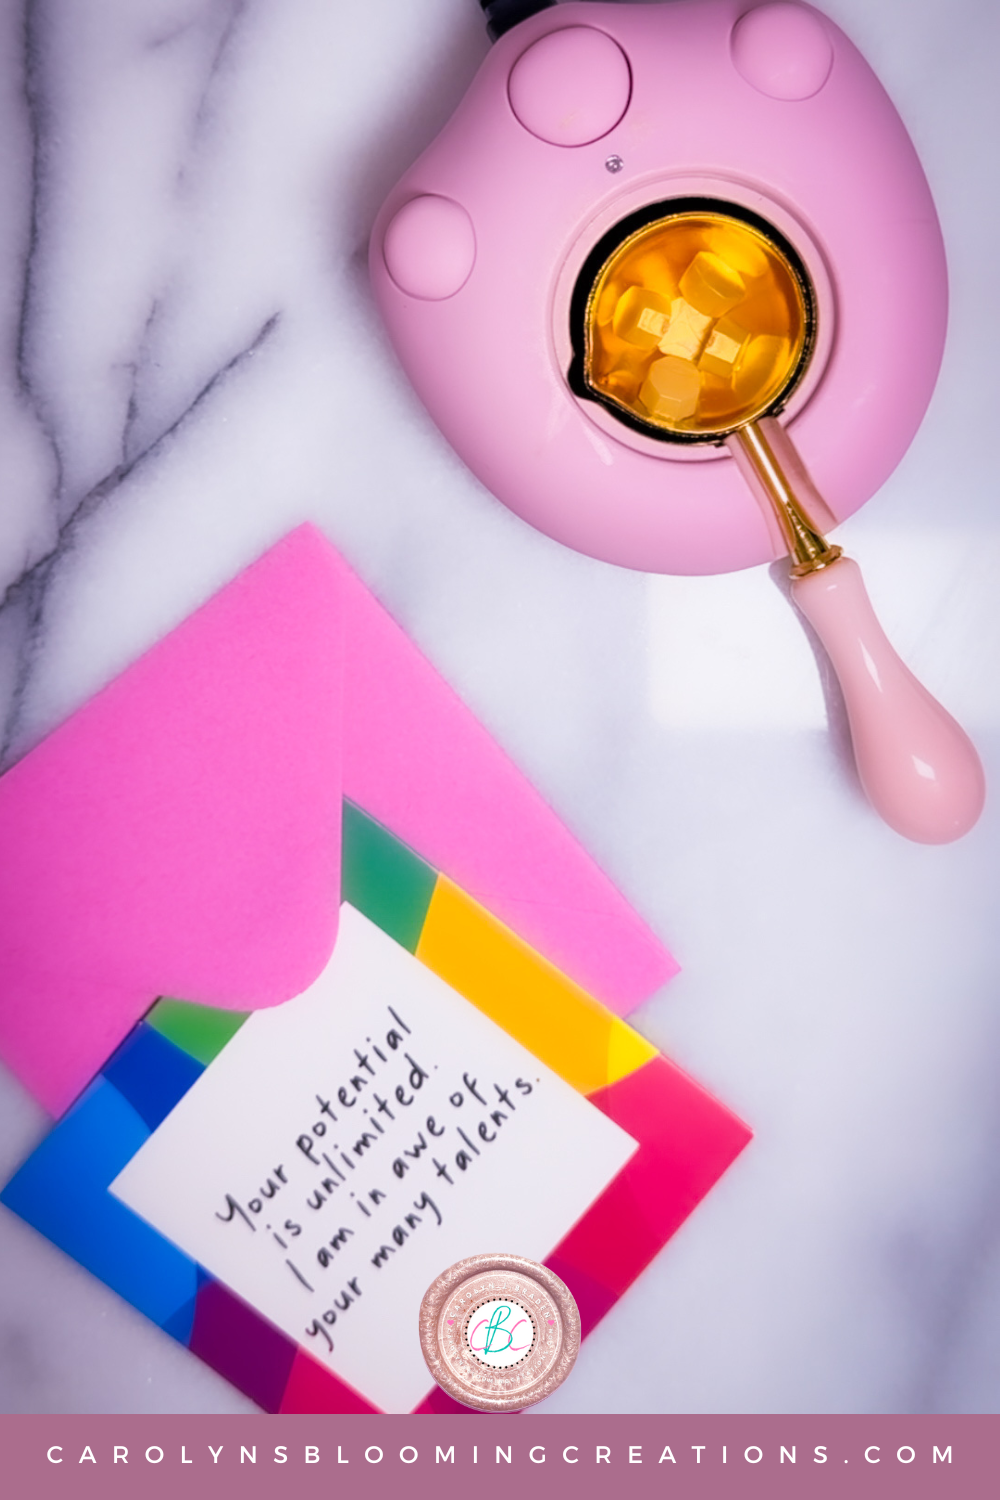
Melting the wax seal wax only takes a few minutes
Place the ladle (it comes with the wax seal kit) in the warmer with 5 wax beads and let them melt. I chose a gold color wax for the envelope, but have also made a wax sealed gift using red too.
See how to create a wax seal gift in my 1-minute video below or via my YouTube channel @carolynjbraden.
I stirred the wax just a bit with a small metal letter opener that came with my kit.
Carefully pour the melted wax onto the envelope flap.

Pouring the melted wax onto the envelope
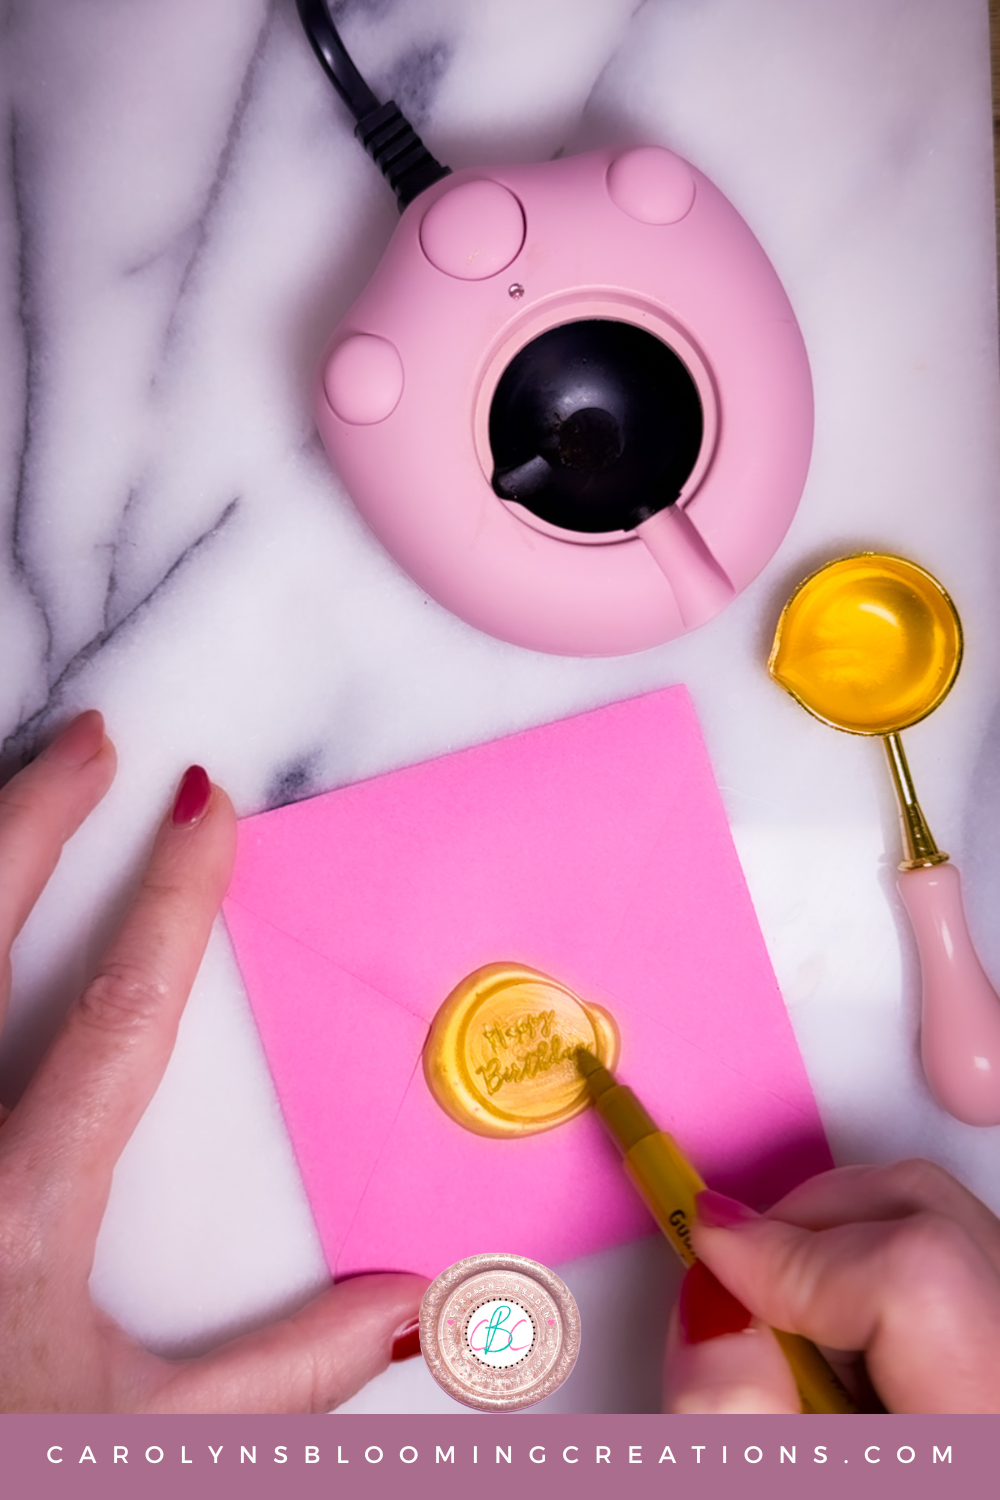
I selected the Happy Birthday stamp, screwed it on the handle, and while the wax was still hot and wet, I placed the stamp into it and let it sit for about 2 minutes. The metal of the stamp is cool and seems to speed up the cooling of the wax. After about 2 minutes, I lifted up the stamp and the wax seal was complete.

Placing the stamp on the hot wax
If you are not placing the wax seal on the gift, you can pour the wax onto a heat safe (and non-stick surface like the stone pastry board I have) and stamp down into it.
Using a gold marker to accent the wax seal
After about 30 seconds, you can lift the stamp off the wax and peel the wax seal off and use it however you wish. You can also get wax seal stickers (they are small, round, double sided sticky) to place on loose wax seals for use on envelopes and more.

The seal with the gold marker accent
I used a permanent gold marker that came with my kit to draw over the Happy Birthday stamp to make the letters pop a little more.
I hope this is inspiring and adds a little more flair to your cards and invitations!
If you loved this idea, we know you’ll love this one too: DIY Pen Featherington Dried Flower Hair Comb
Carolyn J. (C.J.) Braden is the owner of Carolyn’s Blooming Creations is a regular contributor and editor for CBC. She has been featured in numerous media publications such as InStyle Magazine, on HGTV, on Bustle.com, and more. She is the author of the books Georgia McMasters in Amethyst Lake Cemetery, How To Be Yourself: 3 Ways To Help You Being You, and the illustrator for the children’s book Bridging Connections. She is a former classroom teacher that now dedicates her life to educating others on how to live their most healthy, creative and happy life. Learn more about her visiting our About Us page.