


Carolyn J. Braden • 3 Minute Read

How to Make a Sparkly Pipe Cleaner Magic Wand
Magic was in the air during the week of my birthday, as it should be! During a birthday getaway, I created a car craft of a pipe cleaner magic wand, which has a lot of personal symbolism around it. I also made a pipe cleaner crown, and with Independence Day also around the corner, making some pipe cleaner wands to match seemed appropriate. It’s a fun craft you can make in 15 minutes or less. Read on to learn how to make a pipe cleaner magic wand.

My dog, Minnie Pearl, helped make the wands, lol!
Easy Summer Crafts
I made this sparkle pipe cleaner magic wand in the car during a road trip. I like to craft in the car as reading in the car often makes me feel nauseous and you can read more about it here in my pipe cleaner crown tutorial. This is an easy car craft but also an easy craft in general to make at home by yourself or with a group.
Try this easy pipe cleaner crown via my tutorial on my website or get the tutorial via my 1-minute video below or via my YouTube channel @carolynjbraden:
Why Make This?
I think this is a great craft to make because it’s easy, it’s inexpensive AND looking at my wands bring me JOY. I’m a big believer in keeping the things in your life that bring you joy and if it’s something as simple as a pipe cleaner magic wand, then keep it around. I’ll keep mine on my makeup vanity in a mug or vase so I can see it often.

I love this wand!
You can make this with sparkly pipe cleaners or I also like these pipe cleaners:
Jumbo Furry Pipe Cleaners ($12, Amazon)
Extra Thick Chenille Stems ($12, Amazon)
Fuzzy Chenille Stems (large color mix of 500 for $20, Amazon)
Hello Hobby Rainbow Fuzzy Sticks (100 pack, $2.53, Walmart)

This wand is a cute 4th of July craft idea
If you make a red, silver and blue one like I did, it could be fun 4th of July party décor. The iridescent ones represent love and light to me, and are my favorite color…iridescent….which represents many colors.
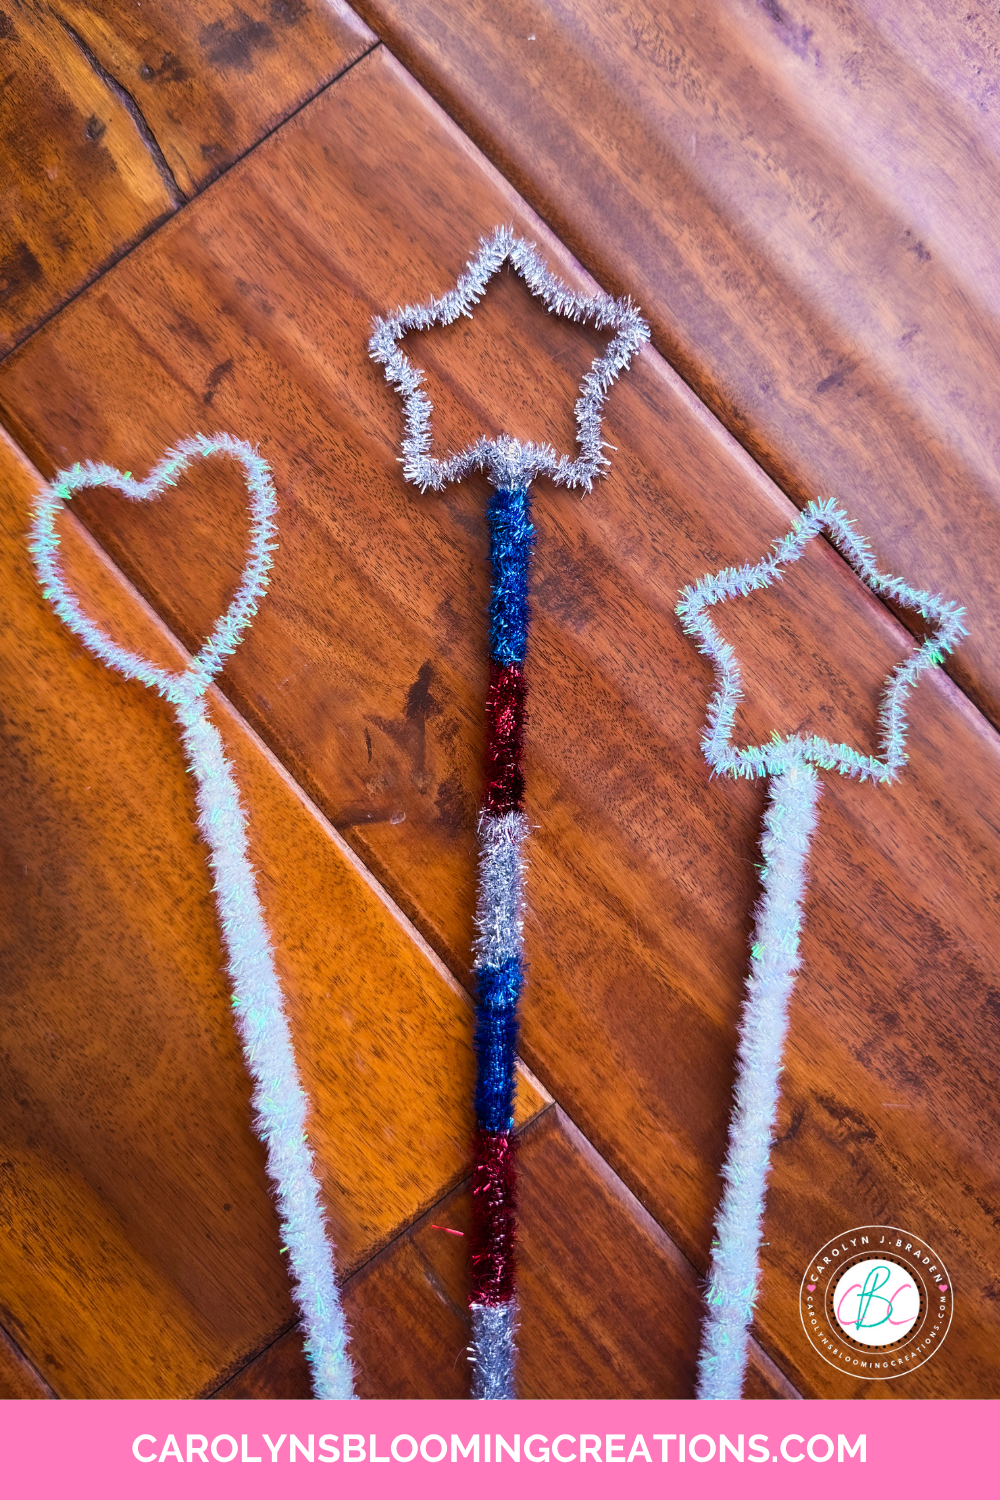
The wands I’ve made (so far!)
Bringing Back Childhood Magic
I remember being drawn to magic wands as a kid. I loved thinking that you could put a magic wand on something and transform it into something else, like the pumpkin that became a carriage in Cinderella. I know there is so much more work that goes into transformations as an adult (as I’ve learned about it personally through personal growth, renovating numerous houses, career changes and more), but I still like the concept of a magic wand.

You can make a wand in your favorite colors
A magic wand is very symbolic in my life right now, and I’m putting in a lot of hard personal work (learn about the trauma therapy I opted to try called EMDR here on the Cleveland Clinic’s website) to bring back some of my childhood magic into my life. Oh, how I loved thinking as a child that Fairy Godmother’s existed in the world, and now to understand as an adult that they actually do…in the form of therapists and good, caring people, is heartwarming.
I will look at this wand and will remember that I can’t magically change things, but I am willing to put in the hard work to make life more magical again, and that brings me joy.

How to Create a Magic Wand
Now for the project. Here’s what you need:
12 inch sparkle pipe cleaners, 200 for $9.99, Amazon or I also used iridescent pipe cleaners from Amazon (Just an FYI, sparkle pipe cleaners can irritate very sensitive skin so use fluffy soft ones instead if this is an issue.)
Cookie Cutters (I used Wilton 2-inch star and heart cookie cutters I already had, similar to this $7 twelve piece cookie cutter set on Amazon)
Bamboo skewers (I used 12-inch skewers, and you can get them at many grocery stores, on Amazon and here at Walmart)
See me create this in a 1-minute video below or via my YouTube channel @carolynjbraden:
Optional:
IF crafting in the car or at home, I recommend using these plastic food service trays from Amazon lined in this non-slip drawer liner. It keeps things even and captures messes. The pipe cleaners do shed a bit when you work with them.

The magic wand supplies
How-to:
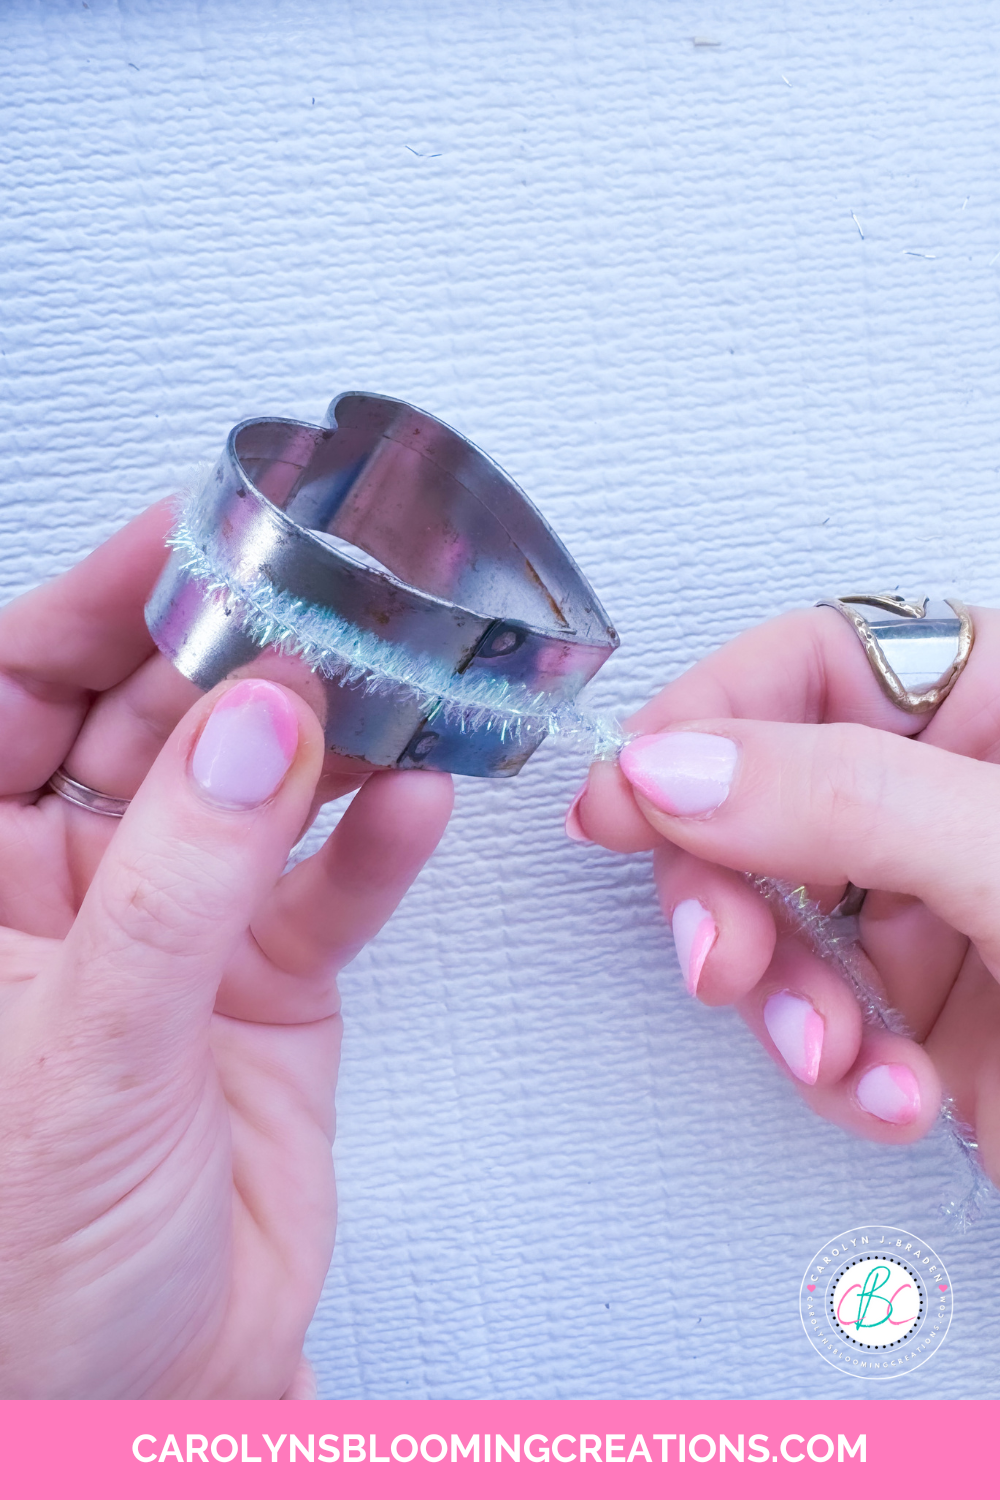
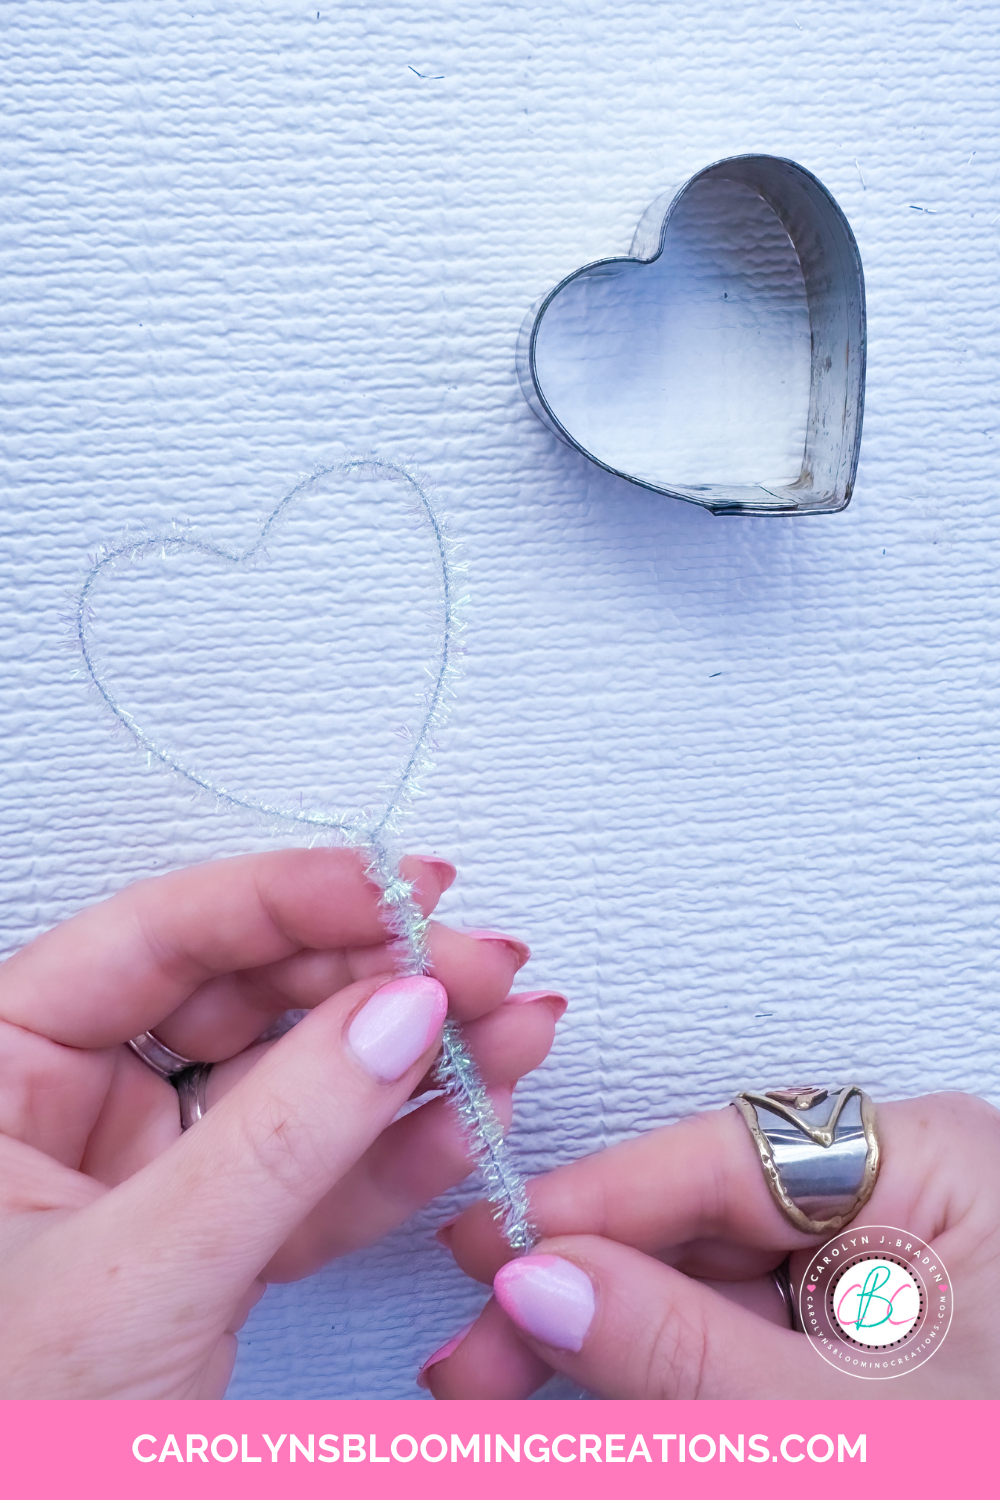
Wrap a pipe cleaner around a cookie cutter and use your fingers to shape it, making the “end” at the bottom of the heart or star. While it was still on the cookie cutter, I twisted the “end” of the pipe cleaner (one end) to the left-over part of the pipe cleaner to close the shape.

Creating the “love” magic wand
I then slid the shape off the cookie cutter and it will look like a shape with a long stem coming off the BOTTOM. I practiced wrapping my pipe cleaners around the cookie cutters, always having the “end” or “stem” come off on the bottom.

Cutting the sharp tip off the skewer
Next, I cut the tip off the bamboo skewer so no sharp pieces would exist. I highly recommend doing this, especially if children will play with it. If children are making these wands, an adult could pre-trim the ends off, like I would have done when I was an art teacher.
Twisting the bottom of the shape together
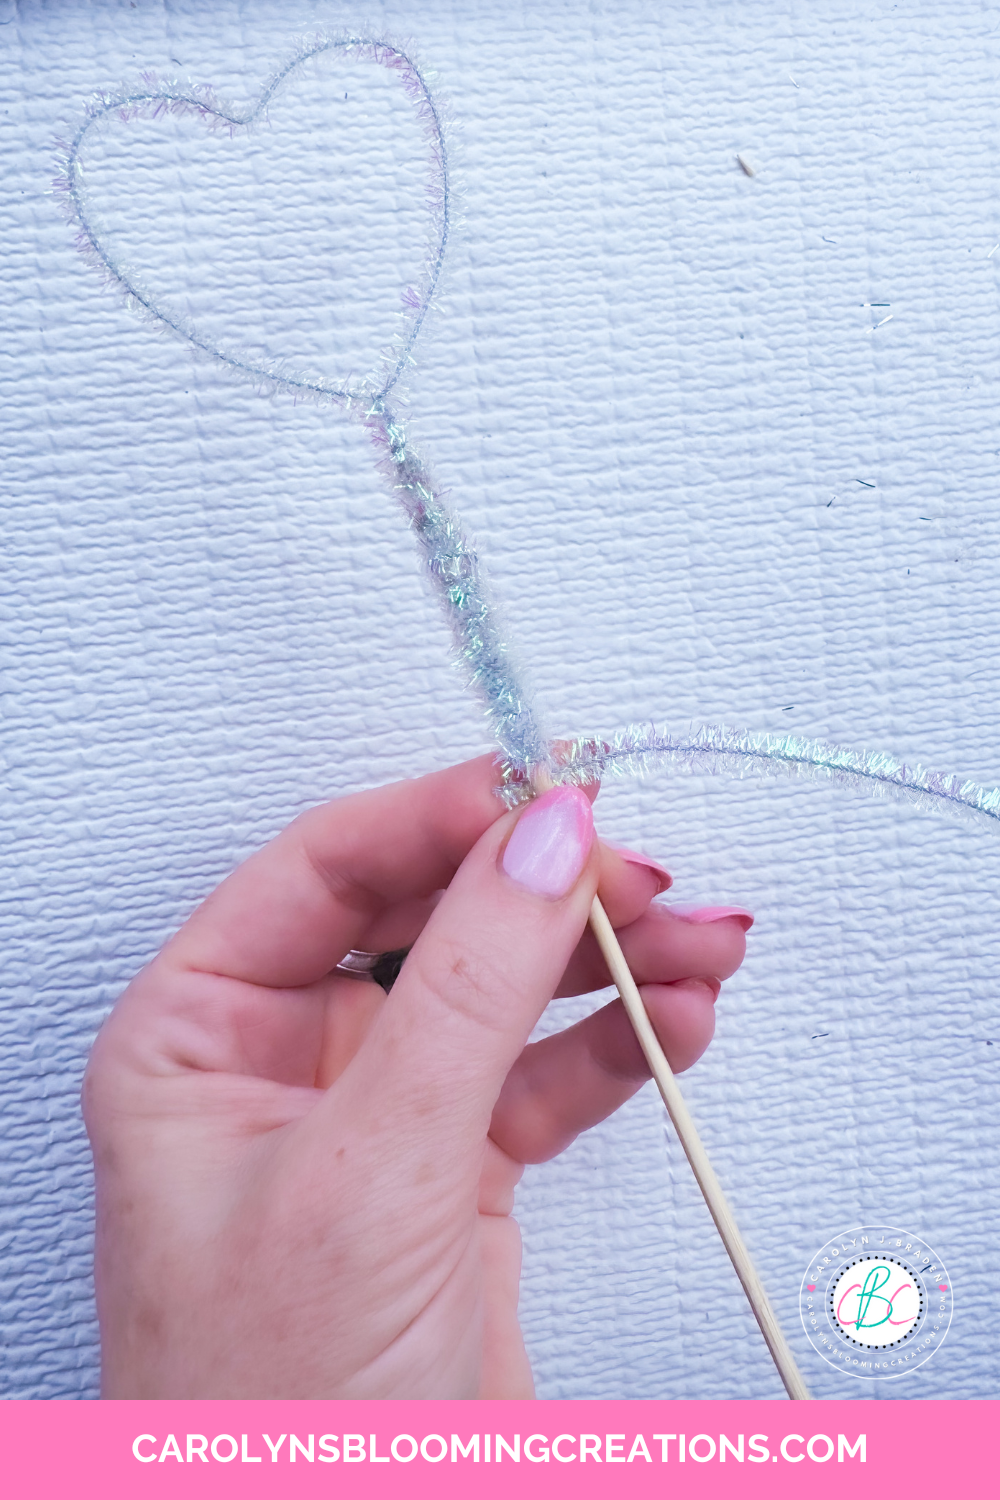
Wrap the left over “stem” of the cookie cutter shape onto the top of the skewer until it’s fully on it.

Attaching the shape to the wand
Next, wrap another pipe cleaner around the skewer, slightly overlapping the pipe cleaners. The overlapping will keep the top pipe cleaner shape in place without the need for glue.
Adding more pipe cleaners
Continue wrapping the pipe cleaners around the skewer until it’s completely covered. I had to slide them up a bit as I wrapped to make sure the skewer didn’t show.
Push up on the pipe cleaners to cover the skewer as you wrap it
When I got to the end, I just wrapped what was left around OR trimmed off extra with scissors if needed.
If you made this craft, let us know…share your results below!
If you loved this article, then we know you’ll love this one too: How to Make Sprinkle Sunglasses
Carolyn J. Braden is the owner of Carolyn’s Blooming Creations is a regular contributor and editor for CBC. She has been featured in numerous media publications such as InStyle Magazine, on HGTV, on Bustle.com, and more. She is the author of the books Georgia McMasters in Amethyst Lake Cemetery, How To Be Yourself: 3 Ways To Help You Being You, and the illustrator for the children’s book Bridging Connections. She is a former classroom teacher that now dedicates her life to educating others on how to live their most healthy, creative and happy life. Learn more about her visiting our About Us page.