


Carolyn J. Braden • 3 Minute Read

I Tried A Dupe 6-in-1 Hot Air Tool and Got OMG Hair in Minutes
Updated with SilkStraight Nozzle Tutorial: 1/1/26
I tried the GLAMUP 6-in-1 Hot Air Tool (a Dyson dupe hair tool as you may have seen others on the market) and got OMG hair in minutes—no salon required. From bouncy curls and sleek blowouts to effortless volume, this all-in-one styling tool makes getting glam fast and easy. I’m breaking down how it works, comparing it to the Dyson Airwrap, styling tips, and real results so you can decide if the GLAMUP AirCurler is worth the hype for your hair type. Perfect for busy mornings, beginners, and anyone who wants flawless hair easily.
Shop the Post
Don’t feel like reading this article? That’s okay! See my tutorial via my Amazon Shop plus get buying links at affordable prices! You cannot use my discount code via Amazon though.
Buy any GLAMUP Product at a Discount
Buy a GLAMUP Hot Air Tool via my link here and get $20 off! Or use my code CAROLYNBRADEN at checkout.

It comes in a nice storage bag
The Creative Inspiration
My rose gold/pink hair loves to get styled in fun ways and I thought trying a new air styling tool would be a fun experiment. I take pride in my hair as it’s been a long journey to grow it out and to get it to stay healthy and shiny (grab my favorite shampoos/conditioners by Viori here at a discount that I owe my shiny, long hair to).
Read on to learn my thoughts and get some hair styling ideas!
Bookmark or Pin this one by clicking the Pinterest SAVE button on the images in this article for hair magic in an instant.

The Glamup attachments
Dyson vs. GLAMUP
I have the Dyson AirWrap Styler which currently retails for approximately $749.00. Well, when I bought it many years ago, it was around $500 and I got it on sale during a Sephora 20% off promotion (which is the best time to score high end beauty!). I do love my Dyson, however, if the new higher price is not in your budget, seriously try an alternative! Expensive does not always mean better.

This tool really gives great results!
They are both very high-quality styling tools, and while Dyson invented this hot air styling tool technology, GLAMUP has made the tool a similar concept for a lower price. I also have a Temu version of a multi-tool air styler, and it’s decent, especially for the low price, but it’s definitely not on par with the GLAMUP or Dyson.

Using the dryer attachment
More Beauty Loves
Get the GLAMUP Air Styler and more of my beauty loves here or below via my shop my!
Why Buy the GLAMUP?
So, besides a lower retail cost than the Dyson (my discount code CAROLYNBRADEN and my link will give you that discount or an even lower cost when on sale by the brand on their website), the GLAMUP hot air styler is actually a great tool that is easy to use. It truly gives you salon hair at home.
I have the GLAMUP AirCurler and it comes with the following attachments:
Longer Wrap Curler (2x)
Blow-Out Hair Dryer
Round Brush
SilkStraight Nozzle
Volumizer Brush

My Glamup Tutorial
One thing I noticed that was different than the Dyson tool was that the GLAMUP tool has 1.26” inch metal coated curling rods (one rod for curling hair in one direction and the other curls it in the opposite direction) I like this because it seemed to lock my curls in all day. The Dyson tool has a type of plastic rod, which works, but the curls don’t quite last as long.
See how I add texture to my hair with my own DIY CARAMEL scented sea salt spray below or via my YouTube channel @carolynjbraden:
It has 3 smart heat settings, a cool shot button (which I use at the end of a curling session to lock in the curl by cooling it quick) and has a high-speed motor which dries my long hair fast. You can use this tool on all hair types and lengths.

Adding curls easily to my hair
What Can You Do with the GLAMUP Air Styler?
I first like to use the hair dryer attachment to dry my hair to 75%. Then I use the following attachments for a variety of hairstyles:
Curls: If I want curled hair, I use the Wrap Curler attachments. This attachment “wraps” your hair around the barrel using the air of the tool, so no creases occur in your curl! Using a texture spray before curling helps them last.
Check out my 1-minute video tutorial for the curled style on my TikTok now or above via my YouTube channel @carolynjbraden!

My curled results
Salon Blowout: If I want sleek hair/salon blowout with rounded ends, I use the volumizer brush attachment. It’s the largest brush in my kit.

The round brush gives your hair volume and a bit of curl
Sleek Volume: If I want the ends curled and volume at my crown, I use the round brush attachment. This is the smallest brush in my kit.
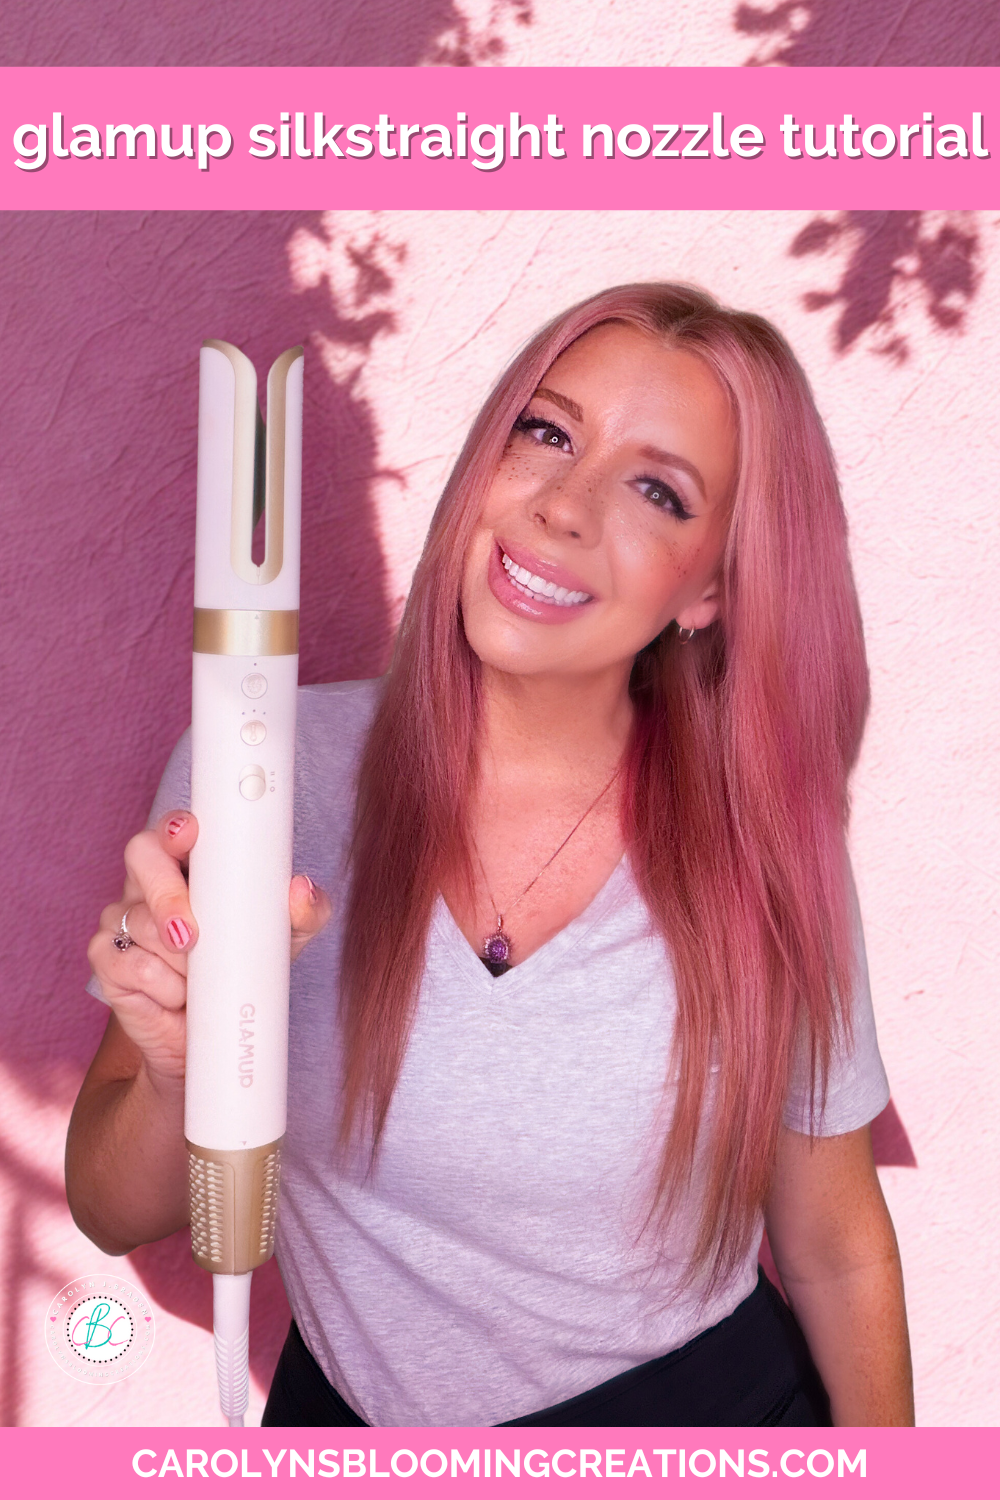
I love the SilkStraight nozzle!
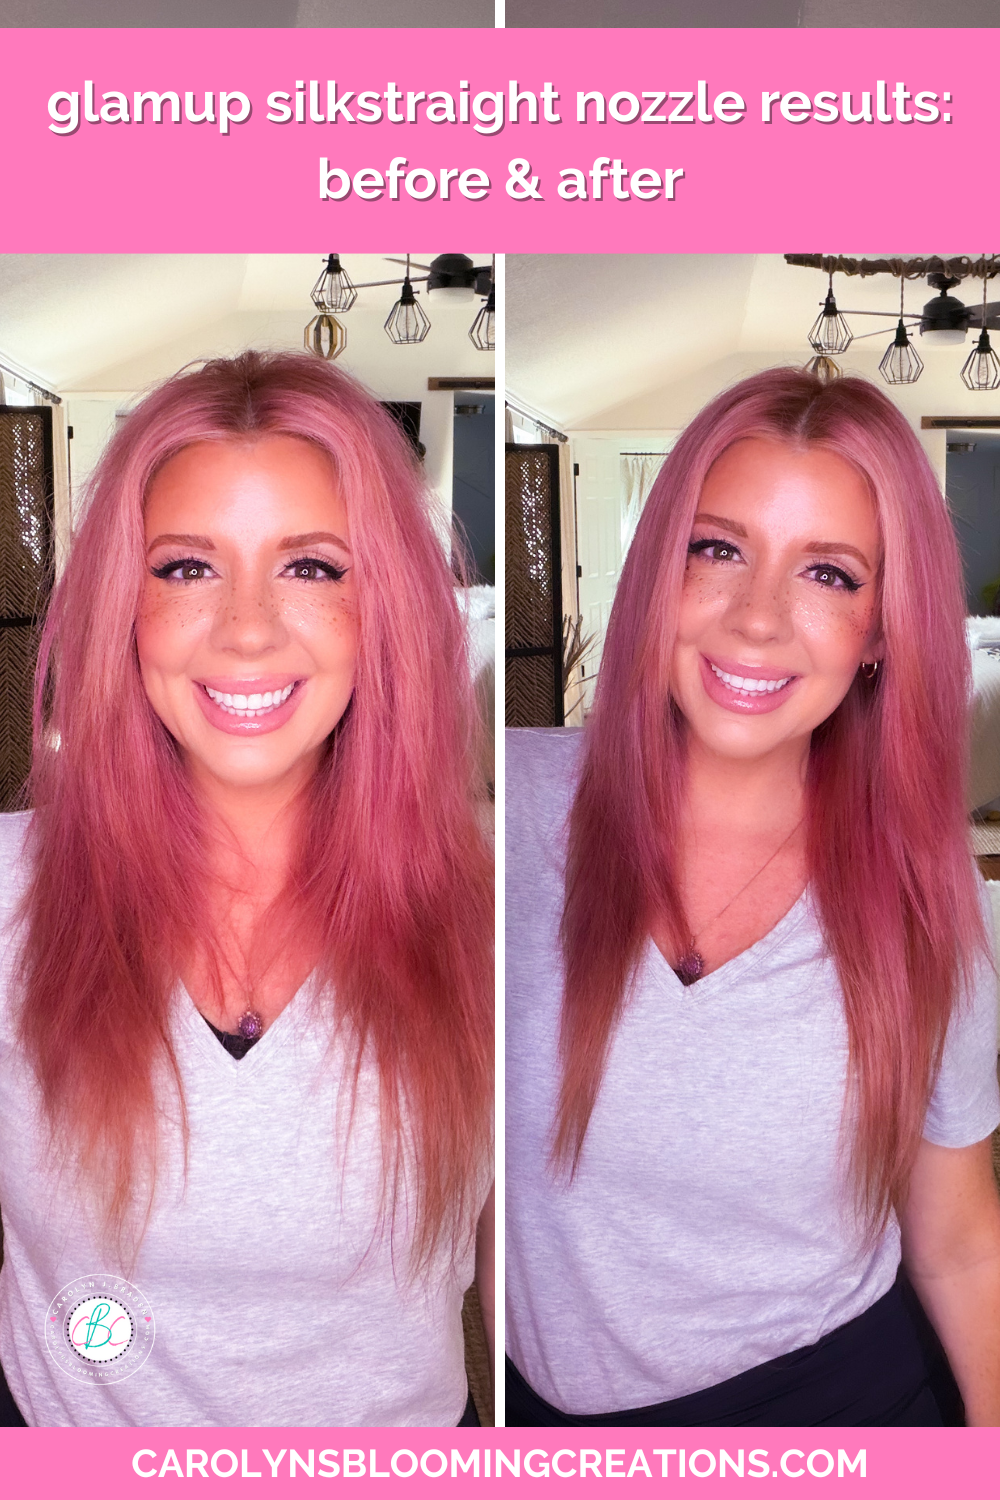
Straight Hair: If I want super straight and sleek and shiny hair, I use the SilkStraight nozzle.
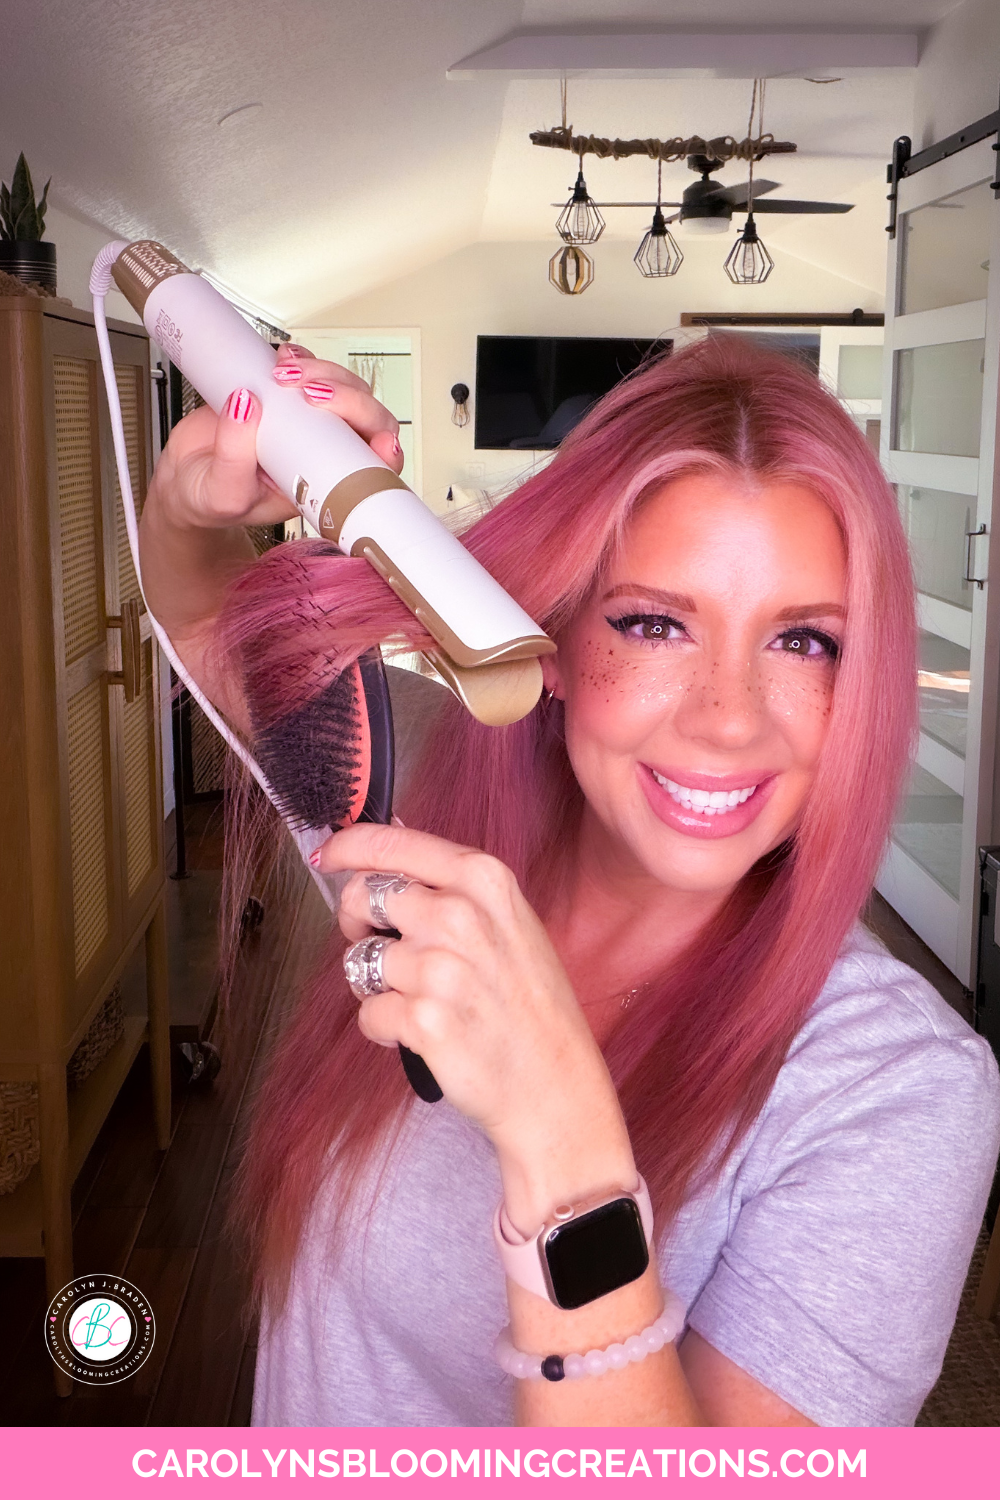
The brush helped me grab onto the hair I wanted to straighten
For best results with this nozzle, I recommend using the hair dryer attachment to dry your hair to almost fully dry or fully dry. I used a boar bristle brush to pull out a section of hair, I placed the nozzle on that section of hair WITH THE AIR FLOW PART FACING AT AN ANGLE IN A DOWNWARD POSITION (if you don’t get this angle right, you’ll blow your hair all over the place) on a low air setting with medium or high heat and ran the brush and the nozzle down my hair until it was straight.
You really see results with this nozzle!
I usually did about two passes on each section of hair to get it super sleek but it really, really works as great as most flatirons I’ve used, making this a great all-in-one budget friendly tool. You can use this nozzle without a brush, but I just found it to be easier.

An easy daily hairstyle
Can I Use it On Dry Hair?
Yes, you can use this tool on dry hair to style it. I only wash my hair every 3 days, so on the days I’m not washing it, I spray a little bit of my moisturizing sea salt spray in my hair (the texture it gives locks in styles too), then use the brushes or curling rods or straightening tool. It will work well even if you don’t wet your hair as I’ve tested it with beautiful success!

My sleek but voluminous style
Final Thoughts
I am very impressed with the high quality and salon-like results of the GLAMUP. My photos don’t lie….my hair looks great after using it! It feels luxurious at a lower price point than the Dyson and gives the same results. While both are great products, GLAMUP is truly a good dupe.
Take Action
I encourage you to try the GLAMUP and style your hair with your own creative twists and share your styles on your social accounts! If you tag me using @carolynsbloomingcreations or @carolynjbraden, I’ll see it! Or tell me about it in the comments below.
If you loved this article, then we know you’ll love this one too: Pink Lily Favorites: Cutest Outfits and Accessories
Carolyn J. Braden is the owner of Carolyn’s Blooming Creations is a regular contributor and editor for CBC. She has been featured in numerous media publications such as InStyle Magazine, on HGTV, on Bustle.com, and more. She is the author of the books Georgia McMasters in Amethyst Lake Cemetery, How To Be Yourself: 3 Ways To Help You Being You, and the illustrator for the children’s book Bridging Connections. She is a former classroom teacher that now dedicates her life to educating others on how to live their most healthy, creative and happy life. Learn more about her visiting our About Us page.