


Carolyn J. Braden • 3 Minute Read
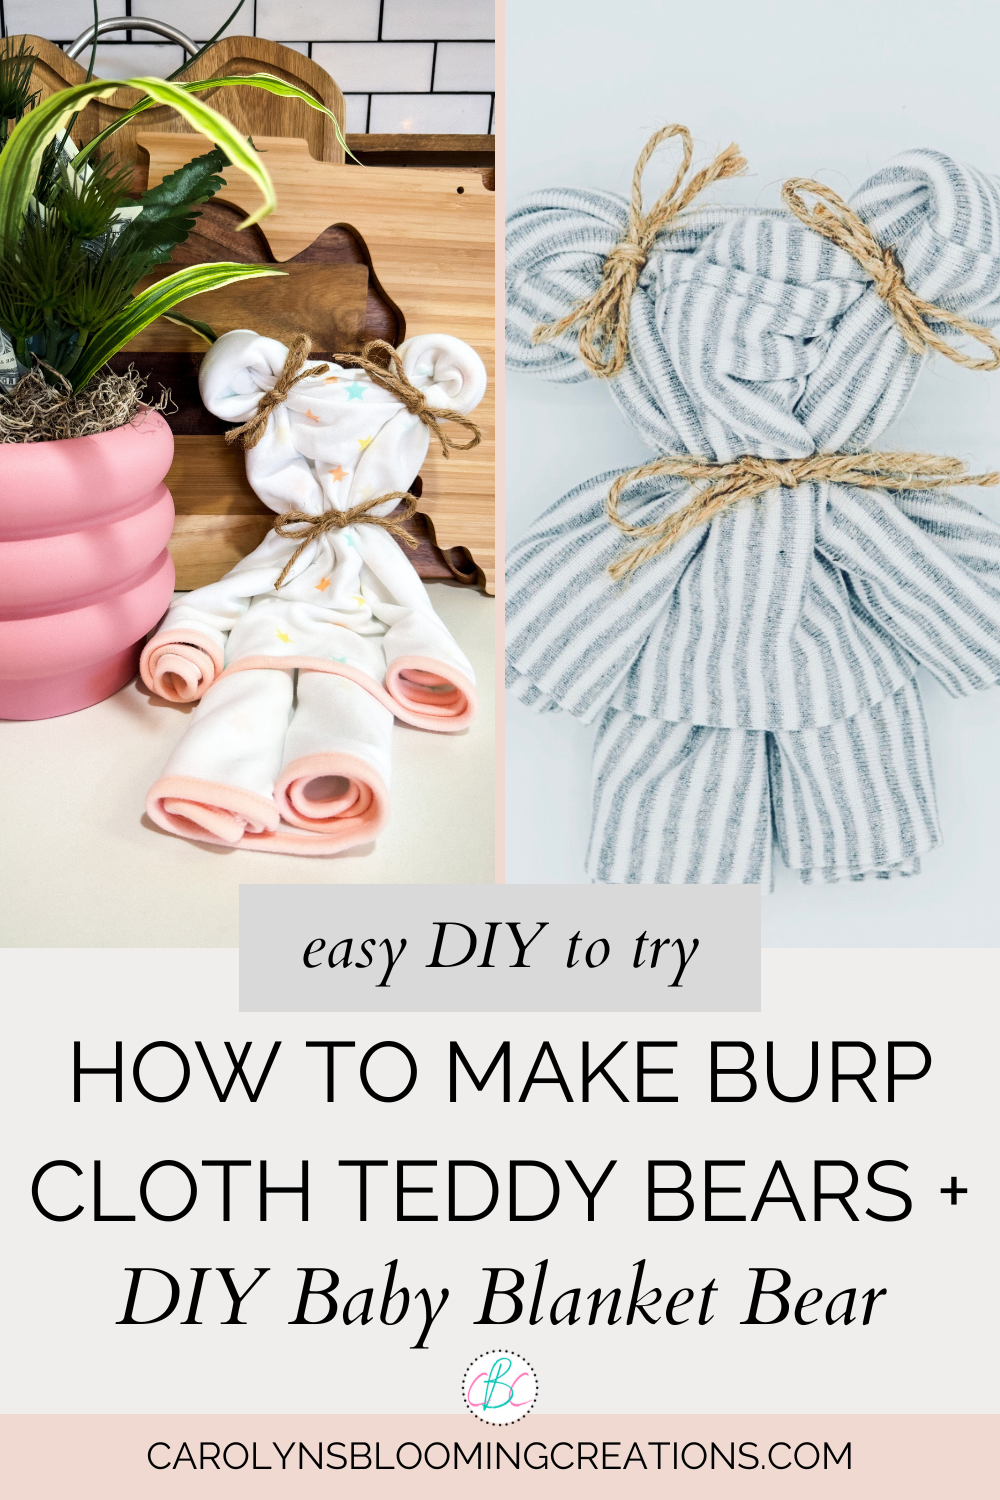
How to Make Burp Cloth Teddy Bears + DIY Baby Blanket Bear
Original article published: 1/17/20
Article updated: 5/8/2024
I originally created this no sew DIY burp cloth teddy bear project in 2020. With seeing so many new bird babies in our Sanibel Island backyard in the spring of 2024, I was inspired and decided to update the project to include a way to turn a baby blanket into a teddy bear too. Read on how to learn how to fold a burp cloth into a teddy bear and how to fold a baby blanket into a bear.
This baby blanket teddy bear just makes a cute way to gift something to a new mom!
I first made the burp cloth teddy bears as gift toppers for gifts for a friend that invited me to her baby shower many years ago. I was super excited for her having her first baby, so I created a few crafts on top of gifting her with things she asked for on her registry. The cute burp cloths were one item on her list and I just had to gift them in a sweet way.
I also got her a really cool baby diaper bag backpack that was very modern and cool and stylish enough for both parents’ tastes. I’d carry it even as someone without a child.

My original project: burp cloth teddy bears
Though I don’t have any children myself, I baby sat and nannied for kids since I was 10 years old, so baby-fever was always around me. I also was a part-time nanny in college while being a part time therapeutic aide for kids at a local children’s home and also taught elementary and middle school kids as a teacher for 10 years right out of college.
See our fun 15 second “reveal” of this teddy bear baby blanket below or via our YouTube channel:

I loved the Burt’s Bees burp cloth prints!
Despite not having human children, I do love babies and all things baby shower gift ideas and thought anyone else that loves to create things for new moms might like some of my baby inspired crafts.
Get my origami money plant tutorial at the bottom of this post! It makes a great shower gift!
My “How to Make a Baby Diaper Cake” video hit over a million views on YouTube many years ago. It was my very first video I ever made as a creator. The birth of my first niece was my inspiration. I made it as no one else had made a baby diaper cake tutorial video yet, and after doing some experimenting, I figured out how to make one in an easy way and shared my experience with others. See the video below or via my YouTube channel @carolynjbraden:
Other YouTube videos of baby DIY crafts I made (or pet baby as I am a pet mom and it feels like I’m running after twin toddlers at times with Minnie Pearl and Johnny Cash, my Miniature American Eskimo dogs):
How to Make a Floral Nursey Mobile (I created this and gifted it to my friend that I also made the burp cloth teddy bears for)
Now for the project tutorial. Here’s how to fold a burp cloth or a baby blanket into a teddy bear. It’s easy and quick and you’ll have it done in just a few minutes.
You only need two things to fold a blanket or burp cloth teddy bear
Things You Need:
Burp Cloth or Baby Blanket
—The burp cloths I used were 17” x 11.75 by Burts Bees (Buy them here on Amazon or buy them here at Walmart.com)
—The baby blanket I used was a thin swaddle blanket that measured 34” x 34” and was an Amazon Essentials brand (Buy them here in lots of cute colors and prints on Amazon or buy a similar swaddle blanket set here on Walmart)
Jute string or any kind of string or ribbon
Watch the YouTube video below for my detailed step-by-step process for the burp cloth teddy bears:
Watch the video below for the short 1-minute video tutorial for the baby blanket teddy bears:
How-to:
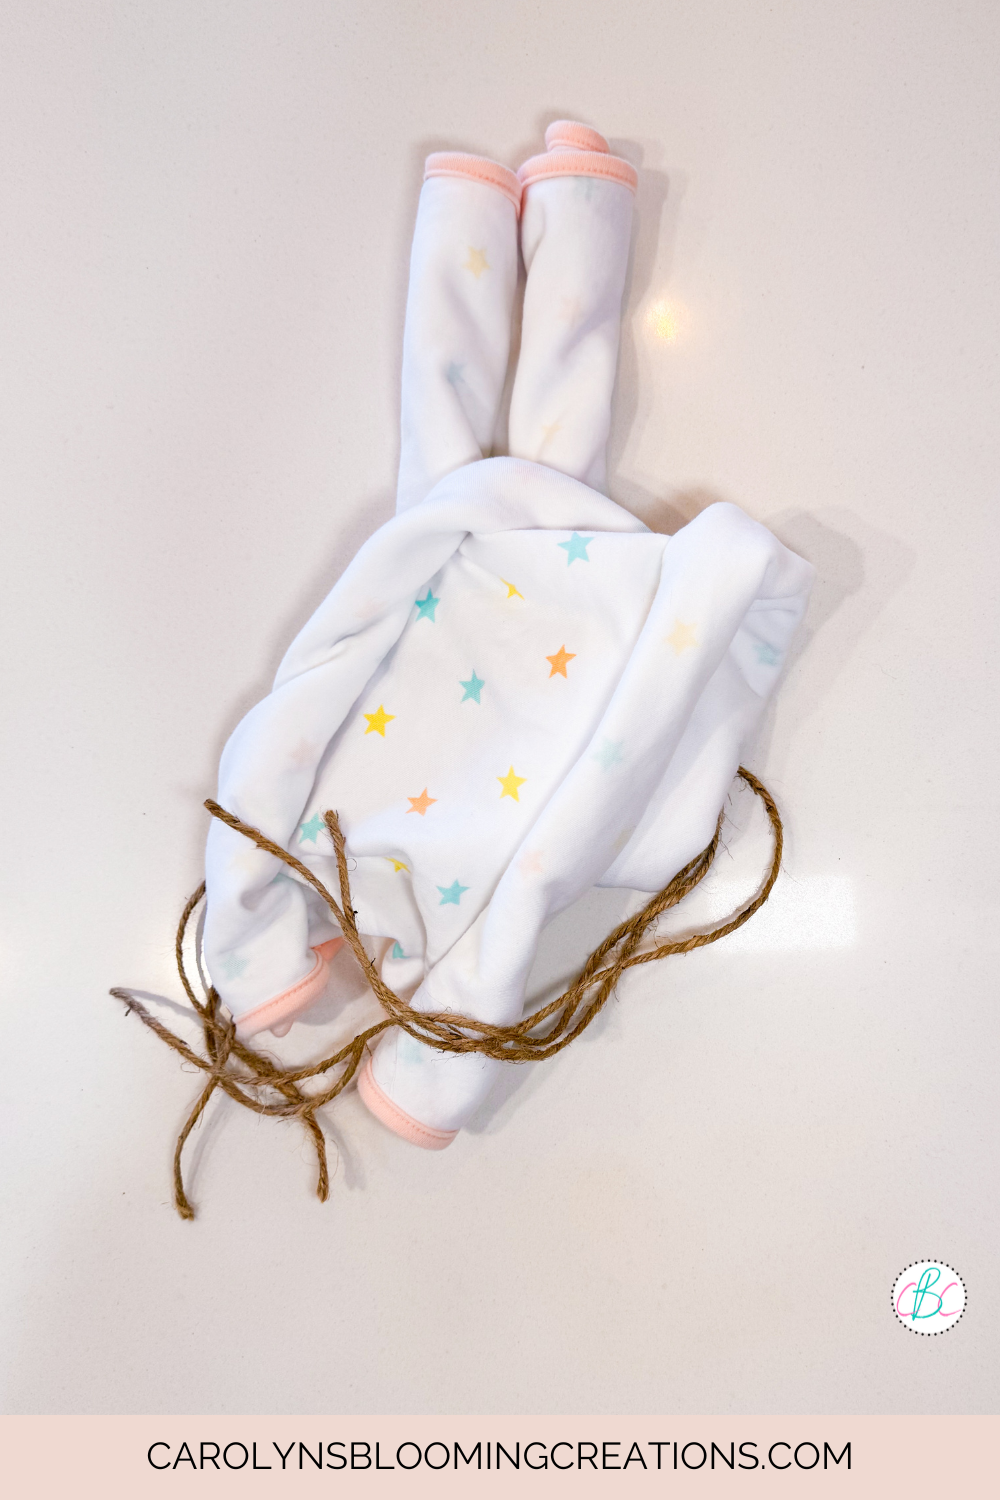
Spread the blanket or burp cloth out flat onto a table.
Roll both sides of the cloth towards the center
Roll one side of the blanket or burp cloth somewhat tightly towards the center of the cloth. Repeat on the other side until both sides are fully rolled into the center.

You can use any kind of thin string or ribbon for this project
Cut 3 pieces of the jute string (about 10 inches or so, depending on the thickness of the cloths, they can always be trimmed) and set aside.
The twisted blanket starts to form the teddy bear
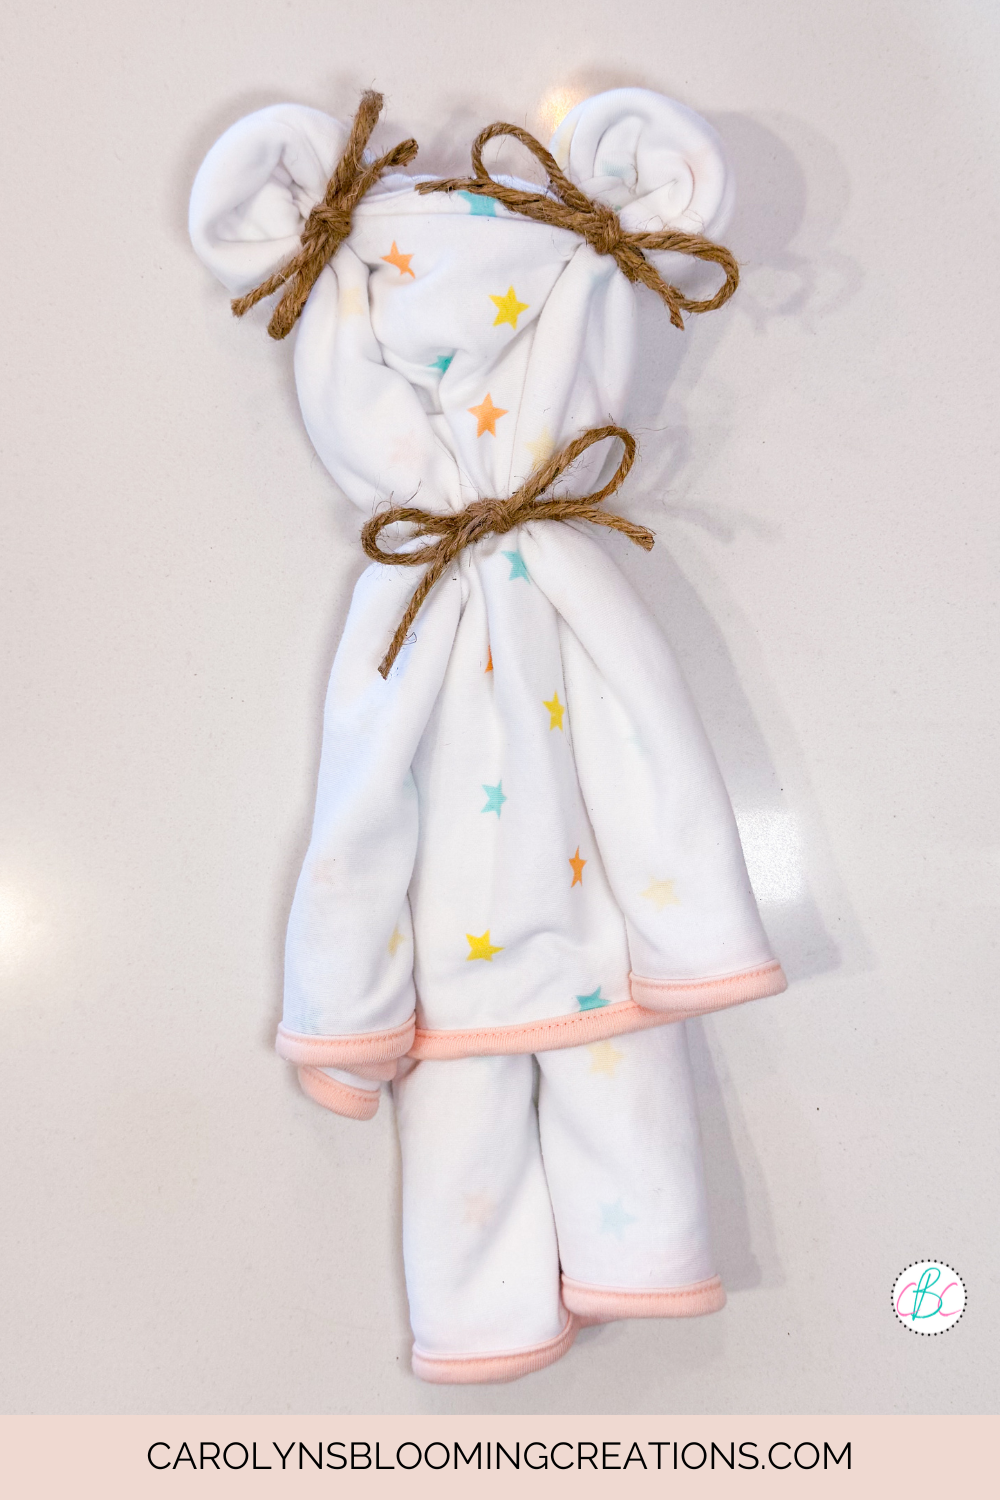
Take one end of the rolled cloth and twist it down towards the lower section of the blanket. Watching my video is really helpful to see this twist! The blanket will fall open a bit on the twisted section and you want this to happen.
One string creates the head of the teddy bear
Tie a piece of string around the upper portion to create the head of the teddy bear.
The finished baby blanket teddy bear
Tie a piece onto the right section of the top of the blanket to create an ear. Repeat on the left side. I used my fingers to shape the ears and head a bit.

The burp cloth teddy bear
This project is definitely easier with a larger and thinner fabric like the blanket, but it’s do-able with either burp cloths, baby blankets and may even work with towels and more.

There are so many variations for this project and if you make one, let me know in the comments!
If you loved this article, we know you’ll love this one too: How to Make a Money Origami Plant or Money Bouquet

Pin me! www.carolynsbloomingcreations.com
Carolyn J. (C.J.) Braden is the owner of Carolyn’s Blooming Creations is a regular contributor and editor for CBC. She has been featured in numerous media publications such as InStyle Magazine, on HGTV, on Bustle.com, and more. She is the author of the books Georgia McMasters in Amethyst Lake Cemetery, How To Be Yourself: 3 Ways To Help You Being You, and the illustrator for the children’s book Bridging Connections. She is a former classroom teacher that now dedicates her life to educating others on how to live their most healthy, creative and happy life. Learn more about her visiting our About Us page.