


Carolyn J. Braden • 3 Minute Read
How to Make a DIY Tiara Hat That Looks Magical (And Is So Easy!)
Want to feel like royalty every day without spending a fortune? Try my DIY tiara hat craft! Learning how to make a tiara hat is a fun, easy, and budget-friendly DIY craft that both kids and adults will love. It’s a perfect way to wear a tiara every day without looking over the top.
Whether you’re preparing for a princess birthday party, a bachelorette party, a costume event, or simply looking for a creative afternoon project, a handmade tiara hat adds the perfect touch of sparkle and charm. Read on how to learn how to make it in minutes

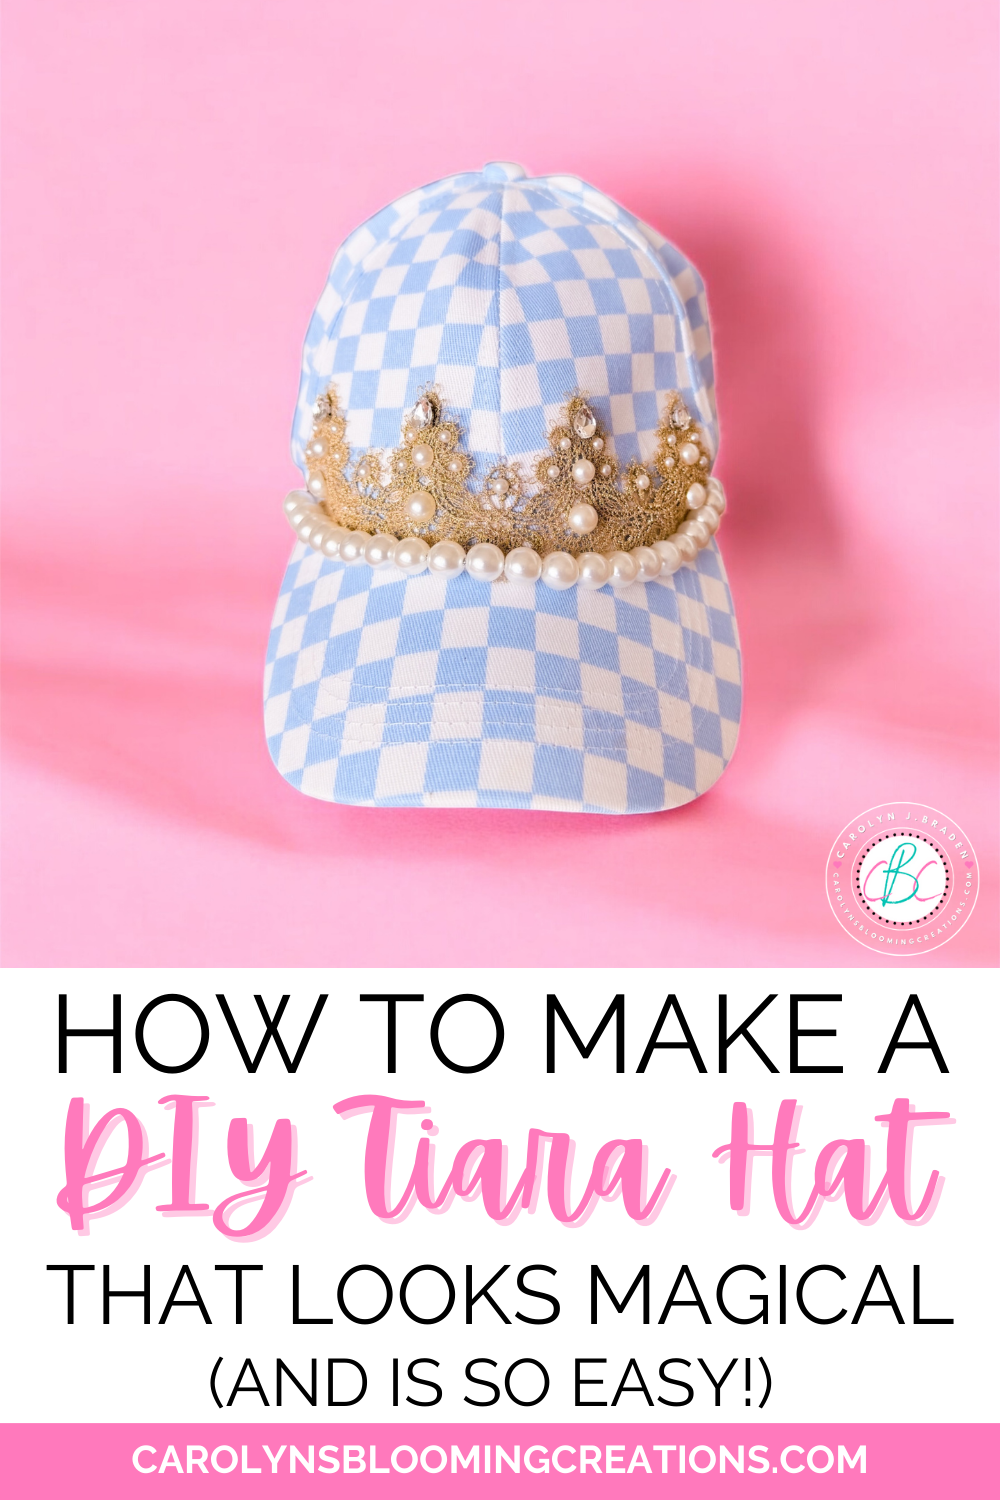
My completed hat
The Inspiration
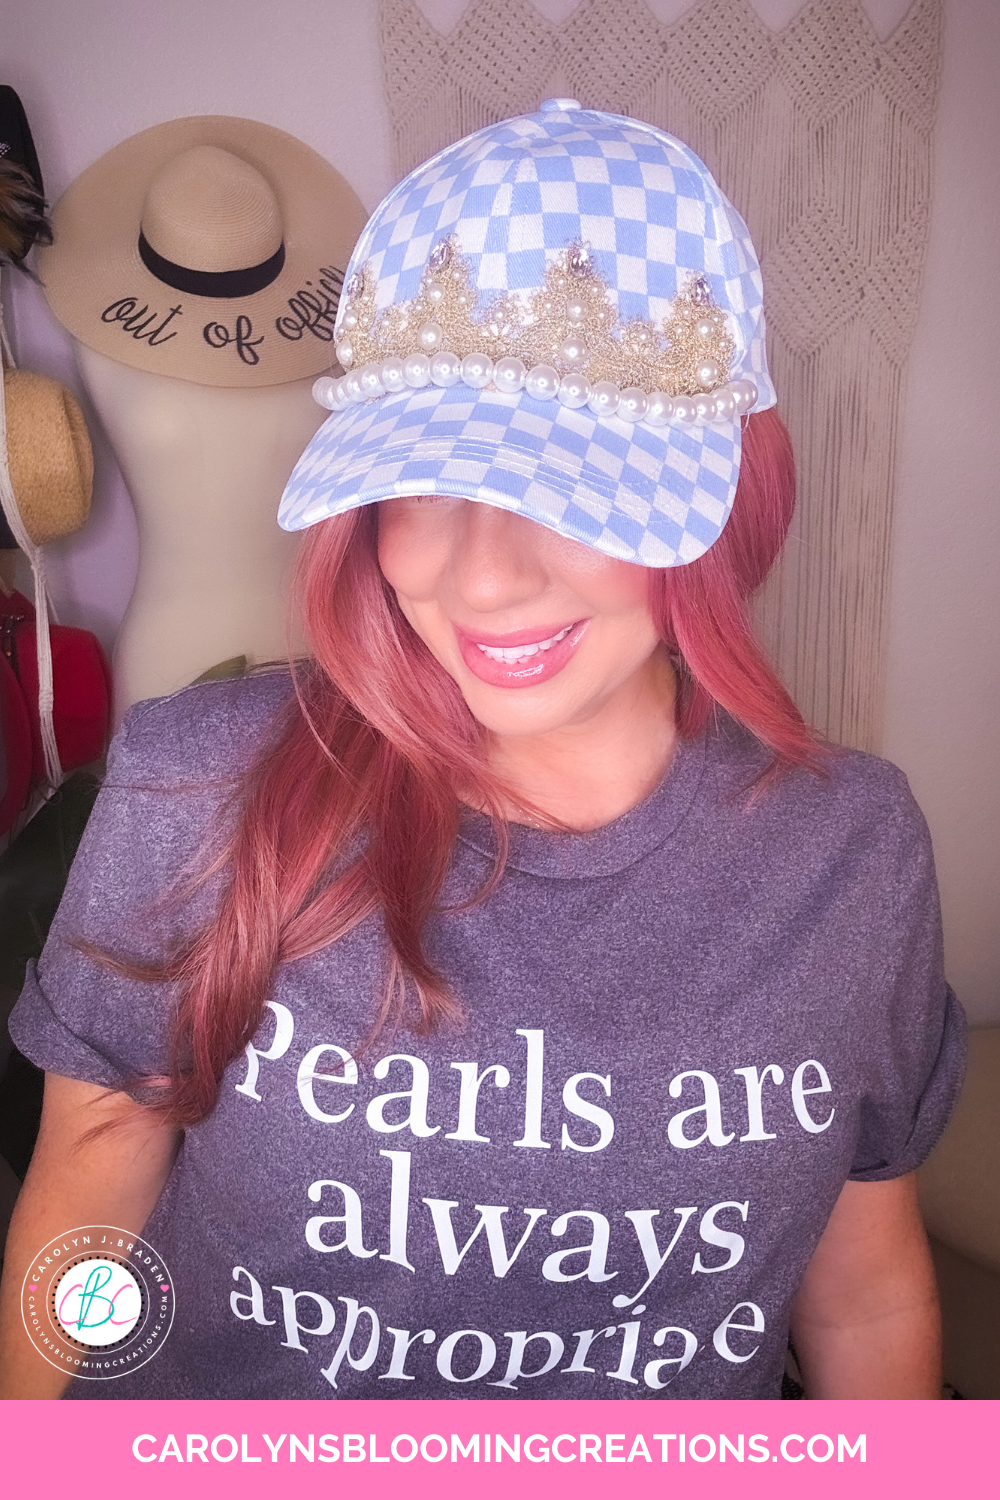
I LOVED tiaras when I was a little girl and this love continued on into adulthood. When I saw some trim that looked like a crown or a tiara, I had the perfect idea for what to do with it. I ordered a simple but stylish baseball hat, got out my glue gun and other crafting supplies, looked at some tiaras on Vogue’s website for inspiration, and this project was born. I made it in about 30 minutes and you can too with my easy instructions.
I also make it with a blue checked hat because I imagined a bride wearing this on their way to get their wedding hair done. It’s a great “something blue!”.
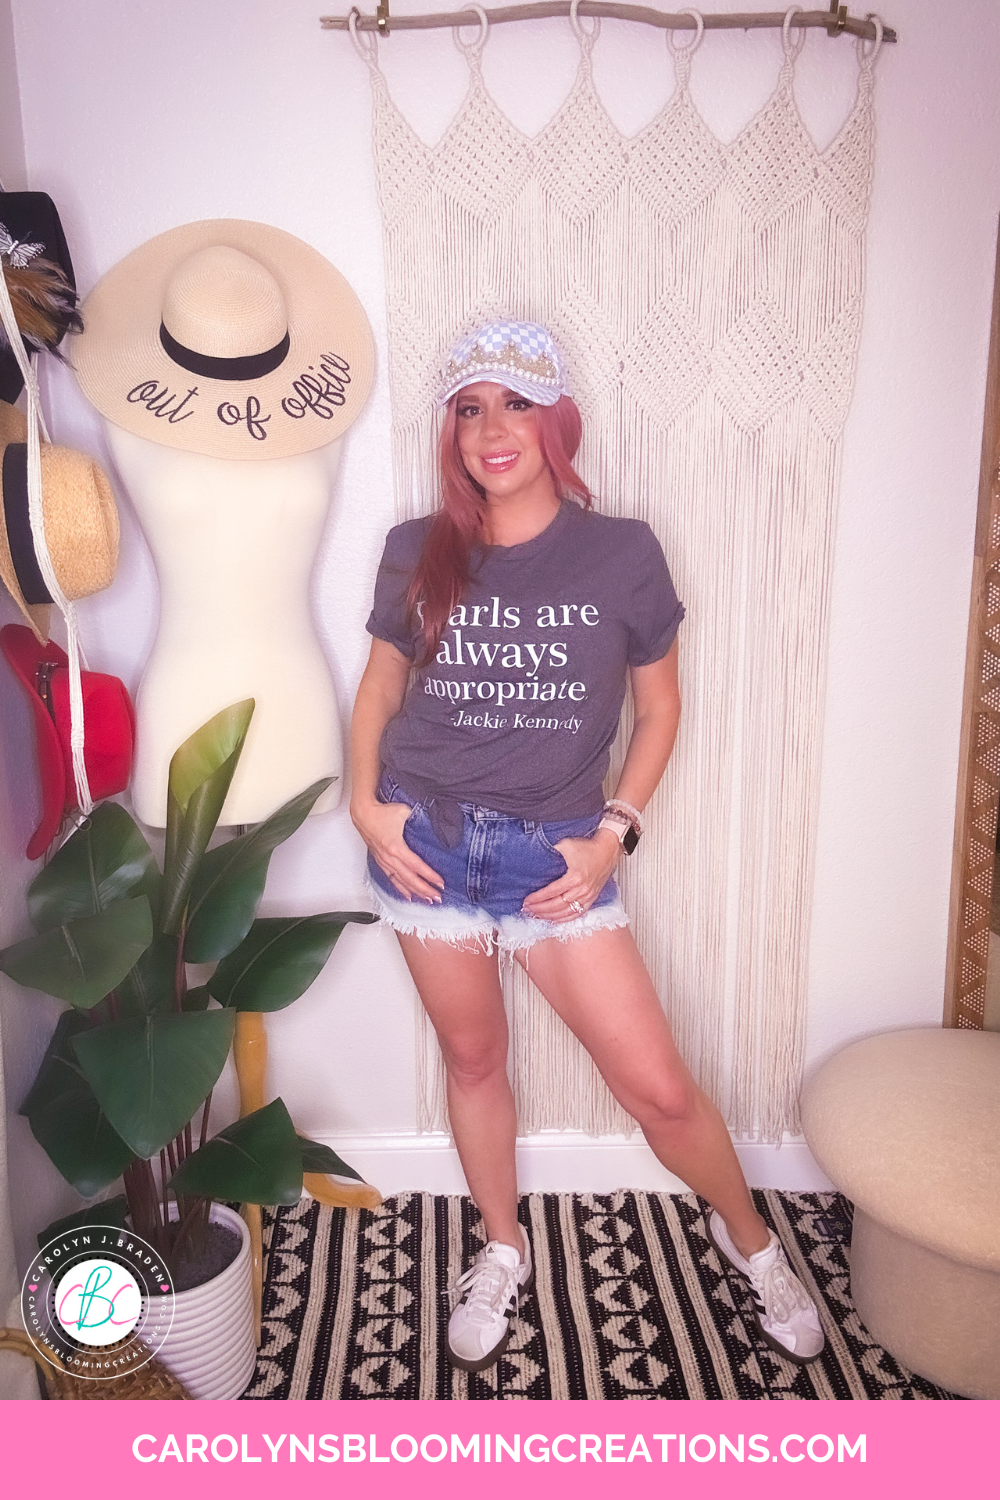
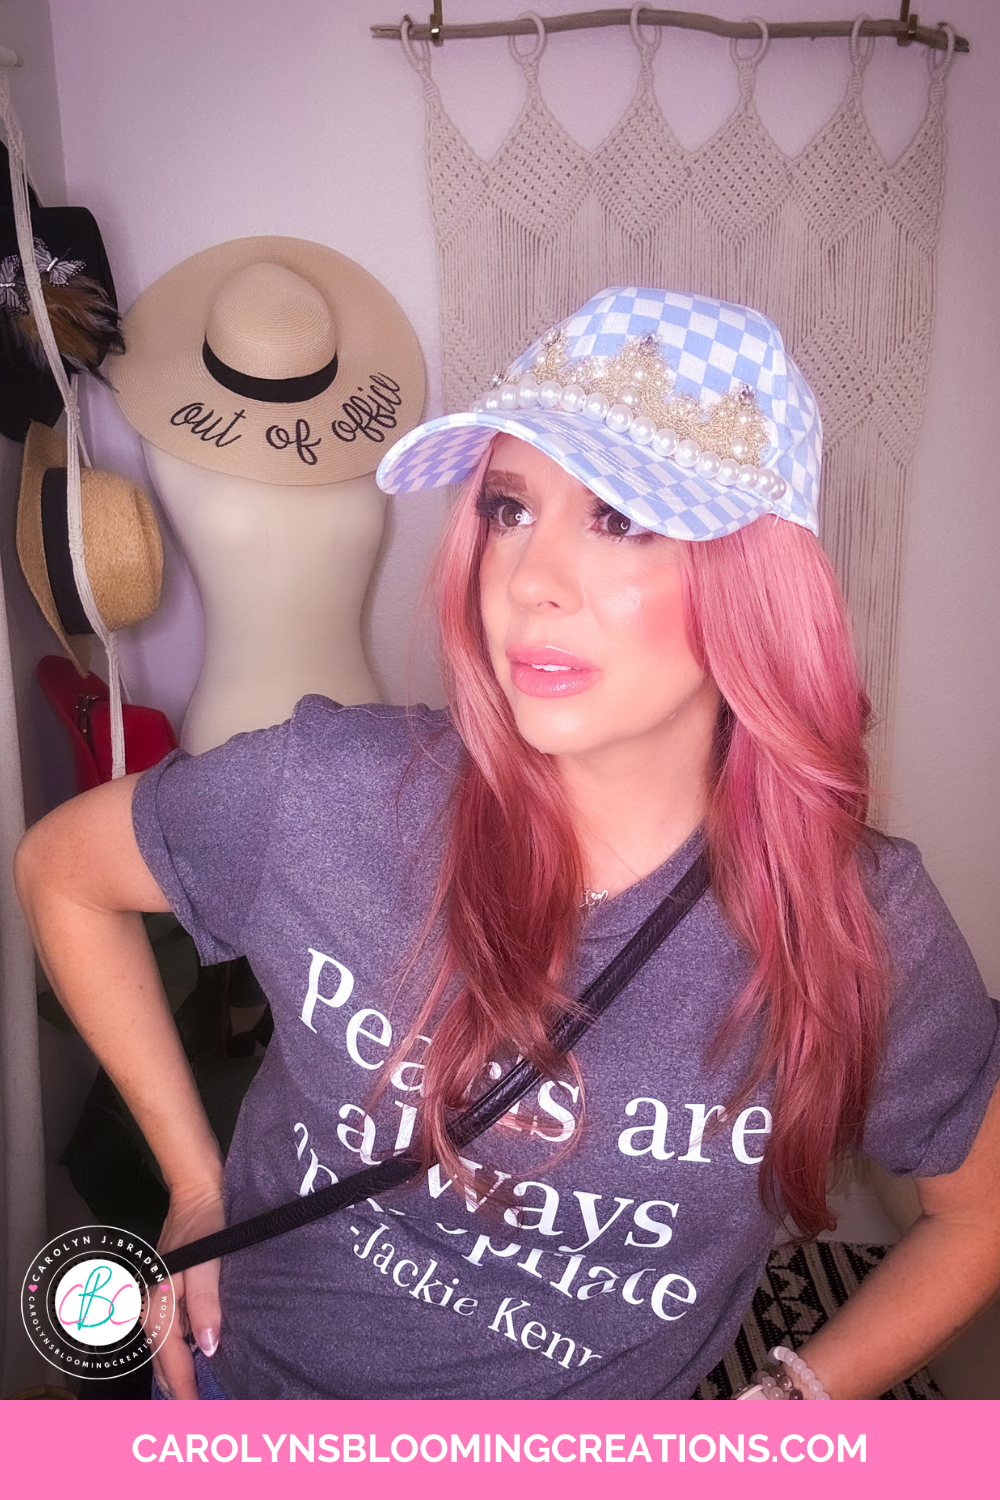
This is a go-to outfit for my life!
Fit for a Princess
While wearing a tiara or crown in everyday life isn’t something even REAL princesses do (or even most people), this is a way to do so without commanding a lot of attention. Well, you may get some attention simply because this hat is CUTE! You can wear this every day and feel like the queen or princess that you are.
Look even more like a princess in everyday life with my EASY 10 minute rhinestone and spike hair combs. Get the tutorial here or below in my 1-minute YouTube video via my channel @carolynjbraden:
Get My Outfit
Jean shorts and/or jeans are my go-to every day casual outfit necessities. Get my outfit in my Amazon Shop here.

The tiara hat adds just a little “fancy” to a simple outfit
How to Make a DIY Tiara Hat
In this tutorial, you’ll discover step-by-step instructions, simple materials you probably already have at home, and creative tips to customize your crown. By the end, you’ll have a beautiful DIY tiara hat that’s fit for any celebration or everyday wear! I made this hat in about 30 minutes.
I made the hat in about 30 minutes
Supplies:
Hat of your choice (This one on Amazon comes in many colors or this one at Walmart is very affordable and comes in many colors too)
Gold lace trim (There are many choices out there like this one on Amazon, or this one on Amazon)
Flatback pearls (I use this kit from Amazon)
Large Rhinestones (Amazon)
Aleene’s Jewel It Craft Glue (Amazon)
Hot Glue Gun Kit (I love this rechargeable and cordless glue gun from Amazon)
Wax Tip pencil (Amazon)
Pipe Cleaner (I have this kit from Amazon, but Walmart has some too)
Pearl Beads (this kit on Amazon has many sizes)
Scissors
Get my 1-minute video tutorial for this craft on my YouTube channel @carolynjbraden or above.
You could use many varieties of lace
How to:
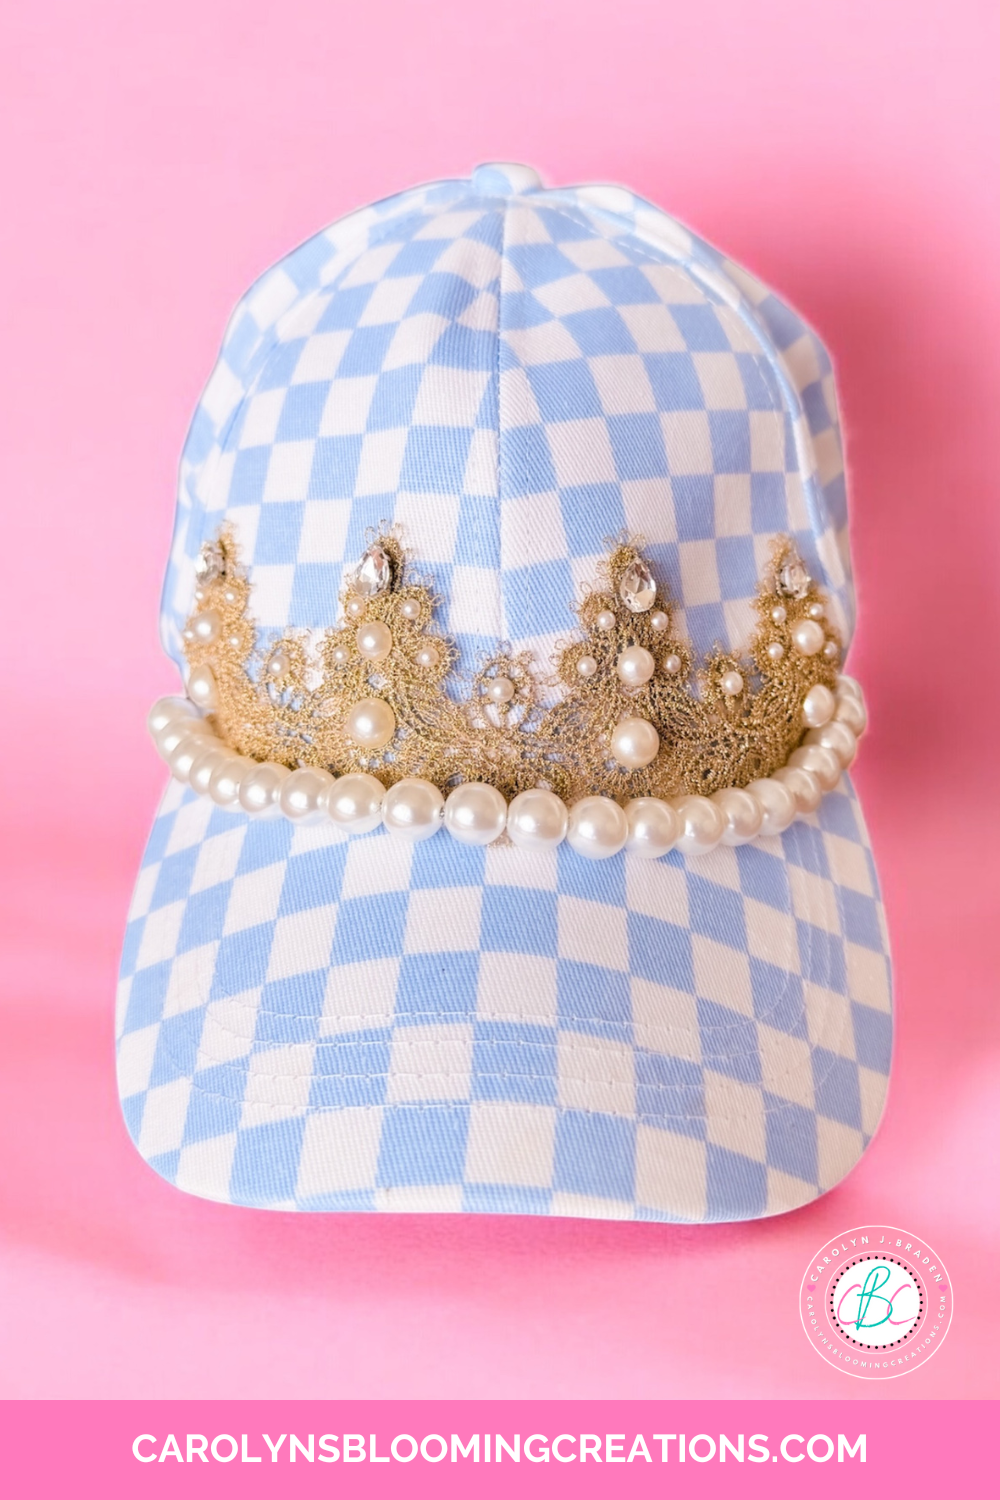
Lay out the lace trim onto the front of the hat to see how long it needs to be. Trim to fit the front of the hat and use the hot glue gun to attach it. I glued it a little at a time to ensure the glue could not be seen.
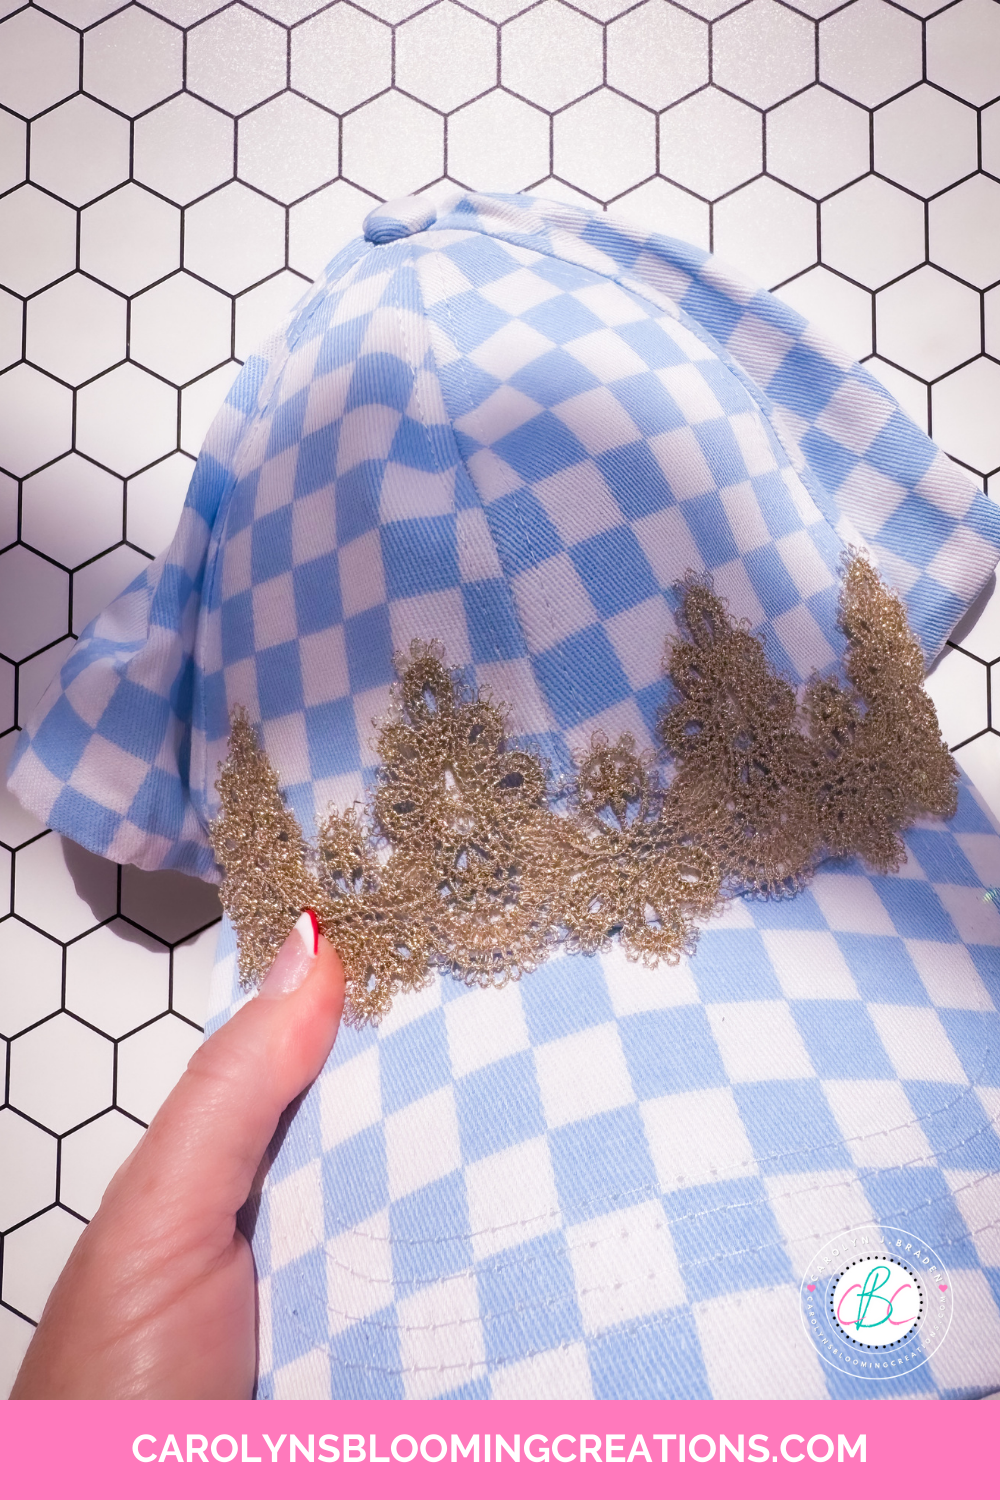
Adding the lace trim
String the pearl beads onto the pipe cleaner. String on as many as you need to reach from one side of the hat to the other. Trim the pipe cleaner as needed, then hot glue it onto the lace/hat.

Adding the pearls to the pipe cleaner
I glued again, a little at a time, bending the pipe cleaner to flow along the bend in the hat bill.
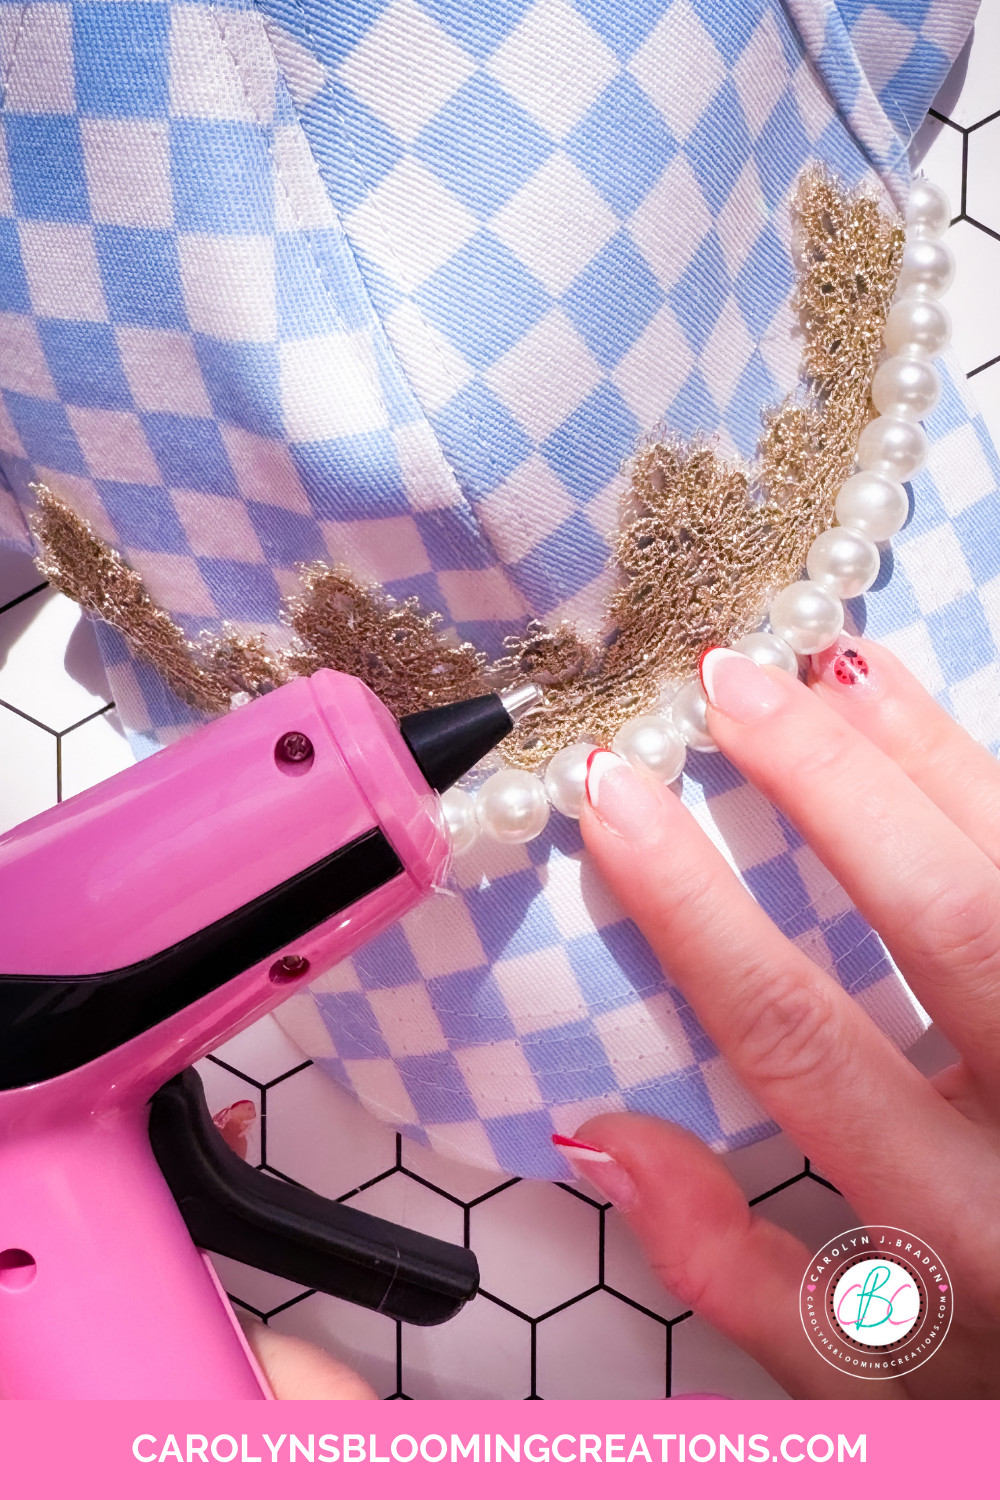
Adding the string of pearls to the hat
I hot glued large tear drop shaped rhinestones onto the lace.
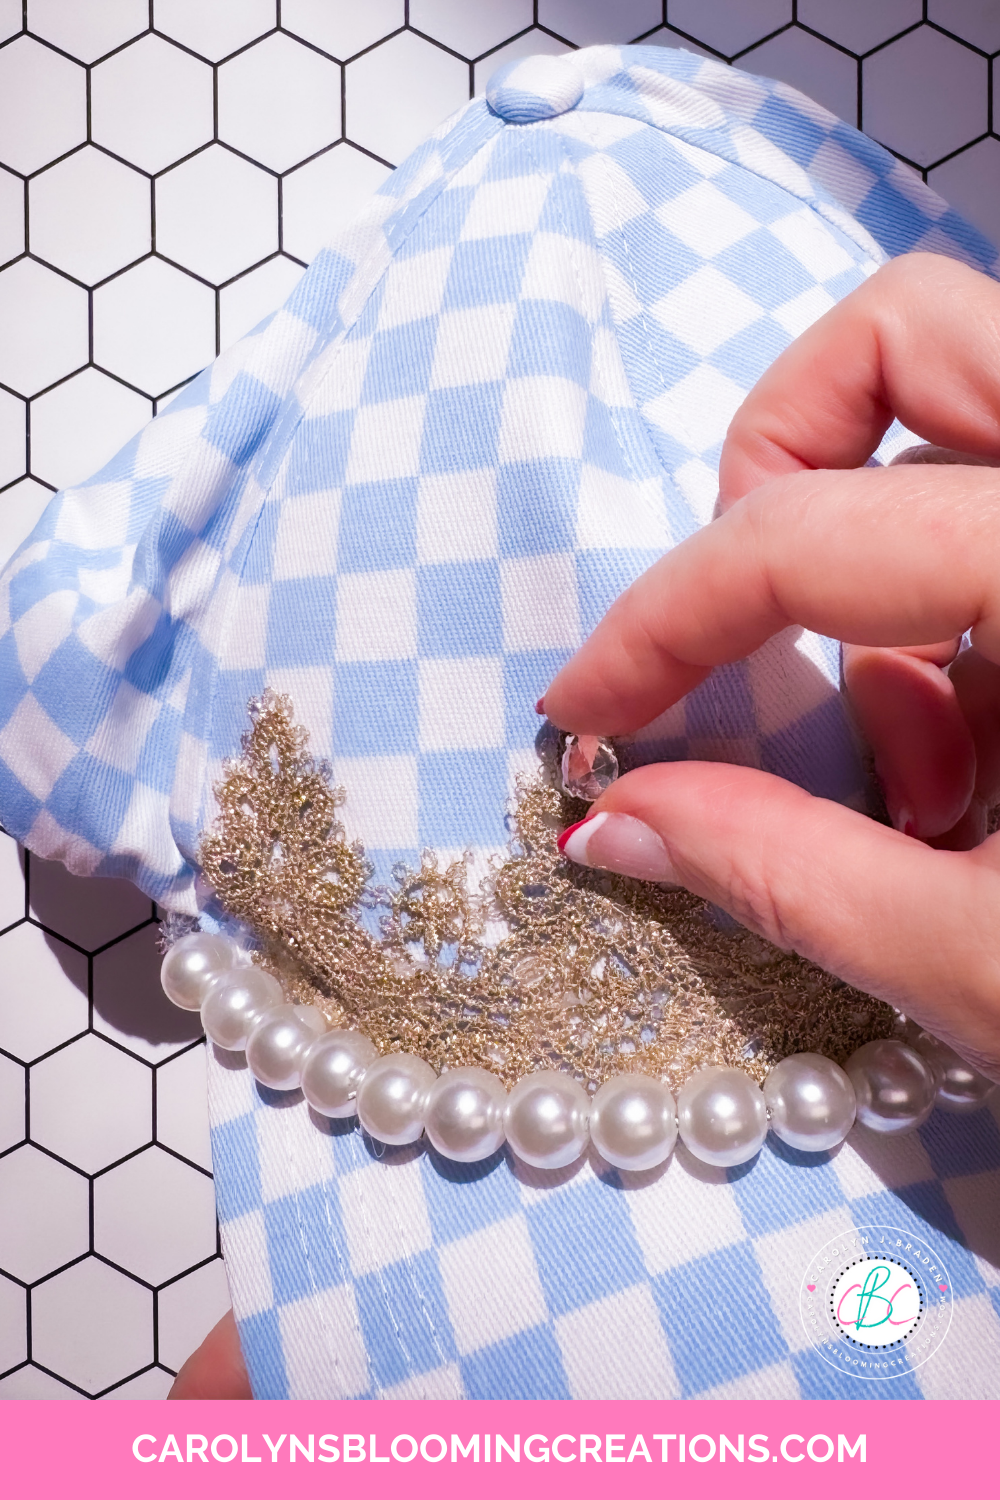
Adding the rhinstones
I added some of the Jewel-It glue along the lace and used a wax tip pencil to apply some flatback pearls.
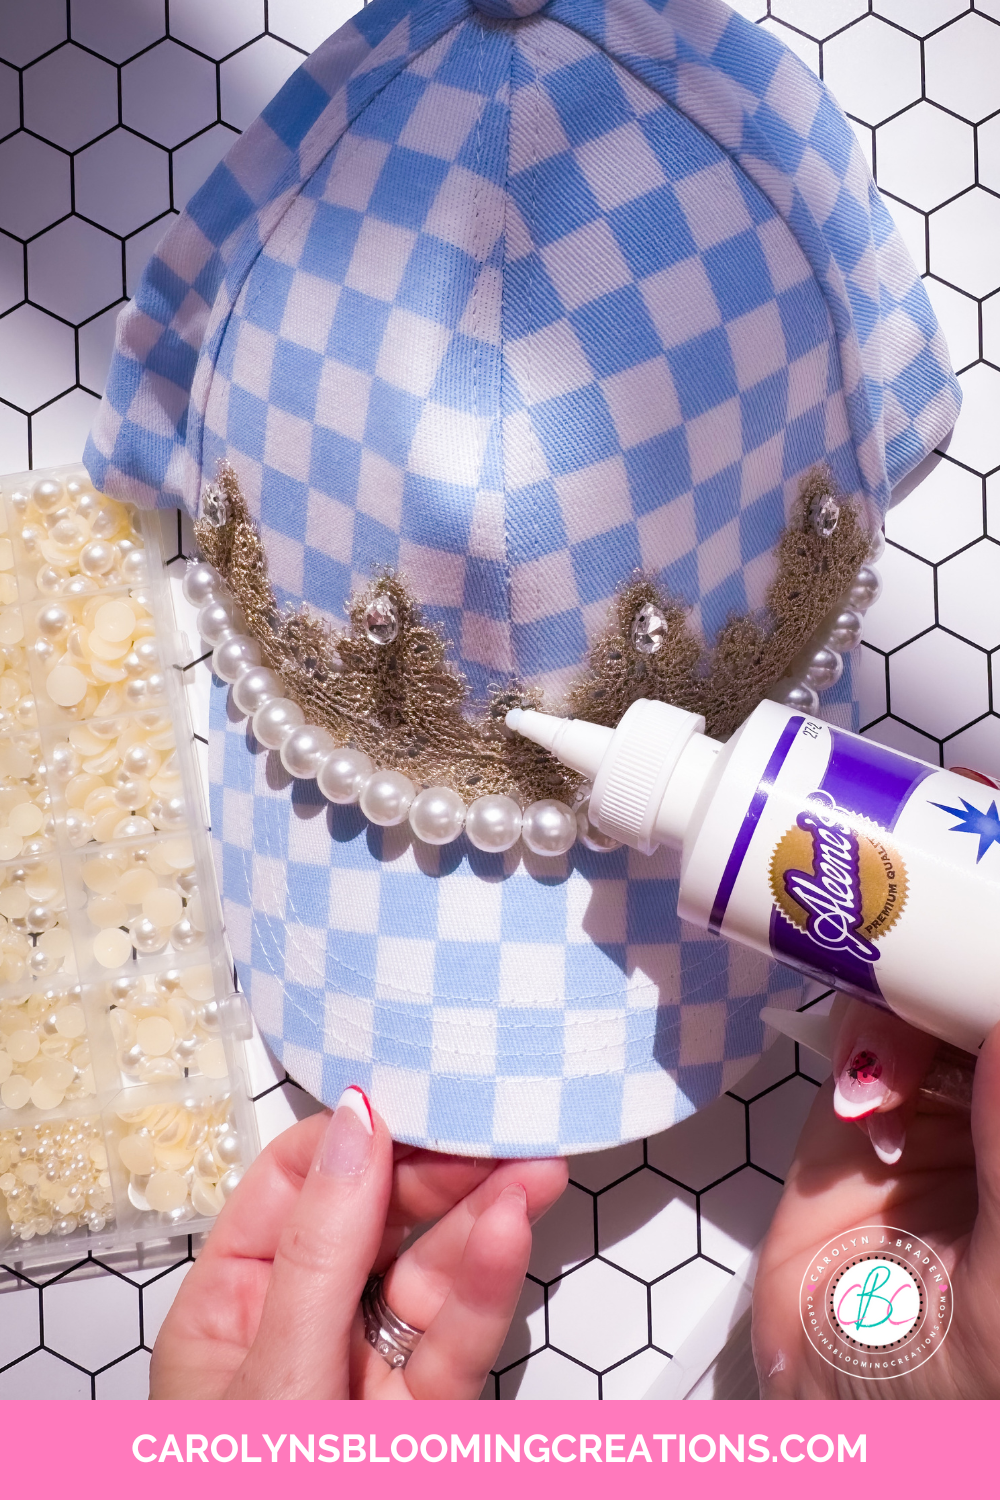
Adding the flatback pearls
I used my fingers to glue on the larger pearls.

Adding larger pearls with my fingers
I allowed it to dry overnight and then it was ready to wear. It’s simple, easy and super cute! You can make it in many colors and add as many jewels/pearls as you want.
This craft is simple and beautiful
If you loved this article, then we know you’ll love this one too: How to Make a Magical Color Changing Pipe Cleaner DIY Tiara
Carolyn J. Braden is the owner of Carolyn’s Blooming Creations is a regular contributor and editor for CBC. She has been featured in numerous media publications such as InStyle Magazine, on HGTV, on Bustle.com, and more. She is the author of the books Georgia McMasters in Amethyst Lake Cemetery, How To Be Yourself: 3 Ways To Help You Being You, and the illustrator for the children’s book Bridging Connections. She is a former classroom teacher that now dedicates her life to educating others on how to live their most healthy, creative and happy life. Learn more about her visiting our About Us page.