


C.J. Braden • 3 Minute Read
How to Make a 10 Minute DIY Reclaimed Wood Towel Rack
In need of a small towel rack for my small laundry room space, I scoured the internet to find one. I found a reclaimed wood towel rack on Amazon Handmade, but it was around $75. It was a simple design that I thought I could easily recreate for less than $75, and I did just that. After creating my Flora Neon Wall Sign, I used the concept of using a plain wood sign from that project to create this easy reclaimed wood pallet DIY towel rack.
Read on to see how I did it.

DIY Reclaimed Wood Towel Rack Supplies
Here are the items I used for this project:
10”x 18” inch blank reclaimed wood palette sign with a rope already attached (Amazon)
12 small (about 1/4”) stainless screws to attach boat cleat hooks to the wood sign
two long (about 2”-3”) stainless screws to help anchor the sign to the wall
a drill or a way to attach the screws to the wood
Optional: Spar Urethane (to seal wood), chip brush (for the Spar), wood peg hook (It came in a set of 6 from Amazon and I used the other hooks throughout my home because they are so cute!)
Total cost: If you skip the Urethane and the wood peg hooks (as you could use a stainless screw to hang the sign), you can make this for about $30 or less. If you add the wood peg hooks and Urethane, it put the cost at being about $50 or less, BUT you’ll then have plenty of Urethane leftover for other projects and because the hooks came in a set, you’ll have 5 other hooks you can use throughout your home.

Boat Cleat Hooks and Wood Sign
I used to buy a similar boat cleat hook from Anthropologie for $16 a piece. When I bought these similar hooks from Amazon, they were roughly $13 for a set of three. I love a good deal!

10” x 18” Reclaimed Wood Palette Sign
My only complaint about the wood palette sign I used is that the wood is quite brittle. There are other wood signs similar to this one at craft stores, but because I live quite far from a craft store, I opted to order mine online. I also really liked the color of the wood.
To help keep it from breaking (and to waterproof it), I spread one layer of Varathane Spar Urethane Oil Based Varnish over it with a chip brush.

Spar Urethane for Waterproofing Wood Sign
I spread one thin layer over the front side of the wood sign. I did this outside because it does smell quite strong. The urethane slightly darkens the wood, but it was worth it to me as it waterproofs the wood so I can hang wet items on the rack.
If you skip the Urethane, you can put the entire project together in 10 minutes. If you use the Urethane, I’d let it dry overnight before adding the hooks and hanging it in your home.

Using a chip brush to apply the Spar Urethane Varnish
My husband helped me with attaching the hooks to the wood. We originally placed all three hooks in the center of the wood sign, and started to attach them, starting from the center. We quickly changed up the placement of the hooks because as we attached one of the hooks to the right of the center hook, the wood started to split.

Adding the boat cleat hooks to the wood palette sign
This didn’t surprise me, as the wood was brittle. We changed up the design and placed two hooks up higher on the sign and one in the center. This prevented any further splitting of the wood.

Using stainless screws for the hooks will prevent rusting
After attaching the hooks, we used a drill to pre-drill two small holes at the bottom of the sign. These holes were for the longer stainless screws. I didn’t want the rack to bang up against the wall with every use, so I figured out if we placed screws at the bottom, it would secure the rack to the wall better.

Pre-drilling the holes in the reclaimed wood sign
After the hooks were attached and the holes were pre-drilled, we were ready to hang it up. We mounted the wood peg hook (using the hook package directions) and hung the sign using the string that was already attached to the sign.

Hanging the reclaimed wood towel rack from a wood peg hook
My husband then drilled the two longer screws into the wall using the pre-drilled holes.
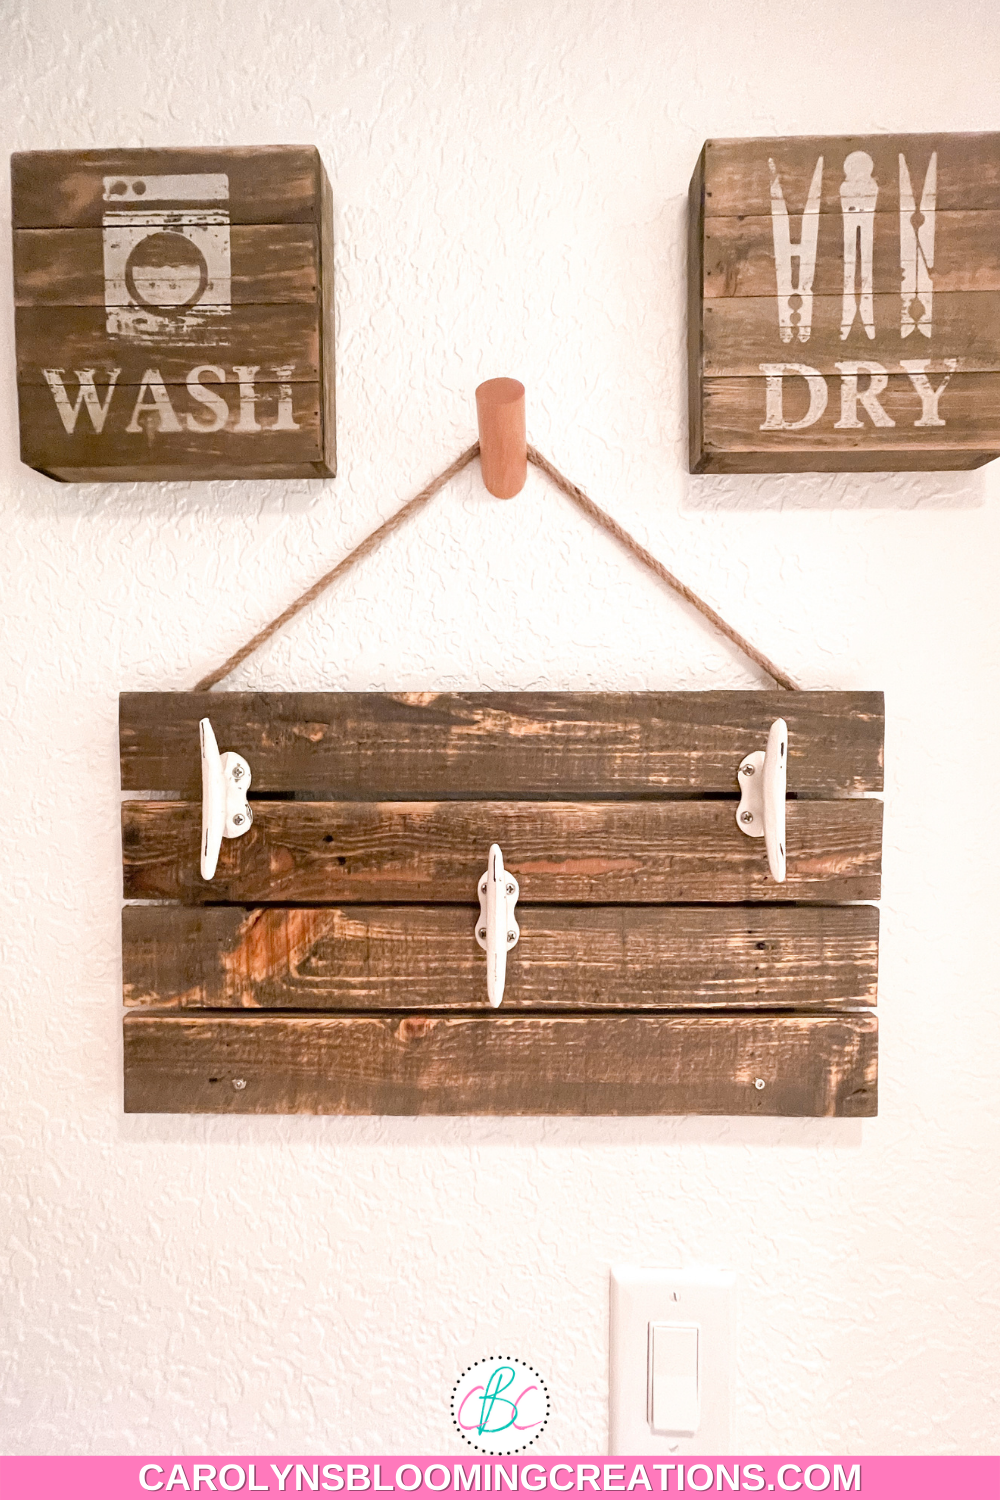
Hanging the reclaimed wood palette towel rack in our laundry room
Living in a coastal area, the main purpose of this towel rack was to hang the numerous pool and beach towels we always seem to have lying around.

Side View of the 10 Minute DIY Reclaimed Wood Towel Rack
Due to our current small laundry area being within a guest bathroom area, we’ve had guests already use this towel rack to hang bath and beach towels and it’s held up perfectly.

Wash Away Your Worries washcloth from Naples Soap Company
I had the two “Wash” and “Dry” wood pallet signs from our previous home and bought them at Hobby Lobby. I fortunately was able to match the color of the sign wood with the towel rack wood so it looks like a cute set.

Usage idea for the reclaimed wood towel rack
Now we have a cost effective towel rack (which hangs on a small wall space opposite our laundry machines) that is cute, decorative and most importantly, functional!

Our small laundry space that houses the reclaimed wood towel rack
Have you used any of my tips and tricks or completed any of my projects? If so, let me know by leaving a comment in the comment section below. Or, leave a DIY home update or DIY decor tip for others to read about.
Sharing is caring!
C.J. (Carolyn) Braden is a regular contributor and editor for Carolyn’s Blooming Creations. She has been featured in numerous media publications such as InStyle Magazine, on HGTV, on Bustle.com, and more. She is the author of the books Georgia McMasters in Amethyst Lake Cemetery, How To Be Yourself: 3 Ways To Help You Being You, and the illustrator for the children’s book Bridging Connections. She is a former classroom teacher that now dedicates her life to educating others on how to live their most healthy, creative and happy life. Learn more about her visiting our About Us page.