


Carolyn J. Braden • 3 Minute Read
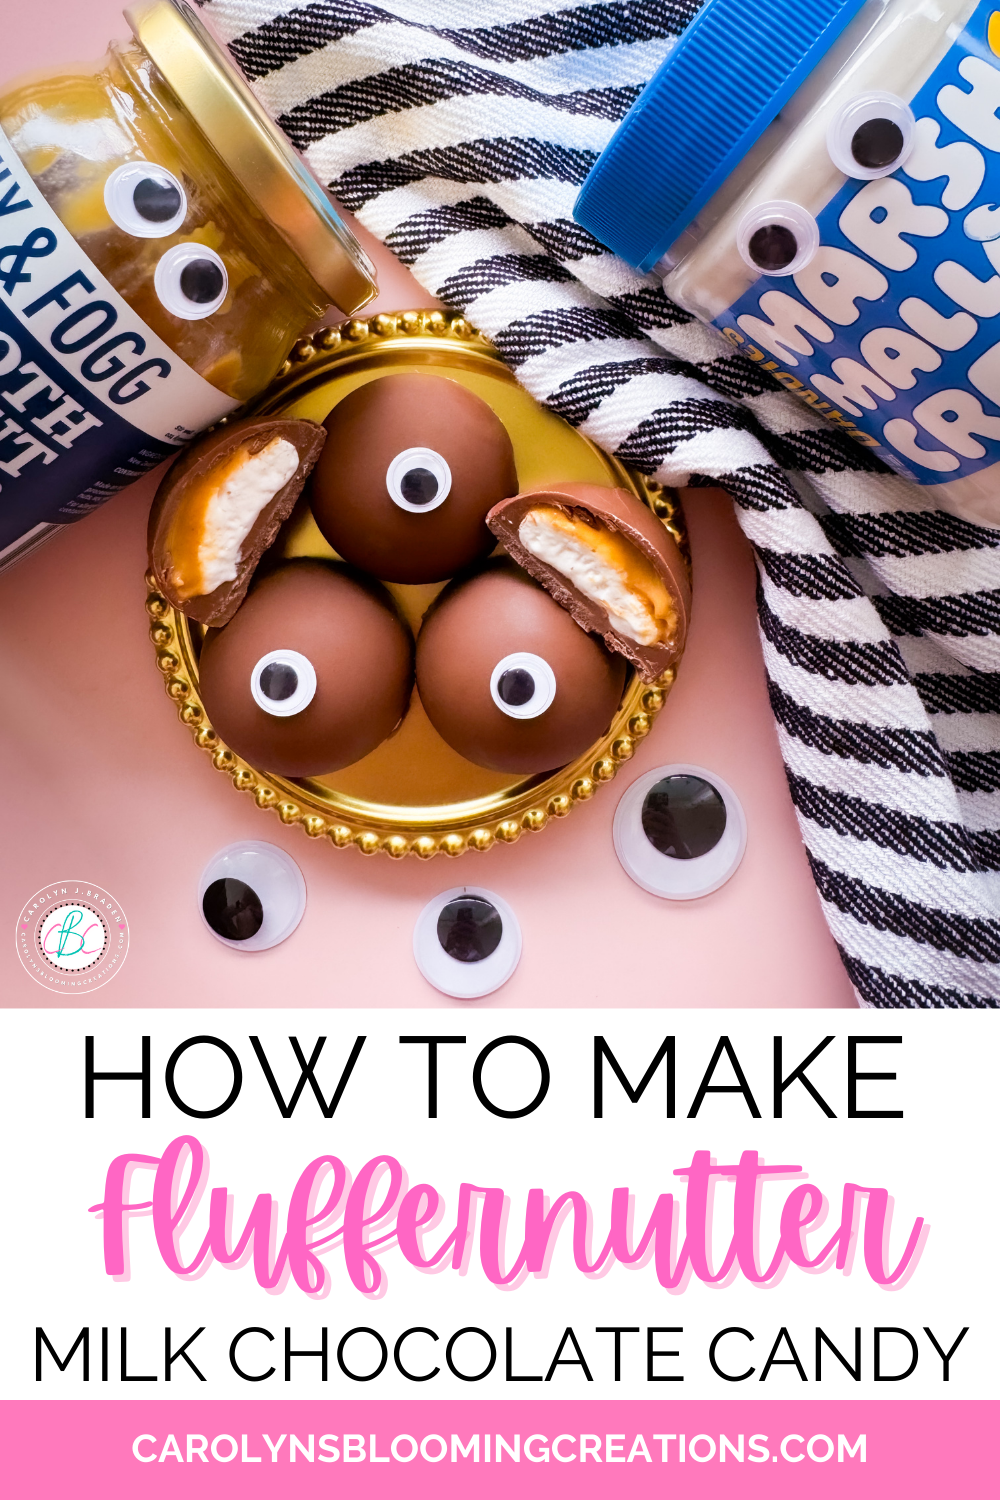
How to Make Fluffernutter Milk Chocolate Candy
Learn how to make irresistible fluffernutter milk chocolate candy filled with peanut butter and marshmallow crème. This step-by-step recipe guide will show you how to create this trendy chocolate candy at home—perfect for cozy nights, gifts, or a fun treat. Easy, delicious, and packed with gooey marshmallow and nutty peanut butter flavor, these DIY chocolate candies are a must-try! Read on to learn how to make this decadent candy.
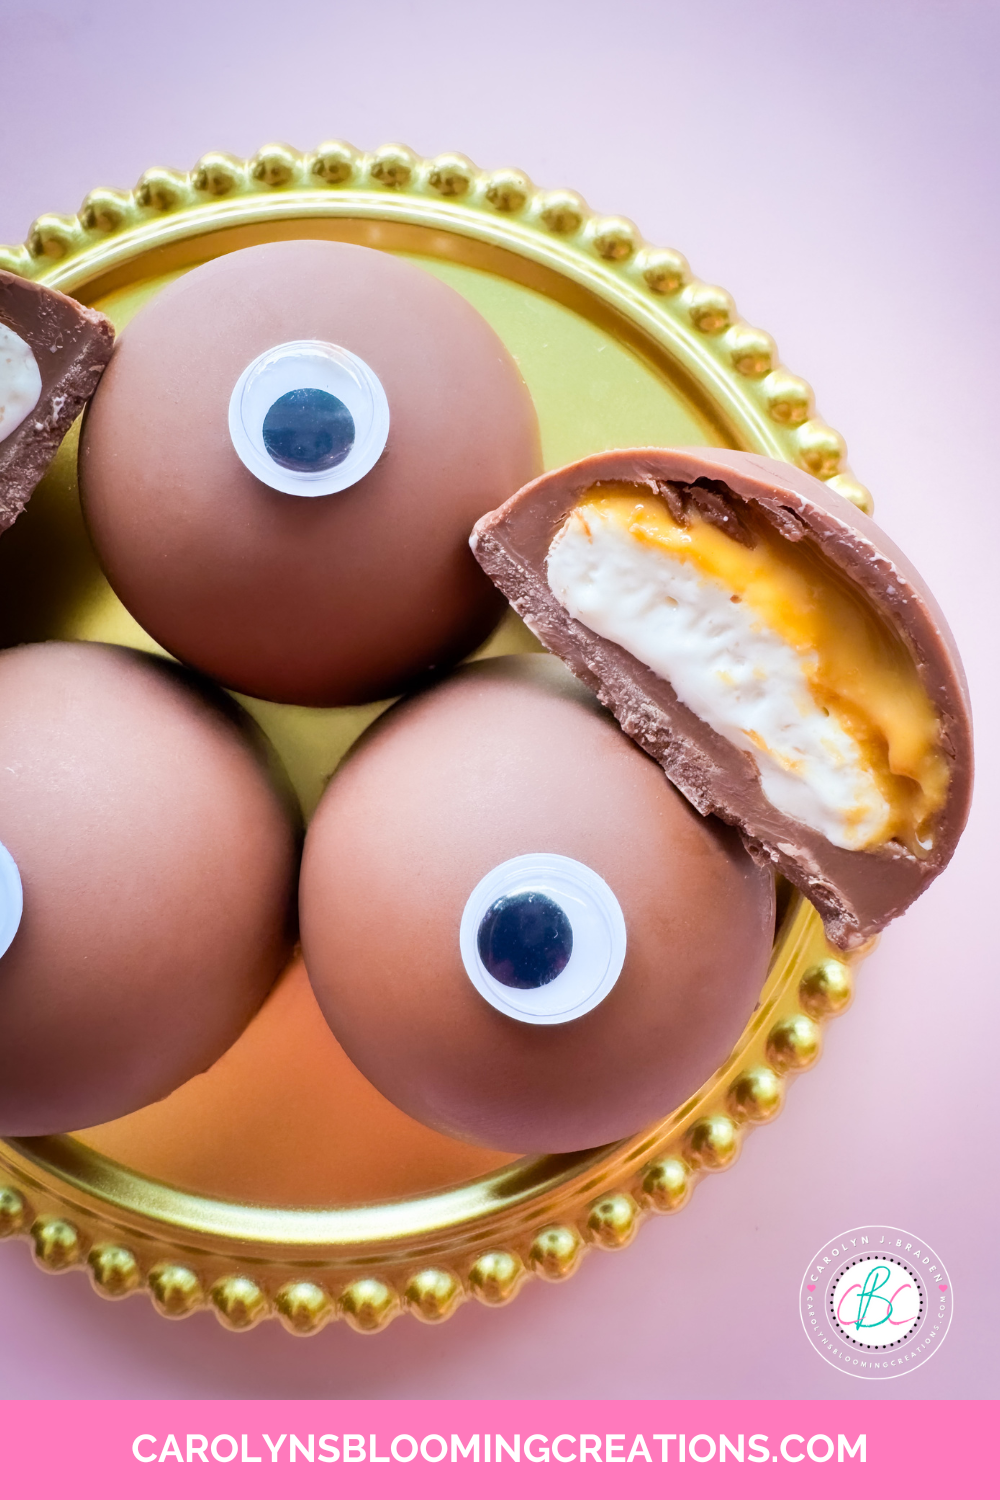
Completed Fluffernutter candy
Fluffernutter Inspiration
After throwing around some candy ideas with some friends, the idea for a fluffernutter candy came up. If you don’t know much about a fluffernutter, it’s a sandwich that was called a “Liberty Sandwich” and was created after marshmallow crème was invented in Massachusetts (Northern US). There’s even a Marshmallow fluff festival called “What the Fluff” in Somerville, MA.
The combination of marshmallow crème (also called Marshmallow Fluff) and peanut butter onto a sandwich was born around the early 1900’s. Read more about the invention of fluffernutters here.

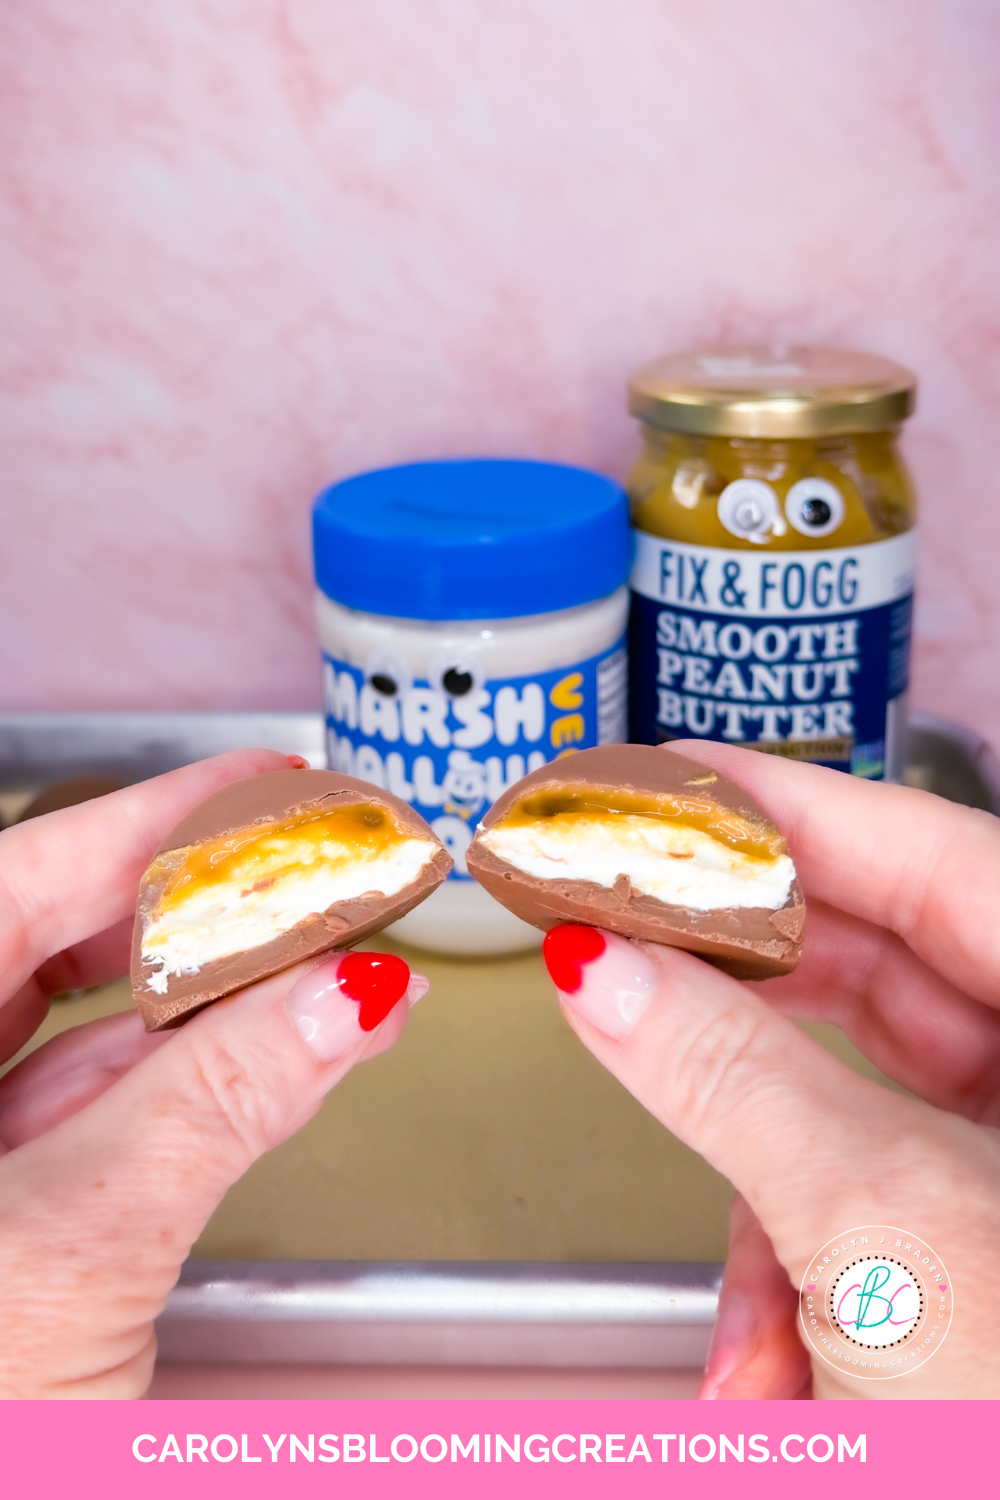
The “parents” watching over their babies
I learned that Butterfinger came up with a fluffernutter-ish candy bar in 2025 after I created this recipe, so I do believe this combination is on the rise. Marshmallow crème or fluff with peanut butter is actually quite delicious! When you add the milk chocolate, it’s decadent and each candy piece becomes very hard to resist.
I also love the combination of peanut butter, jelly and milk chocolate and wrote up a Peanut Butter and Jelly Cup recipe and you can get it here. See me make them in my 1-minute video below or via my YouTube channel @carolynjbraden.
How My Recipe Can Help with Stress
I placed google eyes (no you cannot eat the “Emergency Googly Eyes” I used, but you can get candy eyes to decorate with) on the jars of marshmallow crème and peanut butter because I love creating characters and puppets. My creative brain imagined the jar of peanut butter and the jar of marshmallow crème sitting in my pantry in the dark, googling their google eyes at each other and making the fluffernutter babies. It’s how my brain thinks and I hope this idea makes you laugh.
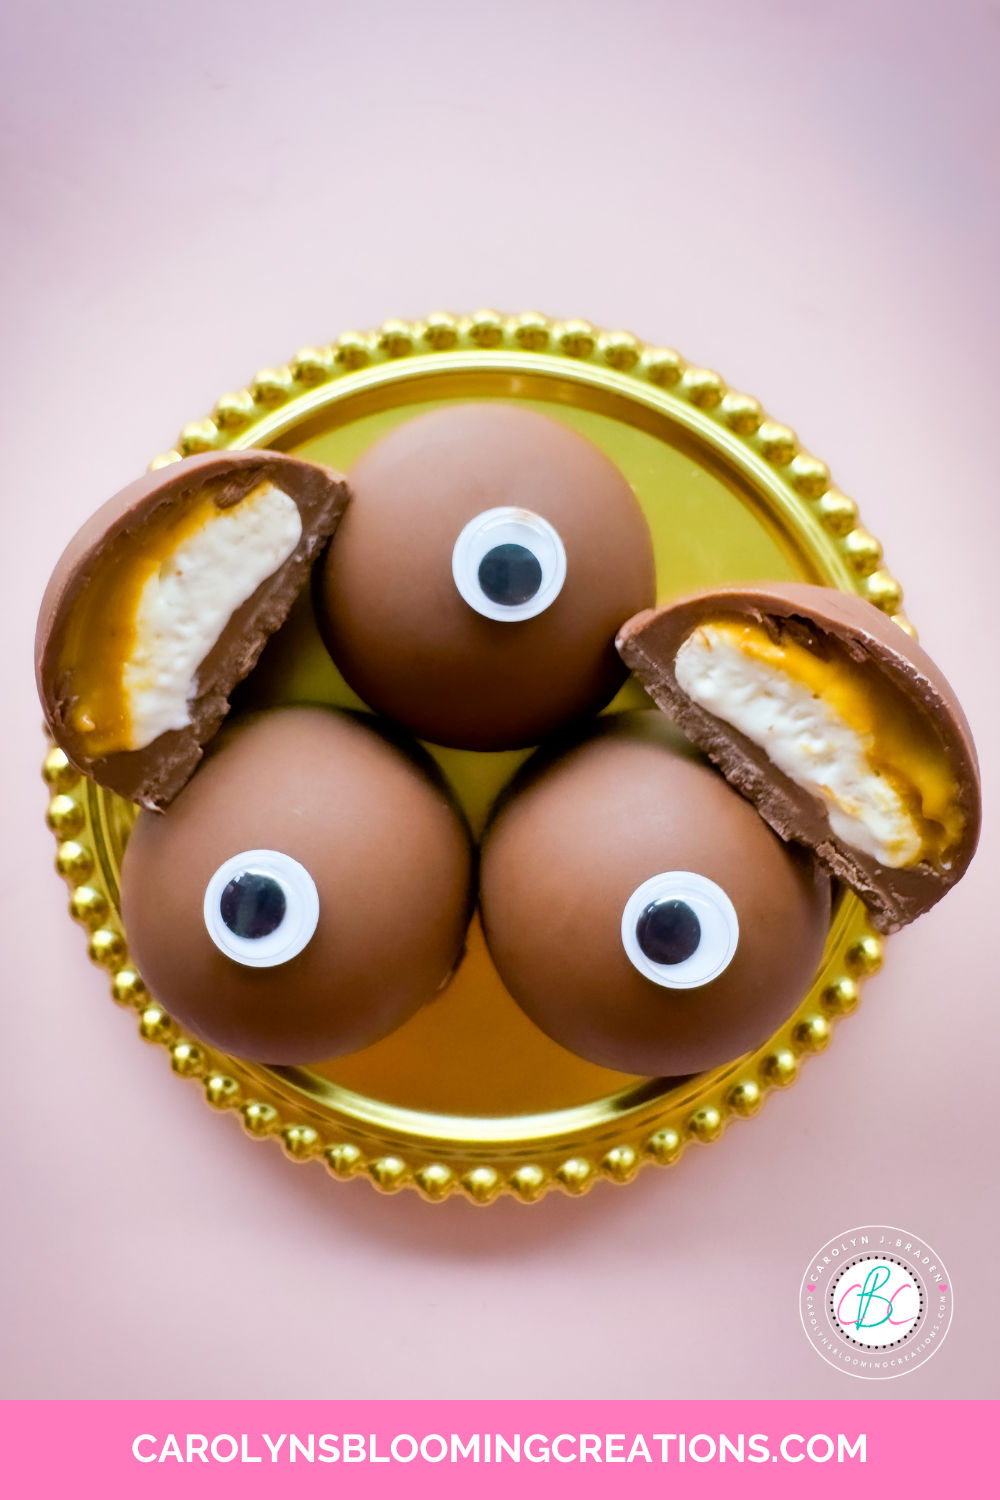
These are delicious!
Between eating the candy and laughing at the concept, stress levels can go down. Did you know that the adage “laughter is the best medicine” is true? While it’s true that dark chocolate can help your brain (I wrote about it here in my dark chocolate orange creamsicle bombs recipe), it’s also true that laughing can too. Read about how you can get stress relief from laughter from the Mayo Clinic.
The Fluffternutter Milk Chocolate Candy Recipe
Now for the recipe! Here’s what you need. If you buy anything from Temu (some of their silicone molds have great prices!), use code afe55197 or my link here for 30% off (for new app users). Links below link out to Walmart, Amazon or Temu.
Yield: 8-10 candy pieces
Time: 40 minutes to make
Tools:
Two 6 or one 12 Cavity Silicone Mold (The rounded molds I used are from Target and Amazon…sometimes the shape is called a “fat bomb” mold. You can optionally use parchment muffin liners placed in a muffin tin if you don’t have the mold which will give you more of a traditional peanut butter cup shape or you can use another shaped mold if you have one)
Small baking tray (I used a small metal one I got at TJ Maxx to place the mold on as one of my molds was very flexible and needed stability)
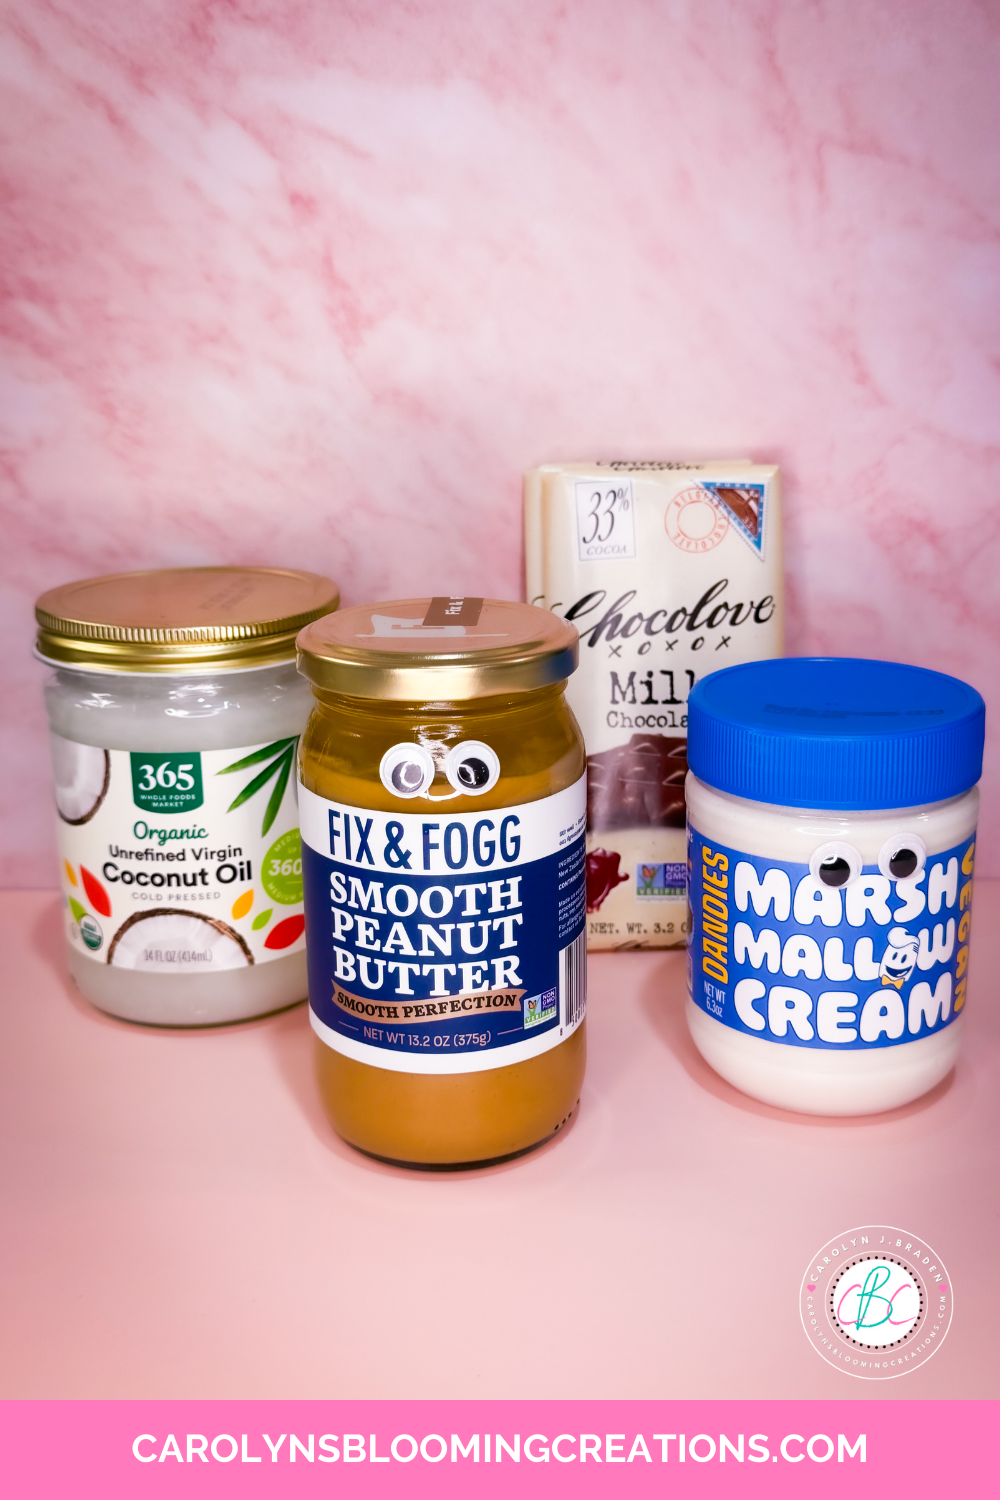
The fluffernutter candy ingredients
Ingredients:
6 ounces milk chocolate (I used 2 Chocolove milk chocolate bars, which was slightly more than 6 ounces, so I had a little chocolate left over, which I turned into plain candy pieces)
1-2 teaspoons coconut oil (I used this organic unrefined version from Whole Foods, I used 2 as my chocolate was a bit thick)
8 teaspoons peanut butter (I used a creamy natural Fix & Fogg peanut butter for this recipe, but any kind will work from any grocery store)
8-16 teaspoons marshmallow crème (I got mine at Whole Foods/Amazon and my 6.3 oz jar was plenty)
Optional: Candy eyes
Note: I stored mine in a sealed container in the refrigerator for about 6 days and they were still delicious.
Check out my 1-minute video tutorial for this project on my TikTok now or on my YouTube channel @carolynjbraden!
How-To:
Place your mold onto the baking tray and set aside. If using parchment muffin liners and a muffin tin, place 10 muffin liners into your muffin tray and set aside.
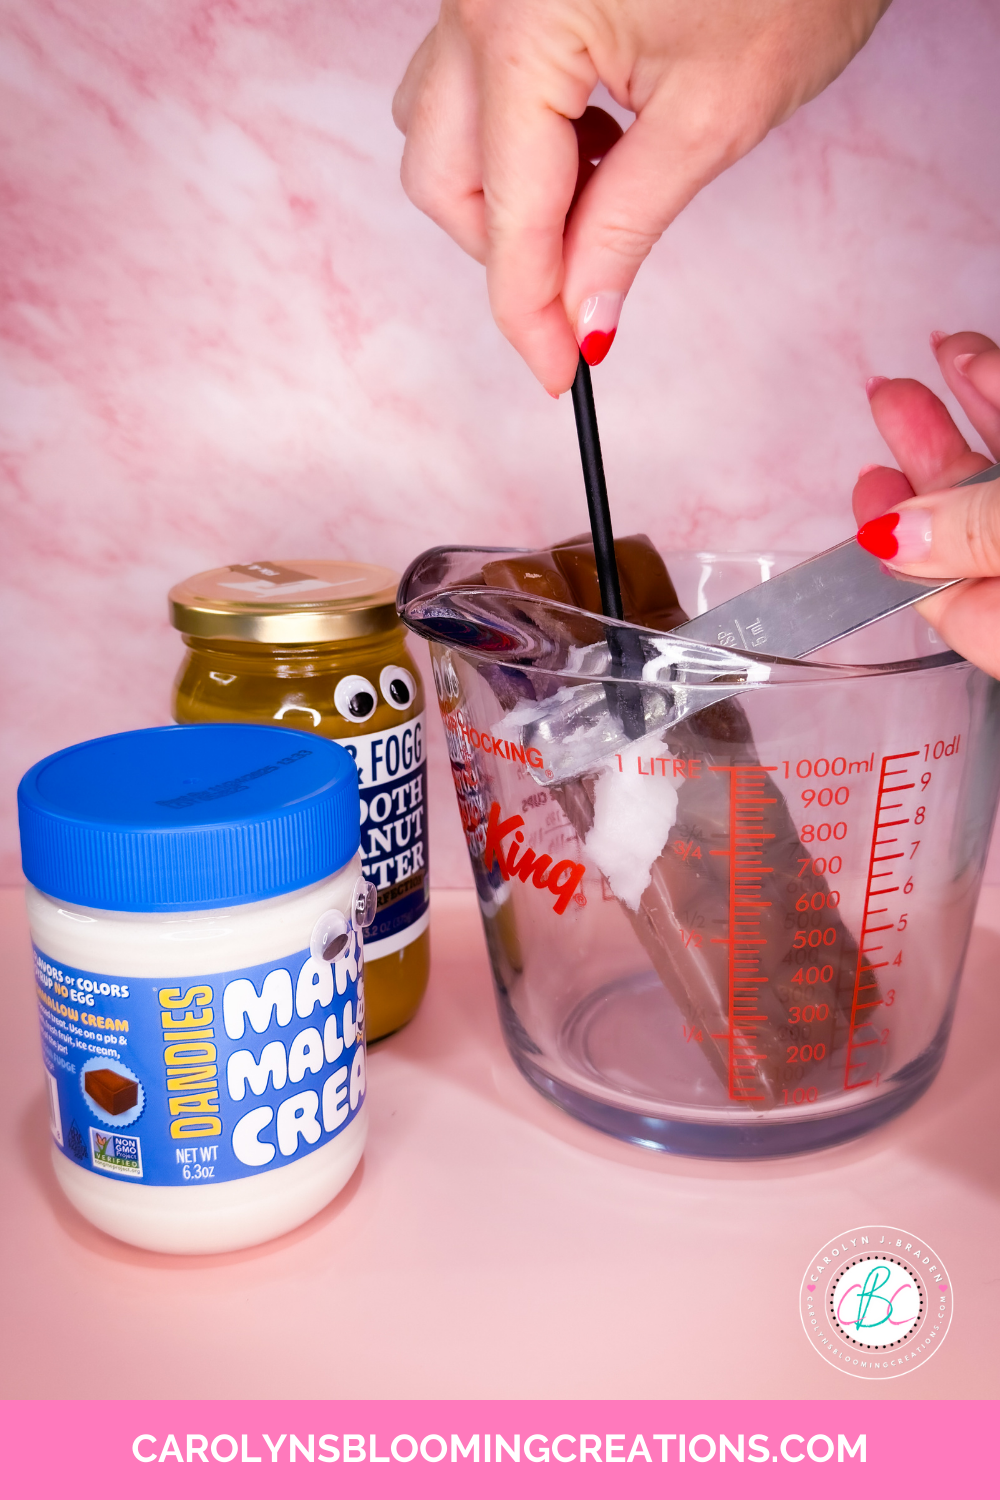
Adding the coconut oil
Place your chocolate in a glass measuring cup with the 1-2 teaspoons coconut oil (use 1 to start and if your chocolate is really thick like mine was, add the second teaspoon) and place in the microwave. Melt the chocolate in 30 second increments on 50% power.
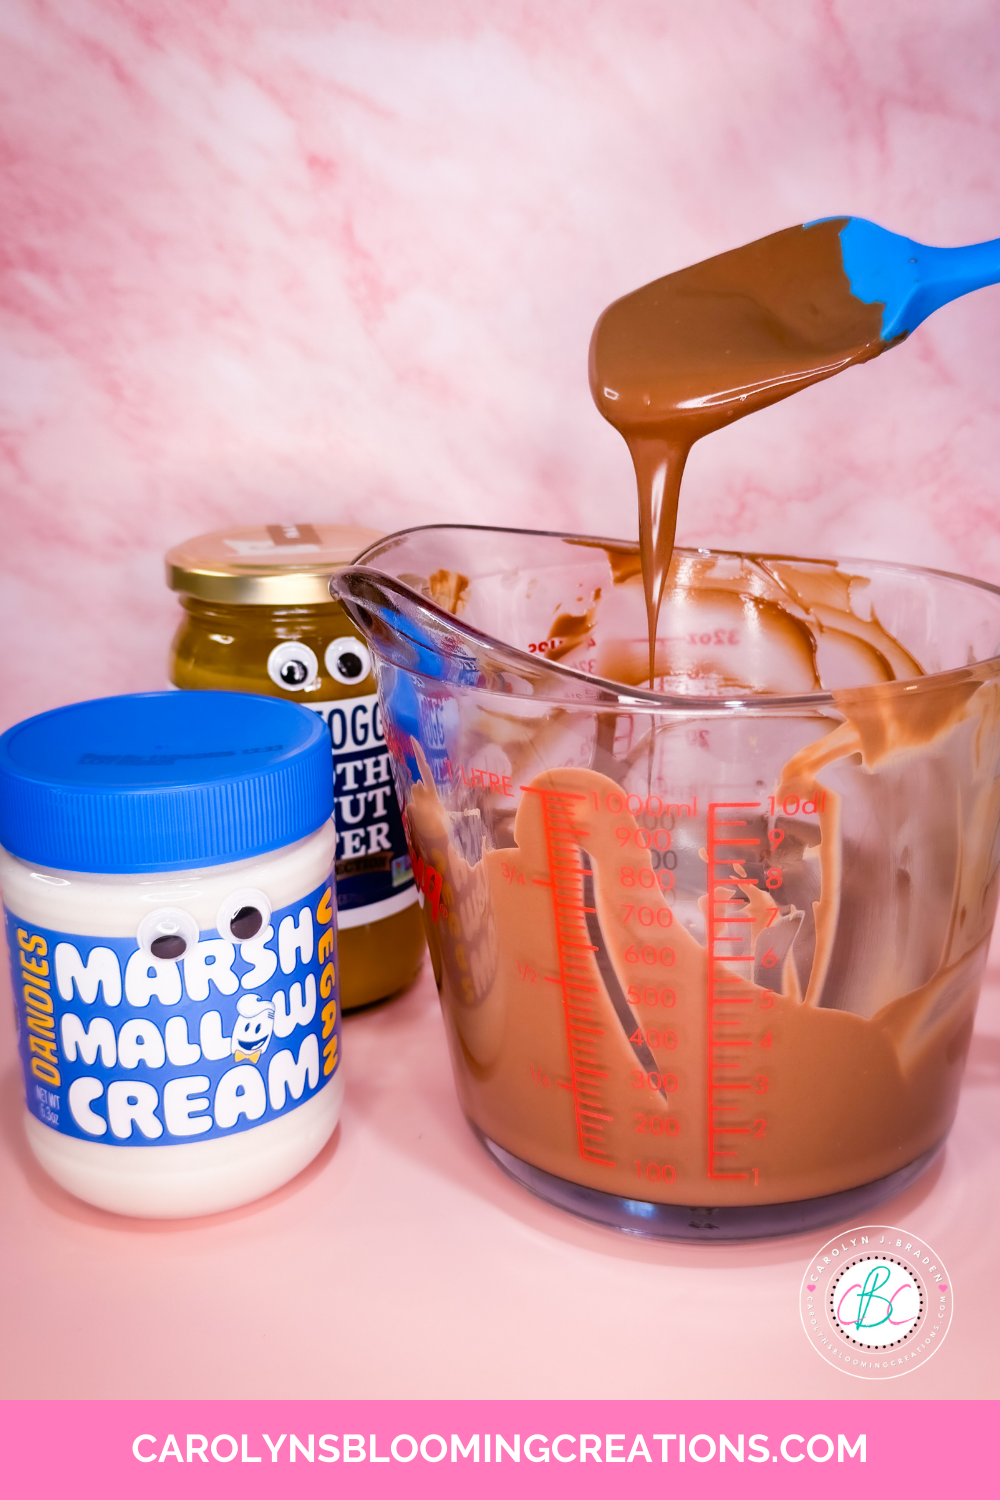
The microwave melting method is quick and easy
Stir using a spatula or spoon in between the time increments and keep going until it’s melted and creamy. Do this slowly so you don’t burn the chocolate. You could alternatively use a double boiler method to melt the chocolate.
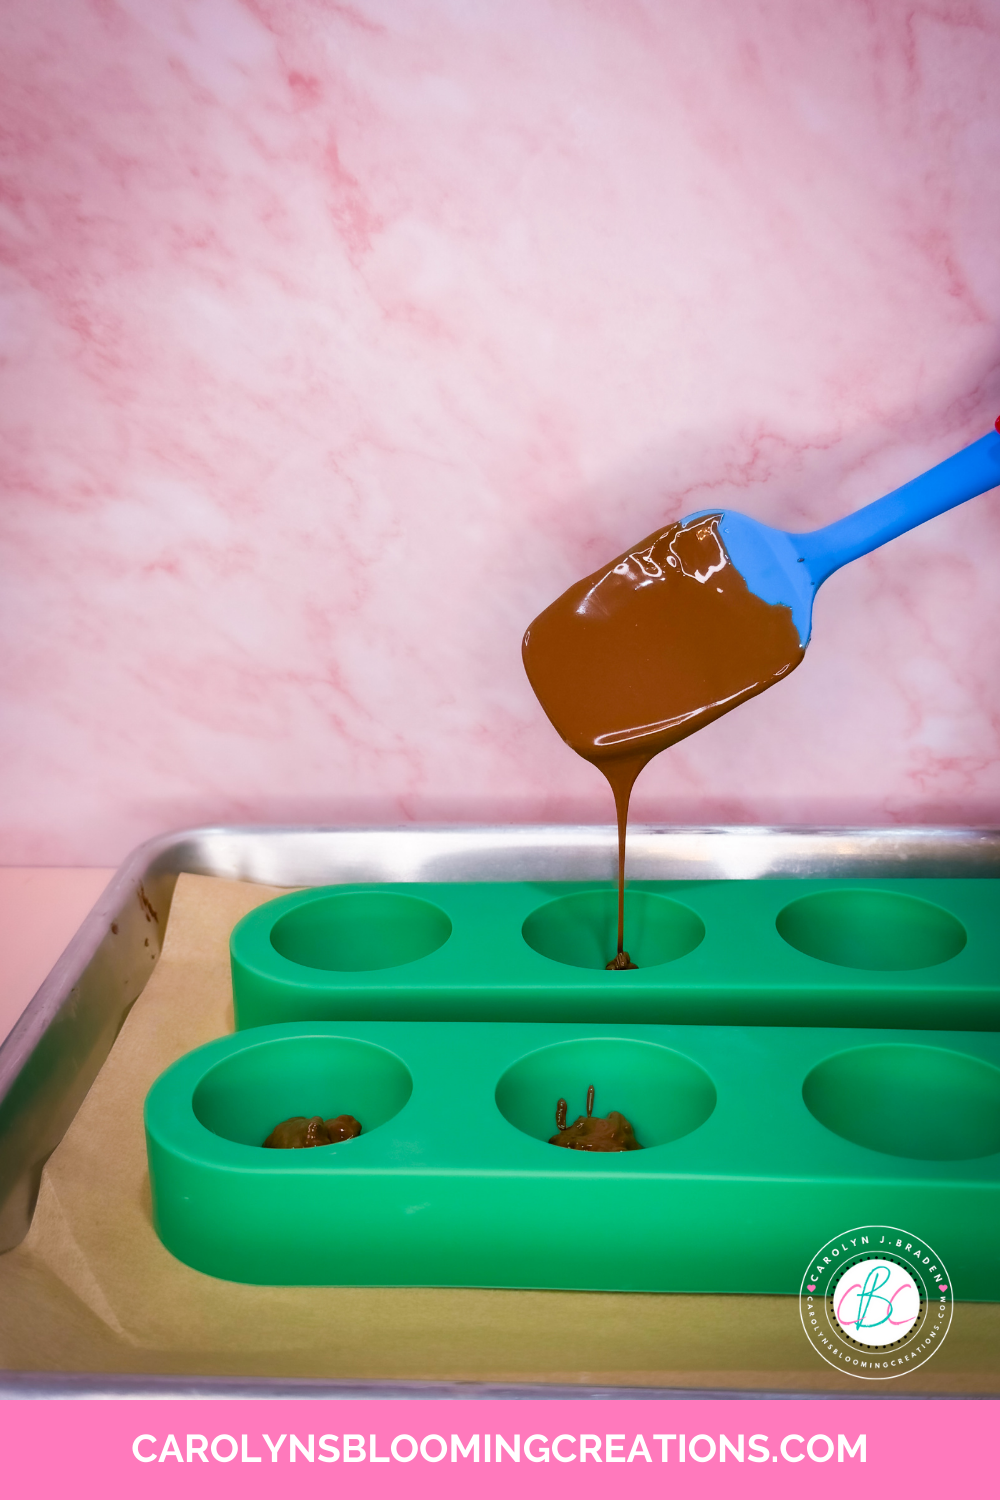
Spooning the chocolate into the molds
Pour about 1/2 tablespoon of chocolate into 10 mold cavities.
Swirling the chocolate to coat the molds
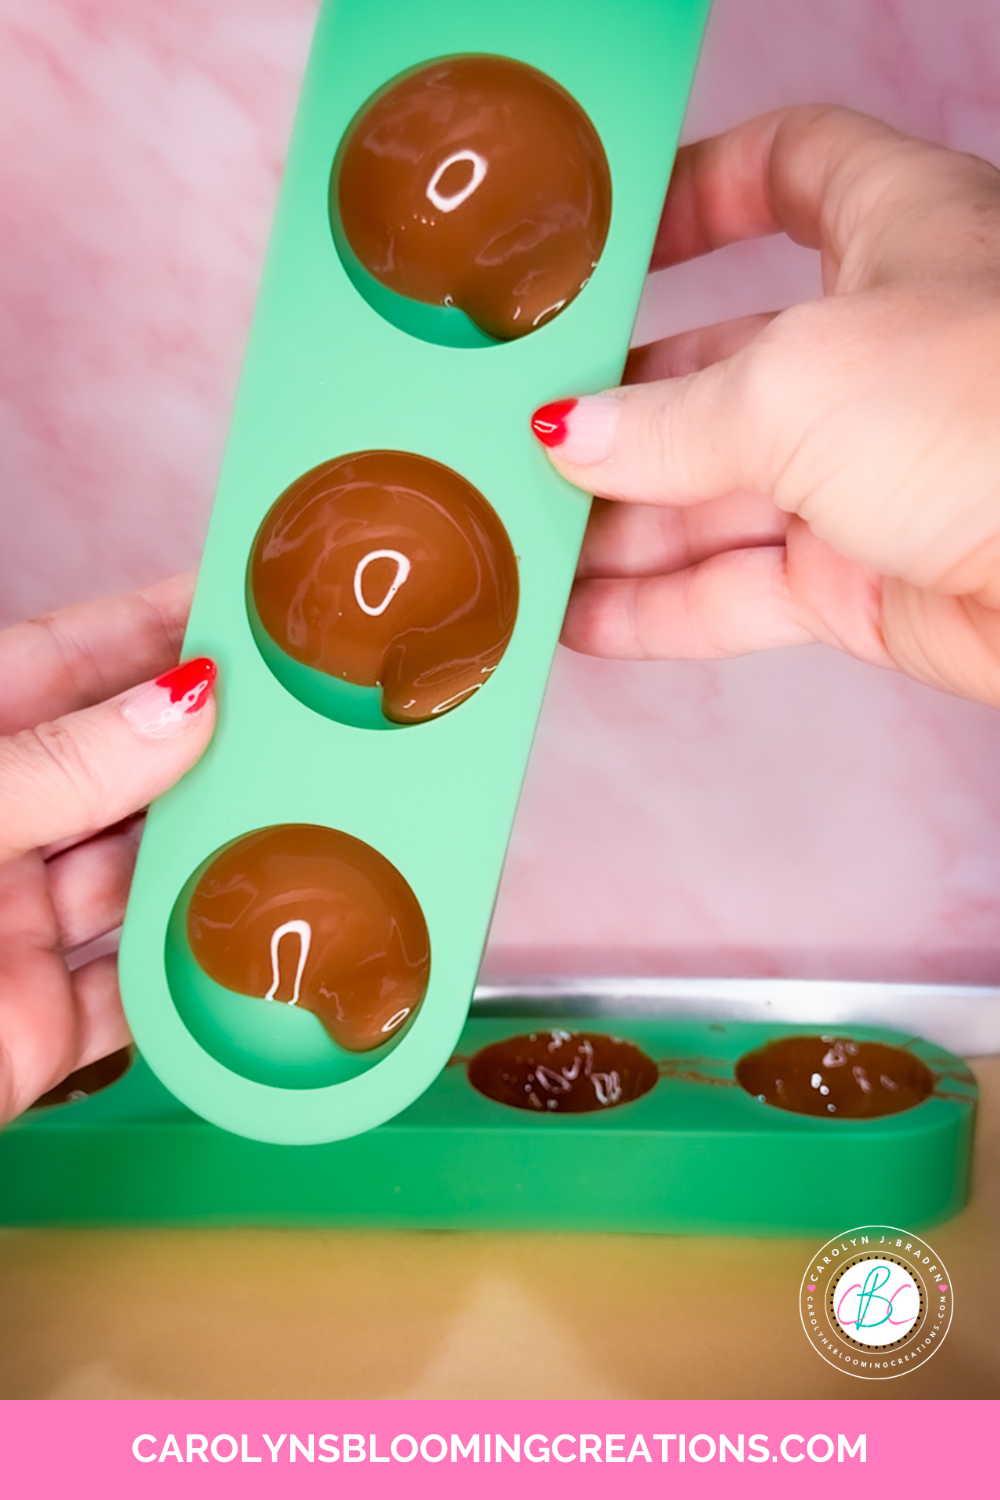
Lift the tray up and move the tray around to “swirl” the chocolate around in the cavity to coat it COMPLETELY…all the way to the top. You can also use the back of a small spoon to coat the cavity with the chocolate. Place in the freezer for 10 minutes or until the chocolate is hardened.
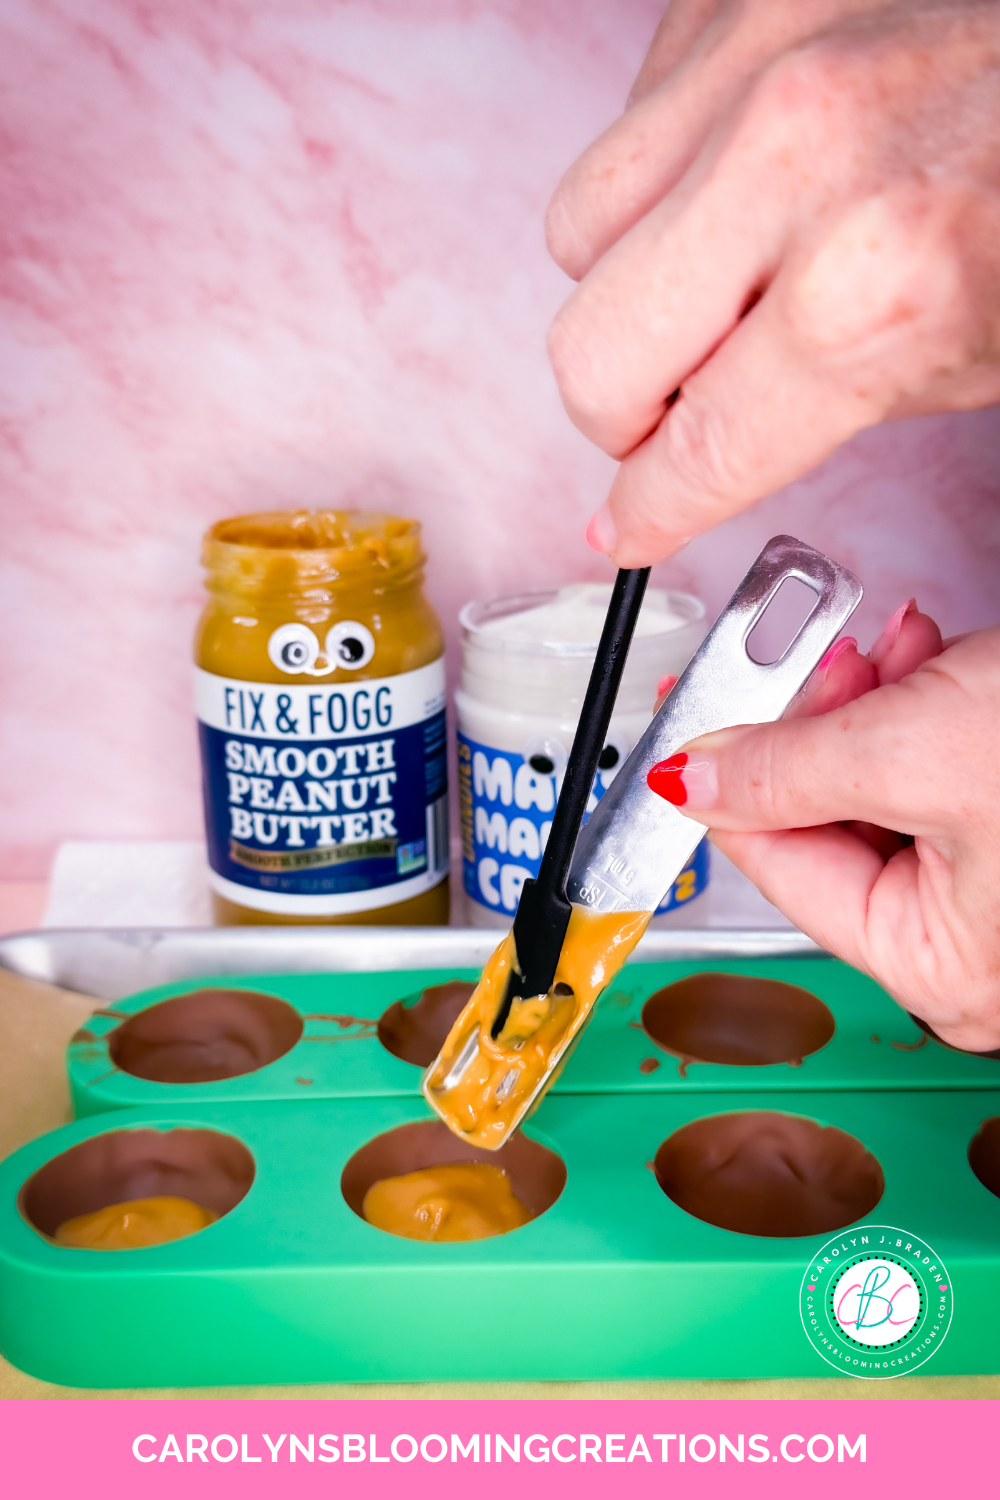
Adding the peanut butter
Top each chocolate layer with 1 teaspoon of peanut butter and smooth down with a small spatula.
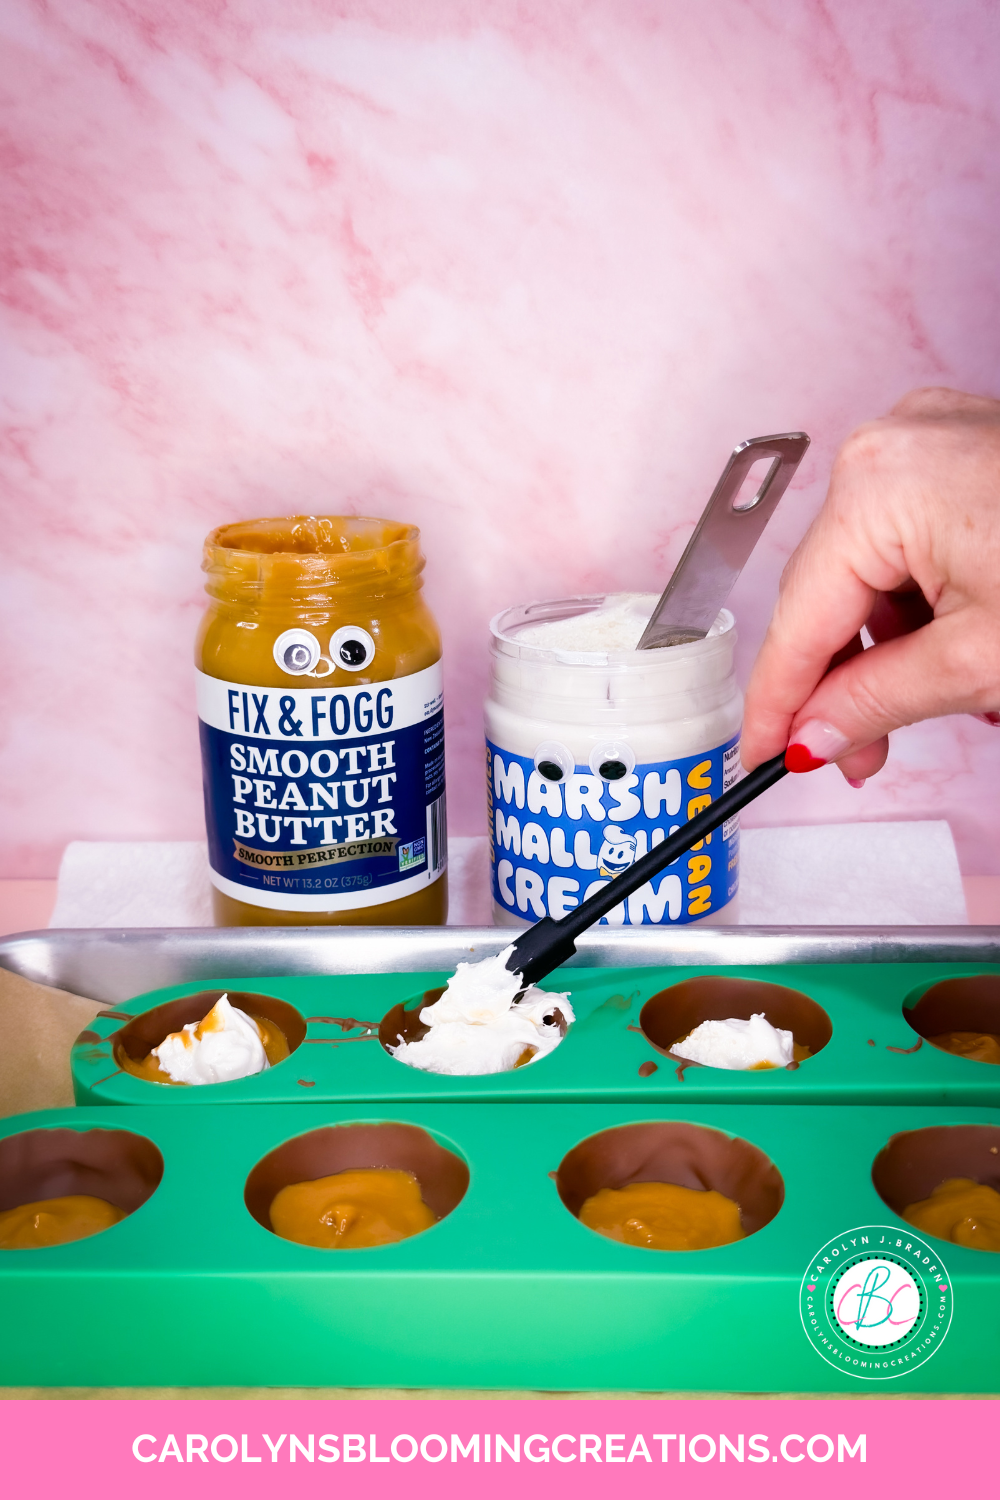
Adding the marshmallow creme
Next, top each peanut butter layer with 1-2 teaspoon of marshmallow cream and smooth down with a small spatula. I basically added enough to fill it almost to the top. If this filling combination protrudes out the top of the bomb, remove some as it won’t seal properly in the next steps.
I heated my chocolate a bit longer when I got to this point to make sure it was still very “melty”. Pour about a tablespoon or so of the chocolate on top of each marshmallow filling, using up the rest of the chocolate.
I did not worry about them being perfectly smooth….I just made sure each cavity was covered in chocolate until all the chocolate was used up. I tapped the tray on the counter to settle the chocolate, which made them all flatten and smooth.
The finished candy
Freeze for 10-15 minutes more and then you should be able to pop them out of the molds.
If using muffin liners, I suggested parchment due to the fact that they should cleanly be able to be removed from each bomb after freezing.

This is a delicious and easy candy recipe!
I stored mine in a sealed container in the refrigerator to keep them fresh and firm (we live in south Florida and everything melts here…even in the winter sometimes!). We tested them and they were exactly how I imagined…delicious!
If you tried these, leave us a comment below or share you own favorite dessert idea!
If you loved this article, then we know you’ll love this one too: 3 Ingredient Crescent Roll Wraps for a Fast, Delicious Dinner
Carolyn J. Braden is the owner of Carolyn’s Blooming Creations is a regular contributor and editor for CBC. She has been featured in numerous media publications such as InStyle Magazine, on HGTV, on Bustle.com, and more. She is the author of the books Georgia McMasters in Amethyst Lake Cemetery, How To Be Yourself: 3 Ways To Help You Being You, and the illustrator for the children’s book Bridging Connections. She is a former classroom teacher that now dedicates her life to educating others on how to live their most healthy, creative and happy life. Learn more about her visiting our About Us page.