


Carolyn J. Braden • 3 Minute Read

How to Make Daisy DIY Mouse Ears Headband
Over the years, I’ve seen Disney produce mouse ears and more that are really nice, but I noticed that the designs are not quite “complete”. I noticed that many of the mouse ear headbands did not have any décor on the back. I even bought mouse ears years ago from someone on Etsy and the back of the ears were not decorated either.

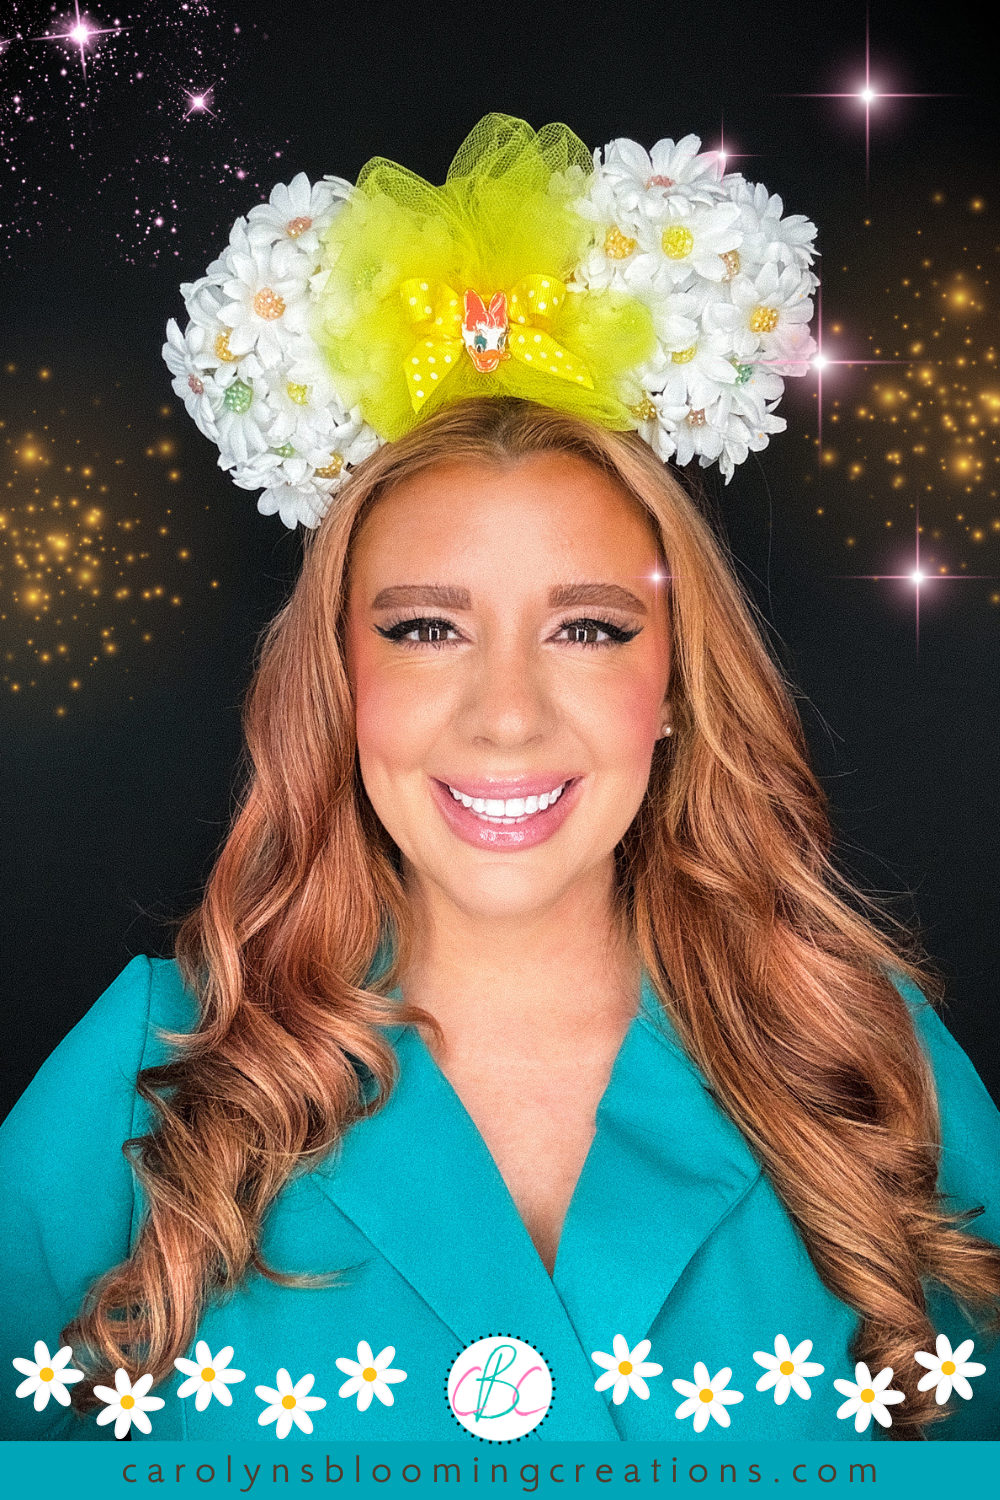
A colorful look with my DIY mouse ears
One of my YouTube subscribers even noticed this, which gave me an idea. I love creating things that look good from all angles, so I decided to create my own mouse ears headband with a design on both sides. Read on to learn about my DIY mouse ears headpiece design process.

The side view of the DIY mouse ear headband
Many years ago, I visited Disney World in Florida and got a mouse hat. I customized it at the gift shop, so it was quite pricey, but it was cute. It wasn’t the best quality, so I had to throw it out after a few years of having it on display in my closet.
I also never wore it outside of the park, so it became an expensive souvenir that had no use. After seeing many mouse ears headbands show up on Etsy and more, I decided the mouse ear headbands were a better buy, being a bit more suitable for wearing to parties and more.

The back view of the DIY mouse ears
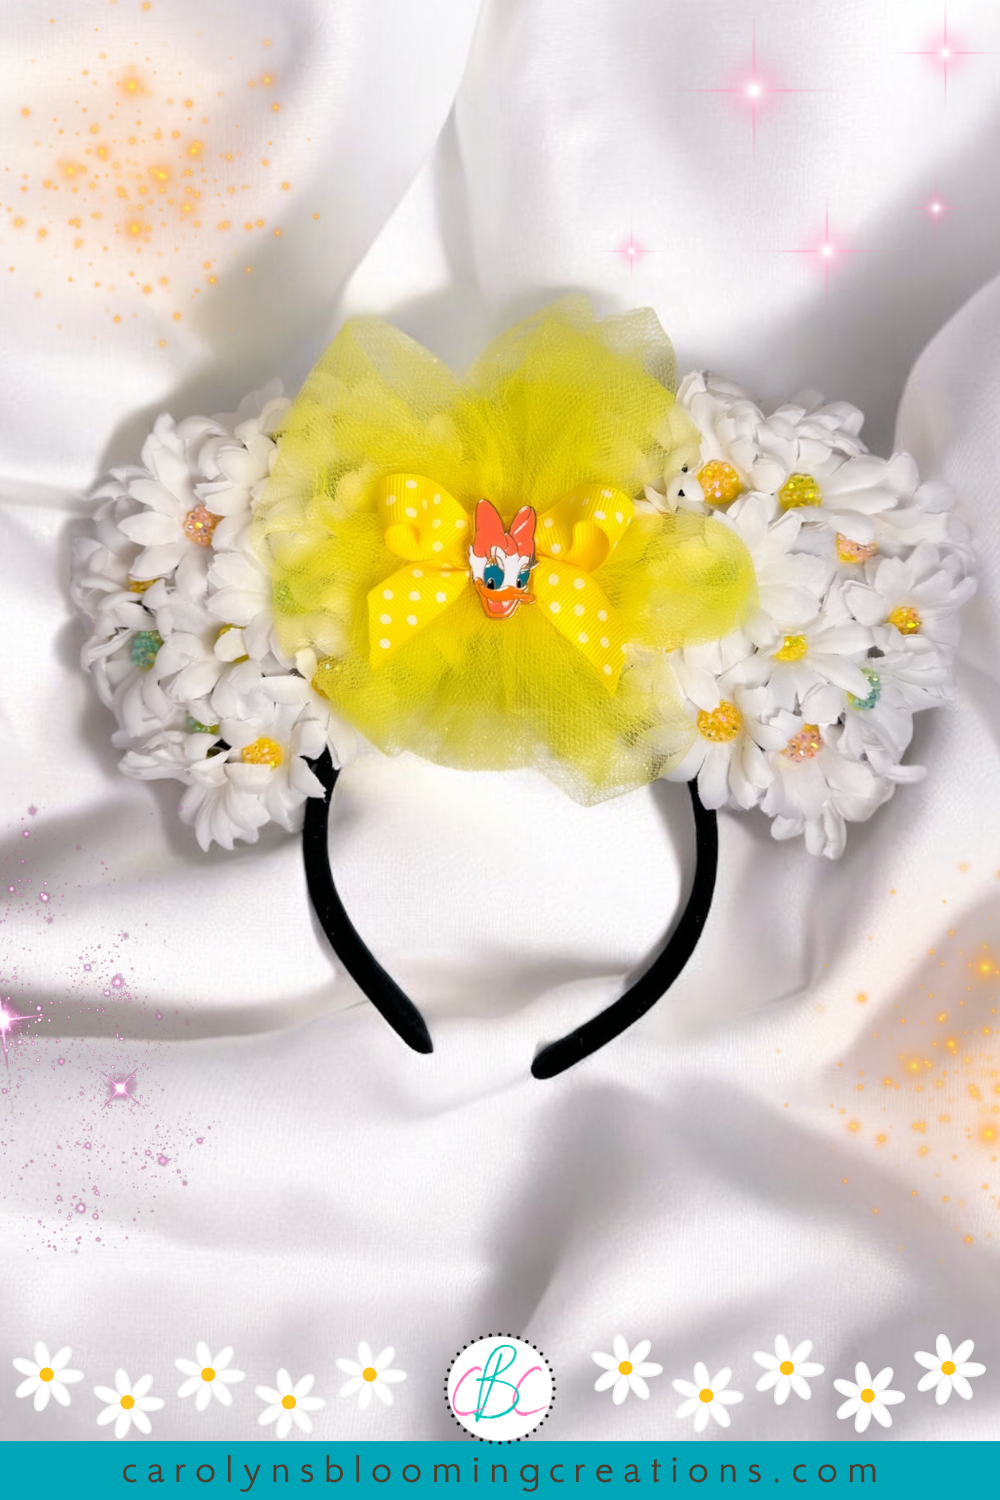
I had a vibe around the daisy flower in early 2024 and looked to see if Disney produced a Daisy Duck themed headband and they did. You can see it here. Again, as I’ve noticed on many mouse ear headband designs, the back of this Disney Store mouse ear headband is not decorated. Maybe it’s just me, but it looks unfinished. I found a Disney licensed Daisy Duck pin on Temu and it gave me inspiration to create my own Daisy themed mouse ear headband that is fully decorated on both sides.
My cute mouse ear headpiece
I love researching meaning behind my inspirations and according to Floraly.com, the Daisy flower represents “purity, innocence, new beginnings, joy and cheerfulness”. Daisies do bring me joy when I look at them. There is something about the traditional pure white contrast of the petals against the cheerful yellow center that makes me smile. As far as new beginnings, we did list our house for sale, and even though it has not sold yet, new beginnings are upon us, which is exciting.

My completed DIY mouse ear headband look
As far as the Disney character, Daisy Duck, I didn’t know much about her other than the fact that she was cute and was mainly depicted in cartoons as being Donald Duck’s girlfriend. According to Wikipedia, Daisy is quite a character. She was the calm to Donald’s anger, she was an aunt to April, May, and June, and loves to talk.
See how I paired the ears with a cute retro dress in the 15 second video reveal below or via my YouTube channel @carolynjbraden:
Overall, she is a joyful character, which is well represented by the daisy flower which is also her namesake, Daisy. We have a pair of silly ducks that visit our backyard every spring (in 2023, they even tried to swim in our pool due to having some destroyed screening from Hurricane Ian), so that also served as some inspiration for my creation.
See my 1-minute video tutorial for this project below or via my YouTube channel @carolynjbraden:
Now for the project. Here’s what I used to create my Daisy DIY Mouse Ears Headband:
If you purchase any products from Temu (I get lots of my craft items from there as the prices are great) use code afe55197 at checkout or this link to get 30% off (new app users only).
Mouse ears headband (I got mine on Temu, but you can find them here on Amazon)
Artificial daisies (I used about 5-6 stalks or about 12 daisies for each ear side + a few extra and got them at Hobby Lobby but Amazon has some similar ones here)
Jelly rhinestones in various colors (I got a set on Temu, but here’s a similar set on Amazon)
Yellow tulle (I purchased a 6” roll at Hobby Lobby, but here’s an exact copy on Amazon)
Bowdabra (what I used to make a tulle bow)
Yellow polka dot grosgrain ribbon (I got a 7/8 inch wide spool at Hobby Lobby, but here’s a similar spool on Amazon)
Daisy Duck enamel pin (I got mine on Temu, but there are similar ones on Amazon)
Thick felt (I got this set on Amazon)
scissors
See me create another one of my other headpieces, a cowboy hat fascinator in the video below or via my YouTube channel @carolynjbraden:

The supplies I used for the DIY mouse ears headband
How-To:
First I pulled all the daisies off the stems. They pulled off easily, then I used scissors to trim the stem that was close to the daisy top.

Cutting the stems on the daisies
On a low temperature setting, I glued each daisy head to the mouse ears.

Gluing the daises to the mouse ears
I glued the daisies to both sides of the ears. Each side took about 12 daises.

I glued daisies to both sides of the ears
Next I glued some more daisies to the tops of the ears to conceal all of the black of the mouse ears.

Adding daisies to the tops of the ears
Then I added a thin layer of Liquid Fusion glue to the centers of the daisies and added some jelly rhinestones using my wax pencil. The pencil helps you pick them up easily. I used a variety of color to match the Daisy Duck pin.

Adding the rhinestones to the daisy centers
I used yellow, orange, pink and blue. I applied them all to one side of the ears, allowed them to dry overnight, then did the other side and the top. The rhinestones will slide if you use too much glue.

Adding different colored rhinestones to the daisies
Then I realized the ears were a bit too “floppy” for my tastes, due to the weight of the daisies. I cut some thick yellow felt into 2 small squares. I squeezed them in between the daisies at the top of the headband, between the ears and secured a square on both sides of the ears using hot glue on a low temperature. Next time, I’d add the squares of felt first.

Adding the stiff felt to stabilize the ears
I used my Bowdabra to make a small tulle bow for each side of the ears. I made a 1 minute video showing this process and you can get it here on my YouTube channel @carolynjbraden or below!

Using my Bowdabra to make a tulle bow
I used hot glue on a low temperature setting to add the bows on top of the felt. I added one to each side.

Adding the tulle bow to both sides of the headband
I then created a bow using the yellow polka dot ribbon. You could tie it or loop it into a bow and use hot glue to secure it and glue a second small piece of ribbon around it to finish it. That’s how I made mine, as I wanted it to look perfect. You can use the Bowdabra to make a perfect bow too.

Making the second bow for the mouse ear headband
Lastly, I added the Daisy Duck pin by poking it into the ribbon to make a small hole to make sure it’d lay flat, then I hot glued it on.

The mouse ears without the Daisy pin is cute too!
The whole thing took me a few hours spread across a week to make as I was thinking through the design of it as I created it.
The finished mouse ear project
By adding the felt, I made a very sturdy and cute mouse ear headband that I could wear to the Disney park (I’d be the only one with this as it’s my custom design!) or anytime I want. I thought about adding a veil to it, as it’d be cute for a wedding for a Daisy Duck and Disney loving person.
There are many different designs you could create for this project and I send you magical crafting fun if you decide to make one of your own!
If you loved this article, we know you’ll love this one too: How to Make a Mickey Mouse Inspired Claw Clip
Carolyn J. (C.J.) Braden is the owner of Carolyn’s Blooming Creations is a regular contributor and editor for CBC. She has been featured in numerous media publications such as InStyle Magazine, on HGTV, on Bustle.com, and more. She is the author of the books Georgia McMasters in Amethyst Lake Cemetery, How To Be Yourself: 3 Ways To Help You Being You, and the illustrator for the children’s book Bridging Connections. She is a former classroom teacher that now dedicates her life to educating others on how to live their most healthy, creative and happy life. Learn more about her visiting our About Us page.