


Carolyn J. Braden • 3 Minute Read

How to Make Rhinestone and Pearl Holiday Ornaments
This easy rhinestone and pearl holiday ornament tutorial is one I adapted from my Blingy ornament tutorial which you can see here. While my bridal and cotton candy blingy ornaments were a little more for all year-round creating, this red and green DIY ornament is more for the Christmas holiday season of crafting. Read on to learn how to make this cute and shimmery craft!
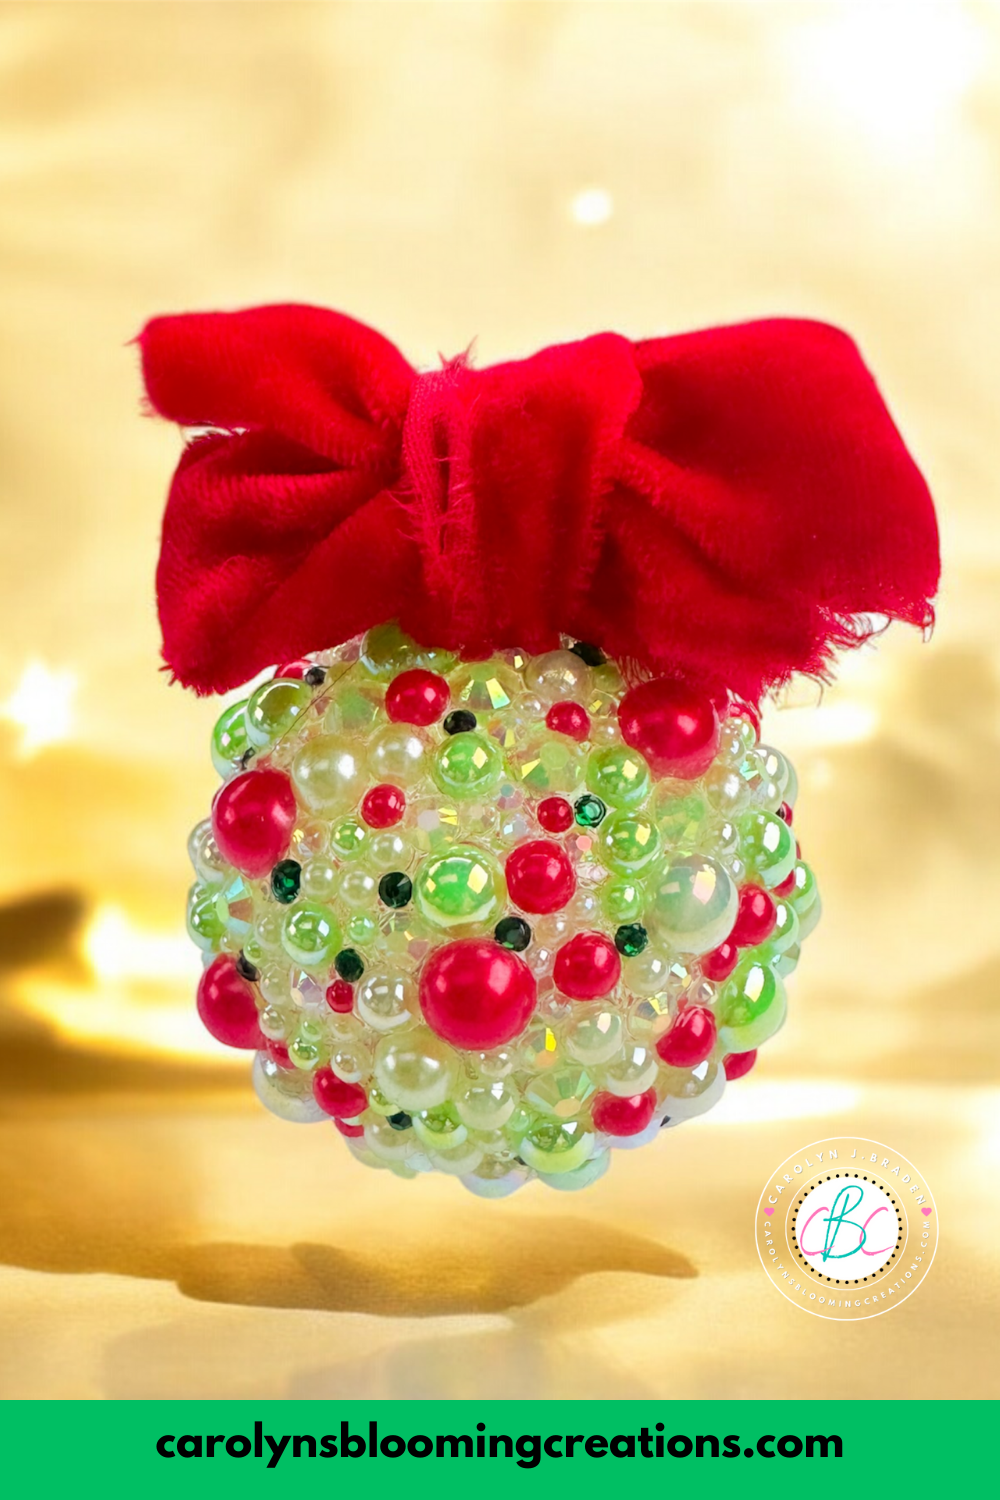
My completed ornament
I created this project in the car as one of my “car crafts”. Whenever we travel, I like to create things in the car to pass time. See some more of my “car crafts” like an evil eye claw clip in this article here. I’ve created quite a few in 2024 during short trips, vacations and most recently, during our two hurricane evacuations; Hurricane Helene and Hurricane Milton.

Crafting with precious cargo during our Hurricane Milton evacuation
Check out this cute Halloween/Fall-ish candy corn claw clip that I created in the car for our Hurricane Helene evacuation in my 1-minute video below or via my YouTube channel @carolynjbraden:
Hurricane Evacuation Car Crafting
As I type this, I have no idea what will happen on Sanibel Island, Florida, where we currently live. We have our house for sale, have had lots of showings (even days before we evacuated from Hurricane Milton, we had 2 back to back) and pray that we can keep this goal of selling a priority for the near future.
We are pretty much “over” evacuating. It’s not bad to get out of a schedule sometimes, but as often as we have been lately, it is starting to be extremely tiresome for us, our fur babies and our work schedules. It’s also costly.

I create in the car on a plastic tray lined with a drawer liner
Creating crafts keeps my mind calm as creating, in general, always has. If you ever find you mind wondering and you need it to stay in a positive wander state, creating crafts, cooking, working in a garden, meditation and more can help with that.
I had a lot of trauma knocking on my mind post Hurricane Ian as our experience with that was not fun at all. It took us a year to get our property back on track due to insurance and more and about 2 years to process the trauma. Many think Hurricanes are simply wind, but the flooding can be simply devastating to not only properties, but human and animal lives. You can read about our Hurricane Ian experience here.
Why You Should Create More
Did you know that creating is good for work/life balance, brings overall balance to your life and encourages feelings of joy? Read this article by Psychology Today about the importance of creativity. Anytime in my life when I’ve felt overwhelmed, sad, or anxious, creating by doing my hair, putting on makeup, baking/cooking or creating an art project has always helped me feel better.
Even if you don’t feel like you are a creative person, there is a vein of creativity within you. Maybe this project can help you feel more creative by trying it!
Now for the DIY ornament craft project. Here’s what you need to make a rhinestone and pearl holiday ornament:
Ornament Supplies with Links to Buy + Discount Code
Rhinestones and pearl sets in red and green colors (I order bulk packs from Amazon…the link is to Amazon. I also order from Temu and if ordering from Temu, use my code afe55197 or use this link to get 30% off for new users)
Clear Fillable Ornaments (mine were 2.36 inches and I got them on Amazon, but Walmart has them and Temu does too)
1.5” inch Red Velvet Ribbon (I got my raw edged velvet ribbon on Temu, but Amazon has it too and the link goes to Amazon)
Rhinestone trays in various sizes for holding the charms, rhinestones and pearls while crafting
Small towel to lay projects on as needed
Pointy cotton swabs for wiping away excess glue
Optional: Dual temp hot glue gun
How to:
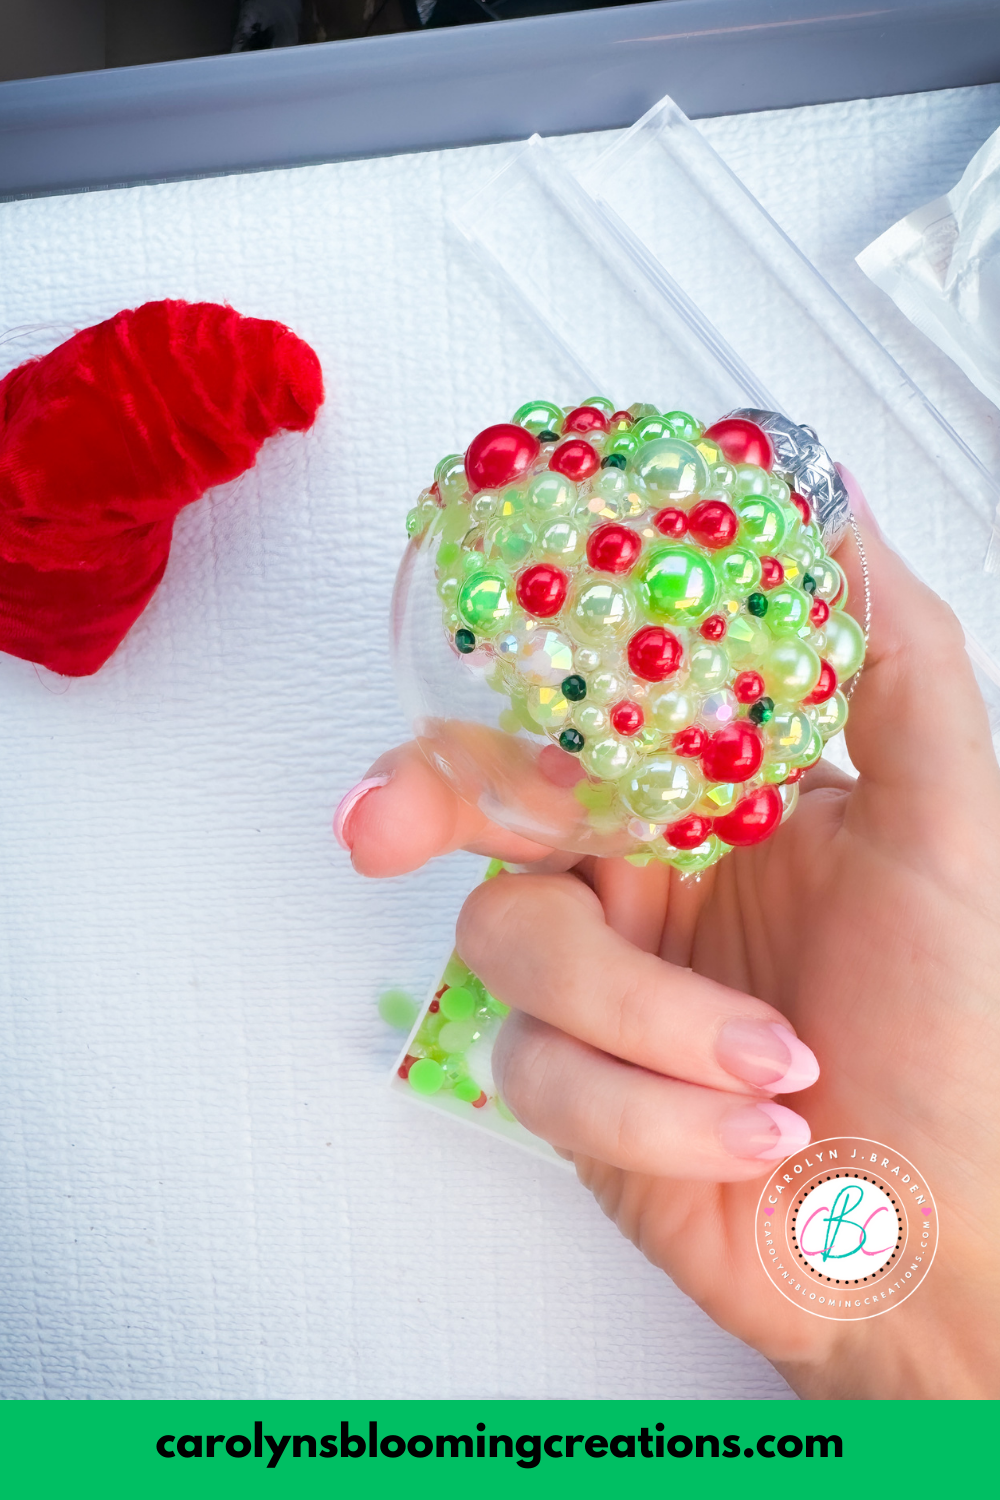
For this project, I simply added a bit of glue to the ornament and used my wax pencil (I had to use my fingers for some of the larger one) to pick up the rhinestones and pearl mix and added them one at a time until it was completely filled.

Craft supplies for the holiday ornament
I held onto the ornament and started at the top and worked my way around, adding glue then rhinestones and pearls. If you add too much glue, the rhinestones and pearls can slide, so be aware of this.
Apply small amounts of glue and work in small sections
For all rhinestones and pearl projects, be sure to add a thin layer of glue and if any oozes out, you can use a cotton swab to wipe the excess away.

I like the light and dark green colors with the red
I worked around the top of the ornament first, and by the time I was ready for the bottom, the glue had cured enough for me to flip it over gently and work on the other side.
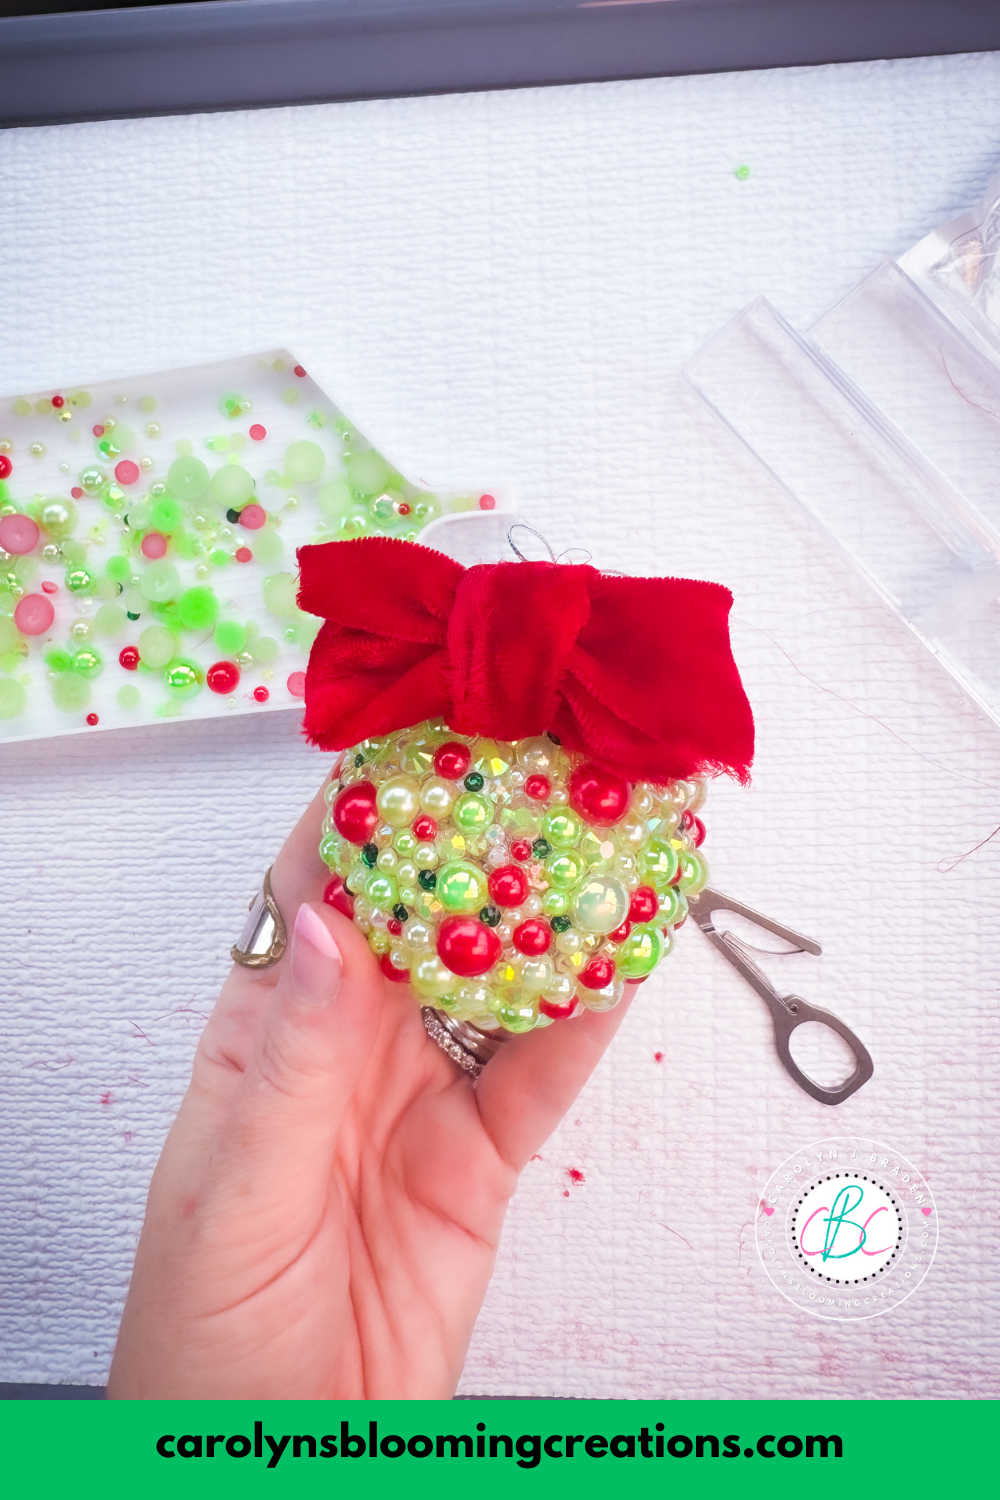
I tied on a raw edge velvet ribbon
I cut a piece of the raw edged velvet ribbon and tied it around the top of the ornament. It tied on well, but I may use a hot glue gun to make sure it stays put. I trimmed it with my scissors as needed.

On the road, evacuating Hurricane Milton
I always give my crafts 24 hours to fully dry before using them fully. Then it’s ready to hang on a Christmas tree!
If you love this idea, then we know you’ll love this one too: How to Make a Beachy Personalized Cricut Ornament Step by Step
Carolyn J. (C.J.) Braden is the owner of Carolyn’s Blooming Creations is a regular contributor and editor for CBC. She has been featured in numerous media publications such as InStyle Magazine, on HGTV, on Bustle.com, and more. She is the author of the books Georgia McMasters in Amethyst Lake Cemetery, How To Be Yourself: 3 Ways To Help You Being You, and the illustrator for the children’s book Bridging Connections. She is a former classroom teacher that now dedicates her life to educating others on how to live their most healthy, creative and happy life. Learn more about her visiting our About Us page.