


Carolyn J. Braden • 3 Minute Read

How to Make a Back To School Giant Friendship Bracelet Banner
I made a giant friendship bracelet banner for my cat’s 15th birthday and reused it for my own birthday celebration too. Then, one of my website readers asked how to turn it into a teacher name banner for back to school and this new take on an old project was born. I created this beaded banner tutorial using a kit I already had, repurposing some of the Styrofoam “beads”. Here’s how to make a back to school giant friendship bracelet banner.
The Former Teacher in Me
Being a former teacher, I remember the back to school time of year very well. Even into my 10th year of teaching, I still got excited to bring new ideas to my practice, loved decorating my bulletin boards and classroom (when I had one…being an art teacher, I was sometimes “art on a cart”).

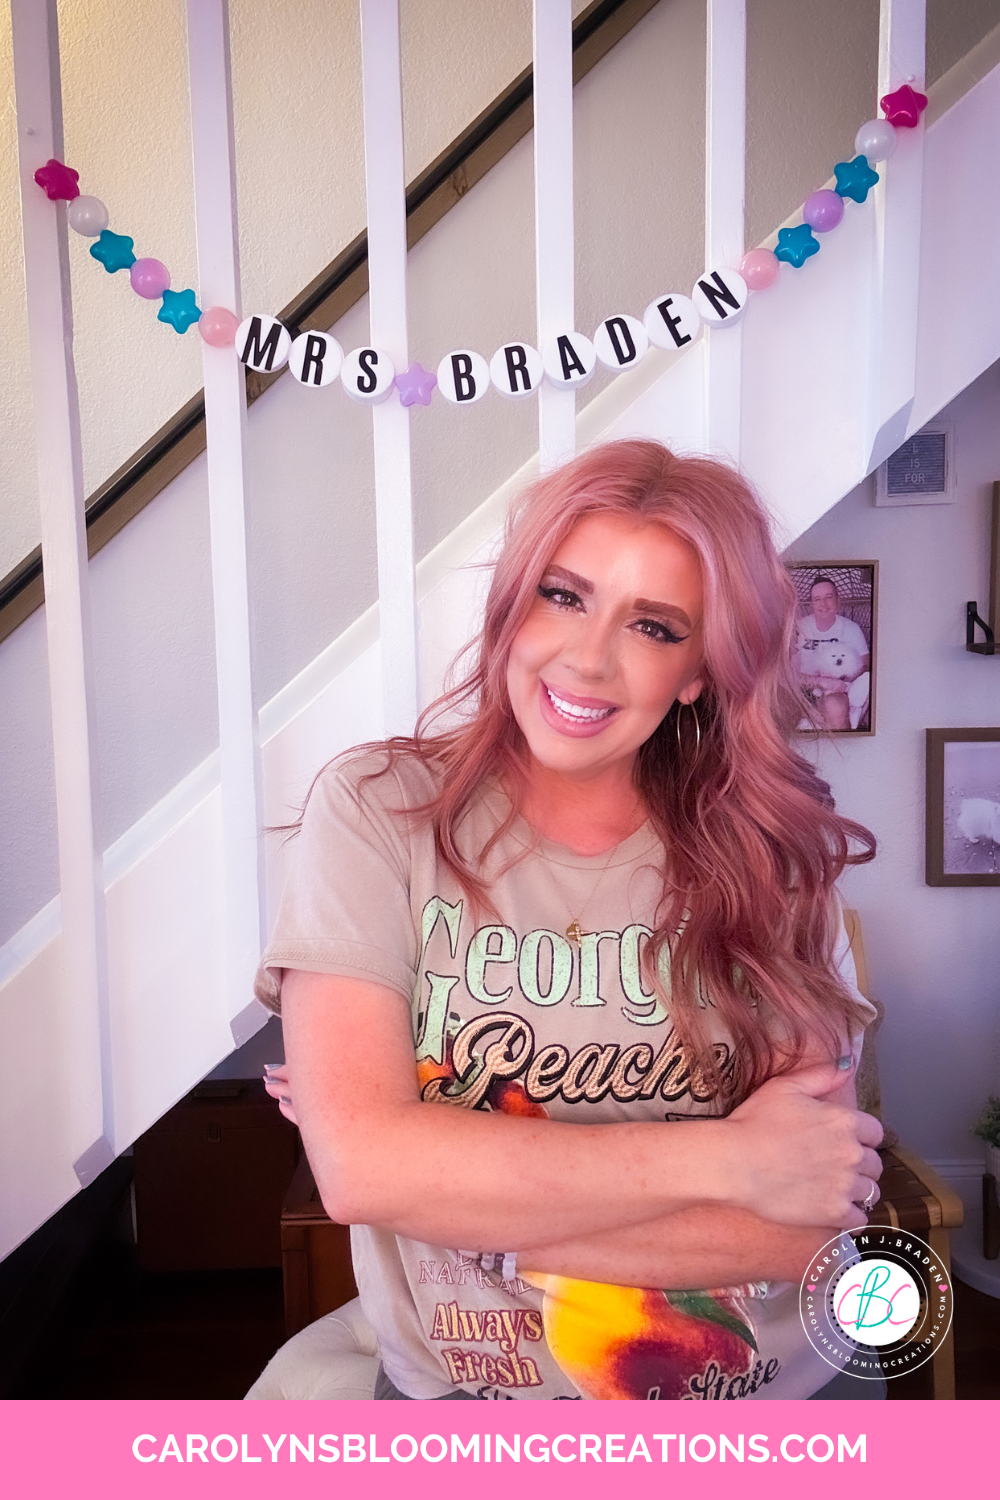
My finished teacher name banner
I admittedly even liked organizing for the new school year (just call me Monica from the TV show Friends…organizing is fun to me)! Seeing all my art supplies stocked, organized and ready to go for all the new art projects I was going to do with my students was a very satisfying thing for me. Here are some great ideas from Good Housekeeping for your classroom and home for the new school year. I love idea number 2 and have one in my home for when kids visit.
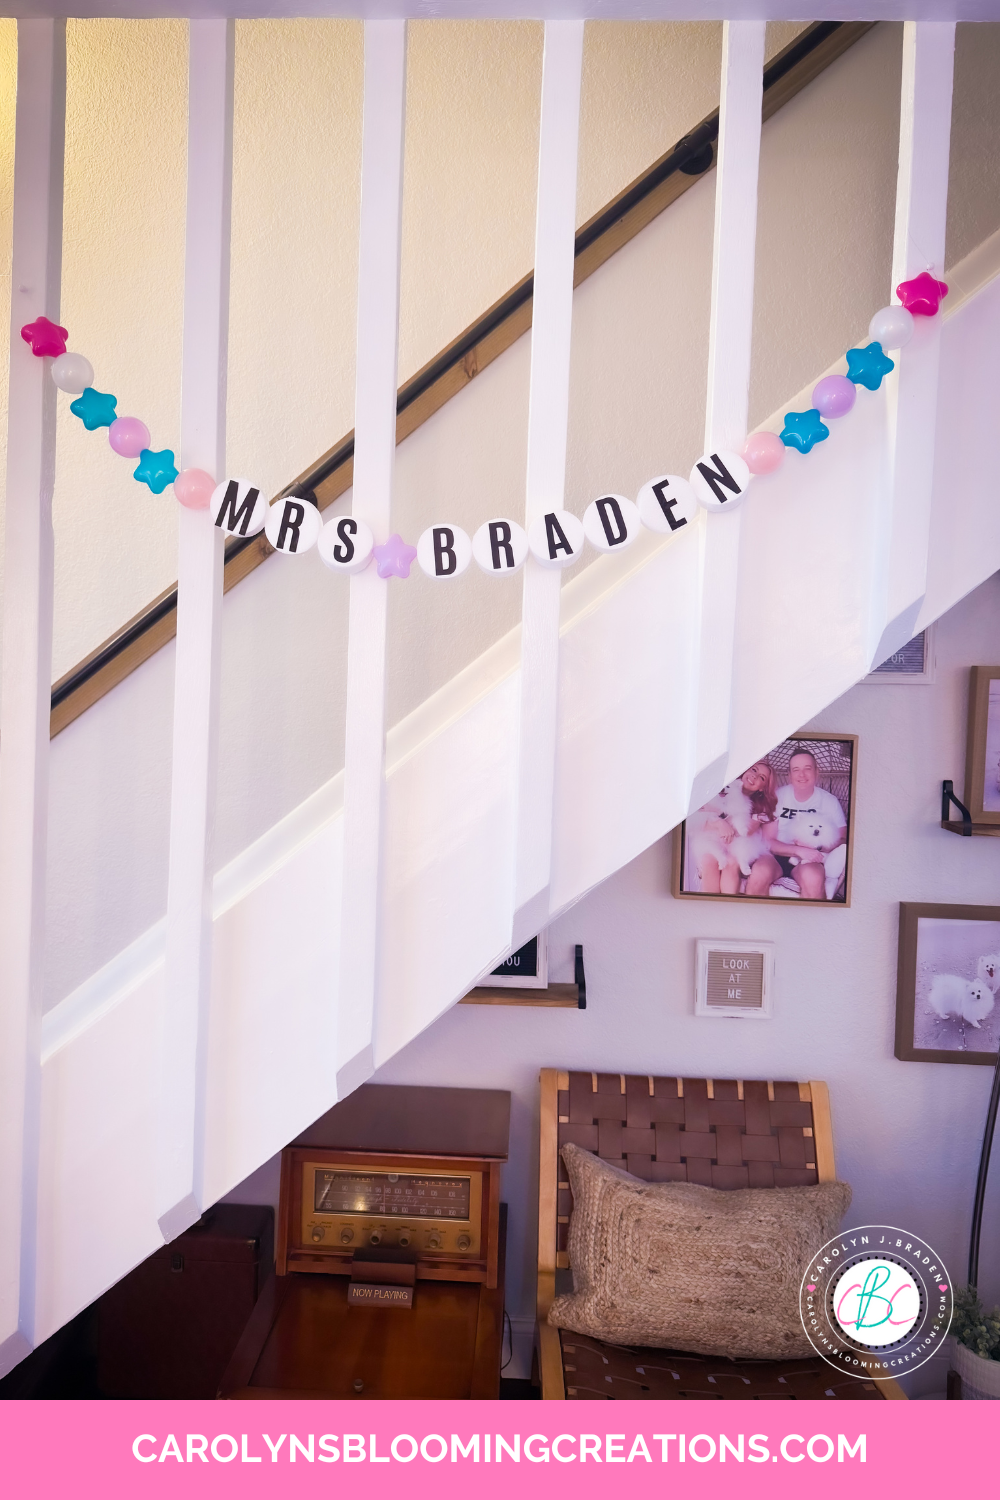
Test it by hanging it at home before taking it to your classroom
My Inspiration for Teacher and Parents and Bachelorettes
When one of my website readers asked to learn how to make a teacher friendship bracelet banner (thank you to my readers out there for your inspiration!), that back to school excitement vibe came right back to my mind and I was happy to help her make her idea come true with this tutorial. I think this name banner would be a great thing for teachers to make but I also think parents could make it for their kids.
You could put their name on it OR “happy back to school” or something to celebrate this new beginning. Celebrating little things like this mean BIG memories for kids and create adorable photo opportunities. Have them stand in front of the banner with a cute reusable chalkboard sign (like this one on Amazon) and you’ll have a beautiful photo memory to capture. I’ve even seen some people string a phrase like “MRS” with beads and wear it for a bachelorette party.
Reusing My Birthday Beaded Banner
I took the number “beads” I labeled in my Birthday Friendship Banner tutorial (see that tutorial here…I even included a way to add reusable numbers!) turned them onto the back side and reused them for this project.
See my 1-minute video tutorial for the birthday banner below or via my YouTube channel @carolynjbraden:
What I love about this banner is that you can reuse it many times. It came with extra string and lots of beads, so if you don’t mind using the same color scheme, it’s perfect for many uses. If the banner will be hung against a wall, using one side of the bead for one thing and the backside for another just makes sense if you like to save money.
My Tutorial + Tips and Tricks + Discount
Now for the tutorial. I learned a few things about putting this together and even stabbed my finger, so I’ll pass along my tips in this step-by-step tutorial to help others learn. Of course, the directions come with the kit, but there are always a few things that they leave out and being a former teacher, this drives me crazy!
You can source this giant friendship banner supplies from Amazon OR you can simply buy a kit. My kit came with ball pit balls in various shapes, Styrofoam discs, a long needle, fishing wire and the letters/numbers. After pricing all the supplies, it was cheaper to buy the kit.
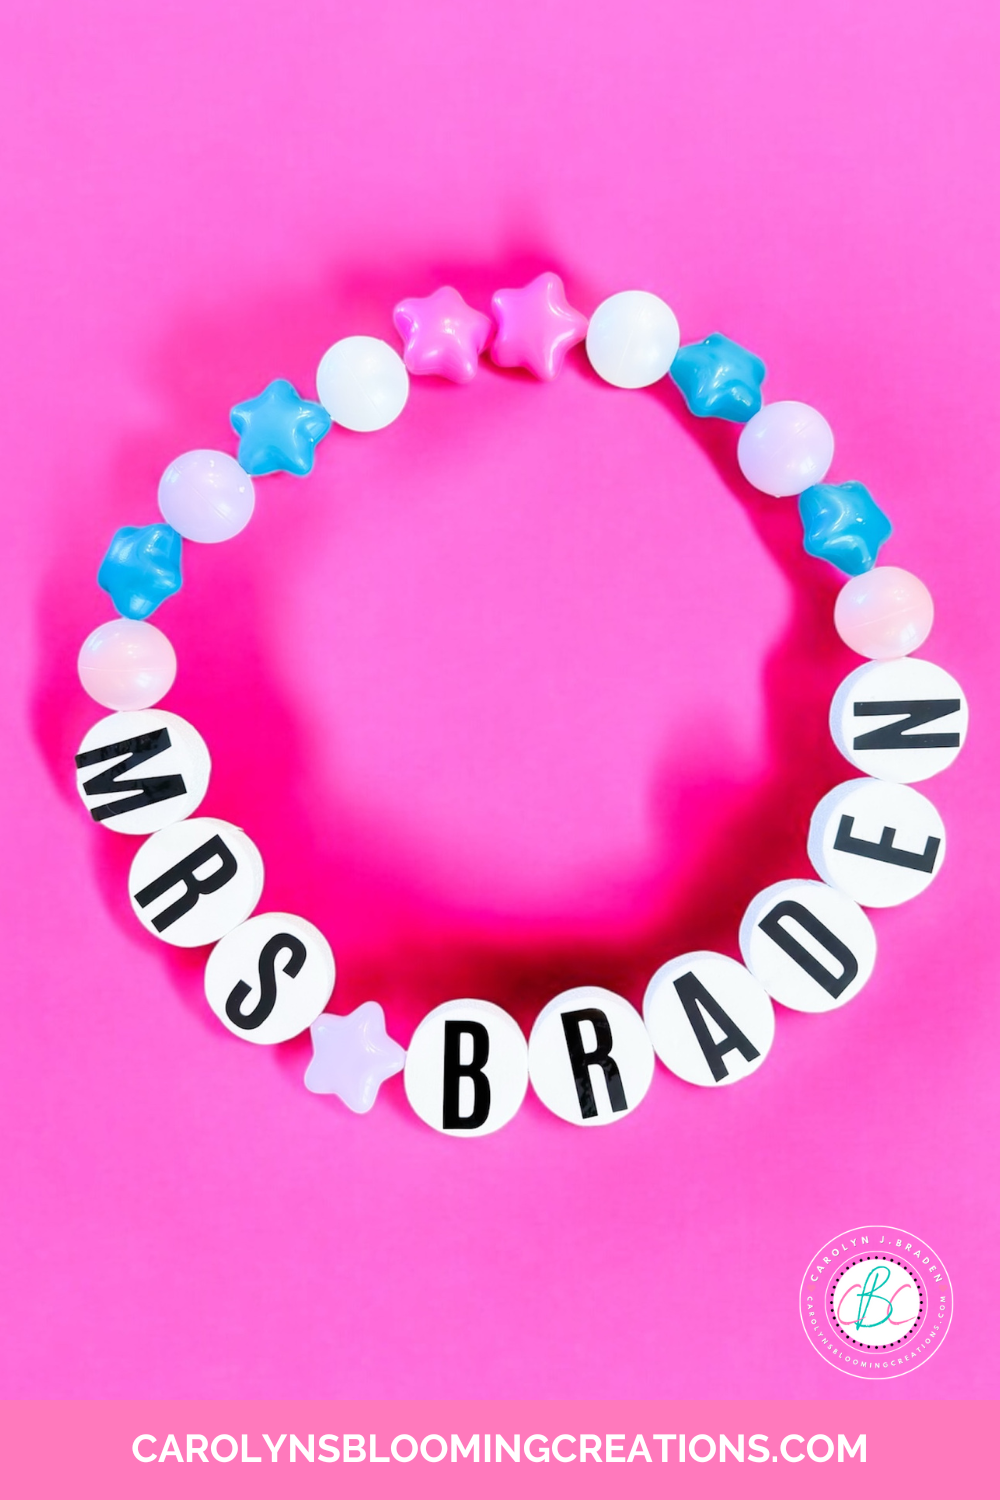
A giant friendship bracelet banner
Supply List
The kit I purchased was from Amazon for around $30 and you can get it here. It comes in several colors, including holiday colors too. Additionally, Walmart has a similar one that is paper (for birthdays) and already made up for around $11 and you can get it here. I prefer the ball pit banner as it will last forever and can be customized. The kit does not come with anything to hang this with, so I recommend push pins as it’s very lightweight and I included a link below.
Temu has a kit too and if you are a new Temu app user, you can use code afe55197 at checkout for 30% off or my link here.
Check out my 1-minute video tutorial for this project on my TikTok now, below, or via my YouTube channel @carolynjbraden!
If you want to source the products, you can buy them all separately to customize your colors more. Here are some Amazon links to the products you’ll need:

I made mine in pastel and bold aqua colors
How-To
Place the vinyl stickers onto the Styrofoam discs. I spelled out “MRS BRADEN” with mine, as that was what my students called me when I taught. You can spell out “HAPPY BACK TO SCHOOL” or your child’s name if doing this as a parent. I’ve seen “IN MY ELEMENTARY ERA” too, so if you have a Taylor Swift fan in your classroom or at home, this could be a cute idea and can be changed according to the “era” they are in.

My foam letter beads are ready to be strung
Lay out your design. I wanted this version of a banner to be hung in one banner instead of two like I did for my “HAPPY BIRTHDAY” banner. I placed the letters MRS BRADEN out onto the floor and placed matching “beads” on either side of the word, placing one in the center to divide out the two “words”.

Knotting the fishing wire
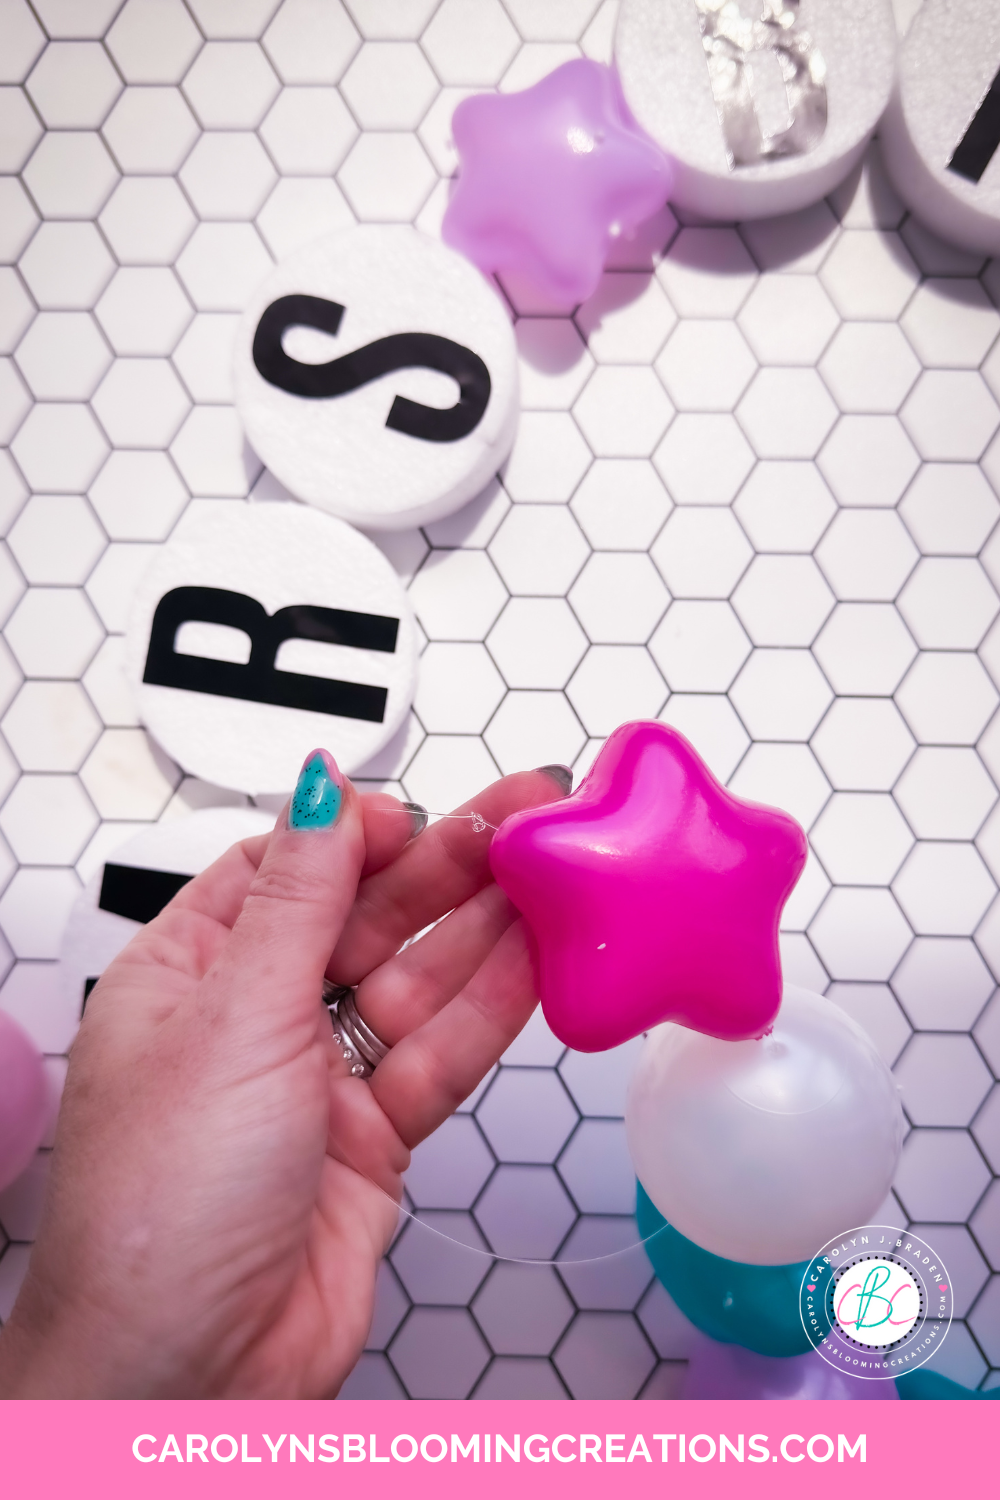
Next, I ran a piece of fishing wire through the needle’s eye and tied it twice. I didn’t cut it off yet….I just let the wire stay on the spool and pulled out what I needed as I went.

The needle is sharp, so be careful
I started with the “beads” first and put the needle through the last ball on one side and pushed it slowly through the other side.
I grabbed the next ball in line and repeated the needle stringing process. The needle is sharp so it can pierce the ball, so be careful. The balls can “deflate” a bit at first, but if you just push on them a bit, they “reflate” or I also learned to use the tip of the needle to pull the dent back up. This works if you put the needle into the hole and pull up a bit.
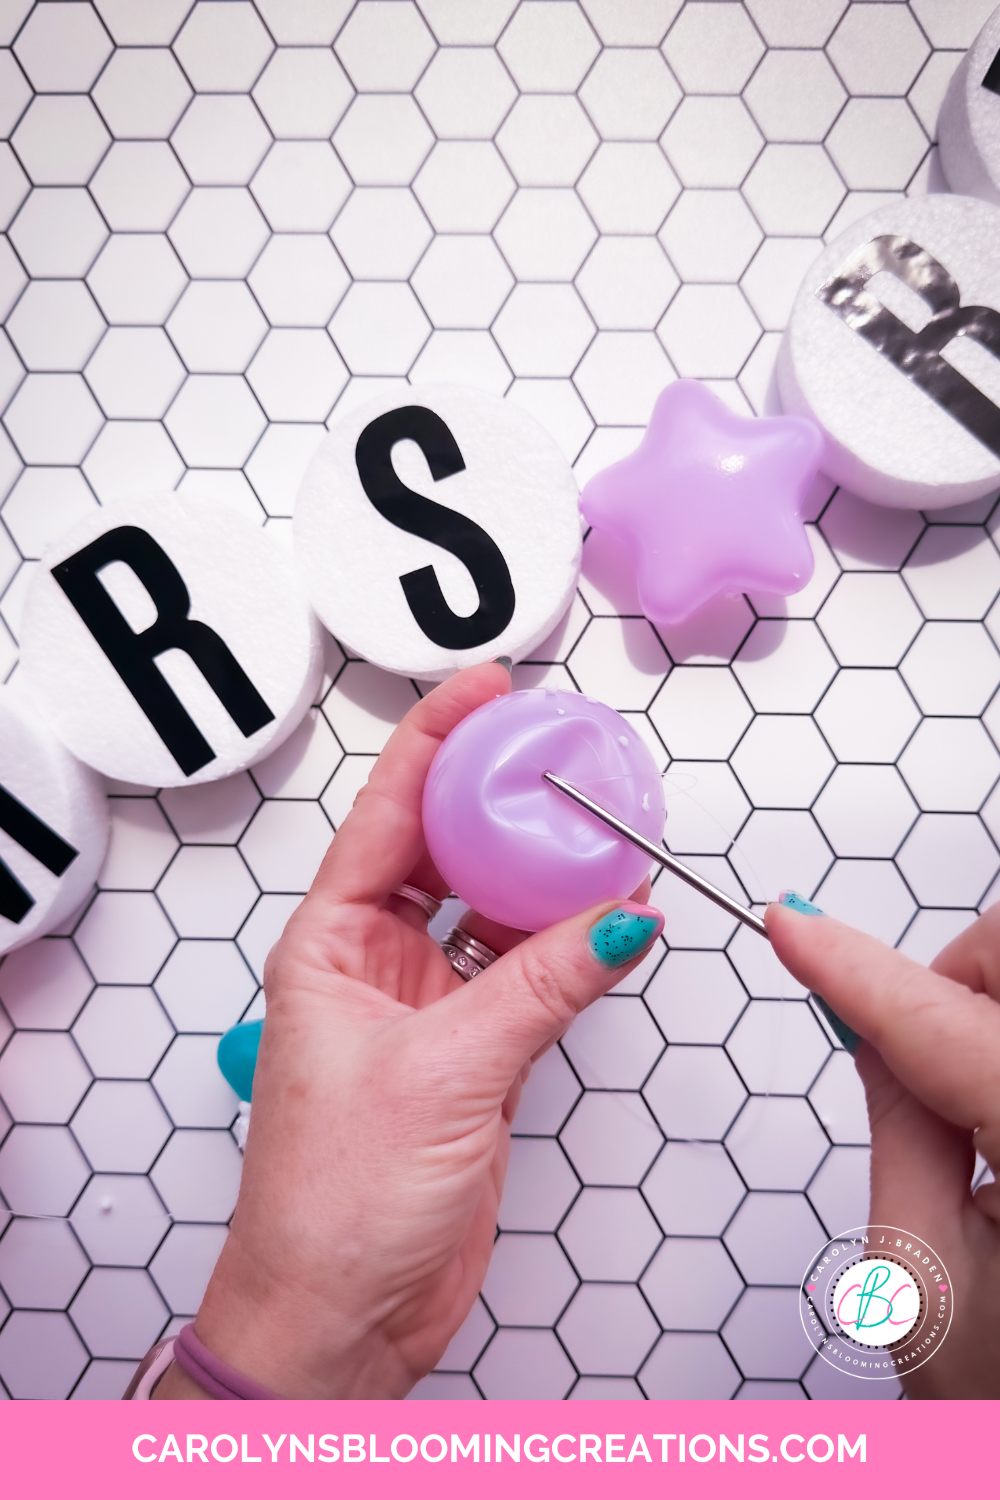
Use the needle to pull out “dents”
Once I got some balls on the wire, I started pushing the needle into the Styrofoam discs, starting with the “N” in BRADEN. I went backwards and this worked best for me.

Carefully string the styrofoam beads on
Place the needle into the side of the Styrofoam disc and very carefully slide it out the other side. If you aren’t careful, you’ll stick it through the front of the disc, which I did once. Luckily, Styrofoam is a bit forgiving and I pulled the needle out and was successful the second time.
Once I strung the name “BRADEN”, I strung a star “bead” to divide up my name, then strung MRS and then I strung some more balls or “beads”. If my string fell off my needle as I strung, I just put it back on and continued.
Knot the ends to secure the beads
I tied some knots in the ends of the wire to hold the beads on the wire, cut it off and took it to my staircase to see what it would look like visually.
I used push pins to hang the banner. I wiggled the push pins into the knots I made at the end of each banner and it hung up on my staircase.
So thankful to my readers for this tutorial idea!
Overall, it’s very simple and cute and has many design possibilities. I think this would be super cute as décor in kid’s room with their name on it or a cute phrase.
If you loved this article, then we know you’ll love this one too: Why You Need Polaroid Camera Instant Photo Memories
Carolyn J. Braden is the owner of Carolyn’s Blooming Creations is a regular contributor and editor for CBC. She has been featured in numerous media publications such as InStyle Magazine, on HGTV, on Bustle.com, and more. She is the author of the books Georgia McMasters in Amethyst Lake Cemetery, How To Be Yourself: 3 Ways To Help You Being You, and the illustrator for the children’s book Bridging Connections. She is a former classroom teacher that now dedicates her life to educating others on how to live their most healthy, creative and happy life. Learn more about her visiting our About Us page.