


Carolyn J. Braden • 3 Minute Read

How to Make 2 Ingredient Shaving Cream Puffy Snow Paint
When I was an art teacher, I used to have my kindergarten students use shaving cream to do “magic paper”. It was fun to draw in and got my tables really, really clean! We used shaving cream to learn about color mixing and we used it to make puffy snow paint. Here’s my easy and quick puffy snow paint tutorial. It reminds me of puffy paint or puff paint, something I used a lot in the 1980’s!
Shaving Cream “Magic Paper”
If I intrigued you with “magic paper”, here’s what I did. I put some shaving cream on my art tables…one little puff in front of each kinder student. I had them lightly pat and smooth the puff of shaving cream to make a piece of “paper”. I told them it was magic because if they pressed too hard, it would disappear. They loved this and most did it exactly as I asked.
Then I went to the chalkboard and put my own shaving cream “magic paper” on the board (it didn’t hurt it). Then I instructed kids to use their finger to draw the shapes like I did. It was basically a guided drawing that taught them how to follow my drawing instructions and it helped them identify how certain shapes could be put together to form a drawing.
For example, I’d draw three circles, one on top of another, varying the sizes, then I’d have the kids figure out what it was (a snowman). Once they figured it out, they got to add the snowman details. Sometimes I’d have them do magic paper before doing drawings on real paper. That’s how I’d teach drawing a snowman before doing puffy snow paintings like the one I made for this tutorial.

My puffy snow paint art, 2 days after painting
Shaving Cream Color Mixing + Pudding
You can add a drop of food coloring to a bowl filled with a bit of shaving cream to make colorful shaving cream. I did this too as an art teacher with my students. We made red, blue and yellow, then mixed some of the colors together to make new ones. This teaches color mixing in an easy and fun way.
See another great “snow day” craft, my “snow day sunglasses”, below in my 1-minute video or watch it via my YouTube channel @carolynjbraden:
We also did it with pudding. If you add food coloring to WHITE CHOCOLATE pudding (it has to be white chocolate to get a white pudding that you can dye and mix and you can get it here at Walmart for $1.54) you can mix the colors to get new ones.
I always had them wash their hands first (or I used unscented baby wipes to clean their hands with the help of my kinder assistant that thankfully usually stuck around during my lessons) then I allowed them to mix pudding colors on paper plates. Then they got to lick their hands when we were done and they loved it!
Shaving Cream Puffy Paint
Now for the tutorial! Yes, kids will love this but honestly, I love painting with puffy snow paint as an adult. It’s weirdly calming and relaxing. If you are on a “snow craft” kick, try these mason jar snow globes too from Better Homes & Gardens.
See me make the puffy snow paint in my 1-minute video tutorial below or via my YouTube channel @carolynjbraden:
Here’s what you need to make puffy snow paint. If you shop Temu, use code afe55197 to get 30% off at checkout (for new app users) or use my link to shop:
Shaving Cream (I have not tested with gel so I recommend just using basic white shaving cream and you can get it via Amazon or Walmart or your local store)
Chilled School Glue (any white school glue will work, I used Elmer’s White School Glue and got it via Walmart, but you can get it on Amazon too…to chill it, I put it in the refrigerator overnight and then let it sit out for about 30 minutes before using….you DO NOT HAVE to chill it….it just helps puff up the paint a bit more while painting)
Optional:
Glitter (You do not have to use this, I just did to add a bit of sparkle…I used iridescent glitter and you can get it via Amazon or Walmart or a hobby/craft store)
Cookie Cutters (Get a letter set on Amazon or Walmart or Temu for $2.27)
Sharpie or black marker (Set of 5, $4.87, Amazon)
Small black flatback pearls (Amazon, came with a wax pencil)
Small orange jelly flatback crystals ($5.88, Amazon)
Bowl for mixing
Measuring cup
Something to stir with

What I used to make snow paint
How-To:
Mix equal amounts of glue and shaving cream in a bowl and stir to combine. For my snowman art project, I used about a 1/4 cup glue and 1/4 cup shaving cream. I had a bit of paint leftover, so if you are doing this with multiple adults or kids, definitely make a larger batch.

Mix equal parts glue and shaving cream
You can add glitter at this point or you can wait and sprinkle it on your painting. I found adding it early on was a little pointless as it kind of got buried in the puffy paint.

First I added a snow covered ground
I first used my art brush to paint onto some card stock. The paint is very fluffy and works best if you pile it on your paper a bit more than you would regular paint. I first added a wavy “ground” at the bottom of my paper.

Painting on the snowman
Next, I painted on the snowman. Again, piling it on makes it look better.

Adding snow paint letters
Then I placed cookie cutters on my cardstock and dabbed some puffy snow paint into the cookie cutter. After raising the cookie cutter up, the letter was on my paper, and I added more puffy snow paint to the letter to make it puff up more.

Adding snow paint snowflakes
Then I dabbed on some “snow” with my brush and used a small art brush to spread it out into little snowflakes.

Adding several orange crystals for a carrot nose
While the puffy snow paint was still wet, I used a wax tip pencil to add black flatback pearls and orange jelly flatback crystals to make a snowman face.
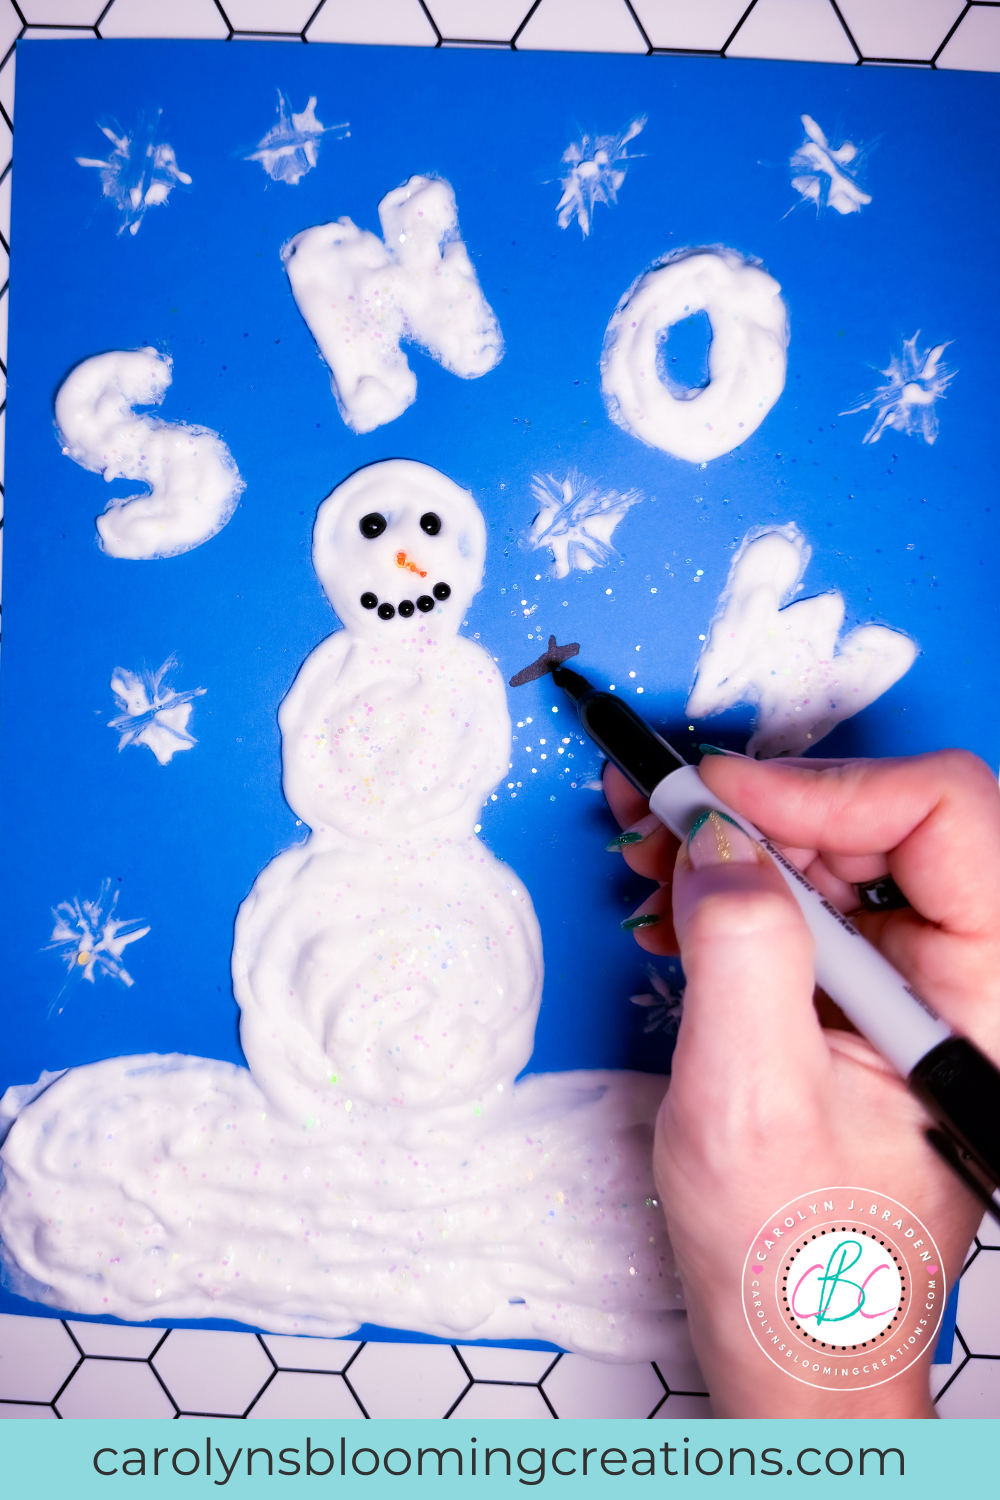
Adding snowman stick arms
Then I used my black marker to make the snowman arms and sprinkled on some iridescent glitter all over the puffy snow paint.

My completed snow paint art
I let it dry overnight and the next day, it was still very puffy and touchable. After almost a week later, it was still puffy (it deflated just a bit as the water evaporated out), but it still looks great!
If you loved this article, then we know you’ll love this one too: How to Make Cookie Cutter Glue Stamp Cards
Carolyn J. Braden is the owner of Carolyn’s Blooming Creations is a regular contributor and editor for CBC. She has been featured in numerous media publications such as InStyle Magazine, on HGTV, on Bustle.com, and more. She is the author of the books Georgia McMasters in Amethyst Lake Cemetery, How To Be Yourself: 3 Ways To Help You Being You, and the illustrator for the children’s book Bridging Connections. She is a former classroom teacher that now dedicates her life to educating others on how to live their most healthy, creative and happy life. Learn more about her visiting our About Us page.