


Carolyn J. Braden • 4 Minute Read
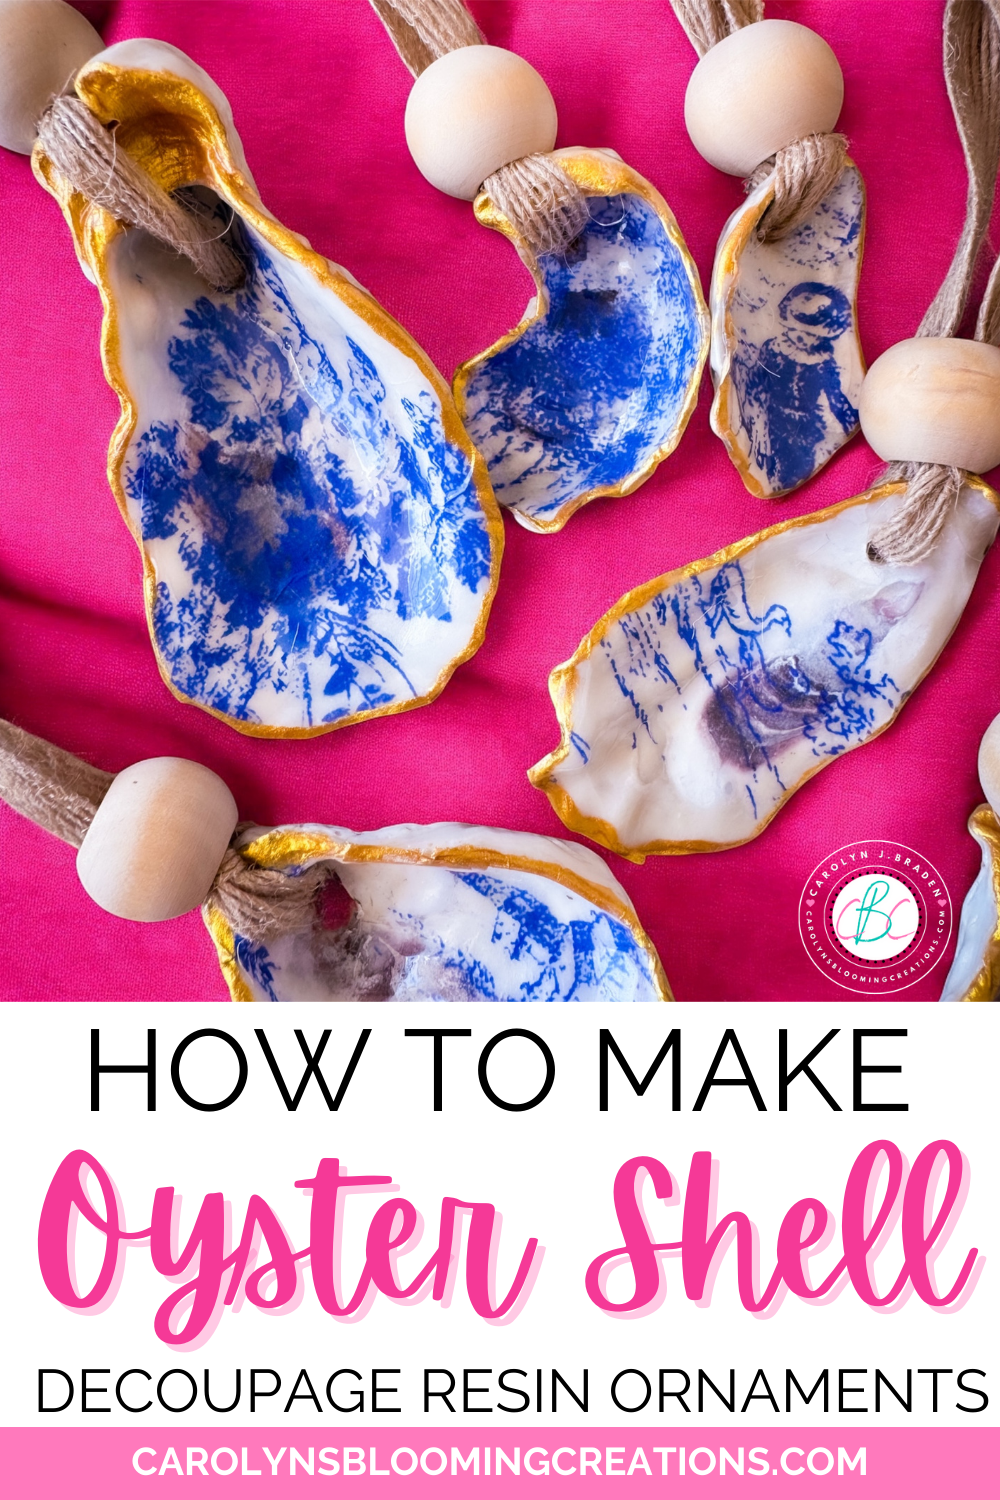
How to Make Oyster Shell Decoupage Resin Sealed Ornaments
Turn simple oyster shells into gorgeous coastal-inspired ornaments with this easy decoupage and resin DIY! After several experiments with different materials, I made mine with decorative tissue paper, Mod Podge, touch of gold paint and resin.
You can create stunning handmade pieces perfect for Christmas, gifts, or year-round coastal décor. These oyster shell ornaments are budget-friendly, beginner-friendly, and so beautiful on the tree! Read on to learn how to make this easy coastal craft.
I love how they turned out!
Inspiration
The cutest porcelain looking oyster ornaments, name tags and more kept showing up in my Pinterest feed to buy from sellers on Etsy. They looked easy to make and with the abundance of seashells on Sanibel Island (where I currently live) I gathered some empty oyster shells and began to experiment.
Tissue Paper or Napkins?
Once I found the beautiful toile inspired tissue paper on Amazon, I knew it would be perfect for these ornaments. I’ve seen decoupage done with numerous things, and since I didn’t want to sand the shells, I decided to use a lightweight tissue paper to prevent as many wrinkles as possible.
You can use what works for you, but tissue paper was what I wanted to also complement the delicate nature of the shells AND so you could see a bit of the shell through the tissue paper, I chose a light print.
Seashell ornament DIY
Tips & Variations
Use Christmas napkins or winter themed tissue paper for holiday ornaments.
Add tiny embellishments (pearls, rhinestones) to enhance the design.
Instead of hanging, you can make them as trinket dishes (just skip the hole and the ribbon, glue wood beads on for “feet”).

My DIY driftwood tree
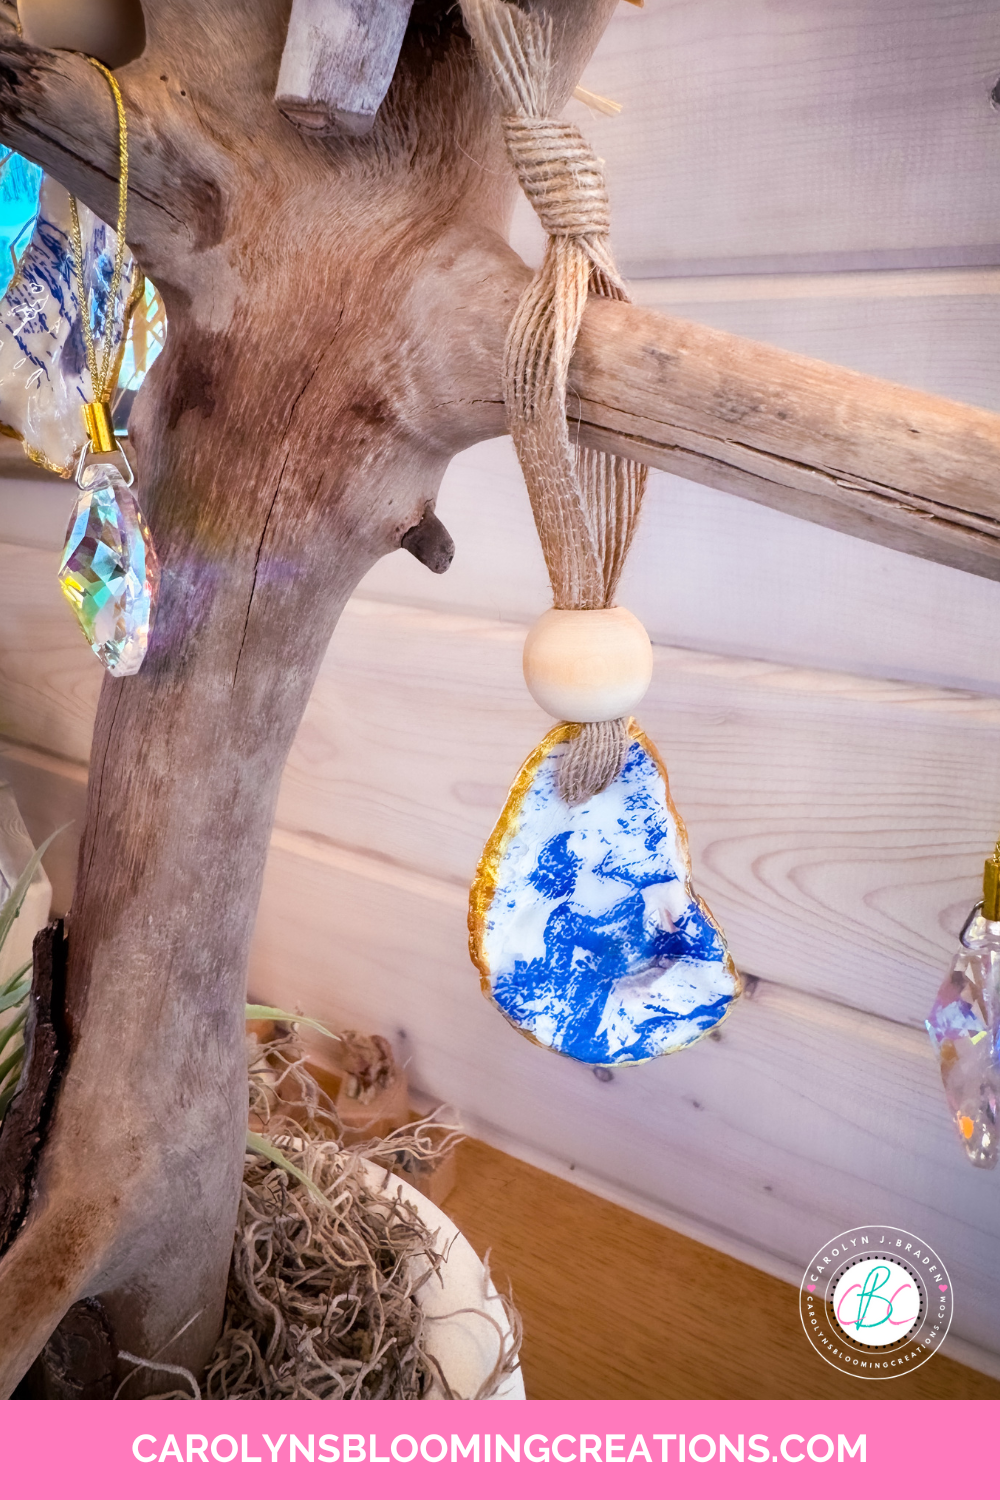
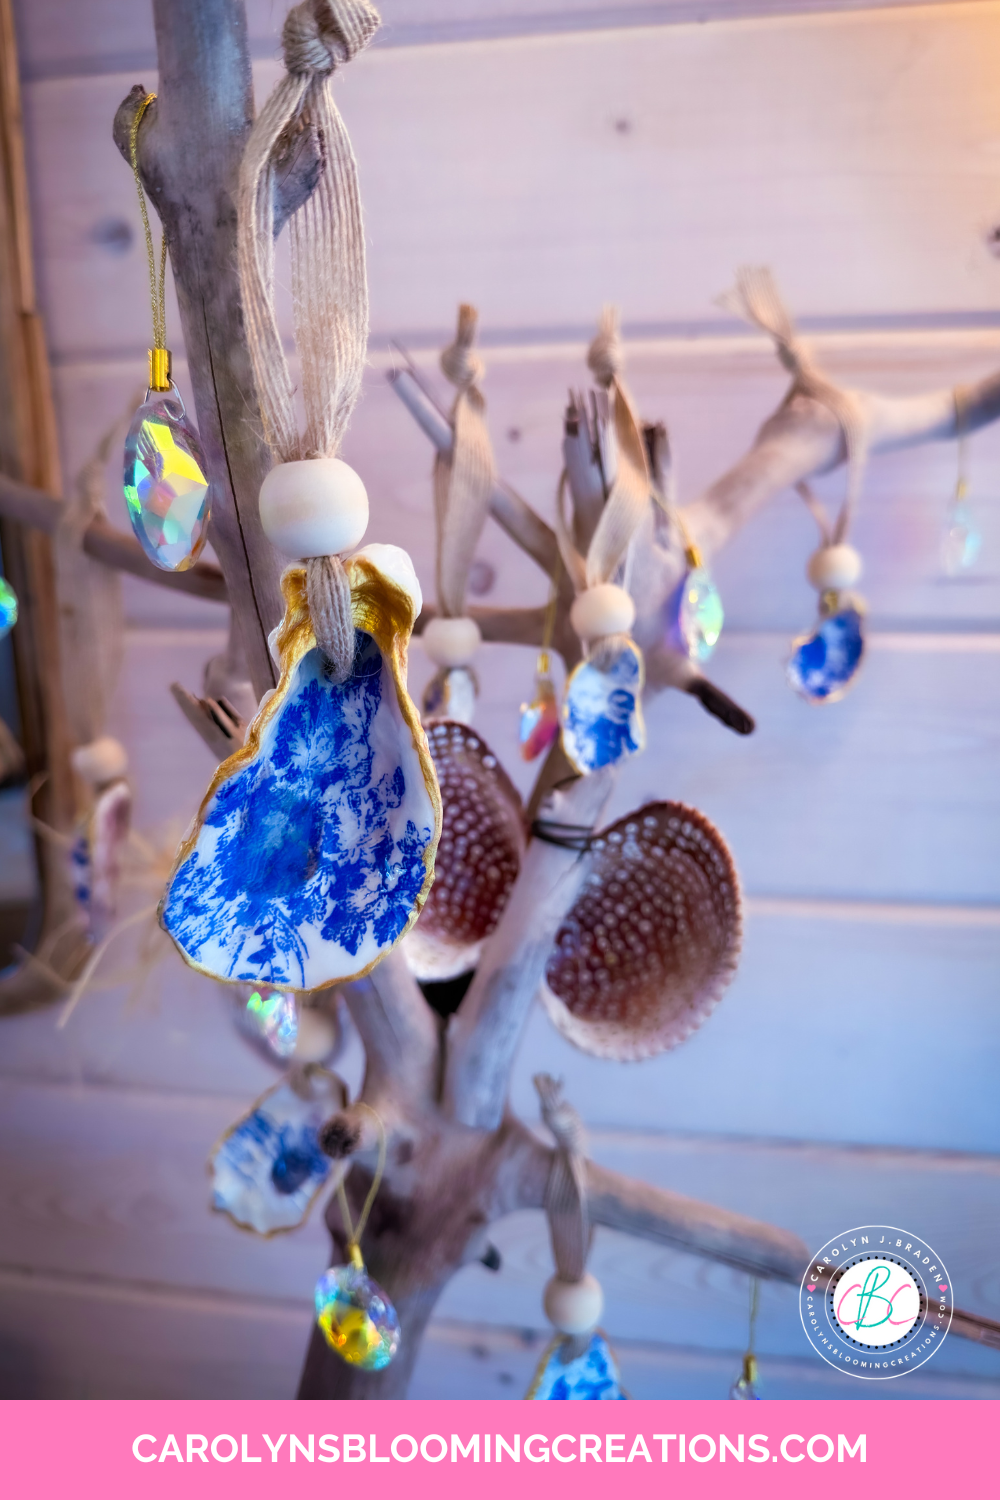
My Year-Round Ornament Tree
I made a driftwood year-round tree to hang various ornaments on. It’s the cutest coastal décor accent for my entryway table. I change out DIY ornaments as the seasons change. Here’s the tutorial for the tree (it’s SUPER easy!) or see it below in my YouTube video or via my channel @carolynjbraden:
See my butterfly and driftwood ornament that you can see on my driftwood tree here.
How to Make Oyster Shell Decoupage Resin Sealed Ornaments
Now for the tutorial! These ornaments are easy but do require some special tools IF making the ornament version. They are worth it! Oyster shell decoupage ornaments are such a beautiful and coastal-inspired craft project.
Watch me make these oyster shell ornaments in my 1-minute video below or via my YouTube channel @carolynjbraden:
Here’s a step-by-step guide you can follow to make them. My buying links either link out to Amazon, Walmart or Temu, based on where I bought my supplies. If shopping Temu, use code afe5517 or my link for 30% off…for new app users.
Materials You’ll Need
Clean oyster shell halves, any size will work, mine were each under 5 or 6 inches for this project (Amazon has some if you don’t live near a beach or Temu does too)
Decorative napkins, tissue paper, or thin decoupage paper (I used this lightweight French toile tissue paper from Amazon)
Rotary tool for making holes in shells (you DO NOT have to turn these into ornaments….a decoupaged shell looks beautiful in a plant, on a desk or table or anywhere!)
Safety glasses and something to use the rotary tool on IF turning these into ornaments
Mod Podge (matte or gloss)
Resin (you DO NOT have to resin seal these…the resin just makes them look very professional and super shiny…you could also use Mod Podge to seal or this acrylic seal spray)
UV Light (if resin sealing)
Small craft brush (for resin)
Foam craft brush (for Mod Podge)
Sharp scissors
Gold (or metallic) acrylic paint or gold paint pen and small detail brush (optional, for edges)
Ribbon or twine (for hanging)
1” Wood Beads with wide holes
Toile DIY oyster shell ornaments
Prepare the Oyster Shells
Wash shells thoroughly to remove any dirt or residue. Let them dry completely. If the inside is rough, you can lightly sand it for smoother adhesion.
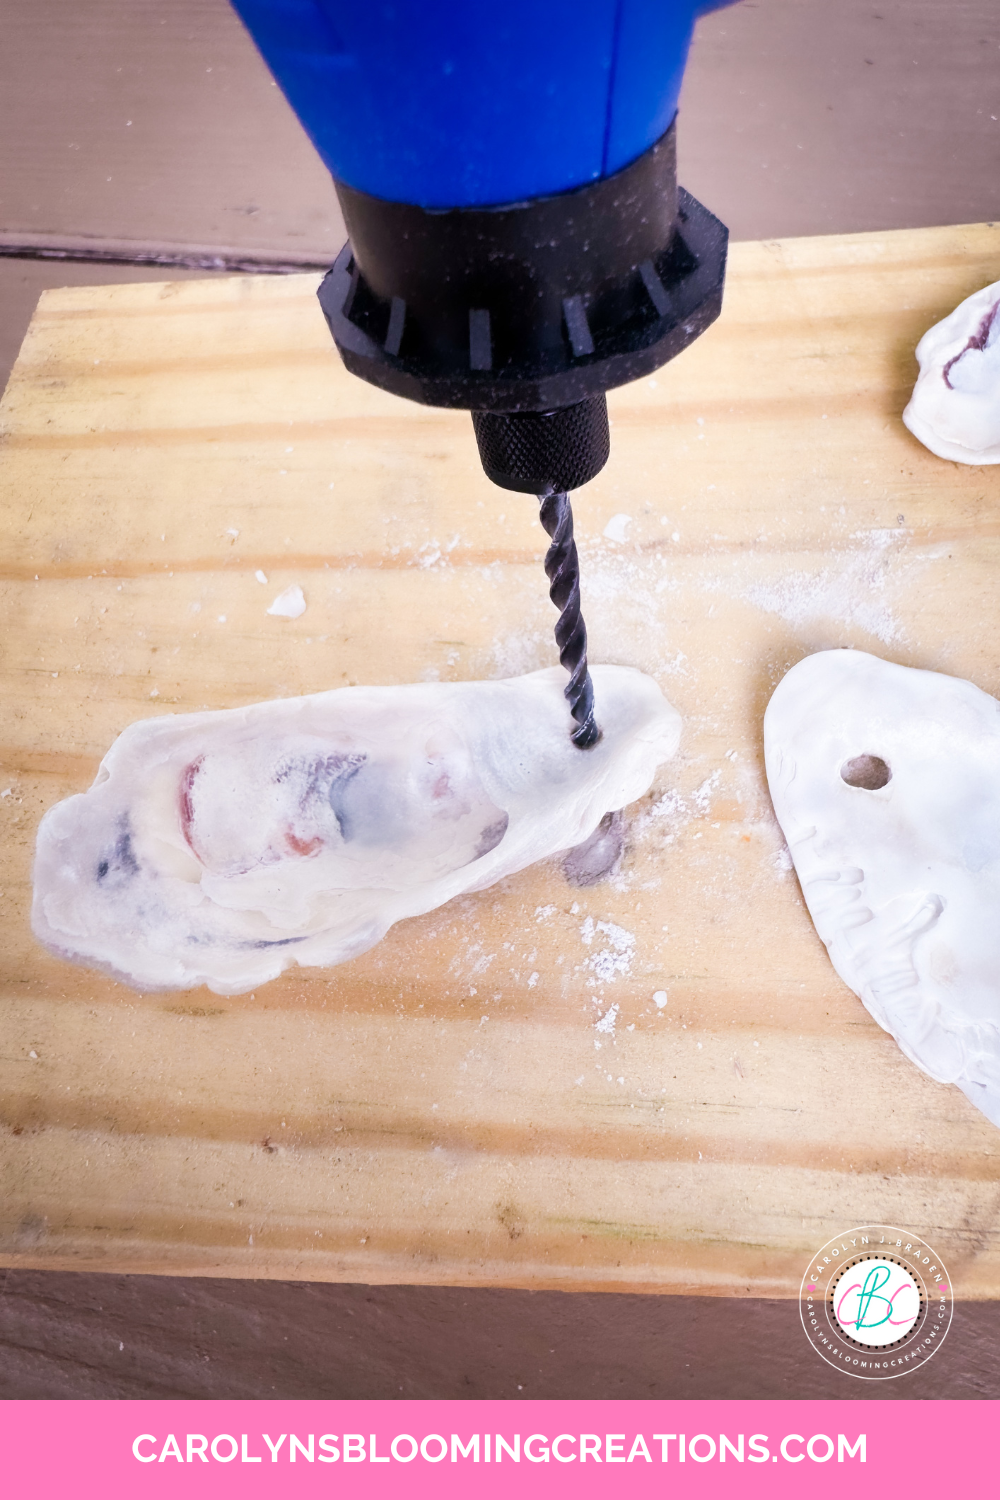
Drilling holes into oyster shells
Drill Holes
Place your safety glasses on, place a drill bit into the rotary tool and place the shell on a SAFE work surface or a piece of wood. I taped mine a bit using painters’ tape at the top to prevent splits and drilled a hole. I also drilled without the tape, and it worked too, but I do believe the tape helped my bit not slip.
I drilled a hole into each oyster shell, going slow and in short increments to not burn the tape or anything else. I broke one, but was successful in the rest. Dust off or rinse off any residue and remove any tape.
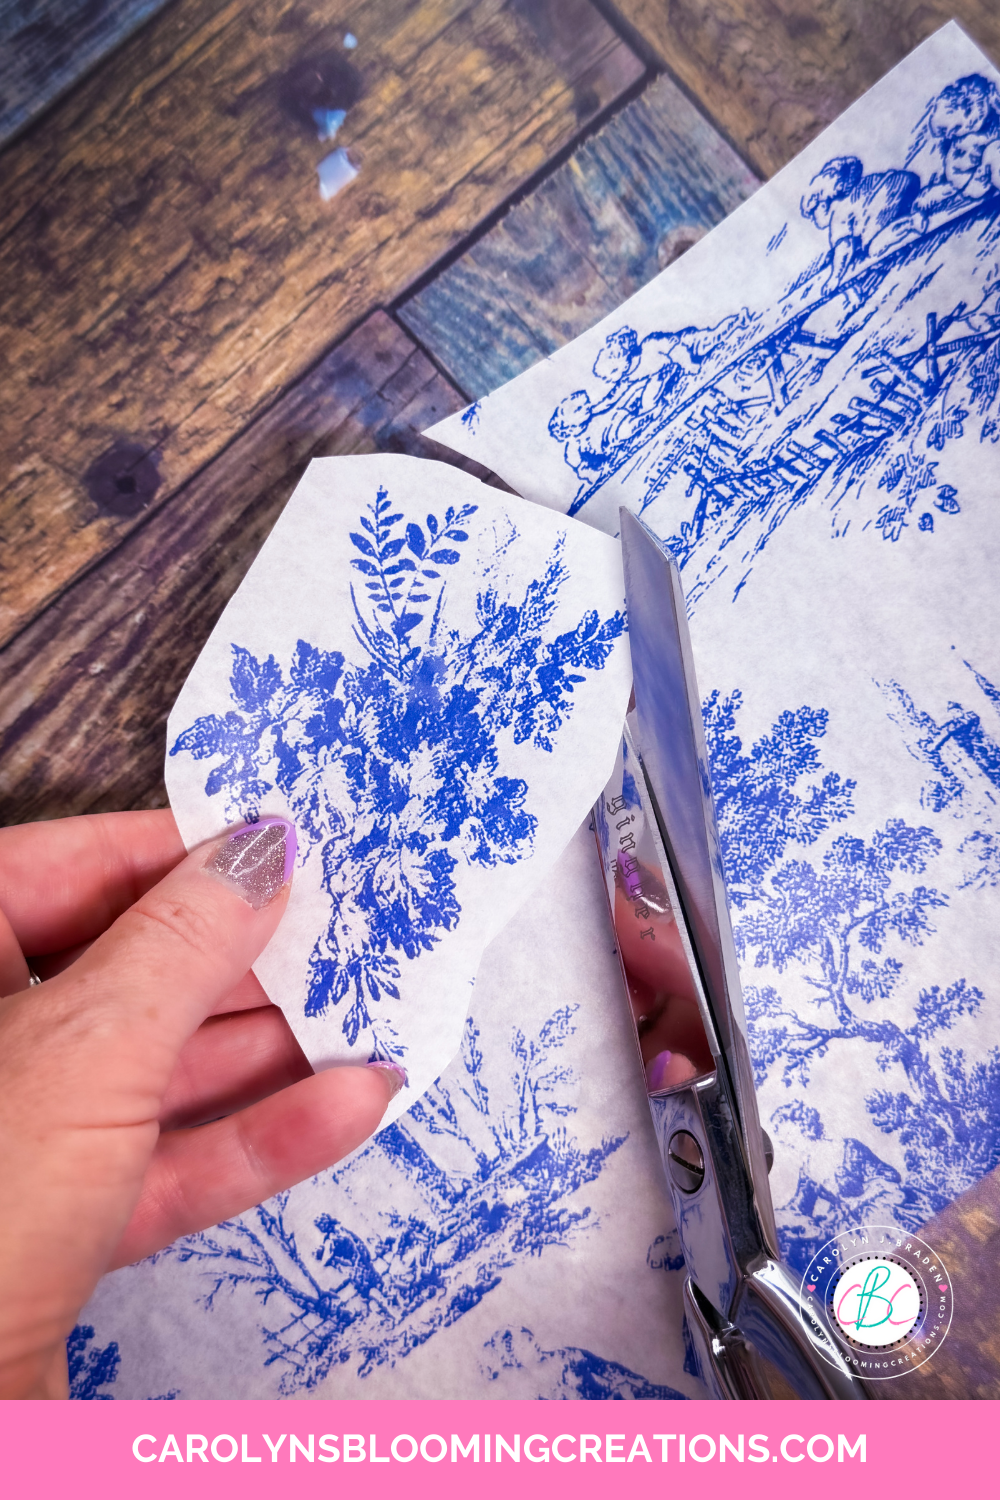
Cut out your design
Choose Your Design
Separate your tissue paper or napkins (most napkins are 2–3 ply; use just the top printed layer).

Applying the Mod Podge
Cut or tear out a design that fits the inside of the shell (floral, coastal, holiday, etc.). It’s okay if it’s a little too big, as you will trim it.

Lightly press the tissue paper or napkin onto the Mod Podge
Apply Mod Podge
Brush a thin, even coat of Mod Podge inside the oyster shell. Carefully place the napkin/tissue design into the shell, smoothing gently with your fingers. It can tear, so use a gentle touch to smooth out wrinkles. A rubber cement would also work in lieu of Mod Podge.
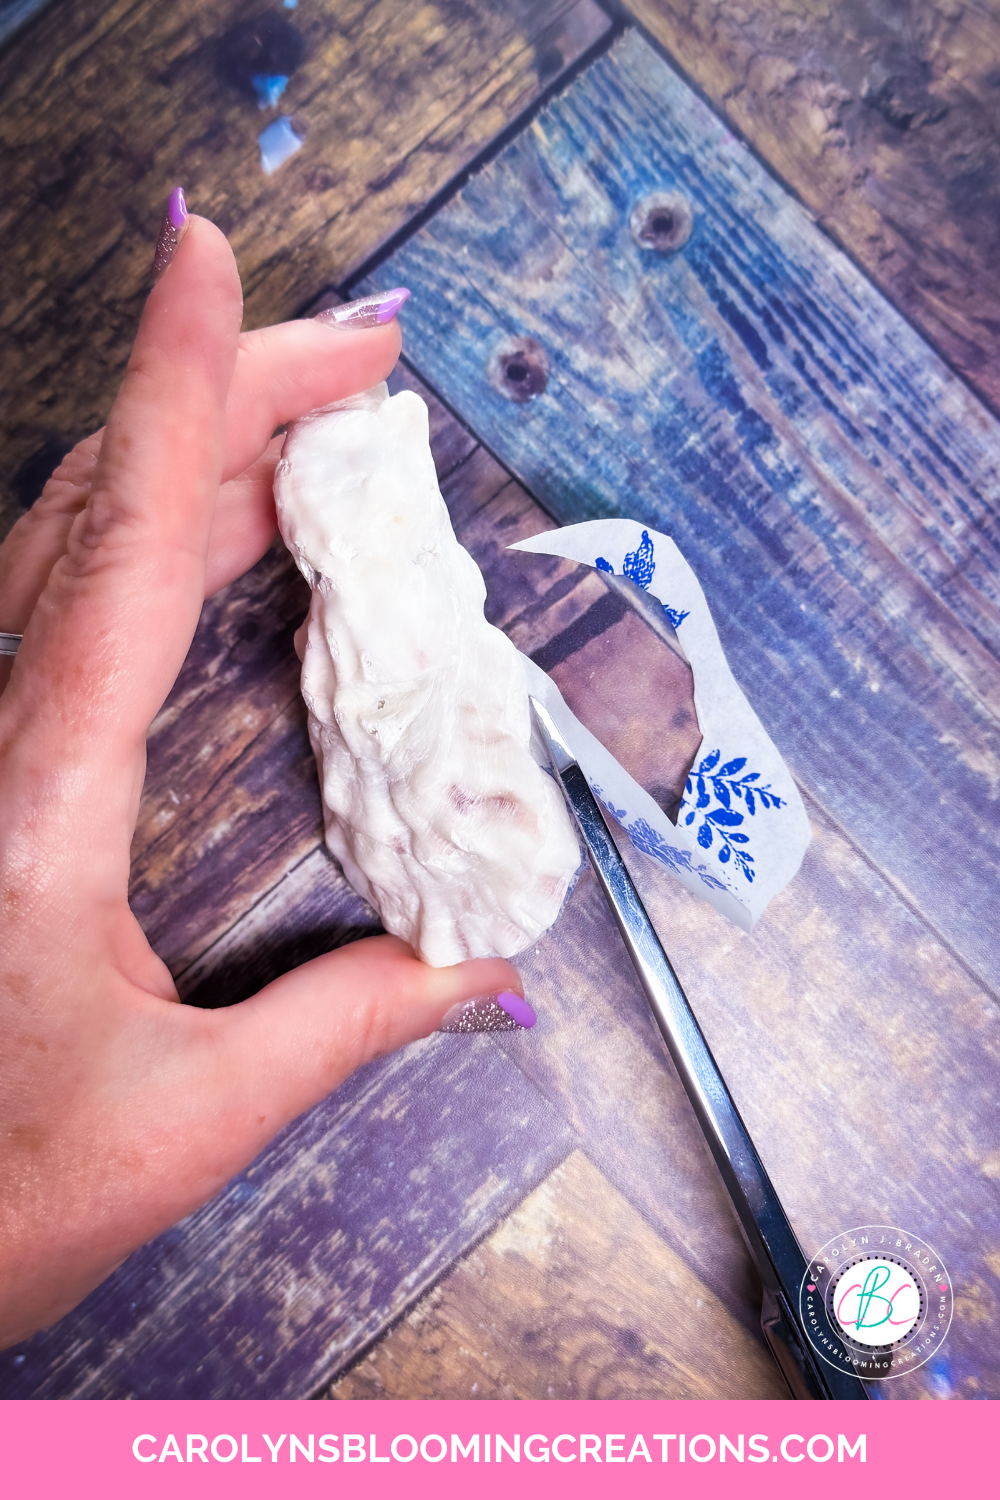
Trimming the tissue paper
Trim the excess tissue paper with your scissors, following the curve of the shell.
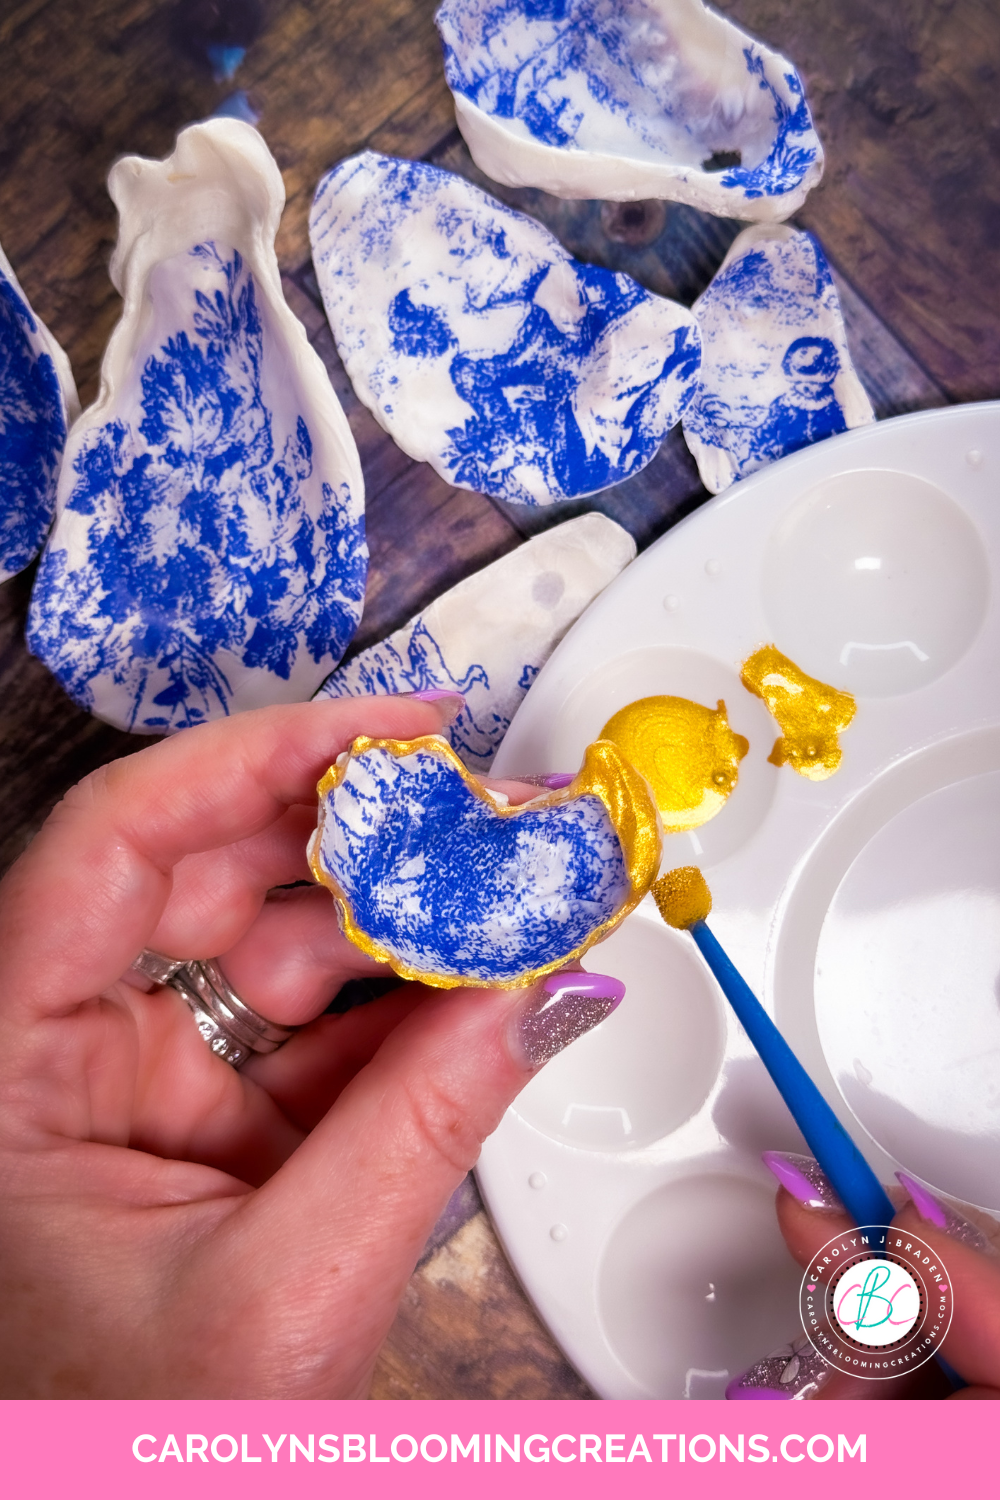
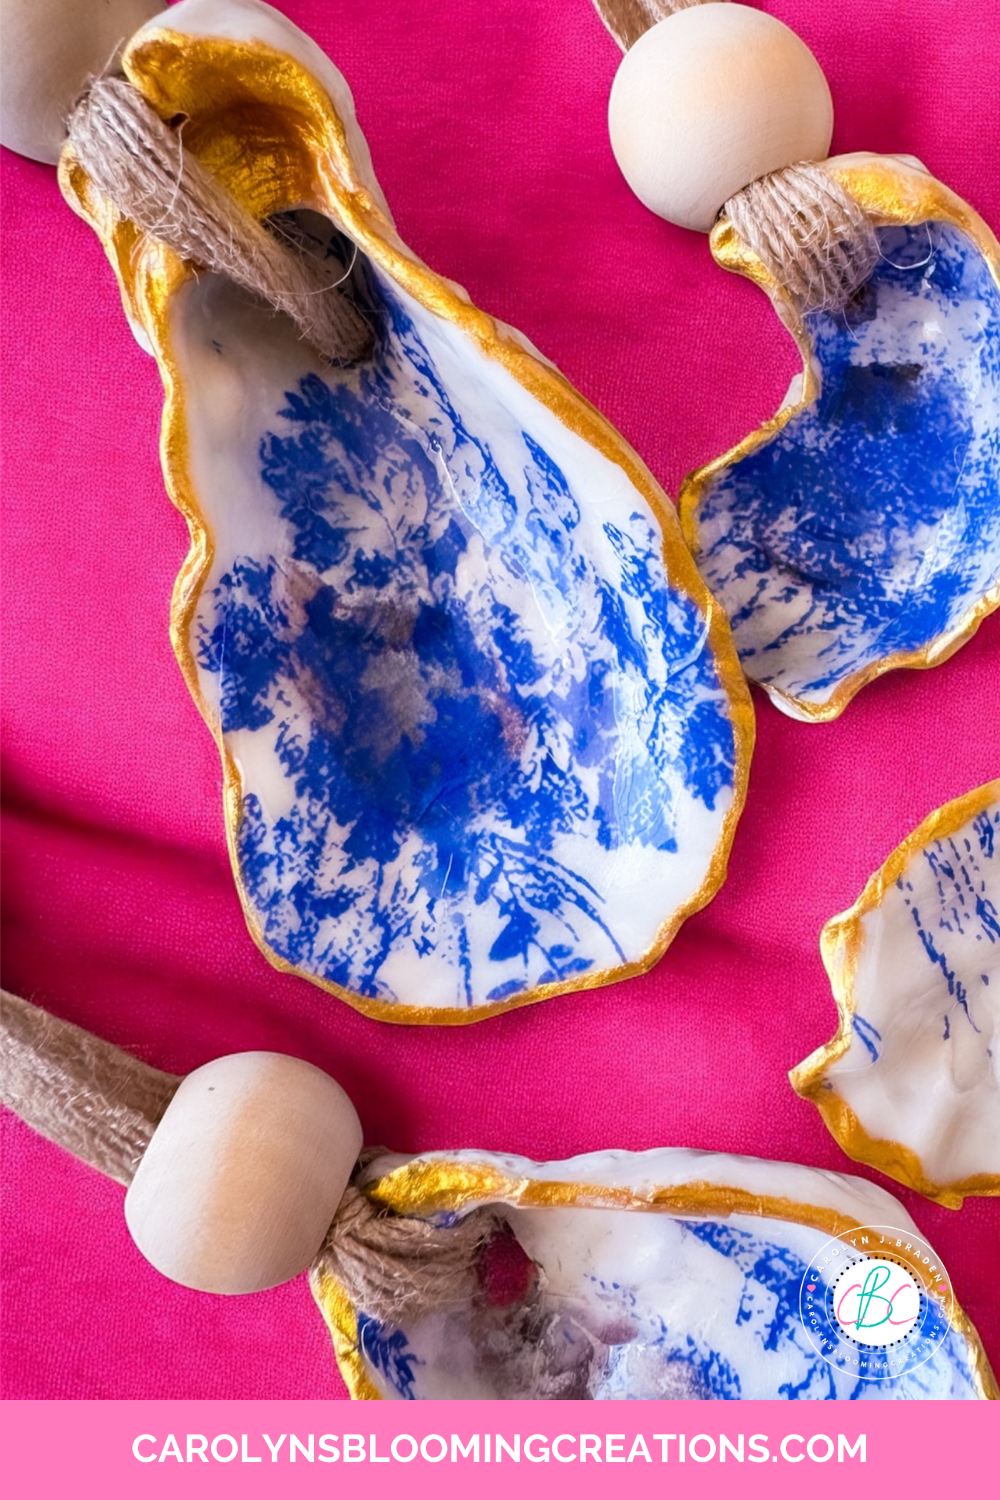
Gilding the edges
Add a Gilded Edge (Optional but Beautiful)
Use a fine paintbrush to paint the shell’s outer rim with gold acrylic paint for a luxe touch. Metallic paint pens also work for clean lines. Allow to fully dry.
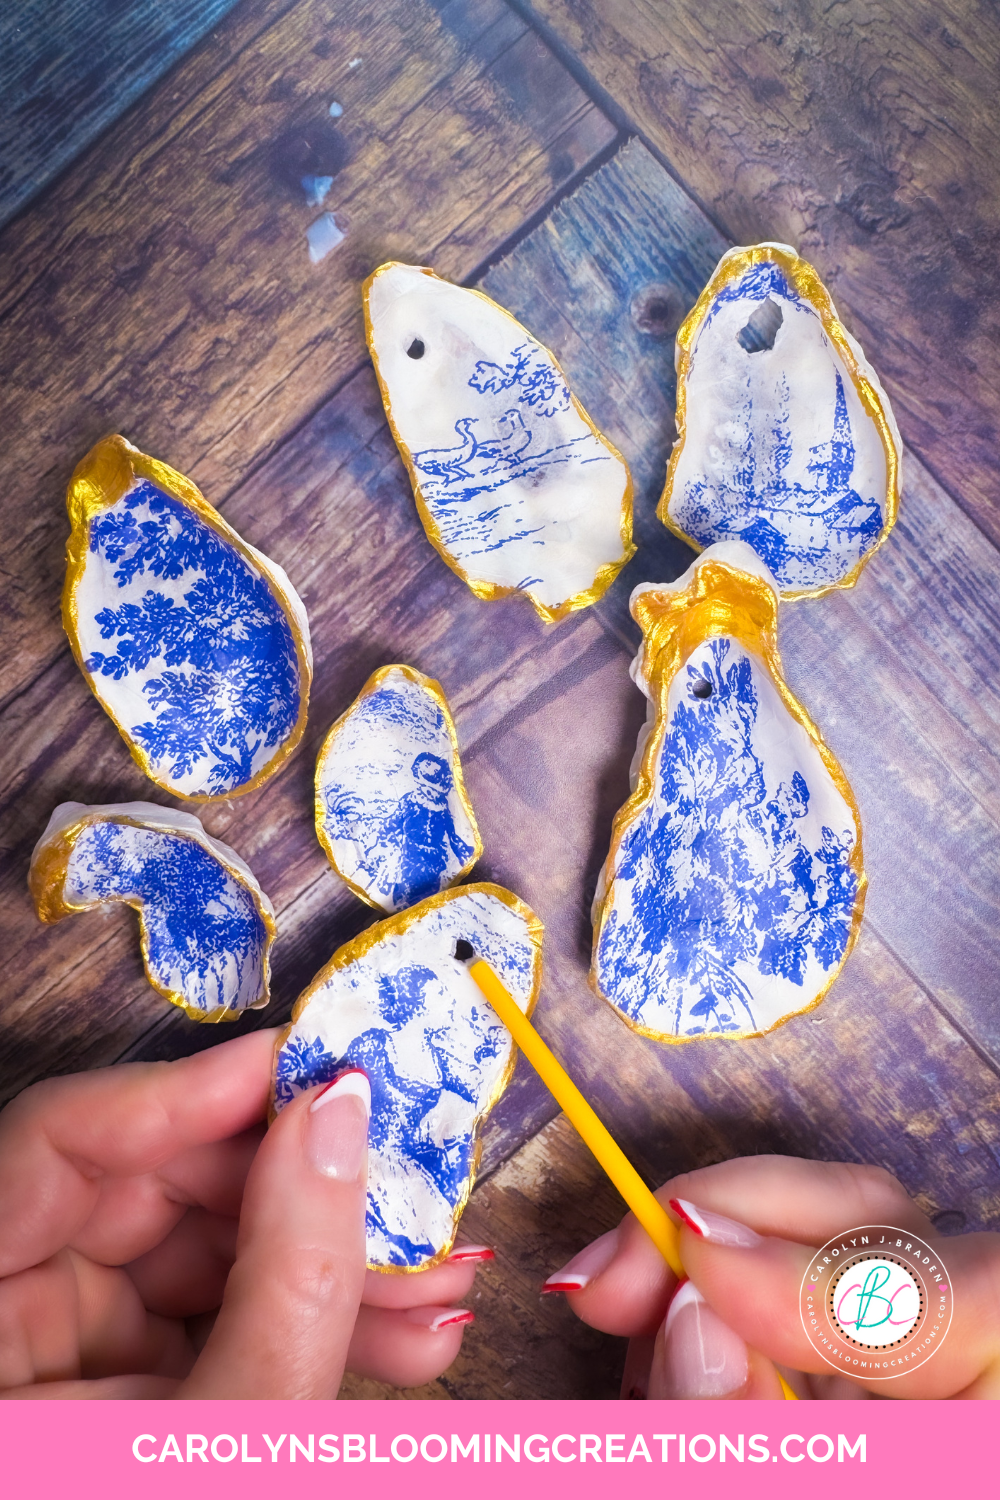
Poking the hole back out
Poke a Hole
My tissue paper covered the holes I drilled, so I used an end of a paint brush to poke a hole back into the tissue paper.

Applying the resin and curing
Seal
If not resin sealing, dab lightly with more Mod Podge over the top, working from the center outward to avoid wrinkles and allow to fully dry. Let the decoupage dry fully (about 1–2 hours). Add another coat of Mod Podge or acrylic clear sealer spray for protection.
If resin sealing, I placed wax paper onto a piece of cardboard to make a “tray”. I poured some resin onto some foil, used a brush to brush on one coat on the tissue paper side of the shell, and placed the shells on the “tray”. I cured them in the UV light for 12 minutes, then resin coated the back of the shell and cured that side for 12 minutes too.

Applying resin to the backs of the oyster shells
I allowed them to fully cool for about an hour and they were shiny and perfect. I worked in small batches at night, but if you are making them in the day time and have lots of sunshine, you can cure them in the sun on your “tray” for 10-12 minutes too. See how I did this here with some seashells and rocks!
Stringing the ornaments
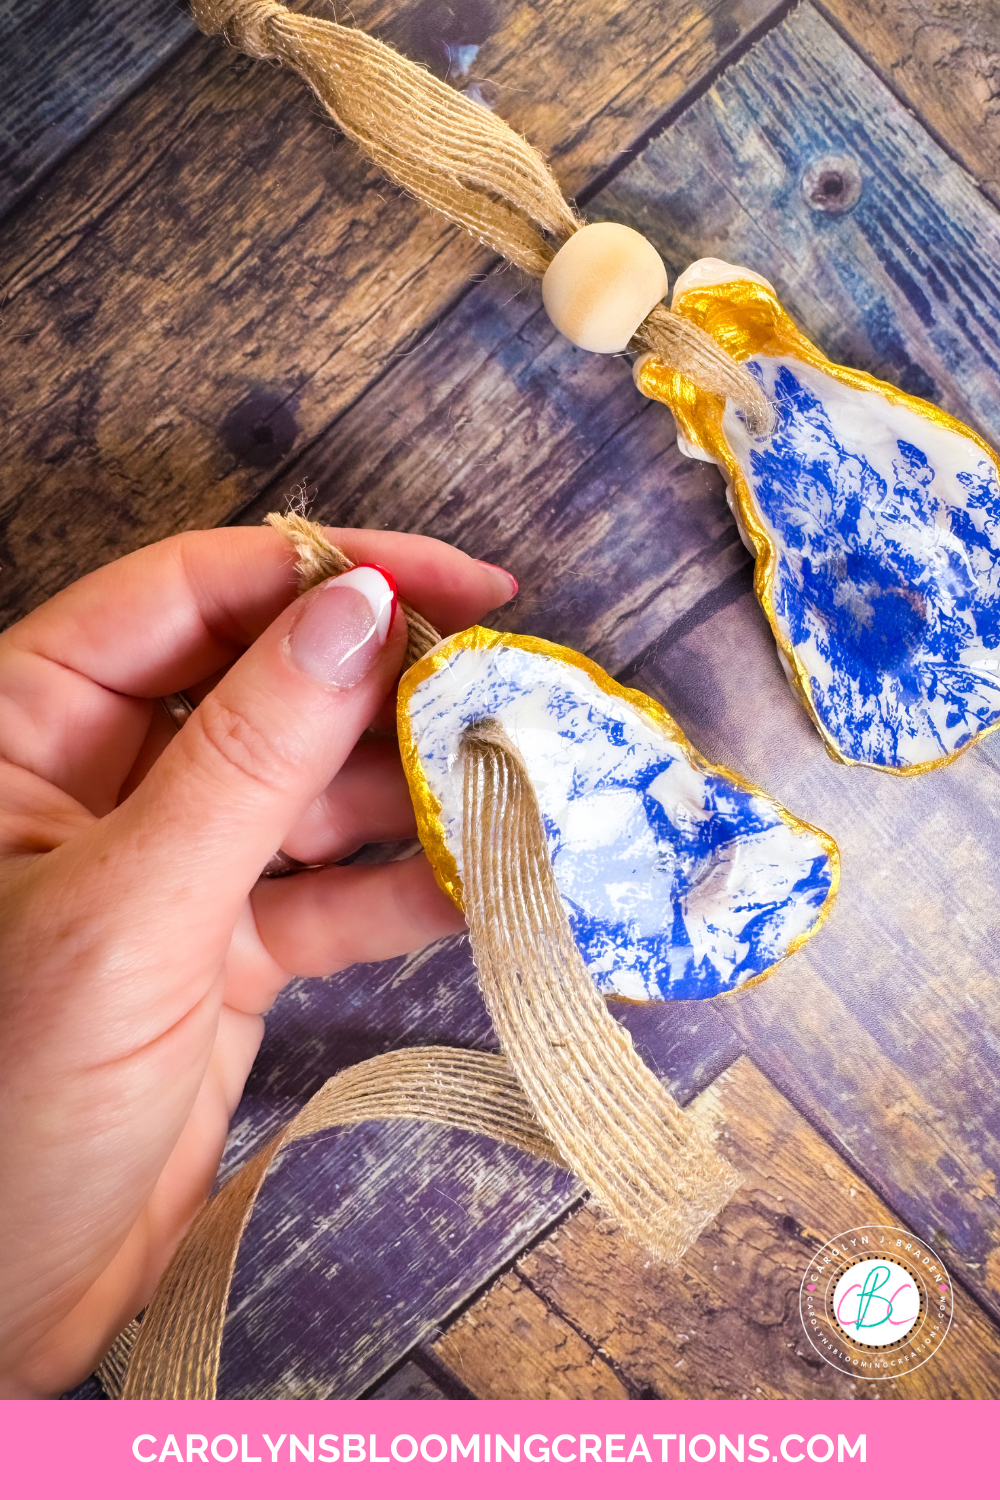
Attach Ribbon for Hanging
Cut a small loop of ribbon or twine to about 14 inches. I folded my ribbon on the end a bit to make it skinny enough to fit through the hole, strung it through the hole and knotted it against the shell.
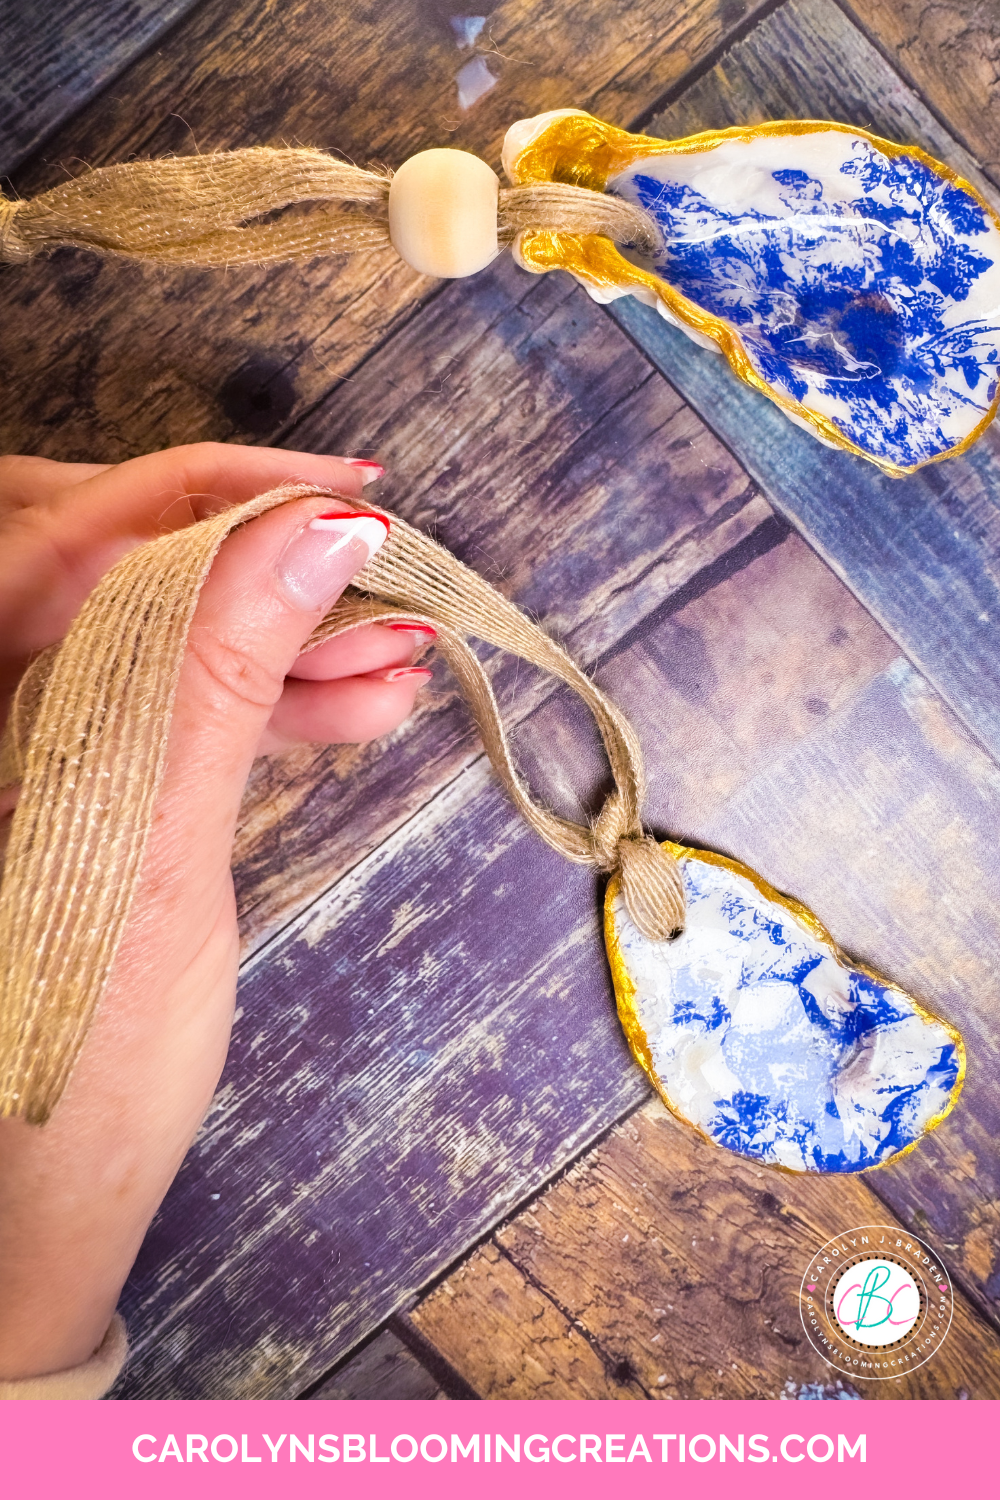
Tying the knot and hiding it with a bead
I strung and placed a wood bead over the knot to hide it, then I tied a knot in the end of the ribbon for hanging and trimmed it. Hang and enjoy!

Trimming the ribbon
If you loved this article, then we know you’ll love this one too: How to Make Beachy Cricut Personalized Ornament
Carolyn J. Braden is the owner of Carolyn’s Blooming Creations is a regular contributor and editor for CBC. She has been featured in numerous media publications such as InStyle Magazine, on HGTV, on Bustle.com, and more. She is the author of the books Georgia McMasters in Amethyst Lake Cemetery, How To Be Yourself: 3 Ways To Help You Being You, and the illustrator for the children’s book Bridging Connections. She is a former classroom teacher that now dedicates her life to educating others on how to live their most healthy, creative and happy life. Learn more about her visiting our About Us page.