Carolyn J. Braden • 4 Minute Read
How to Make Cricut Monogrammed Wood Place Card Ornaments
In thinking of how to spruce up our holiday table settings, I found small bags that you could put silverware in, but they were a little high in cost. So, I turned to Walmart and made my own. Then I decided they needed more, so I added some monogrammed ornaments I made with my Cricut Joy. Read on to learn how to make Cricut monogrammed wood place card ornaments.
You can use the ornaments as actual ornaments too!
How I Made the Paper Bag Silverware Sleeves
For the paper bags, I went to Walmart and found some Lunchskins XL paper bags with a cute print on them. I turned them to the back side and folded in both sides, then folded up the bottom. I added a heart sticker (I got a huge roll for about $1 on Temu) to make it stay folded, but you could use a small piece of tape.
What the paper bag looks like from the back
I turned the bag over and folded a napkin and slid it in along with some rose gold silverware. This alone is a very cute place setting and very simple and inexpensive to make. If you don’t want to make your own, these “Eat, Drink and Be Thankful” paper silverware bags are cute on Amazon.com.
Can You Put Cricut Vinyl on Wood?
After I made the bags, I started making my place card ornaments with the abundance of wood ornaments I had on hand. I went through several experiments after doing some research about placing Cricut vinyl on wood. Placing the vinyl on my smooth and sanded wood ornaments without painting them worked, but it was a challenge. It took a while to use the transfer tape to transfer the design, but my test worked. The vinyl was a bit sticky from having to rub the transfer tape a lot, but it wasn’t too bad.
My full ornament and paper bag place setting
Can You Put Cricut Vinyl on Stained Wood?
I didn’t like the white vinyl on the light wood, so I decided to stain the ornaments with an acrylic gel stain. I sponge brushed on one coat, let it dry, then sprayed an acrylic gloss sealant on the ornaments. I tried the transfer and it did not work at all! I tried multiple times and it would not stick.
Can You Put Cricut Vinyl on Acrylic Painted Wood?
Sometimes the third time IS the charm. I painted some acrylic paint over the stained and glossed ornaments (as I didn’t want to waste the duds) and after they dried, the vinyl stuck to the ornaments! It’s still a bit of a process, but it works. I did notice some of the stickiness from the transfer tape staying on the vinyl as I had to rub it pretty hard to make the transfer, but again, it’s not too bad.
My final thoughts about Cricut vinyl on wood:
Cricut vinyl definitely sticks better on glass and plastic, but painted wood does work.
If I make these again, I’ll use some acrylic ornaments.
Why Cricut Joy?
I decided on the Cricut Joy machine after reading many reviews on Amazon. I’ve ordered stickers for my glass dog food containers and glass soap bottles via Etsy, so if you don’t want to buy the machine, you can ask many Etsy sellers to make personalized vinyl stickers for you.
I wanted to start to make my own vinyl decals so I purchased the Cricut Joy after doing some research. It comes with its own software to help you design many different vinyl decals and even can do beautiful cut out DIY greeting cards.
For my first Cricut project, I had an idea to make a beachy ornament filled with sand and real shells from my current home, Sanibel Island Florida. Here’s that project here. In my beachy ornament project, I talk about free Cricut designs, the Cricut subscription I have, size of decals and more.
See my Cricut beachy ornament in the video below or via my YouTube channel @carolynjbraden:
How to Make the Monogrammed Cricut Ornaments + Discount Code!
Now for the DIY Cricut monogrammed ornaments. They can be used every year or your guests/family can take the ornaments home as a gift. This could also be a great wedding favor idea! You can use my steps below to try this out on your own. You can use other brands of vinyl, but I’ve only experimented with Cricut brand so far.
I purchased the wood ornaments from Amazon years ago, but Temu has them too and they are a bit cheaper, as are many of their craft supplies. If you shop Temu, use my discount code afe55197 or my link here to get 30% off your first app order.
If you do not want monogrammed vinyl decals but still want to make ornaments, Amazon has these vinyl holiday stickers that you could try. I’ve not tested them, but they may be a good option.
Things You Need:
Cricut Joy Machine (I got a set that came lots of things, get it on Amazon or Walmart OR you could one of many vinyl decal Etsy sellers to make a personalized sticker for you as I’ve done before)
White Permanent Vinyl for Cricut Joy Machine (You can buy it on Amazon or Walmart and it comes in many colors)
Cricut Starter Tool Set (My Cricut came with these but you can buy them on Amazon and Walmart)
Dark Brown (Burnt Umber) Acrylic Paint (I got mine at Hobby Lobby, but Walmart and Amazon have similar paint)
Scissors
4” Round Wood Ornaments (Mine are round and flat and from Amazon, but Temu and Walmart have them too)
Optional: If making the bags, I used these Lunchskins bags from Walmart and got my napkins and plasticware from Target
Painting my wood ornaments
How-To:
Paint your ornaments with acrylic paint. I used a 1” sponge brush, but you could use a regular brush. Read my article above if you haven’t yet for why I choose to paint the wood ornaments.
Measure your ornaments so you know exactly how big you need to make the monogram.
Open the Cricut Joy Design Space software on your computer. Click +New Project.
Placing my Cricut monograms
Title your project and click Monogram. A Monogram Maker pop up will appear and you can select the monogram you want. I typed initials in the initial boxes which makes the design choices appear. I selected “Thematic” then “Occasions” and chose a leaf. They have many shapes and designs to choose from. I selected the leaf design as I was making these for Thanksgiving, then selected the font type. Then I selected “Add to Canvas”
I placed my monogram at the top of my screen and sized it using my mouse to ensure it would fit on the ornament. My ornament was 4 inches and I made sure my design would fit in width and height, so I made them around 2.68” x 2.5”.
Repositioning my Cricut designs
After you get your design the way you want it, click the Make button. I selected “Without Mat” to answer the next box that asked “How will you load all your materials for this project?” as I was using Cricut Smart materials. Click Confirm.
On the “Review artwork” screen, review your sizing and design. This is also where you can double check the size and resize as needed. Because the monogram function was still in Beta, I did have to do some rearranging, but it didn’t take me too long. If everything looks good, click Continue. You can always click “Cancel” to return to the previous screen if needed.
The screen tells you how far along the cutting is
On the next screen, your machine will connect and you need to select the material. I selected Smart Vinyl-Permanent. Then it asks you to load the material into the machine. Just unroll your vinyl and slide it into the machine and make it fit in between the markers and slide it towards the needed. The machine will position itself.
My office mate Monica, watching my Cricut move!
Once loaded, click Go and it will cut your design into the vinyl. I had 9 cut outs, so it took about 7-10 minutes or so to cut them all out. My cat Monica was curiously watching the paper as it fed through the machine.
Cutting the designs apart
I then cut around my designs with scissors and used the hook looking tool to pick off the BACKGROUND vinyl from my design.
The hook tool helps you remove the Cricut design from the paper backing
I peeled that background off and it left the letters on the backing.
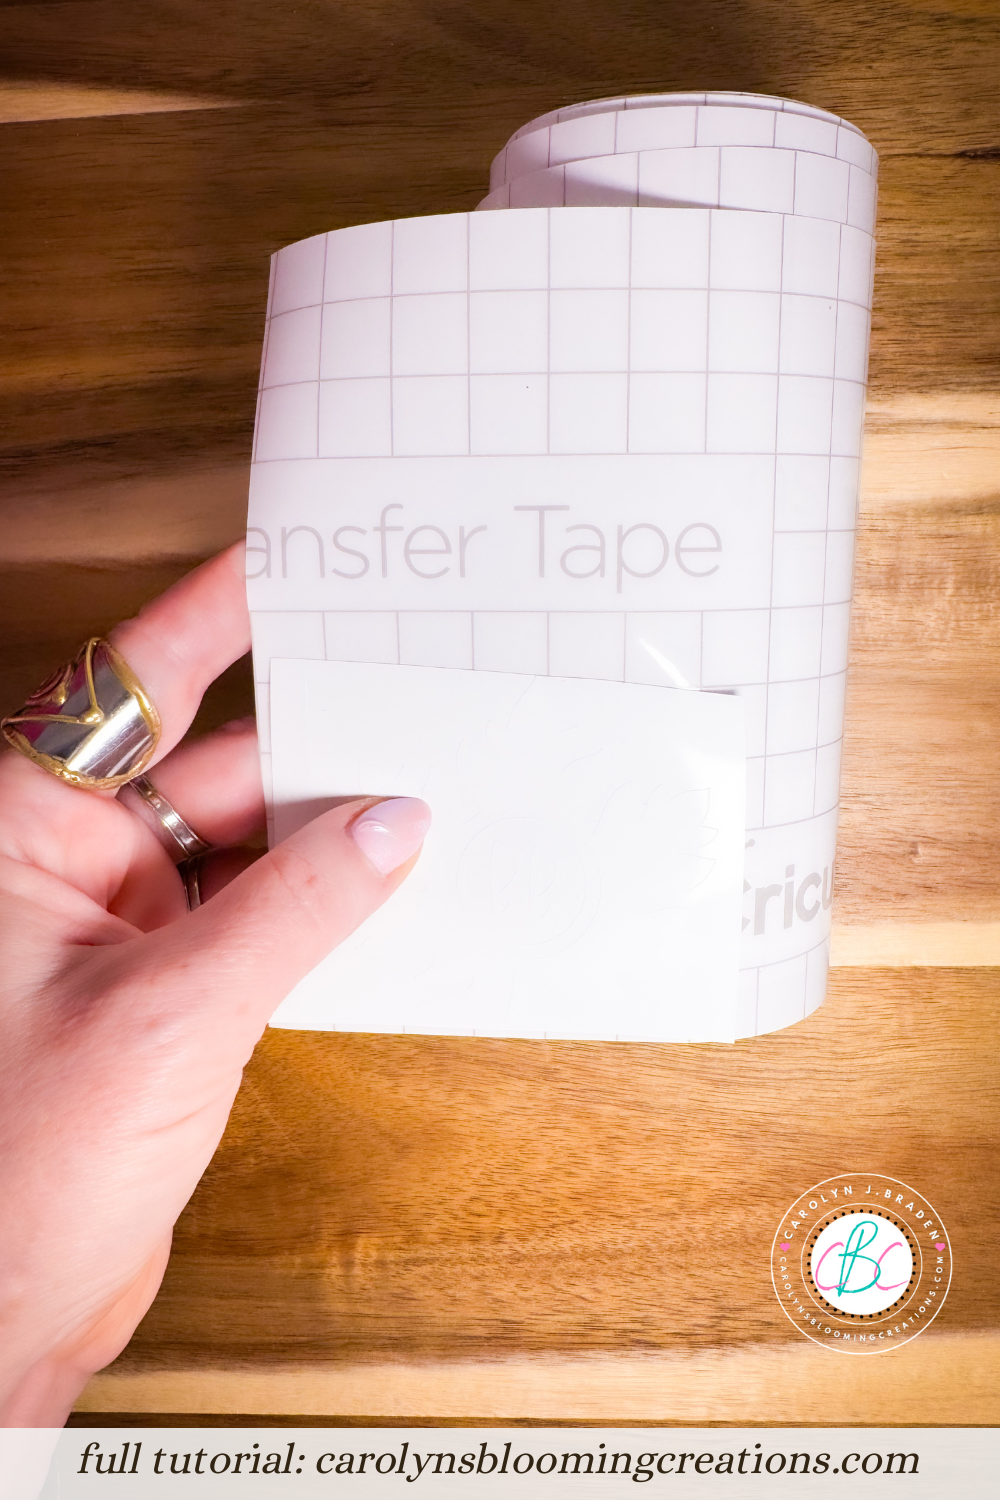
Cutting my transfer tape to size
I cut a piece of transfer tape to fit over my design.
I peeled the transfer tape off its backing and put it onto my cut design.
I then used the scraper to make sure the transfer tape stuck to the design. This took several attempts. I peeled it away from my design slowly to make sure it stuck to all of it, placed it back down if it didn’t and scraped some more.
Placing the transfer tape on the design
Once I made sure the tape stuck to my entire design, I peeled the transfer tape off the design and all it was on the tape.
I placed the transfer tape with my design onto the ornament (make sure you get it exactly where you want it as its permanent!).
I used the scraper to “transfer” my design onto the ornament by gently scraping over the transfer tape. I peeled the transfer tape up gently and the design was transferred onto the ornament. This took a bit of work (much more stop and go than when I transfer onto plastic or glass), but it worked. Read the top of my article if you haven’t yet to see my thoughts on putting Cricut vinyl on wood.
Finishing the ornament
I scraped a little more to make sure the design had no bubbles and was completely flat.
I tied on the jute string that came with the ornaments for hanging them, then tied on some natural raffia.
The completed ornament
Then it’s done for placing on top of your paper bag place settings or hanging in your home or on a Christmas tree.
If you loved this idea, then we know you’ll love this one too: How to Make a Cricut Personalized Dried Flower Cricut Ornament
Carolyn J. Braden is the owner of Carolyn’s Blooming Creations is a regular contributor and editor for CBC. She has been featured in numerous media publications such as InStyle Magazine, on HGTV, on Bustle.com, and more. She is the author of the books Georgia McMasters in Amethyst Lake Cemetery, How To Be Yourself: 3 Ways To Help You Being You, and the illustrator for the children’s book Bridging Connections. She is a former classroom teacher that now dedicates her life to educating others on how to live their most healthy, creative and happy life. Learn more about her visiting our About Us page.


