


Carolyn J. Braden • 3 Minute Read

How to Make Satin Cord Ornaments
These satin cord ornaments have been two years in the making. I first was inspired to make these ornaments by a gift shop worker at Hardman Farms in Helen, Georgia. I spoke with her and she explained how they handmade many of the ornaments for their classic Christmas tree they displayed at the historic home on the property.

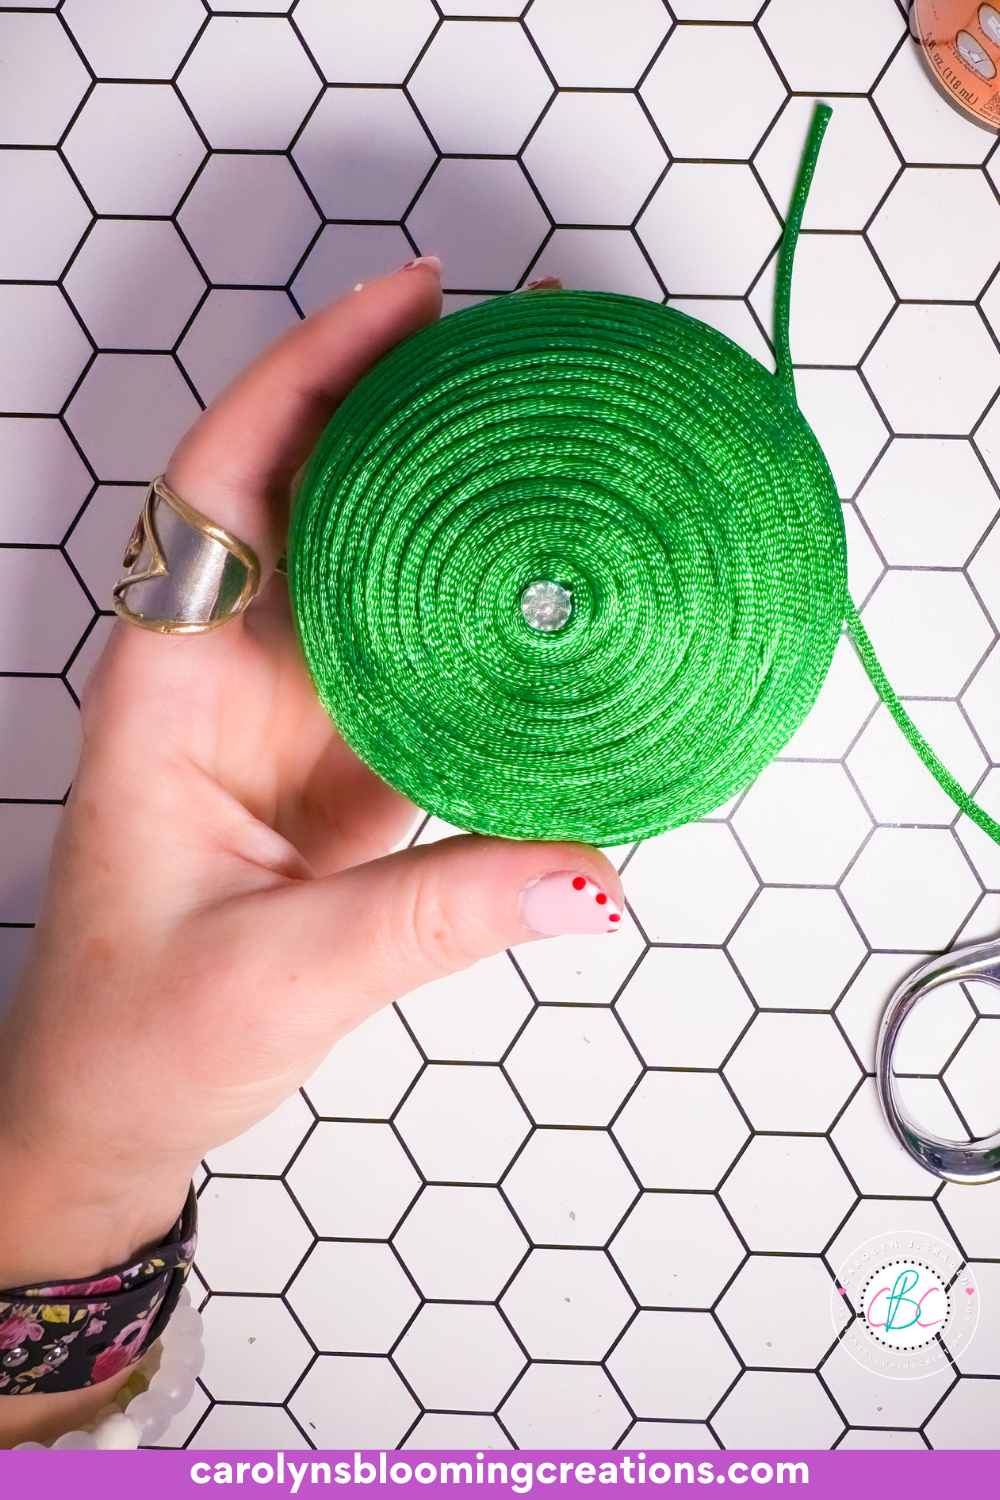
My green ornament in process
She allowed me to watch her make an ornament and it was beautiful. So beautiful, in fact, that I want to share the process with others. Read on to learn how to make satin cord ornaments.

The rainbow satin cord ornament in progress
My TWO-Year Ornaments + a Hurricane
I returned home from that trip knowing two things; I would live in that area at some point (Helen and its surrounding cities are so charming) and I was going to make those ornaments or similar ones.
I bought all my supplies for my own version of the satin cord ornaments, and then Hurricane Ian hit before I could start them. My husband and I and our animals evacuated with our necessities and that didn’t include my ornament supplies.

The back of the black satin cord ornament
How Car Crafts Began
Sanibel Island was hit very hard by Hurricane Ian and we were out of our home for 4 months while the city worked to rebuild the only bridge connecting the island to the mainland, rebuild its infrastructure (the sewers, water and electricity was all ruined) and while the city cleaned up from all the flooding (we called it “trash island” at this time because trash was everywhere). Creating is something that saved my soul during this tough time in my life.
See me create the “back to black” satin cord ornament in my 1-minute video below or via my YouTube channel @carolynjbraden:

The completed black and gold ornament
This is why I now have a crafting “to-go” bag. I started doing car crafts after this life event during long trips and more hurricane evacuations, which we’ve had to do three more times since Ian. I crafted while evacuated, living in my in-laws lovely home for a while, crafting as much as possible to ease my mind.

My completed black and gold ornament
I craft things in the car now during fun trips too. It’s a fun way to pass the time and it’s a very productive time. See me create a winter beanie car craft in my 1-minute video below or via my YouTube channel @carolynjbraden:
Moving On + Hold Ups
We came back to our house in 2023 (thanks be to God for allowing our house to be still standing as others weren’t so fortunate), spent the next entire year putting our home back together and trying to figure out our new way of life. I attempted to create these ornaments in 2023, but I was just not ready for it.

My rainbow ornament is my favorite
I also couldn’t figure out what glue to use after many experiments went very badly. At Hardman Farms, they put the ornament together using super glue, but I knew I could come up with another way since the super glue was very difficult to work with.

My completed flamingo ornament
In 2024, we put our house on the market and set our sights to move to Georgia next, just like we had an intuition about in 2022 during our visit to Helen. I dragged out the ornament supplies, talked with my husband about a glue that would be better (he suggested rubber cement which worked like a dream!) and finally finished these ornaments.

Black and Gold Satin Ornament
I can’t wait to be able to take a short drive to Helen from our north Georgia home and see all their satin cord and vintage looking ornaments during their Christmas tours and celebrations at Hardman Farms! Helen is also super cute during the holidays with all its cute Christmas décor.
Project Tutorial + Discount
Now for the project tutorial! These are the supplies I used. Links go out to Amazon, Walmart or Temu. If you want to shop Temu, use code afe55197 or use my direct link here for 30% off (for new app users).
The bottom side of an ornament
Supplies (you can vary the sizes of the ornaments, ribbon and more to suit your needs):
3.0 mm Satin Cord (I bought the green via Amazon and some via Hobby Lobby, but you can get it at Walmart and Temu too and you need a bit more than 8 yards if covering a 3 inch ball)
3-inch Styrofoam balls (I got mine on Amazon, but Walmart and Temu have them too)
2.1-inch diamond head straight pins (I got mine on Temu, but Amazon and Walmart have them too)
Rubber Cement (I got mine on Amazon but Walmart has it too)
Eye Hooks (I like this set on Amazon which comes with many sizes to fit your needs)
Hot glue gun and hot glue (Amazon)
Optional: 5 inch tassels (Amazon), Decorative Buttons (I got mine at Hobby Lobby), flatback rhinestones/pearls, rhinestone trim (Amazon), Wired Ribbon (I got mine at Hobby Lobby), Bowdabra
See the 1-minute video tutorial with my instructions in my video below or via my YouTube channel @carolynjbraden:
How-To:
Start by taking a diamond head pin and putting it through the end of the satin cord and sticking it in the styrofoam ball.
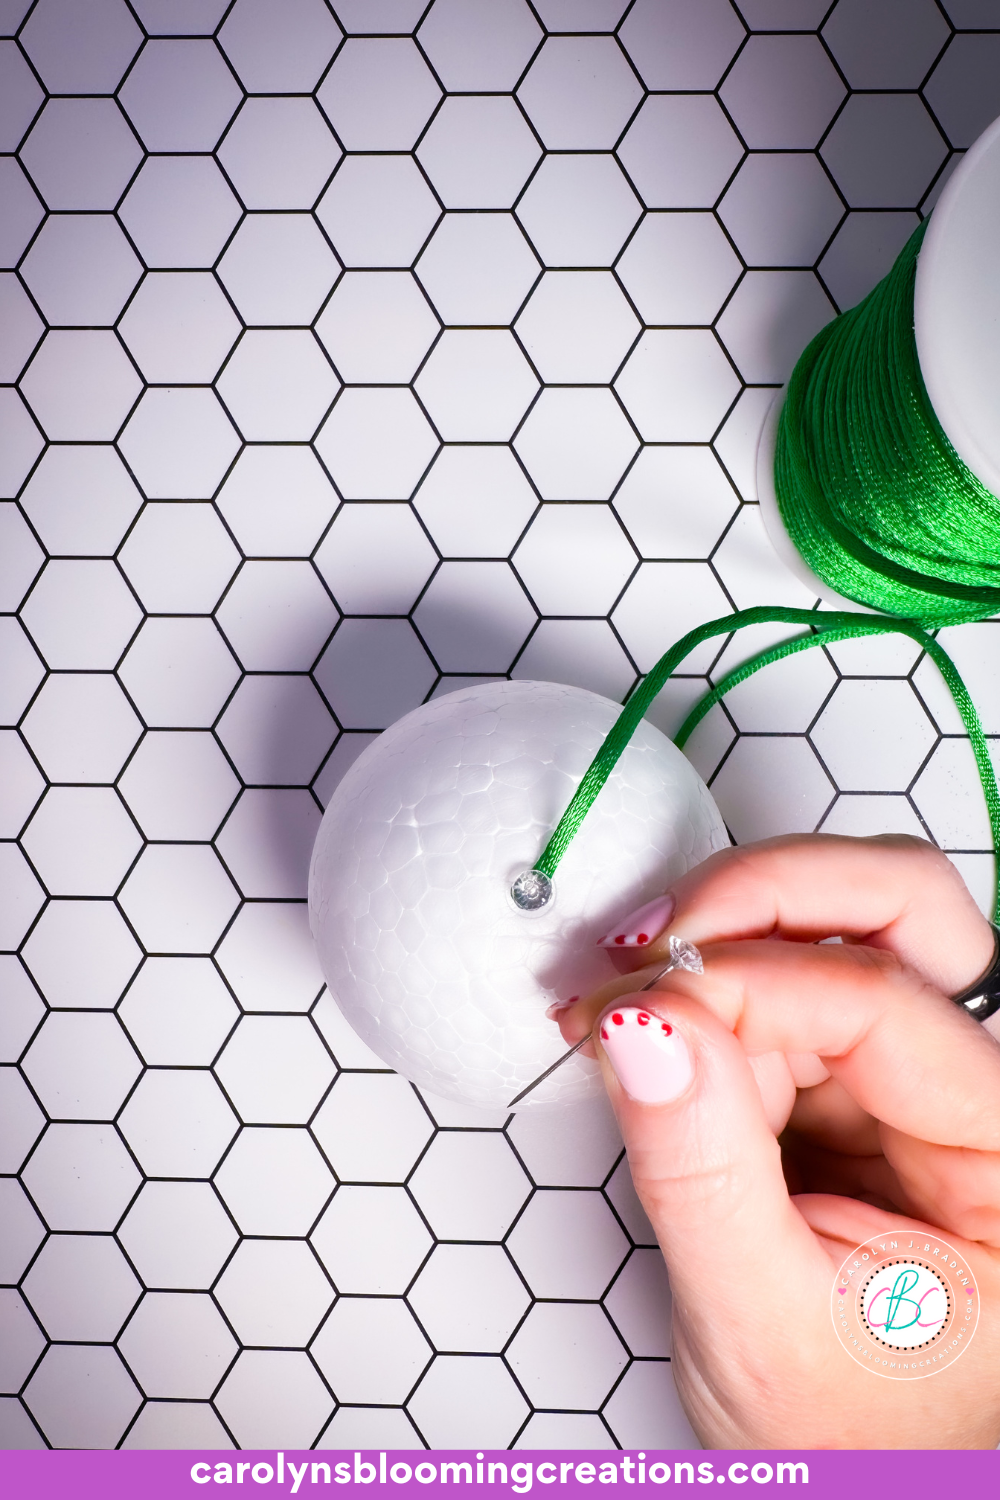
Adding the satin cord
Next, brush on a THIN layer of rubber cement. Too much can make the cord slip. I experimented with hot glue for this and it did not work well at all. At Hardman Farms, they used super glue, but it was extremely sticky. I truly think rubber cement is the best option for this.

Brushing on the rubber cement
Start to swirl the cord around the pin. To get started, I had to put a couple of pins in the cord as I twirled it to hold it in place and then pulled them out later when the glue dried.

I took out the extra pins after the glue dried
I slowly applied rubber cement, and swirled the cord all around the ball until it was covered, working in small sections. I placed another pin in the cord when I got to the end and slid it into the styrofoam ball.

Finishing wrapping the satin cord around the ball
The rubber cement (if any oozed out) can be rolled off the satin cord if you see any when it dries. It rolled away cleanly on the green and rainbow ornaments, but the black showed a bit of the rubber cement. I may have gone too fast on this one. Slow and steady is best!

The ornaments are pretty on their own!
Then I cut off the end of a tassel (the loop) and hot glued (using a low temperature setting) onto the bottom of the ornament where one of the diamond head pins was. I also took out the top pin and hot glued an eye hook in its place for hanging the ornament.

Adding a tassel
Next I used my Bowdabra (see me use it here to make a bow in my 1-minute YouTube video) to form a double bow. I then hot glued it to the top of my ornament.

Using a Bowdabra to make a wired bow
Lastly, I hot glued on a decorative button. On the rainbow one, I added some rhinestone trim around the center and on the black one, I added some gold flatback pearls using Liquid Fusion Glue and a wax tip pencil as well as I hot glued on some gold rope trim.

Adding the decorative button
I added an ornament hook and they were ready to be hung. I will say that the buttons were a bit heavy, which make them a little “top heavy” so in the future, I’d either put my eye hook back a little from the top or I’d use a less heavy button. But, overall, I’m happy with the way they turned out!

The completed flamingo ornament
If you love this article, then we know you’ll love this one too: How to Make a Paper Bag Snowflake Garland
Carolyn J. Braden is the owner of Carolyn’s Blooming Creations is a regular contributor and editor for CBC. She has been featured in numerous media publications such as InStyle Magazine, on HGTV, on Bustle.com, and more. She is the author of the books Georgia McMasters in Amethyst Lake Cemetery, How To Be Yourself: 3 Ways To Help You Being You, and the illustrator for the children’s book Bridging Connections. She is a former classroom teacher that now dedicates her life to educating others on how to live their most healthy, creative and happy life. Learn more about her visiting our About Us page.