


Carolyn J. Braden • 3 Minute Read
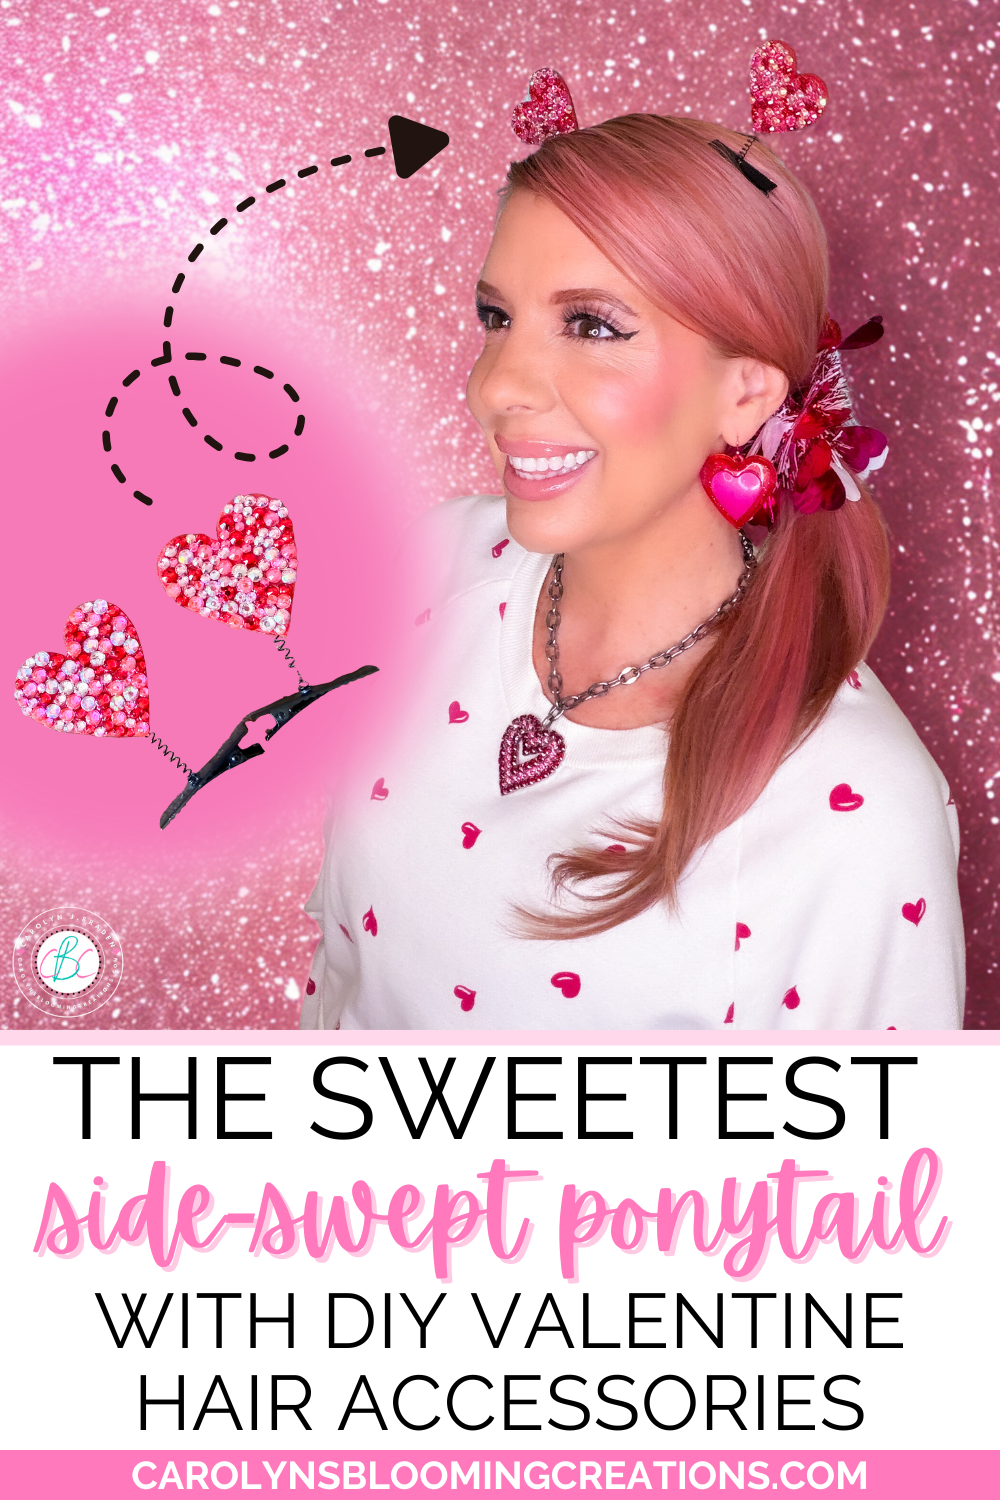
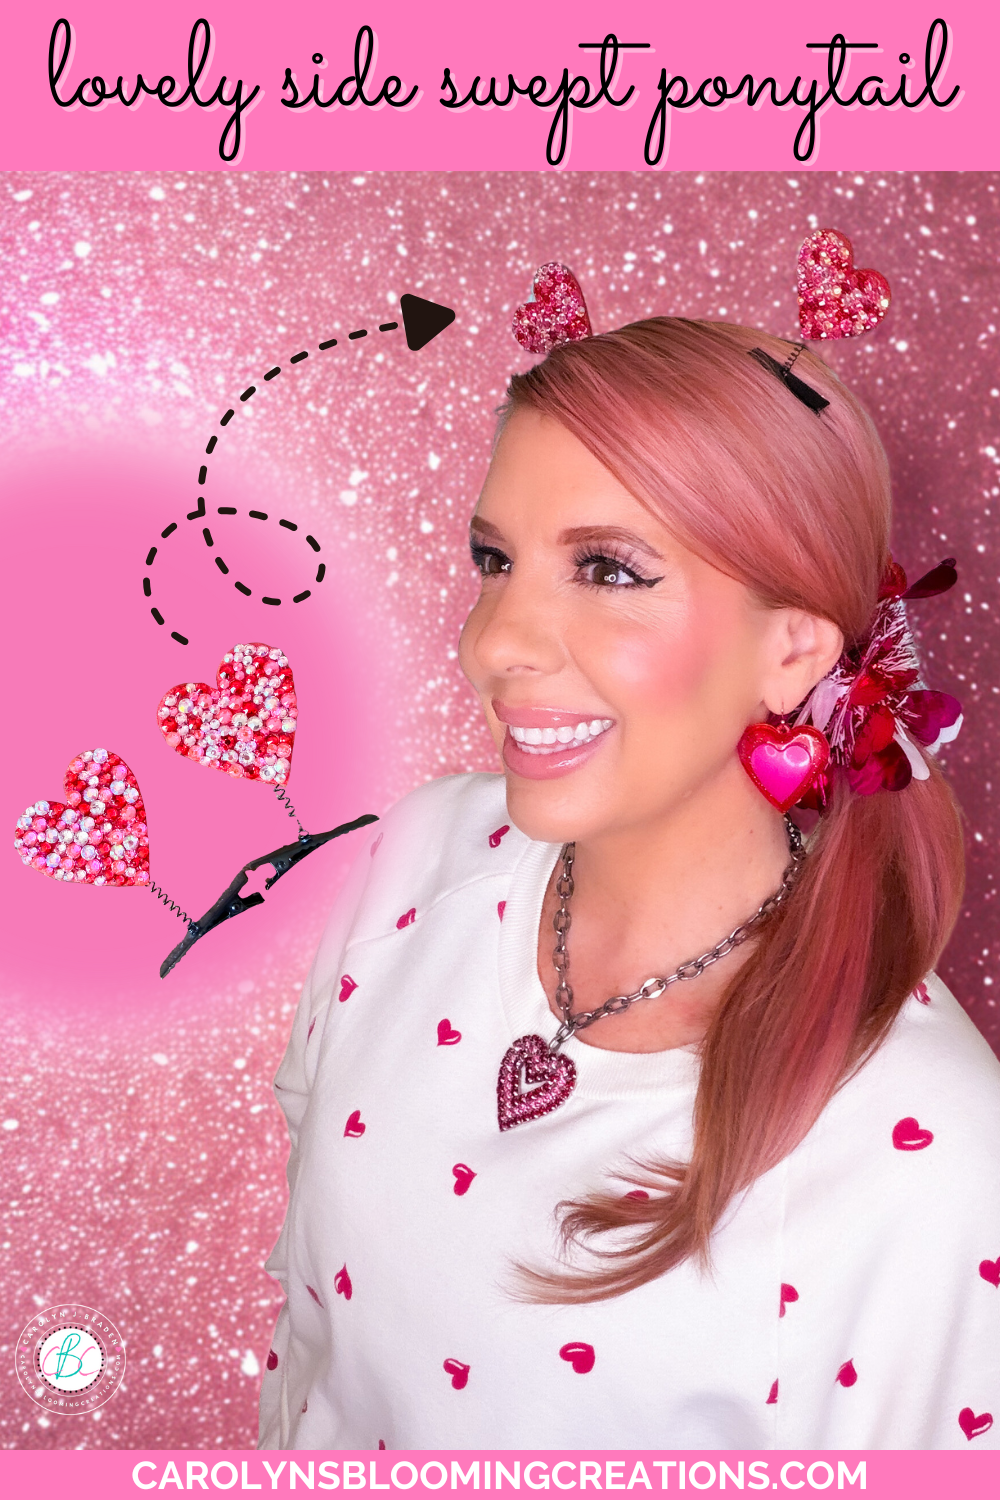
The Sweetest Side-Swept Ponytail with DIY Valentine Hair Accessories
Valentine’s Day hairstyles don’t need to be complicated to feel special. This side-swept ponytail is soft, romantic, and incredibly easy—plus the DIY Valentine hair accessories I deconstructed from some tinsel and felt heart hair clips I had on hand, to make it feel custom and extra cute. Whether you’re heading out for date night, Galentine’s brunch, or just want something festive for the day, this look comes together in minutes and works on many hair textures.
Shop the Post
Don’t feel like reading this article? That’s okay! See my style come together via my Amazon Shop plus get buying links at affordable prices!
We also love shopping CVS (the ExtraCare card savings stack helping you to save!) and here are some of our CVS finds to stock up on (especially when you get that 40% off coupon!) and love Walmart (Walmart+ gets you free shipping and delivery on many items)!
Bookmark or Pin this one by clicking the Pinterest SAVE button on the images in this article for hair magic in an instant.
More Beauty + Hair Loves
You can also get more of my beauty loves via my Target shop here or my CVS Store here (use your ExtraCare card to double up on savings!) or via my shop my store here or below:
The Inspiration
After watching a video for It’s Like That by Mariah Carey, I fell in love with her deep-parted side ponytail. It was uncharacteristic of Mariah’s usual curled hair, but I liked how sleek and simple it looked. I recreated it with a touch of curl using a thermal brush. It can be recreated by you using this simple hair tutorial, with or without the Valentine accessories.
My sweet Valentine, Johnny Cash
Why I Love This Look
Easy and beginner-friendly
Perfect for short, medium, or long hair
Customizable with DIY accessories
Romantic without being overdone
Try This Festive Hairstyle
Don’t want a side-swept ponytail? Try my easy festive bun tutorial and swap out the gold tinsel for Valentine tinsel! See me create it in my 1-minute video below via my YouTube channel @carolynjbraden:
How to Style This Look
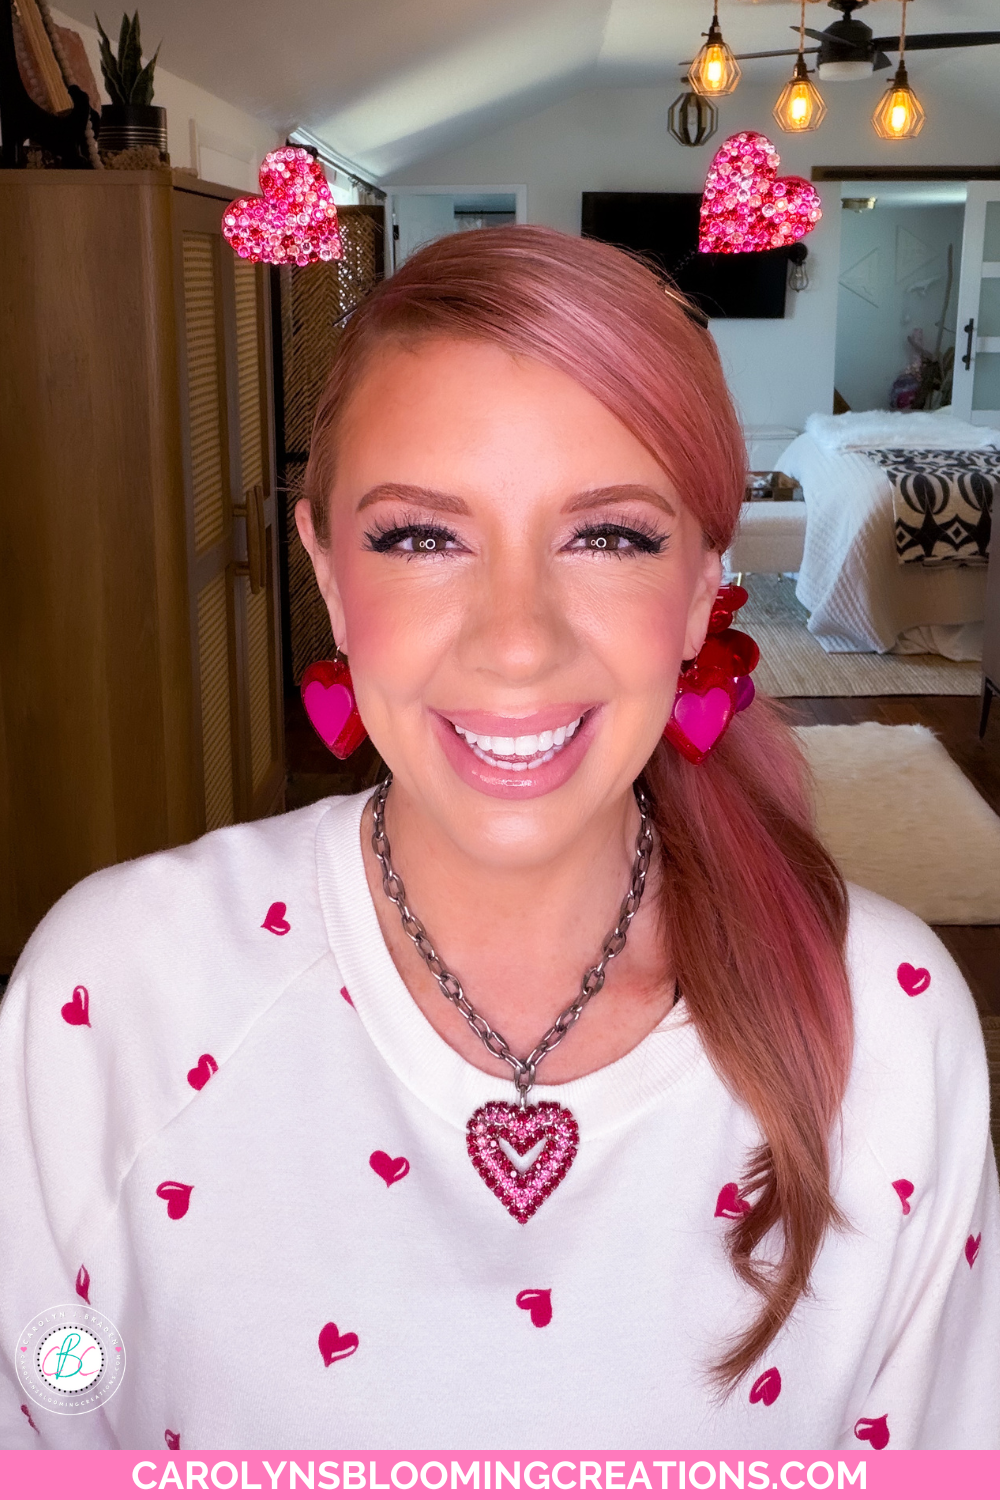
Pair with soft makeup and pink blush and shimmer (try my favorite Natasha Denona Berry Pop Trio…it will give your entire face a sweet flush of pink that is perfect for a Valentine’s Day GLOW)
Wear it with a valentine outfit with cozy knits or a flirty Valentine dress or heart sweatshirt or this cute LOVER sweatshirt from Sam’s Club is cute and only $10!
Add some cute light up heart earrings like I purchased via Walmart
Perfect for school events, date night, or anytime you want to look festive
My Cute Valentine Hairstyle
What You’ll Need
Links go out to either the brand website, Amazon, CVS, Walmart, Sam’s Club, Target, Lowe’s, or Temu (code afe55197 gets you 30% off your first order), where we source our supplies based on discounts, budget and pricing.
For the Side-Swept Ponytail
Hair brush or wide-tooth comb (see my cute Mermaid DIY Wide Tooth Comb tutorial here)
Hair elastic (clear or matching your hair color, these hosiery ones are comfy via CVS)
Hair Spray (This is my go-to hairspray via Target)
Braid Balm (for flyaways)
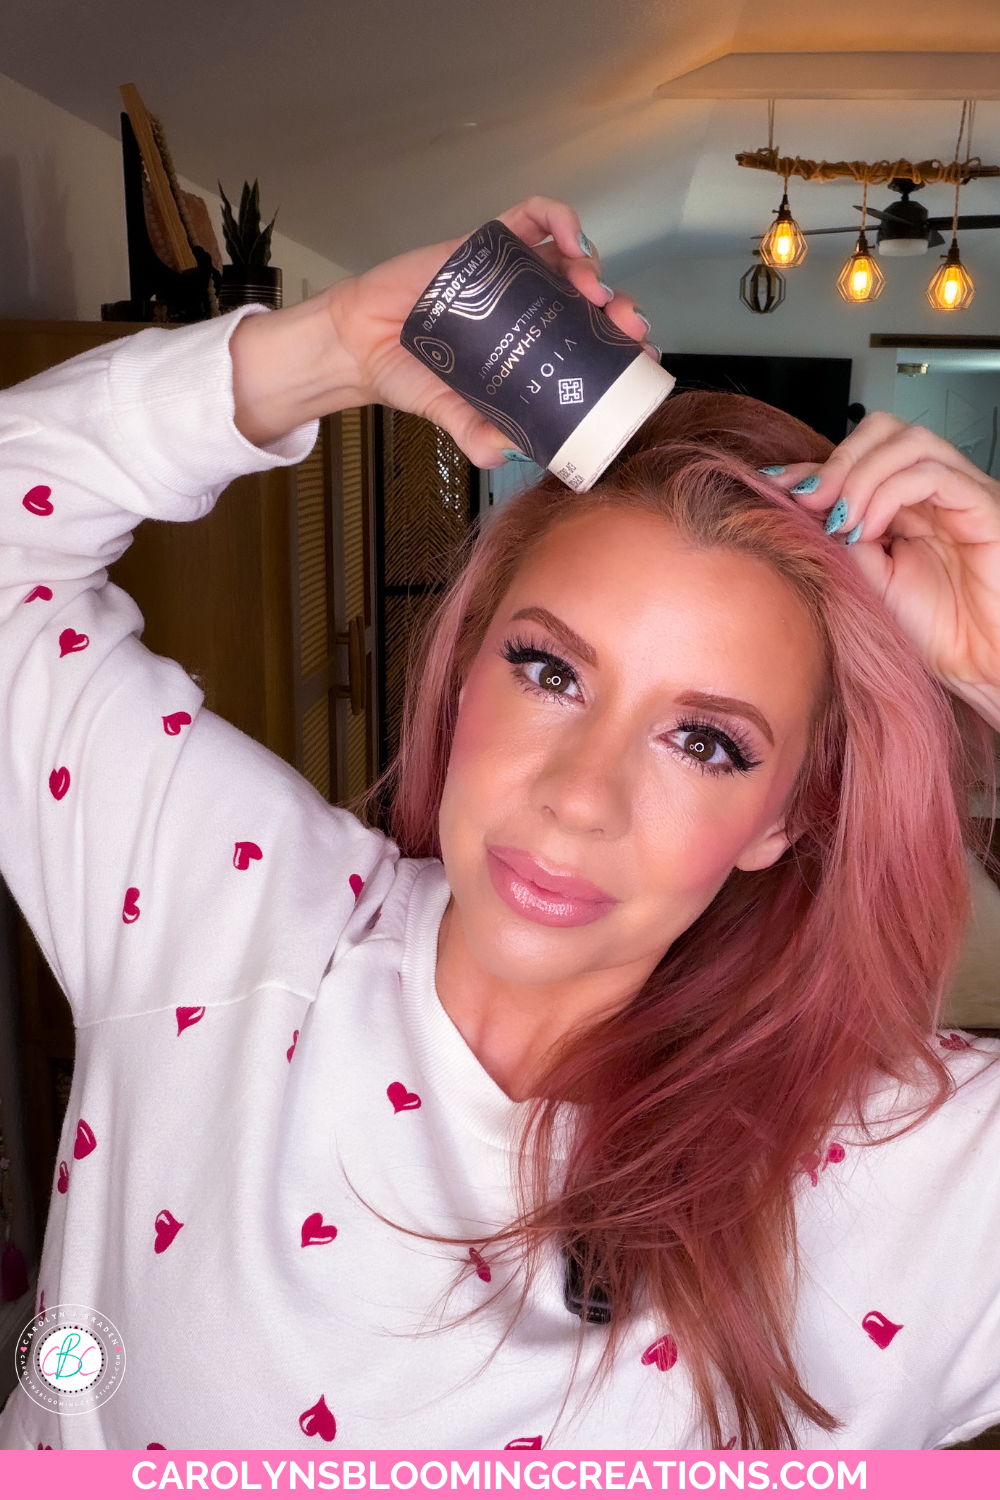
Dry Shampoo (I use and love Viori, use my link for 10% off or use code CAROLYNBRADEN)
Curling iron or wand (optional, I used WavyTalk’s Thermal Brush)
Hair Pins (These are my $7 favorite hair pins via Amazon)
For DIY Valentine Hair Accessories
Aleene’s Tacky glue (this set via Walmart has several of the brand’s glues)
Rhinestones, Wax Pencil (try this pink rhinestone kit I have via Amazon, I also used a red set too)
Check out my 1-minute video tutorial for this project on my TikTok now or coming soon here and to my YouTube channel @carolynjbraden!
Step-by-Step: DIY Valentine Hair Accessories
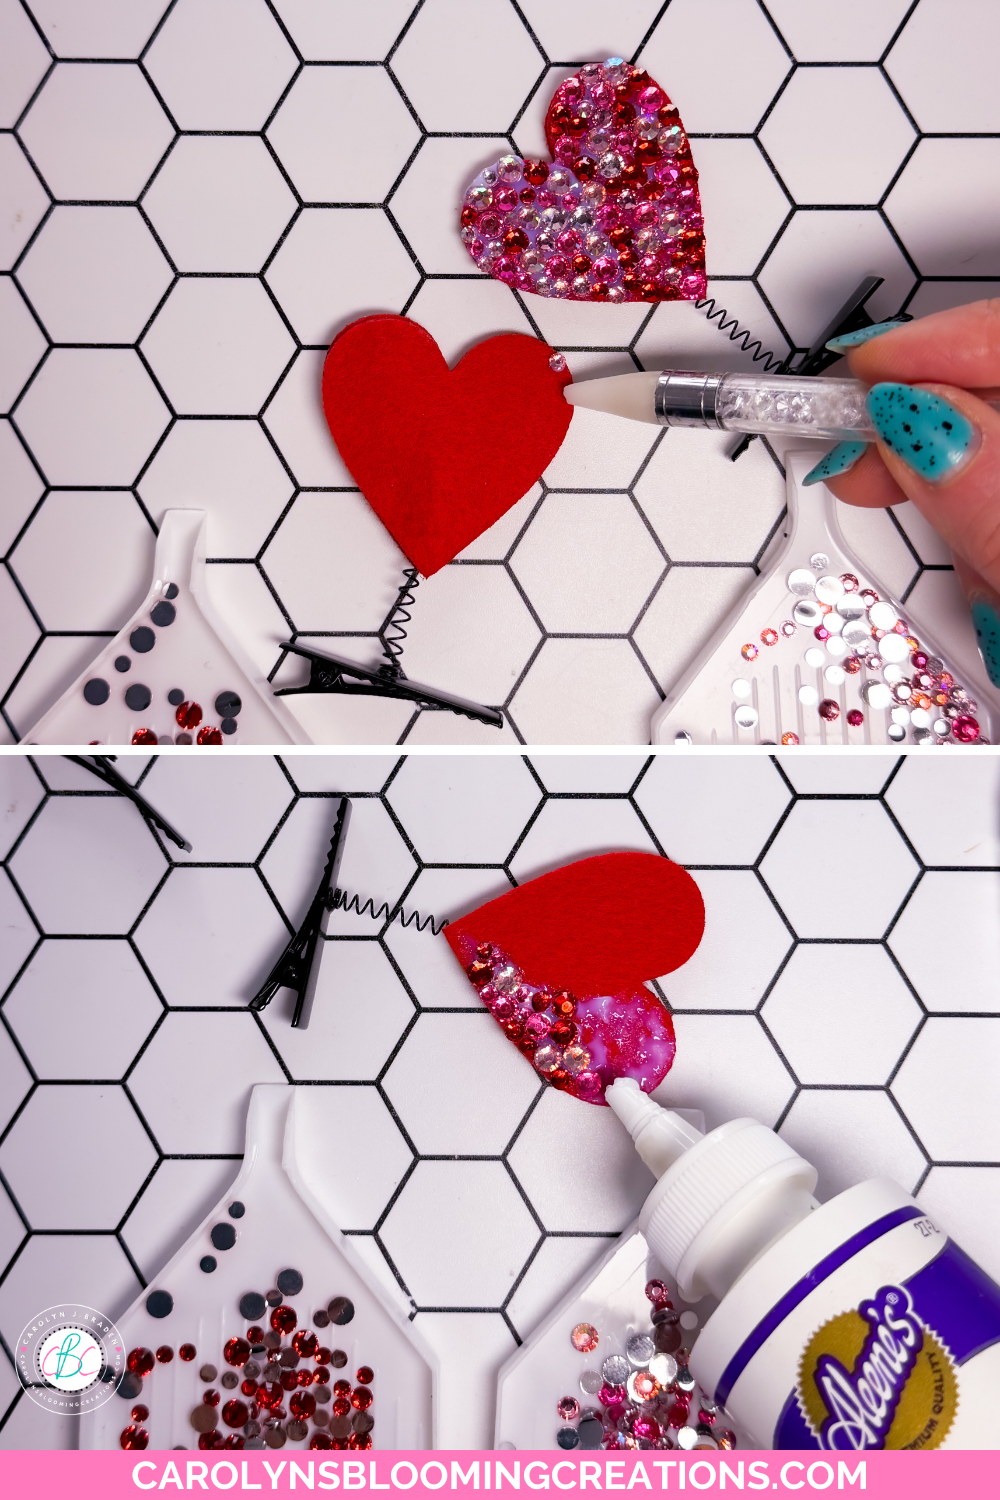
Step 1: Create the Accessories
Glue small heart felt hearts onto mini hair clips or bobby pins or buy the ones I have via Amazon. I had a set of 4 and didn’t like that the backs showed an exposed spring, so I gently tore hearts off two of the clips and used Aleene’s Tacky glue (best glue for felt so no bleeding occurs) to glue a heart to each of the other hair clips (on the back of the felt heart) to conceal the spring. I clamped them together with some hair clips so they would stick while drying.
Blinging up the hair clips
Step 2: Bling Them Up
When dry, I put a bit of Aleene’s Jewel It Glue on the front of each felt heart (I lined them up making sure what the “front” would be and how they would fit into my hair) and used a wax tip pencil to grab various sized and colors of rhinestones and applied them to the glue. I allowed them to dry for 24 hours.
I love Viori dry shampoo!
Step-by-Step: Side-Swept Ponytail Hairstyle
Step 1: Prep Your Hair
If your hair is freshly washed or 3rd day hair like mine was, add a little dry shampoo to give it grip and volume and to absorb oil. This helps the ponytail stay full and soft instead of slipping flat. Add it at the roots and then brush out.
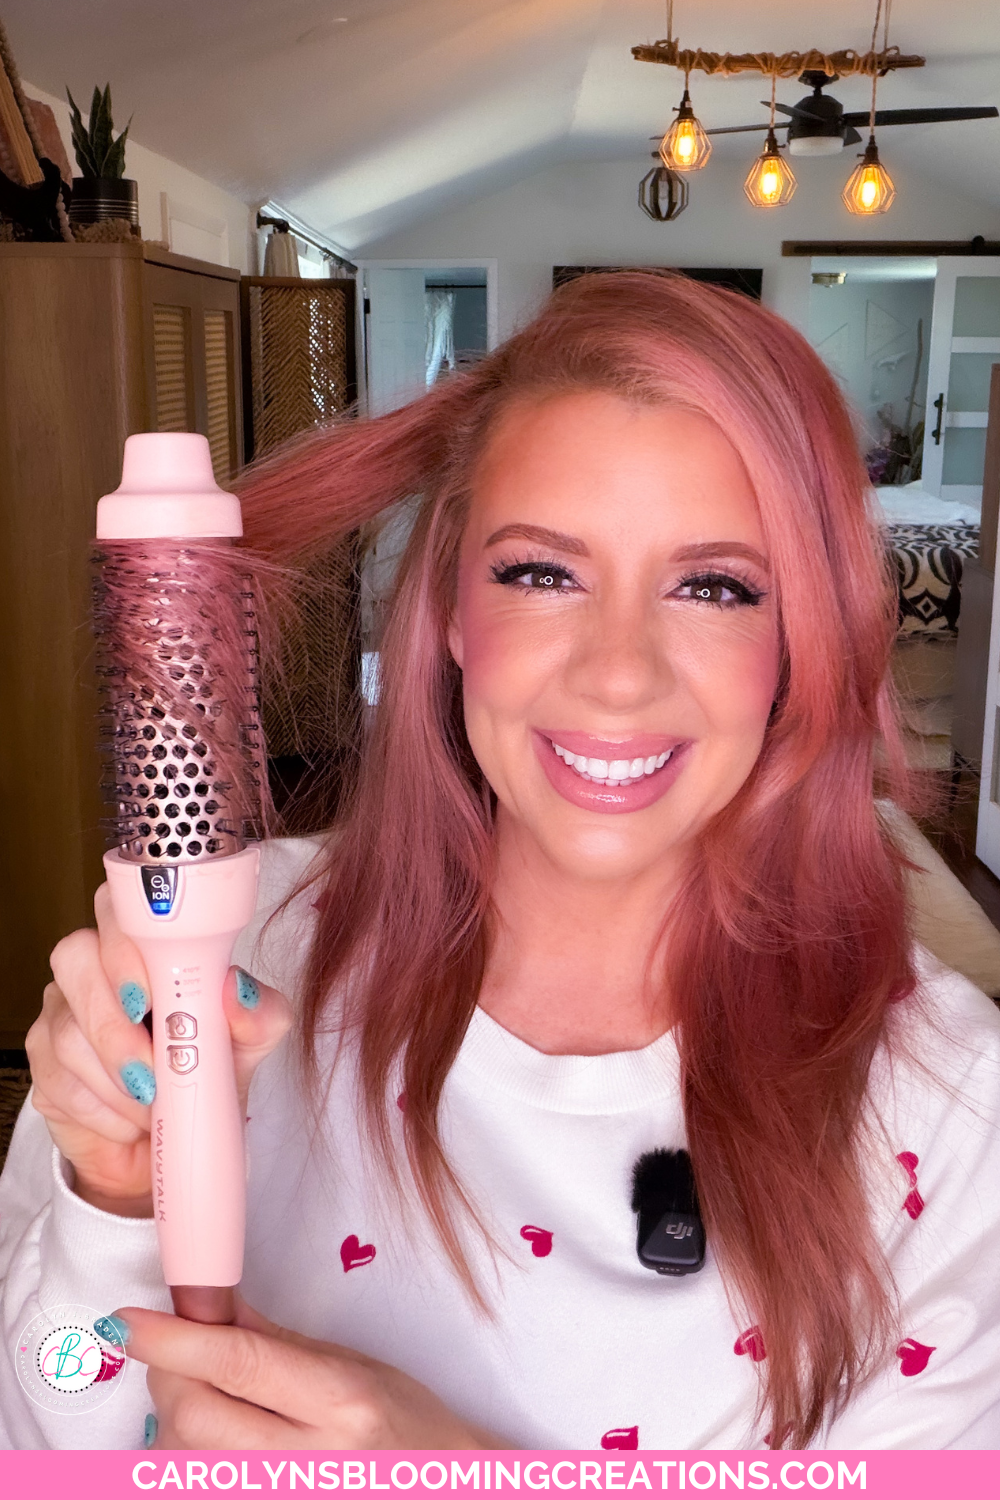
This thermal brush is great at smoothing and curling hair
Tip: If your hair holds curl well, loosely curl it first for extra flair. Here’s a tutorial via my YouTube for the WavyTalk Thermal Brush I used.
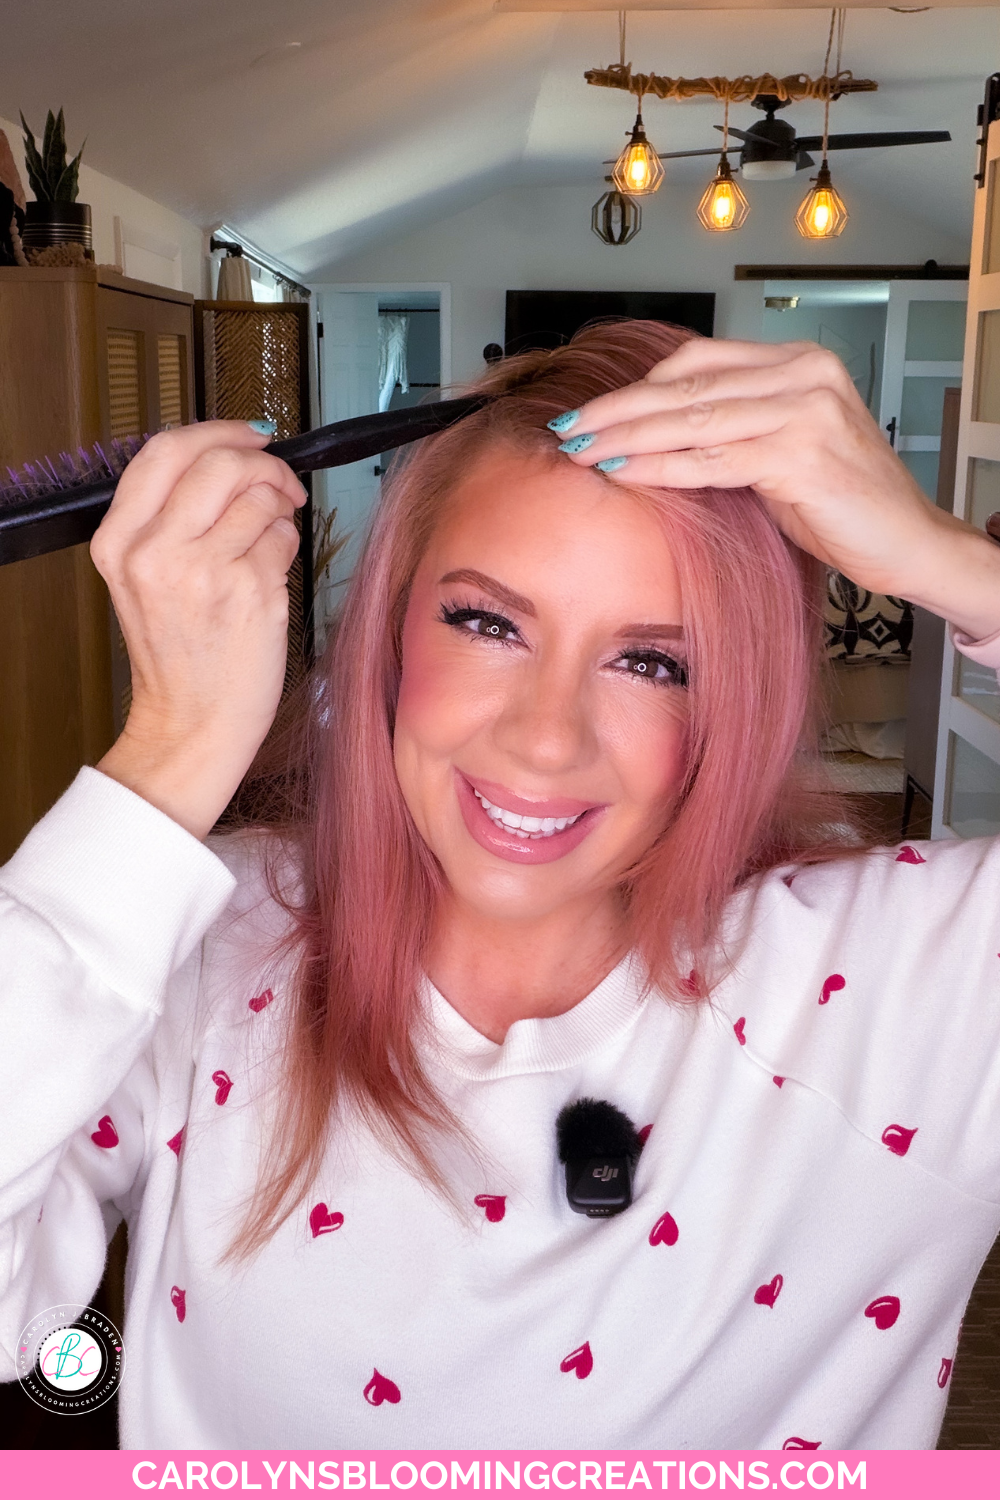
Prepping the part
Step 2: Create a Deep Side Part
Use a comb or your fingers to create a deep side part. This sets the tone for the whole look and gives it that romantic, side-swept feel.
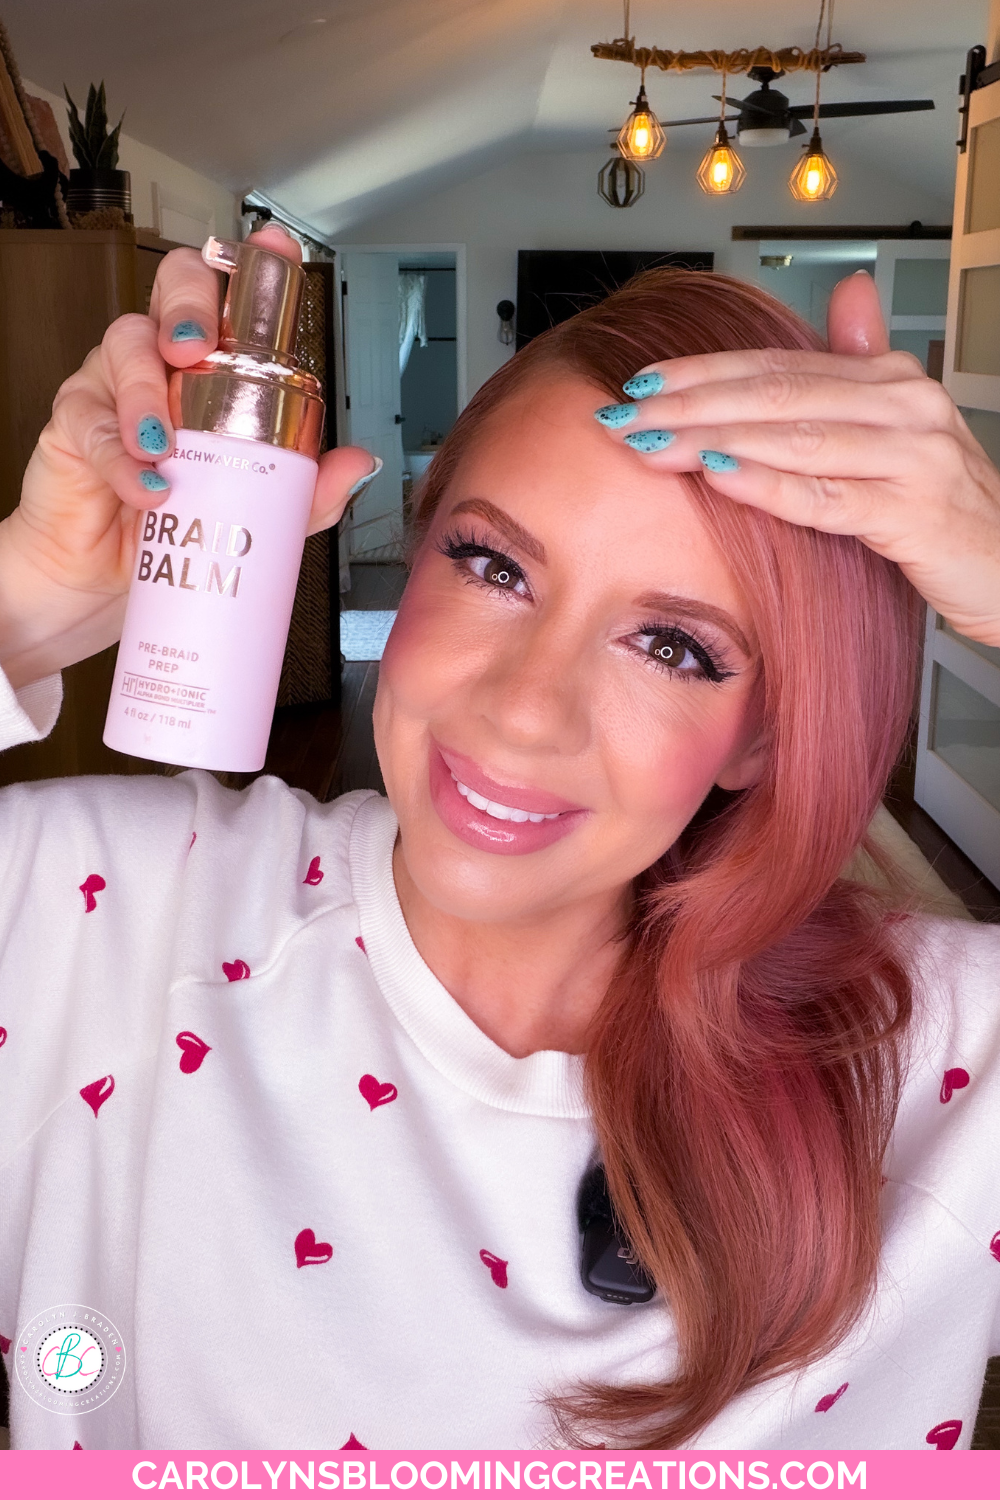
Braid Balm definitely tames flyaways
Step 3: Sweep Hair to One Side
Gently brush all of your hair over to one side of your head. Keep the look relaxed—this isn’t meant to be sleek or tight. I put a little Braid Balm in the palm of my hands and smoothed it over my hair to help lock in the side-swept style and it tamed flyaways.
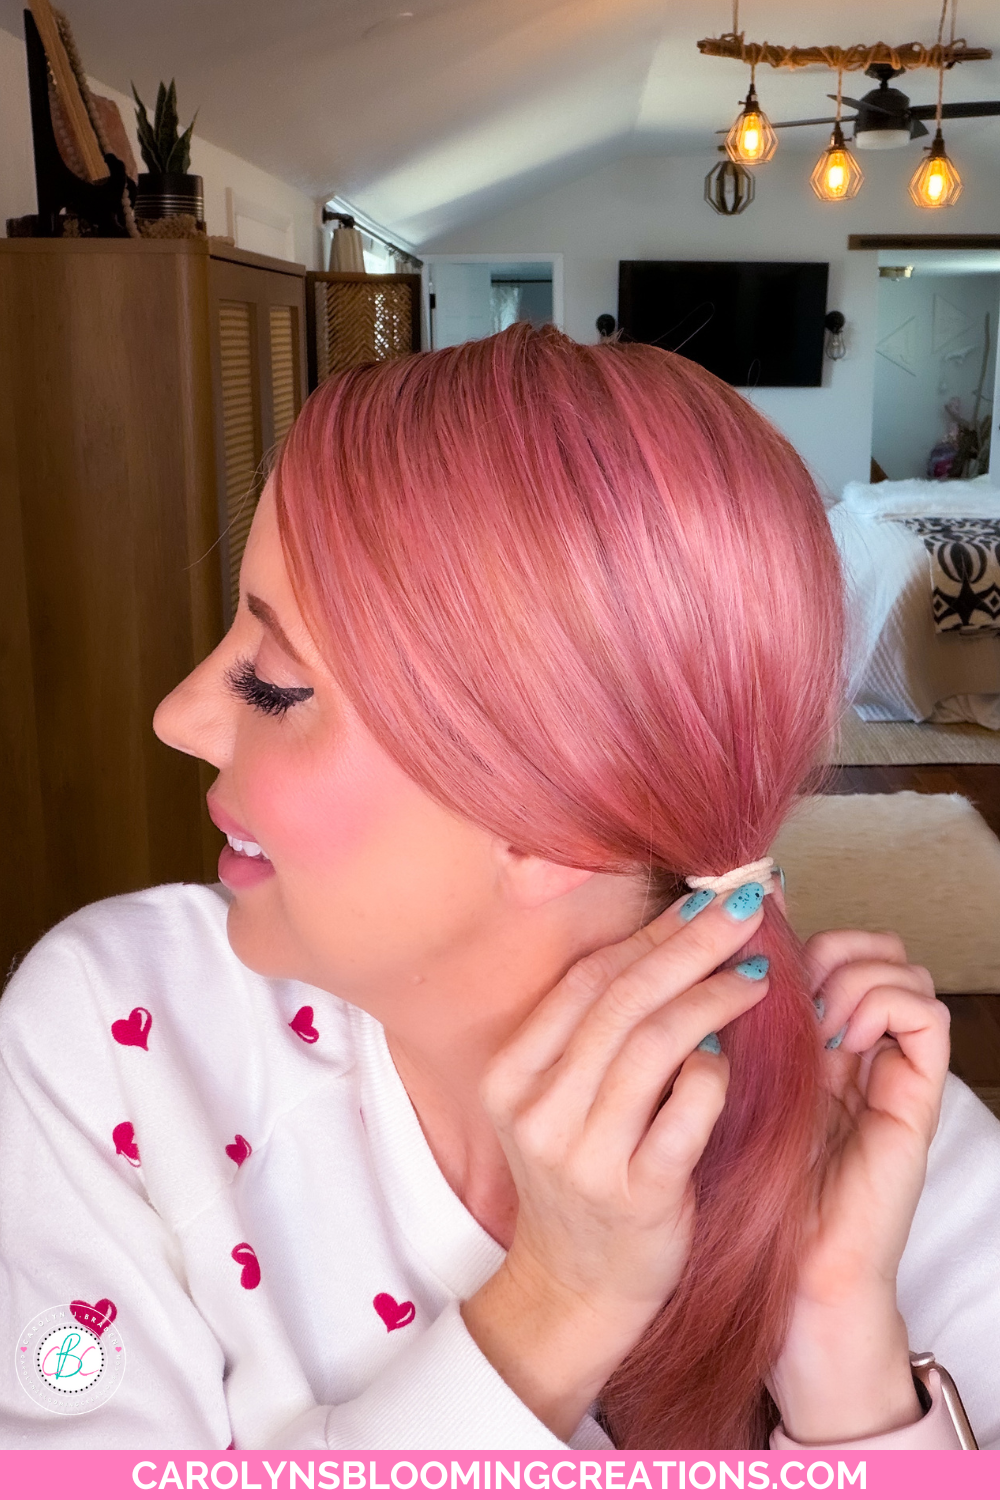
Creating a low side ponytail
Step 4: Secure the Ponytail
Gather your hair at the nape of your neck or slightly higher, depending on your preference. Secure with a hair elastic, keeping the ponytail loose and soft.
Optional: Gently tug at the crown and sides if you want to add volume.
I love these hair pins!
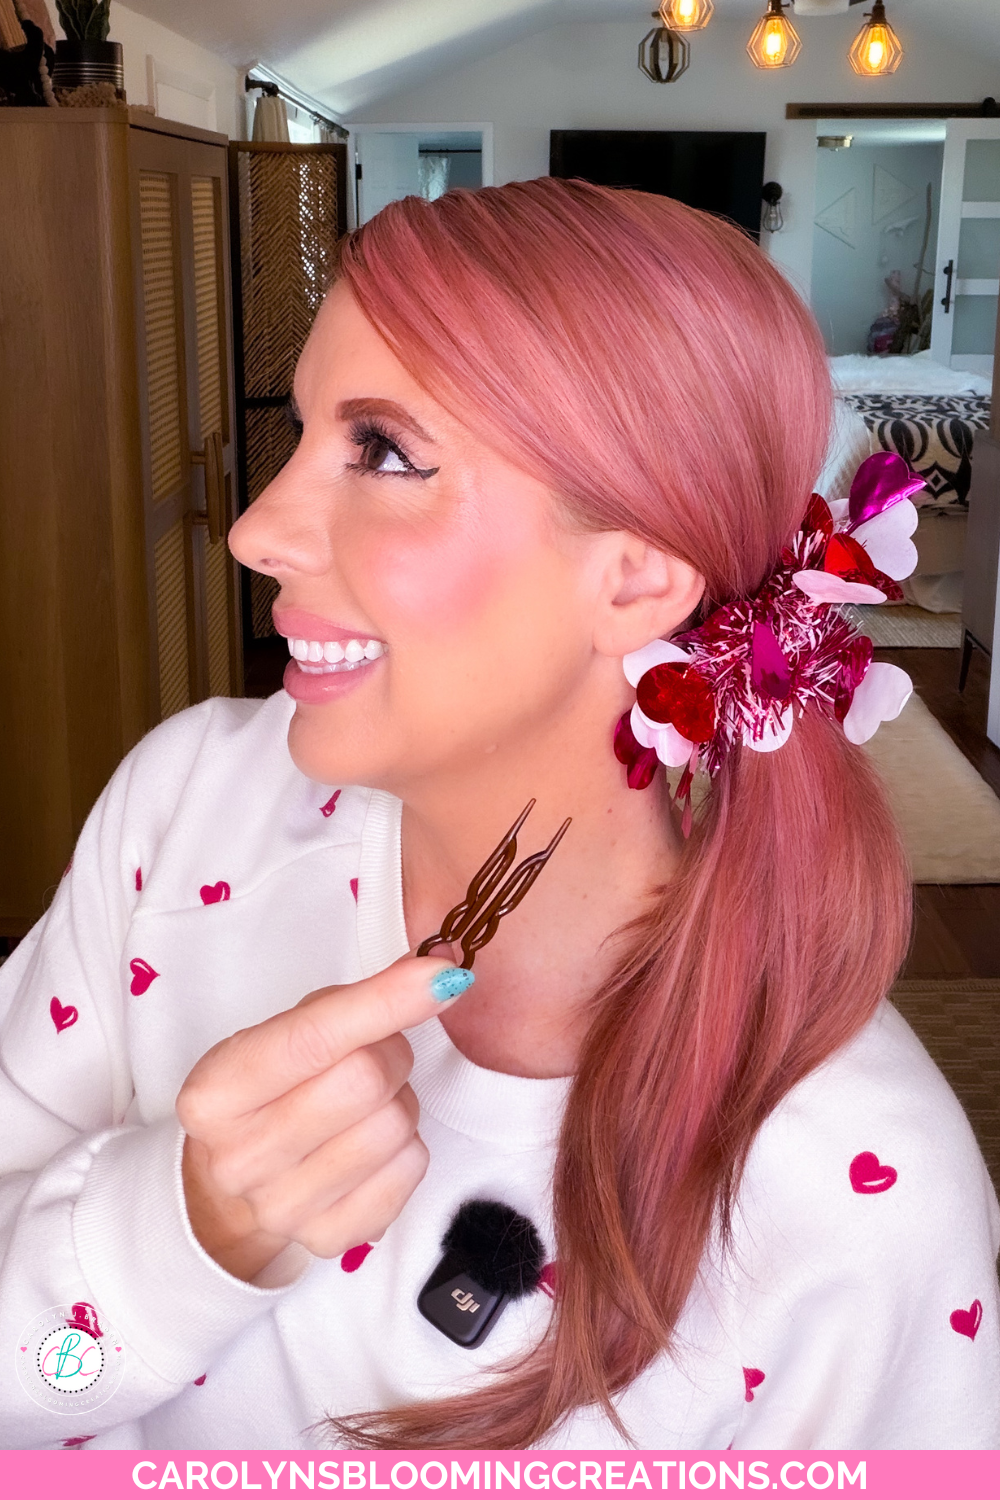
Step 5: Add the Tinsel
Wrap a short piece of tinsel around your ponytail to hide it, securing it with hair pins.
Step 6: Set the Look
Finish with a light mist of hairspray if desired to keep everything in place while maintaining movement.
My finished hairstyle
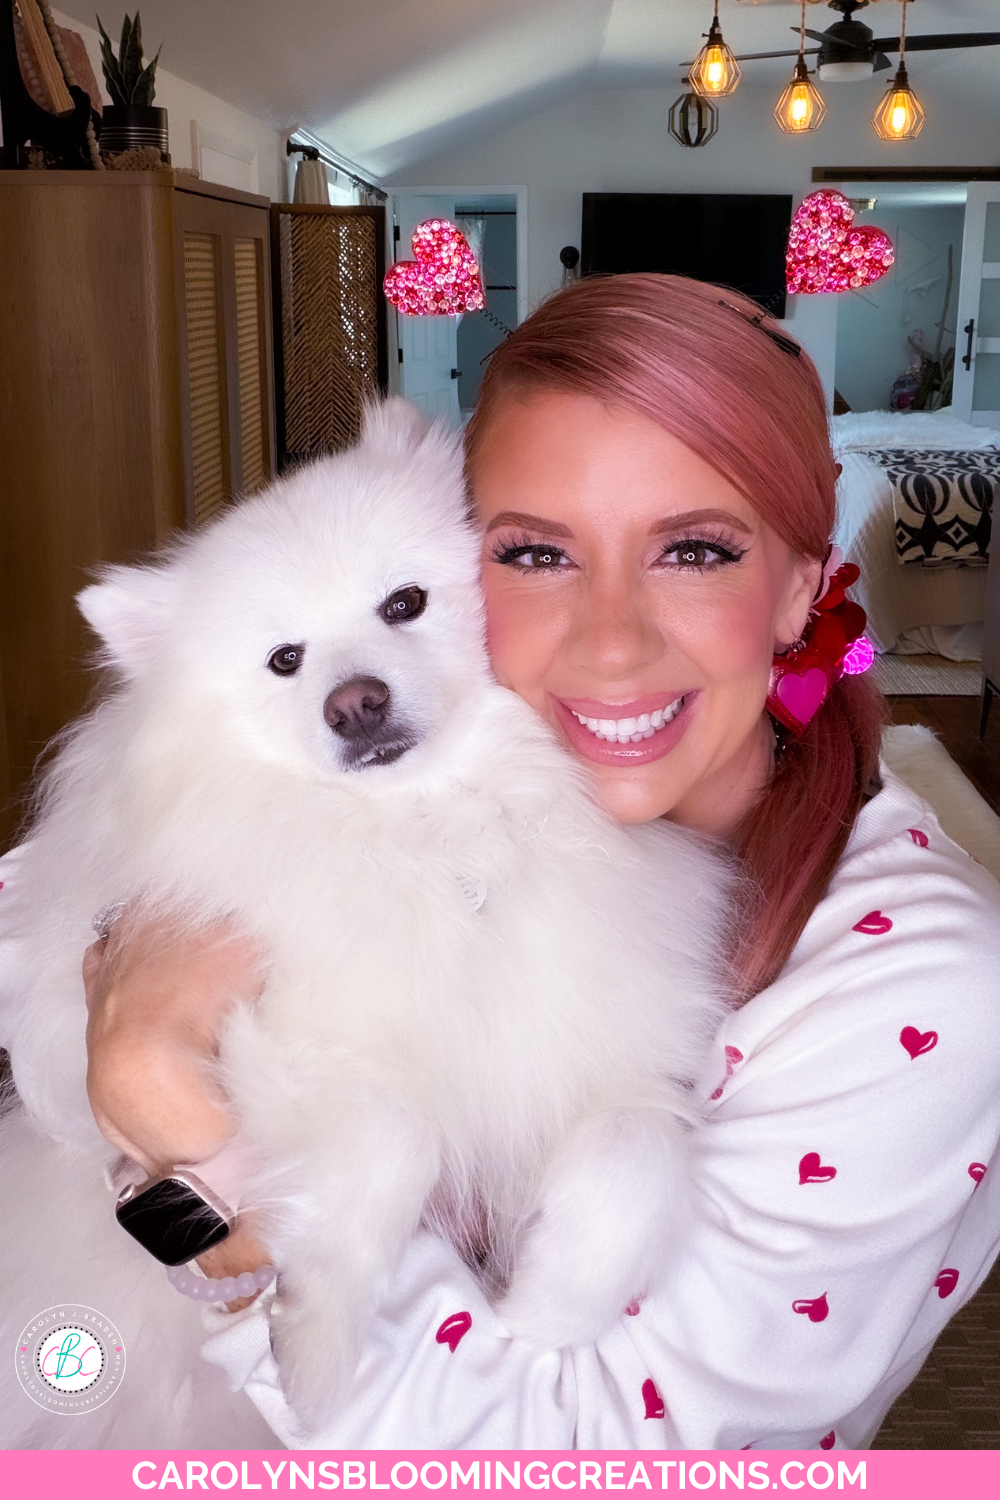
Step 7: Add Accessories to the Ponytail
Clip your DIY Valentine hair accessories or heart boppers to the top of your head for a subtle pop of festive charm.
Final Thoughts
This side-swept ponytail with DIY Valentine hair accessories proves that simple can still be special. It’s easy, affordable, and customizable—exactly what I love in a holiday hairstyle. Plus, the handmade accessories make it feel personal and extra sweet 💕
Take Action
If you try any of my ideas, let me know how it turned out—or tag me when you try them because I LOVE seeing your posts💚 If you tag me using @carolynsbloomingcreations or @carolynjbraden, I’ll see it! Or tell me about it in the comments below.
If you loved this article, we know you’ll love this one too: This Makeup Brand is the Secret to My Everyday Glow (No Filter Required!)
Carolyn J. Braden is the owner of Carolyn’s Blooming Creations is a regular contributor and editor for CBC. She has been featured in numerous media publications such as InStyle Magazine, on HGTV, on Bustle.com, and more. She is the author of the books Georgia McMasters in Amethyst Lake Cemetery, How To Be Yourself: 3 Ways To Help You Being You, and the illustrator for the children’s book Bridging Connections. She is a former classroom teacher that now dedicates her life to educating others on how to live their most healthy, creative and happy life. Learn more about her visiting our About Us page.