


Carolyn J. Braden • 3 Minute Read
Glamorous $3 Plastic Egg Ornament Makeover Using Alcohol Inks (Easy DIY!)
If you love a high-end look on a budget, this easy Easter DIY is about to be your new obsession. I took $3 plastic eggs from Target (you can also find similar ones at CVS Pharmacy), and transformed them into gorgeous, glossy alcohol ink ornaments that look boutique-worthy.
The best part? This entire project is beginner-friendly, customizable, and seriously fun—no artistic skills required!

The rainbow colors are beautiful!
Shop the Post
Support me as a creator and shop my links with no extra cost to you! See my creation come together via my Amazon Shop plus get buying links at affordable prices!
We also love shopping CVS (the ExtraCare card savings stack helping you to save!) and here are some of our CVS finds to stock up on (especially when you get that 40% off coupon!) and love Walmart (Walmart+ gets you free shipping and delivery on many items)!
Bookmark or pin this one by clicking the Pinterest SAVE button on the images in this article for crafty magic in an instant.

They look so cute on my driftwood tree
More Product Loves
You can also get the products I’ve featured and more of my product loves via my Target shop here or my CVS Store here (use your ExtraCare card to double up on savings!) or via my shop my store here or below:
The Creative Inspiration
After having such a great response to my chalk painted eggs, I was curious about alcohol inks, so I bought more plastic eggs to see what I could do with the inks on them. The matte plastic eggs loved alcohol inks and now I’m a huge AI fan, lol!

These will be hanging up all spring!
See my chalk painted and wax gilded masterpiece egg ornaments here or below in my 1-minute YouTube video via my channel @carolynjbraden:
🌸 Creative Ways to Display Your Eggs
Don’t stop at just hanging these cute eggs—here are some fun ideas:
Easter Tree: Hang them on decorative branches in a vase (try my DIY Driftwood Tree tutorial here)
Garland: String multiple eggs together for a mantel display
Basket Filler: Add to Easter baskets for a luxe touch…remove the screw eye and you’ll just have beautiful eggs to display!
Table Centerpiece: Scatter them around candles or florals
Gift Toppers: Tie onto wrapped gifts for an extra special detail
Wreath Accent: Attach a few to a spring wreath
💡 Pro Tips
Use lighter colors first, then layer darker shades
Don’t over-blend—let the inks naturally create patterns
Work on a protected surface (inks can stain!)
Try metallic inks for an extra glam look

The inks gave me very vivid colors
✨ Supplies You’ll Need
Links go out to either the brand website, Amazon, CVS, Walmart, Sam’s Club, Target, or Lowe’s where we source our supplies based on discounts, budget and pricing.
Check out my 1-minute video tutorial for this project on my TikTok now or via my YouTube channel @carolynjbraden!
Plastic whole eggs ($3 from Target or get a similar set at CVS)
Alcohol inks (mine are from Amazon)
Disposable gloves (trust me—you’ll want these!)
Black screw eyes (for hanging)
Ribbon (any style you love, this is my set)
Jute string or twine
Dropcloth or a garbage bag
Optional: Floral foam for storing wet eggs
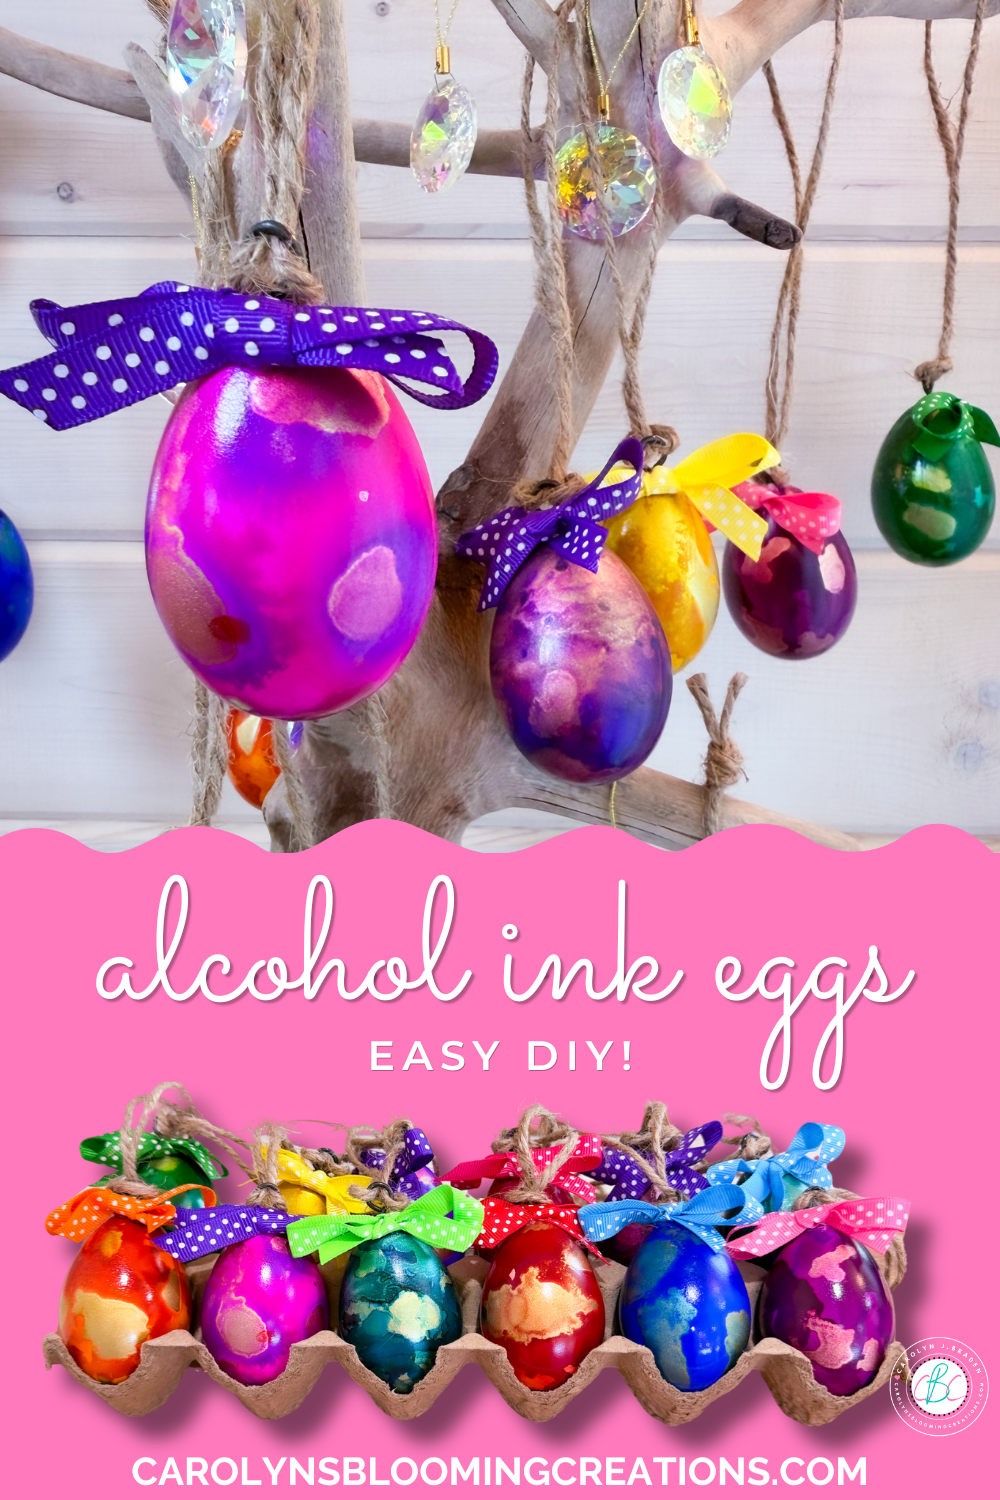
Make them in colors you love!
🎨 How to Make Alcohol Ink Easter Egg Ornaments
Step 1: Prep Your Eggs
Open your plastic eggs and make sure they’re clean and dry before starting.
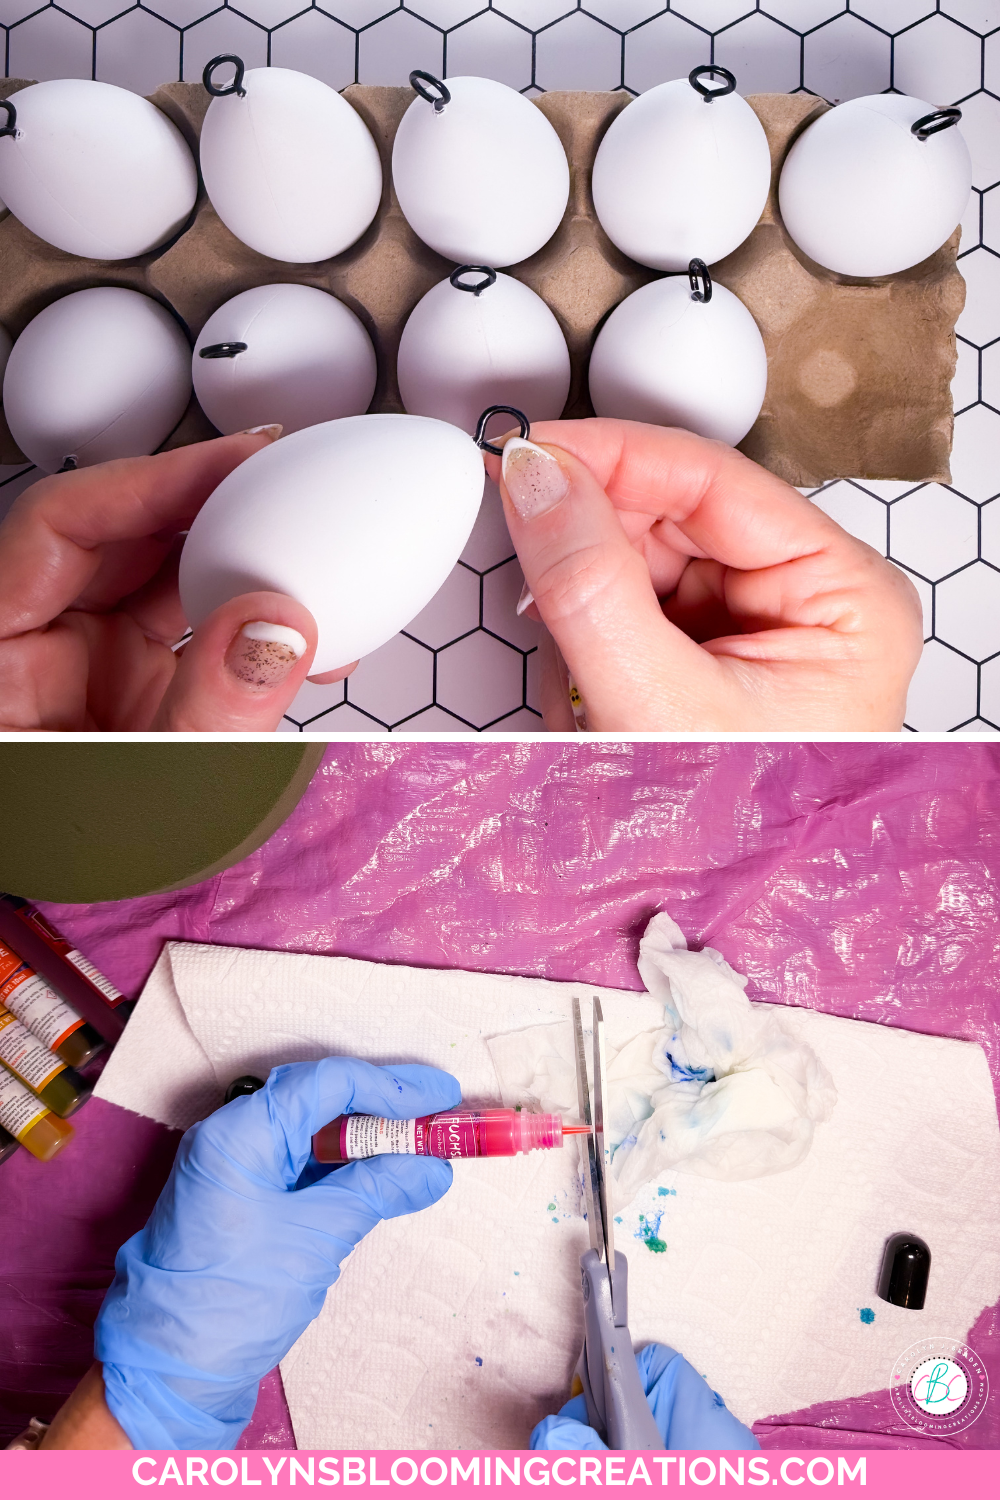
The ink splatters when cutting the tip, so prep your work area accordingly
Step 2: Add the Screw Eye
Carefully twist a black screw eye into the top of each egg. This will be used later for hanging. Use jewelry pliers if this gets difficult….they help you get started easily.
I used floral foam to store the egss
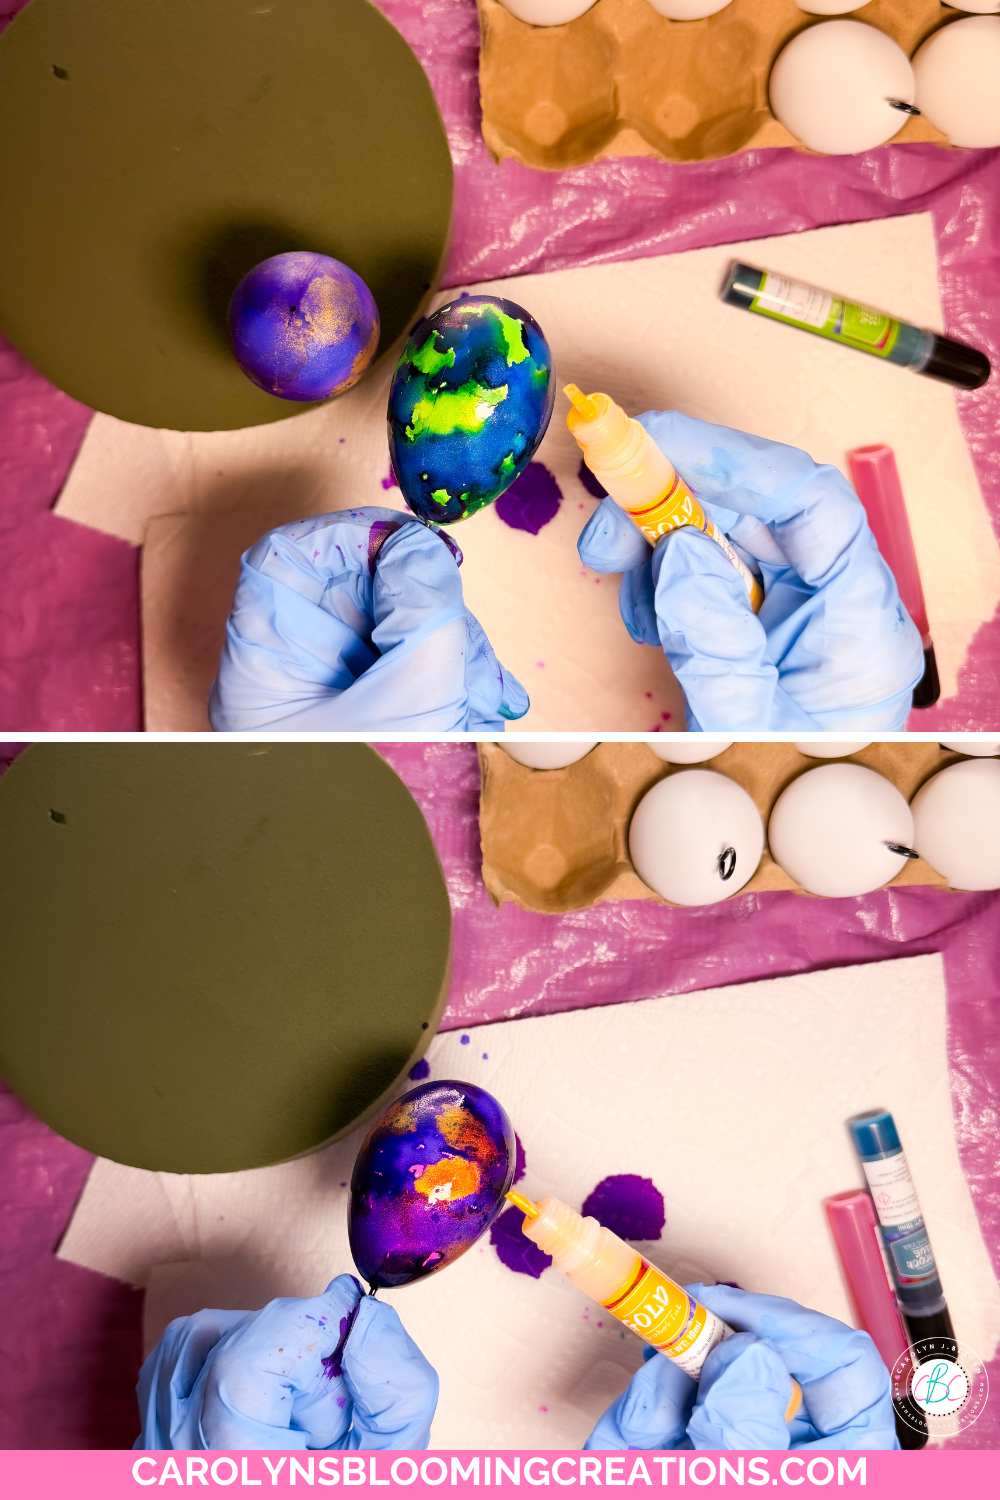
Step 3: “Paint” with Alcohol Inks
Put on your latex gloves—this part gets messy (in the best way!).
Apply drops of alcohol ink directly onto the egg
Use your gloved hands to blend and move the color around
Layer multiple colors for a marbled, artistic look

I added metallic accents
No two eggs will ever look the same—that’s the magic of alcohol inks!
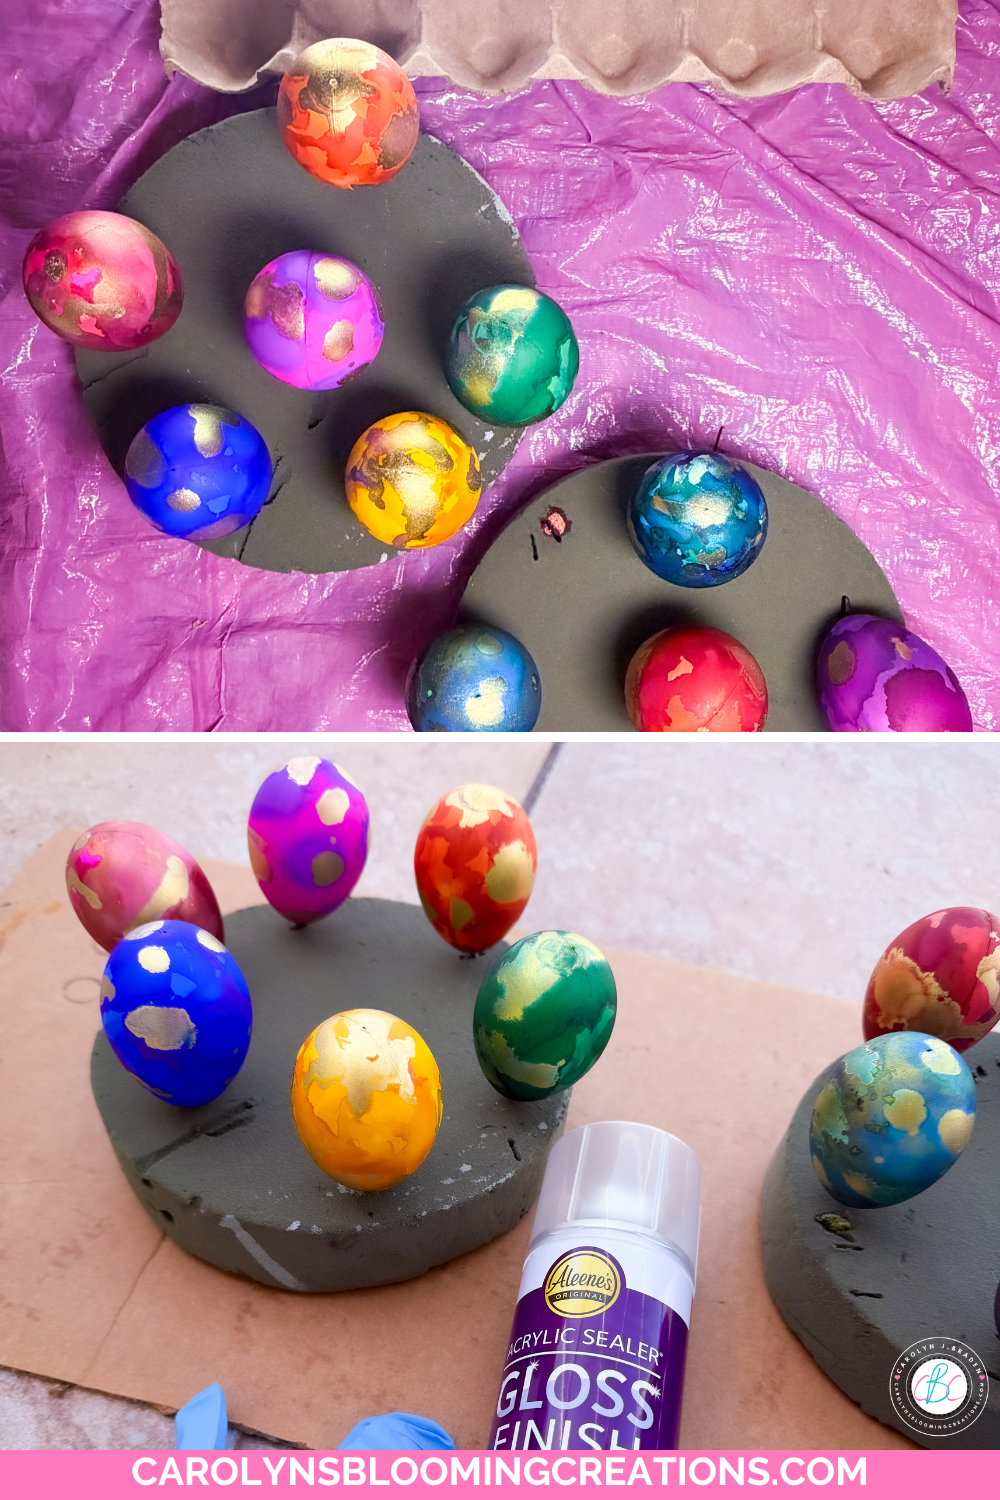
Spray outside for proper ventillation
Step 4: Let Them Dry
Set the eggs aside and allow the inks to fully dry. I set mine on floral foam by their hooks.

They shimmer in the sun beautifully
Step 5: Seal with Gloss Finish
Once dry, spray each egg OUTSIDE with Aleene’s Acrylic Spray Gloss Finish to:
Lock in color
Add shine
Give that polished, professional look

Adding the bows and jute string
Step 6: Add Ribbon & Hanging String
Hot glue ribbon onto the top (low temp) and tie into a bow
Attach jute string to the screw eye for hanging
And just like that—you’ve got stunning, custom Easter ornaments!

They make the cutest Easter decor
Take Action
If you try any of my ideas, let me know how it turned out—or tag me when you try them because I LOVE seeing your posts💚 If you tag me using @carolynsbloomingcreations or @carolynjbraden, I’ll see it! Or tell me about it in the comments below.
If you loved this article, we know you’ll love this one too: How to Make Pickled Pink Deviled Eggs: The Prettiest Appetizer
Carolyn J. Braden is the owner of Carolyn’s Blooming Creations is a regular contributor and editor for CBC. She has been featured in numerous media publications such as InStyle Magazine, on HGTV, on Bustle.com, and more. She is the author of the books Georgia McMasters in Amethyst Lake Cemetery, How To Be Yourself: 3 Ways To Help You Being You, and the illustrator for the children’s book Bridging Connections. She is a former classroom teacher that now dedicates her life to educating others on how to live their most healthy, creative and happy life. Learn more about her visiting our About Us page.