


Carolyn J. Braden • 4 Minute Read

How to Make a Beachy Personalized Cricut Ornament Step by Step
I wanted to start to make my own vinyl decals so I purchased the Cricut Joy after doing some research. It comes with its own software to help you design many different vinyl decals and even can do beautiful cut out greeting cards. I had an idea to make a beachy ornament filled with sand and real shells from my current home, Sanibel Island Florida. Read on to learn how to make a beachy personalized Cricut ornament with my step-by-step tutorial.
Why Cricut Joy?
I decided on the Cricut Joy machine after reading many reviews on Amazon. I’ve ordered personalized stickers for my glass dog food containers and glass soap bottles via Etsy, so if you don’t want to buy the machine, you can ask many Etsy sellers to make personalized vinyl stickers for you.

Sanibel Island, Florida beachy DIY ornament
Free Cricut Designs
There are many smart cutting machines on the market, but the reason why I choose Cricut was because the software had good reviews. After setting it up, I was able to make my ornament from start to finish in about 30 minutes and now that I’ve done it once, I know I could make one even faster. There are FREE templates on their software uploaded by other users that you can use to make your projects quicker.

This beachy ornament makes for a cute gift!
Cricut Subscription
Even though there are free templates and fonts you can use with the Cricut software, you can purchase a subscription for more. I decided to try a subscription for a while to see how much I use it. The subscription gave me access to the fonts I used with this project.
Cricut Joy Size
The Cricut Joy makes smaller vinyl decals as it’s a smaller machine, which is all I wanted it for at this time. You can get larger machines for bigger projects. I purchased larger vinyl decals for my washer and dryer years ago and love them. I got mine on Etsy, but Amazon sellers have them here too.
See our process for applying large vinyl decals to our machines (we made sure these were not permanent in case we didn’t like them) in the video below or via my YouTube channel @carolynjbraden:
How to Make the Cricut Ornaments + Discount Code!
Now for the DIY Cricut personalized Christmas ornaments. You can use my steps below to try this out on your own. You do not need to fill your ornaments with sand…you can fill them with many materials including tinsel, feathers, dried flowers and more. See some of my 10 minute tinsel filled varsity letter ornaments here. You can use other brands of vinyl, but I’ve only experimented with Cricut brand so far.
I purchased the fillable ornaments from Temu and if you shop Temu, use my discount code afe55197 or my link here to get 30% off your first app order. If you do not want personalized vinyl decals but still want to make ornaments, Amazon has these vinyl holiday stickers that you could try. I’ve not tested them, but they may be a good option.
Things You Need:
Cricut Joy Machine (I got a set that came lots of things, get it on Amazon or Walmart OR you could one of many vinyl decal Etsy sellers to make a personalized sticker for you)
White Permanent Vinyl for Cricut Joy Machine (My set came with this, but you can buy it on Amazon or Walmart and it comes in many colors)
Cricut Starter Tool Set (My Cricut came with these but you can buy them on Amazon and Walmart)
Scissors
Tweezers (for placing seashells easily)
Round Fillable Ornaments (Mine are round and flat-ish, about 3.15 inch and from Temu, but Amazon and Walmart have them too)
Natural Sand (I got mine naturally from the beach, but Amazon and Walmart have some)
Tiny seashells (I got mine naturally from the beach, but Amazon and Walmart have some)
Raffia ribbon (I got mine at a craft store, but Amazon and Walmart has some too)
See my one-minute tutorial for this project in the video above or via my YouTube channel @carolynjbraden.
How-To:
Measure your ornaments.

Measure your ornaments before making your Cricut design
Open the Cricut Joy Design Space software on your computer. Click +New Project.
Title your project and click Text. A text box will appear and you can change the font and size in the tool panel of the software at the top of the screen.

How to use Cricut Joy Software
I placed my text boxes at the top of my screen and sized it using my mouse to ensure it would fit on the ornament. My ornament was 3.15 inches and I made sure my design would fit in width and height. I added three text boxes as I wanted my design to be in different fonts. You can buy fonts, but I used ones that were included in my subscription.
After you get your design the way you want it, click the Make button. I selected “Without Mat” to answer the next box that asked “How will you load all your materials for this project?” as I was using Cricut Smart materials. Click Confirm.
On the “Review artwork” screen, review your sizing and design. This is also where you can double check the size and resize as needed. If everything looks good, click Continue. You can always click “Cancel” to return to the previous screen if needed.

How I loaded my vinyl into my Cricut Joy
On the next screen, your machine will connect and you need to select the material. I selected Smart Vinyl-Permanent. Then it asks you to load the material into the machine. Just unroll your vinyl and slide it into the machine and make it fit in between the markers and slide it towards the needed. The machine will position itself. Once loaded, click Go and it will cut your design into the vinyl.

Peeling the background off my design
I then cut around my design with scissors and used the hook looking tool to pick off the BACKGROUND vinyl from my design.

Peeling the background away form the cut design
I peeled that background off and it left the letters on the backing.

Cutting the transfer tape to fit my design
I cut a piece of transfer tape to fit over my design.

Peeling the transfer tape away from the design
I peeled the transfer tape off its backing and put it onto my cut design.
Using the scraper tool
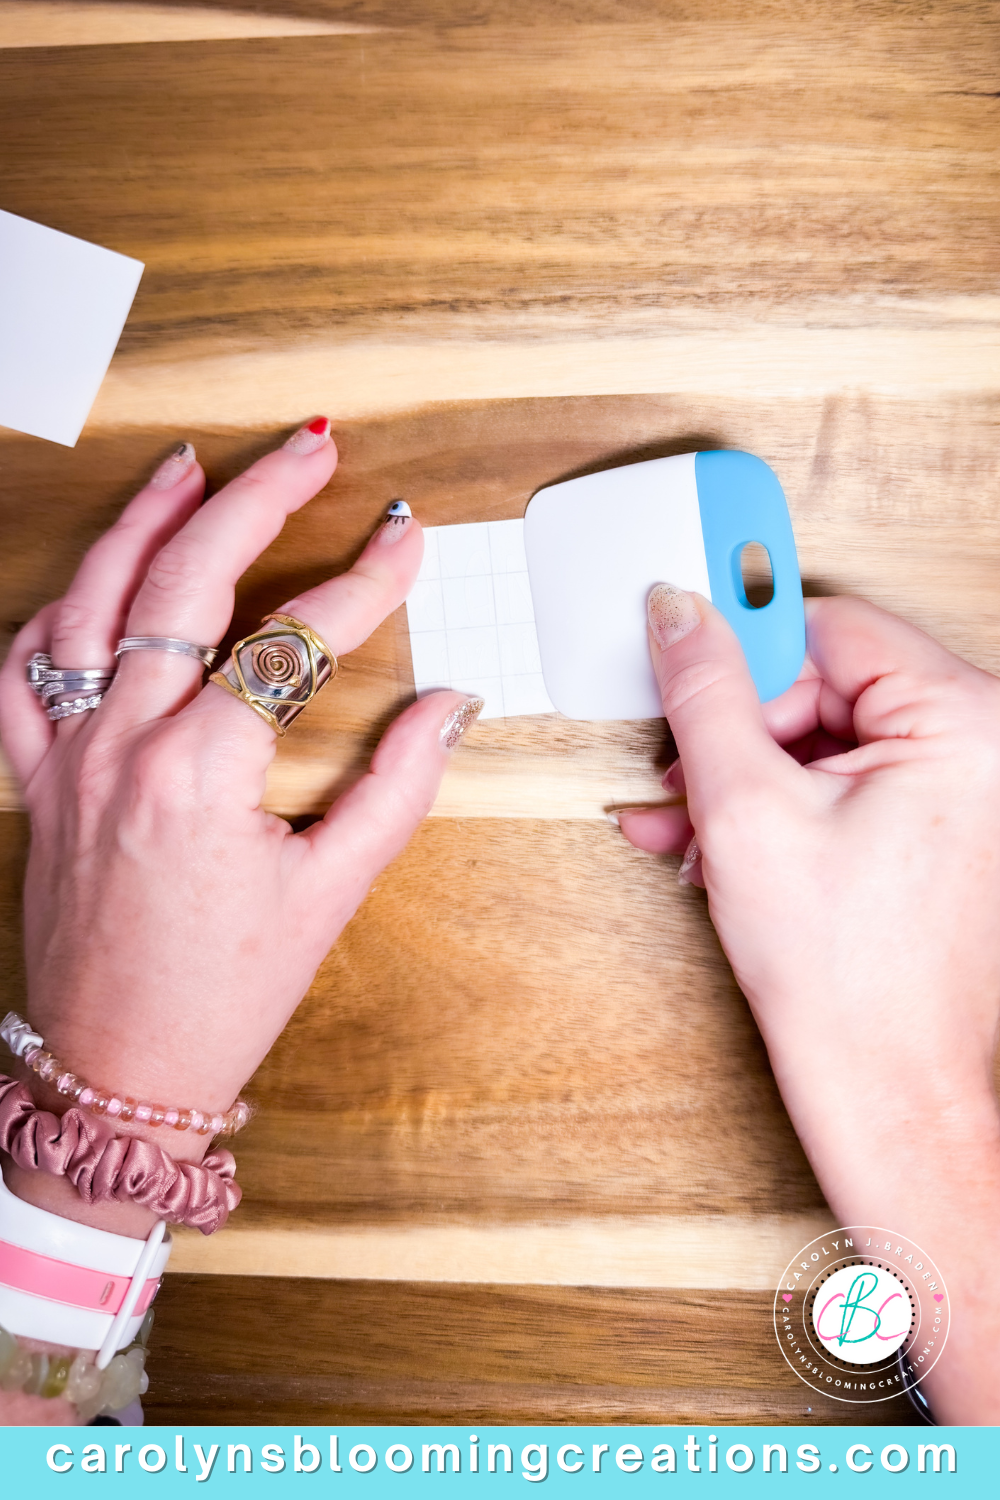
I then used the scraper to make sure the transfer tape stuck to every letter. This took several attempts. I peeled it away from my design slowly to make sure it stuck to all of it, placed it back down if it didn’t and scraped some more.

The design peels away from the backing paper with the transfer tape
Once I made sure the tape stuck to my entire design, I peeled the transfer tape off the design and all it was on the tape.

Placing the vinyl sticker onto the ornament
I placed the transfer tape with my design onto the ornament (make sure you get it exactly where you want it as its permanent!).

Using the Cricut scraping tool to transfer the design
I used the scraper to “transfer” my design onto the ornament by gently scraping over the transfer tape. I peeled the transfer tape up gently and the design was transferred onto the ornament.

The vinyl sticker is placed on the ornament
I scraped a little more to make sure the design had no bubbles and was completely flat.

Filling the ornaments with sand
I took the cap off the ornament and added a bit of sand to a small funnel on the opening of the ornament to fill it.

The ornament is filled with sand
I placed the tiny seashells into the ornament using tweezers, but you could just drop them in.

Placing the shells in the ornaments with tweezers
I put the cap back on the ornament and cut some raffia and tied it around the top of the ornament. The ornament was a bit heavy, so you may want to add a hook instead of using the ribbon that is already attached to the ornament for hanging. Martha Stewart’s website has some great ideas on hanging various types of ornaments.

The completed Sanibel Island beachy ornament
Then it’s done for gifting or hanging in your home or on a Christmas tree. The sand filled ornaments will shift, so they probably won’t ship well. Just a note that I thought was important.
If you loved this idea, then we know you’ll love this one too: How to Make Air Dry Bread Clay Mushroom Ornaments
Carolyn J. (C.J.) Braden is the owner of Carolyn’s Blooming Creations is a regular contributor and editor for CBC. She has been featured in numerous media publications such as InStyle Magazine, on HGTV, on Bustle.com, and more. She is the author of the books Georgia McMasters in Amethyst Lake Cemetery, How To Be Yourself: 3 Ways To Help You Being You, and the illustrator for the children’s book Bridging Connections. She is a former classroom teacher that now dedicates her life to educating others on how to live their most healthy, creative and happy life. Learn more about her visiting our About Us page.