


Carolyn J. Braden • 3 Minute Read

How to Create Superman Ice Cream Foil Nails
Article published: 3/20/25
Article updated: 3/21/25 with a video tutorial
I love easy nail art and these nail foils make it even easier to have fancy nails fast! I bought several packs of nail transfers from Temu and started experimenting with my romantic Rococo style cupid and angel pack and now I’m experimenting with some fun colored shiny foils which reminded me of a childhood favorite ice cream flavor, Superman. Read on to learn how to create Superman ice cream inspired nails.

Superman ice cream example
What is Superman Ice Cream?
If you have never seen or tasted Superman ice cream it’s a three-flavor ice cream that is swirled in Superman colors, red, blue and yellow. According to Wikipedia, it debuted before Superman and it’s said that the ice cream is what inspired Superman’s color scheme. Often times, you’ll see the red take on a pinker tone as it’s mixed with a white ice cream base, so that’s why I call my nails “Superman ice cream” inspired.
What Does Superman Ice Cream Taste Like?
I remember my local Ehrler’s shop (my grandma’s favorite ice cream parlor in Louisville, Kentucky) making it taste sweet and almost like bubblegum, though others say it tastes like a mixture of vanilla, cotton candy, cherry, marshmallows and more. Learn more about the history of Superman ice cream and it’s taste in this article from Detroit Public Radio.
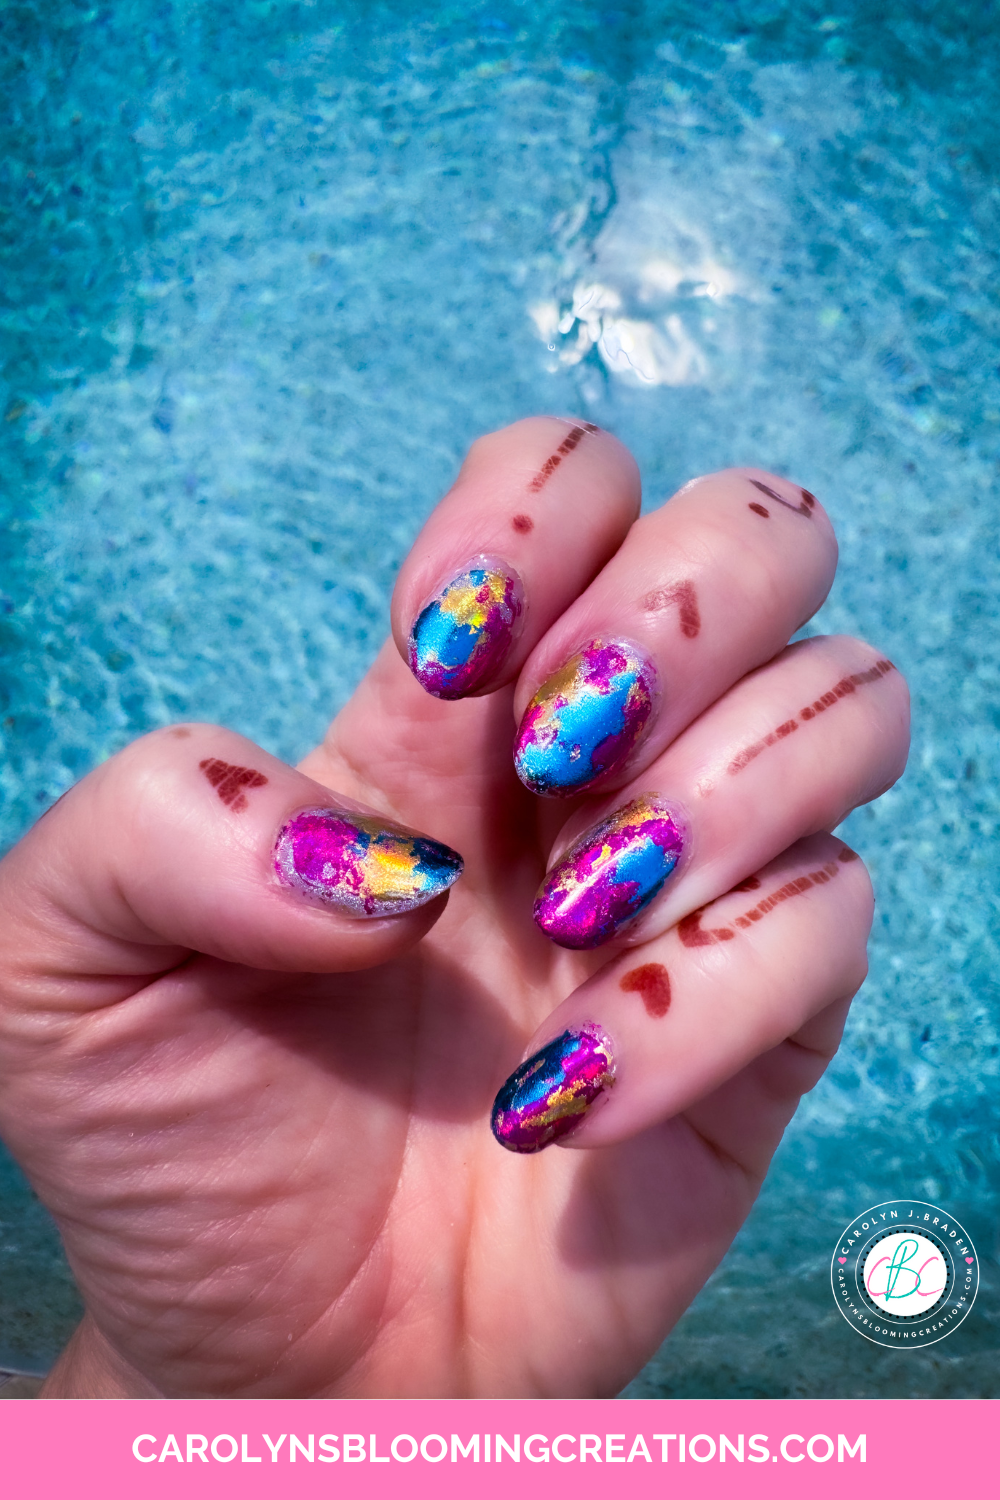
My Superman ice cream inspired nails
If you are cutting back on your sugar intake, looking at these Superman nails fulfills what I truly liked best about the ice cream; it’s color. You can do the Superman colors like I did or you can use a different color combination.
Some other Superman colored items I love:
Super Hero Sprinkles (Amazon)
Superhero Incentive Stickers (Amazon)
Project Cloud Sneakers (Amazon)
Superhero Party Supply Set (Walmart)
Superhero Girls Party Plates (Walmart)

Superman ice cream reminds me of my 1980’s school supply colors
Nail Transfers vs. Nail Stickers + Discount
I ordered my nail transfers from Temu. They came in a pack of 8 and if you order from Temu and are a new app user, you can use my link here to browse all their nail transfers and get a 30% off discount at checkout. You can also use my code afe55197 at checkout.
See my 1-minute Rocco Cupid nail transfer tutorial below or via my YouTube channel @carolynjbraden:
I like nail transfers better than nail stickers because they are thin and lay flat against your nail and mine (so far) have not peeled up. I got mine to last for a week (and they would have lasted longer but I like to do my nails weekly), and usually stickers start popping up on my nails after a couple of days, even on my gel polish.
Now for the tutorial! Here’s what you’ll need:
Gel polish color of your choice (I usually use Red Carpet Manicure for my designs and you can get it on Amazon)
Gel polish base and top coat (I use the base and top coat from Red Carpet Manicure from Amazon)
Nail transfer or nail foil transfer gel (I got mine on Temu, but Amazon has it too)
Nail transfers (I got my set on Temu, but Amazon has a set too that comes with the transfer gel)
Orange stick (Amazon)
Small scissors
LED light to cure gel polish (I like this one from Amazon)

The foil shines beautifully in the sun
Get my 1-minute video tutorial for this foiling nail art below or via my YouTube channel @carolynjbraden:
How-To:
Paint a thin layer of the gel polish base onto each nail and cure. I cured each hand for 1 minute.
Paint 2-3 layers of the color gel polish onto your nails and cure each hand for 1 minute in between each layer.
Use small scissors to cut off a piece of some of the nail foil colors. I did a fuchsia, a blue, and a gold. You don’t have to cut them to perfectly fit your nails, especially if you plan to layer some designs like I did. I cut off three small foil squares and set them aside.
Paint a thin layer of the transfer gel onto each nail and cure for 30 seconds to 1 minute.
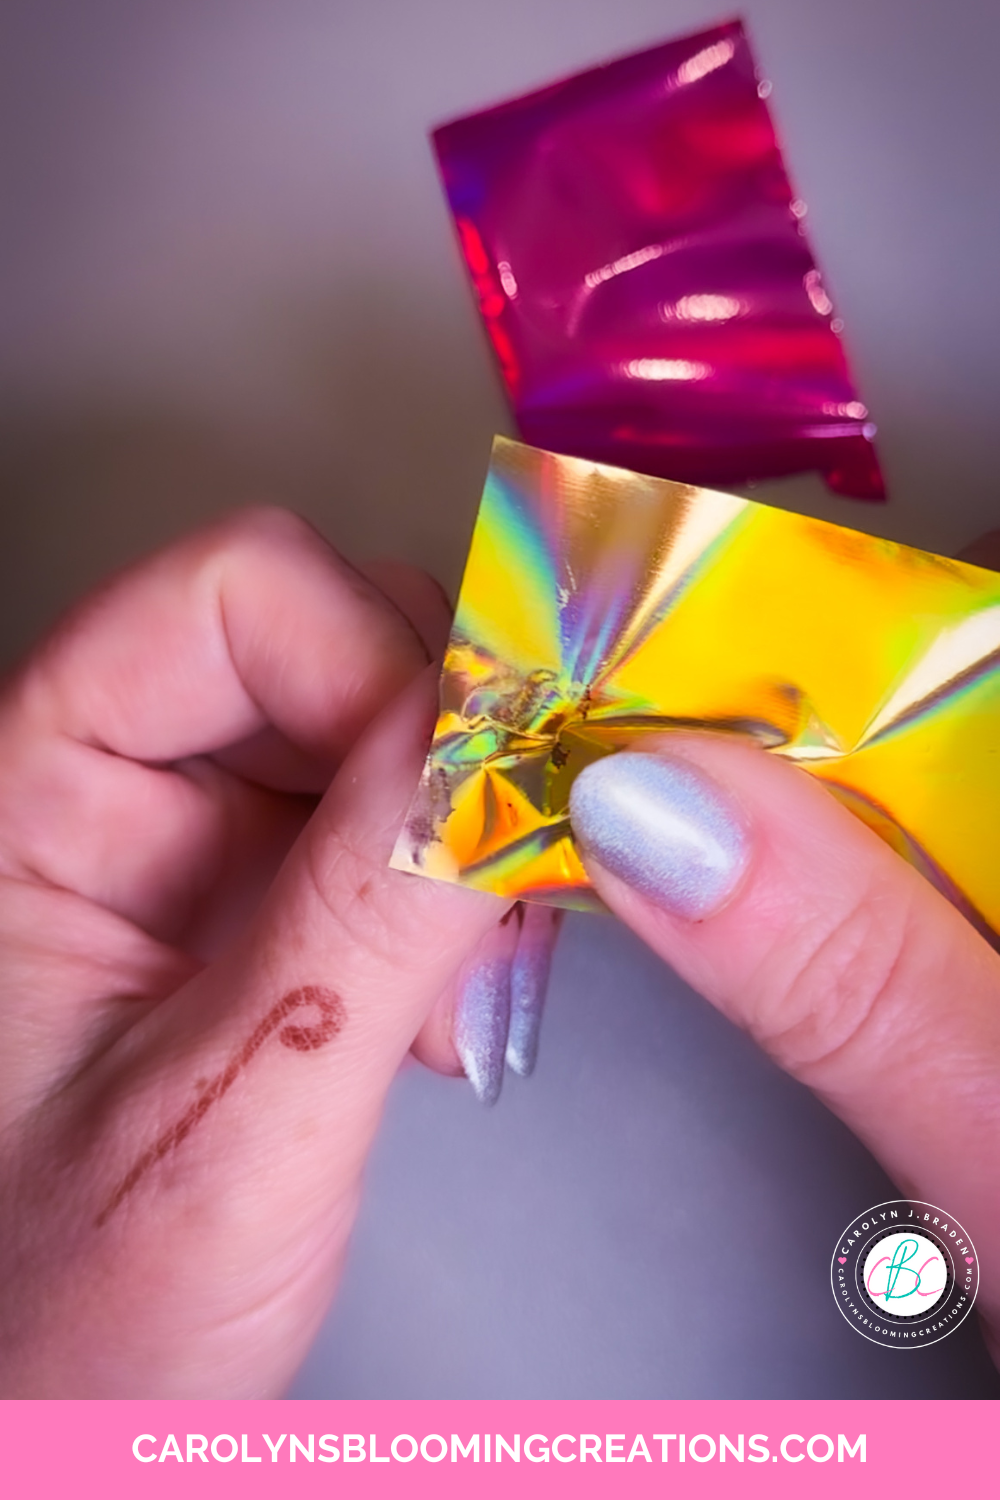
Applying the foil after the transfer gel cured
Place a piece of the nail foil onto each nail. I used a metal nail tool and a wood orange stick to rub or “transfer” the design from the plastic to my nail. I gently peeled it back to make sure it transferred and if it didn’t, I placed it back on my nail and rubbed it a bit more.

The gold foil layer
I layered three colors of foils and kept layering until my nails were mostly covered. I selected a base coat that coordinated in case you could still see some of the polish after foiling. You may have to add more transfer gel in between each transfer. I only had to on a couple of nails to touch up some small areas.

Layering fuchsia foil over blue and gold
IF YOU ARE HAVING PROBLEMS WITH YOUR TRANSFER STICKING: Try curing the transfer gel for less time. If you’ve used up all the “stickiness” of the transfer gel while trying, apply a second round and cure for a little less time….I’ve had to do this and the next round stuck better.
After I had all my nail transfers looking how I wanted, I applied my gel top coat and cured for 1 minute.

Superhero nails complete
Overall, this process is pretty easy. The colorful nail foil set I used applied very quickly and easily.
The all over nail transfer designs look like they’ll be a bit harder, but I’ll try them soon. It is a lot easier than hand painting my designs on each nail, but I do enjoy that too. See my hand painted designs in my article here.
If you loved this article, then I know you’ll like this one too: Easy Hair Product Storage Solution with Wireless Lighting
Carolyn J. Braden is the owner of Carolyn’s Blooming Creations is a regular contributor and editor for CBC. She has been featured in numerous media publications such as InStyle Magazine, on HGTV, on Bustle.com, and more. She is the author of the books Georgia McMasters in Amethyst Lake Cemetery, How To Be Yourself: 3 Ways To Help You Being You, and the illustrator for the children’s book Bridging Connections. She is a former classroom teacher that now dedicates her life to educating others on how to live their most healthy, creative and happy life. Learn more about her visiting our About Us page.