


C.J. Braden • 4 Minute Read

How To Hide Ugly Ceilings With Reed Fencing
When we completed this reed fence ceiling project in September 2022, it was less than a week before Hurricane Ian hit our home, Sanibel Island. Hurricane Ian hit Sanibel and much of Southwest Florida at a category 4 (a fraction away from being a 5) hurricane on September 28th, 2022.

The area was dark and not finished looking
As I write this, I am fortunate to be back at home after a 4-month evacuation with family in Indiana. Hear my story about the life-changing event for many humans and wildlife by clicking here.

Finished Reed Ceiling Pre Hurricane Ian
One thing I know for sure is that our reed ceiling survived Ian’s wind and flooding! I waited to write this project up because I wanted be able to see if it survived.

We had lots of damage to our house though, like our roof was damaged, our pool turned into a muddy pond, some of our floors warped a bit from leaking and more, but we were one of the fortunate ones as some neighbors had ceilings collapse and some lost their homes and businesses completely.

Here’s a one-minute video tutorial of our reed ceiling process via our YouTube channel @carolynjbraden:
Siding was cleanly swept off our house from the exact side that our reed ceiling was on, but because the reed ceiling was under the house and was shielded by massive Screw Pines (trees that did not survive the storm, yet saved our pool cage and much else), it was okay.

The patio ceiling before the reed fencing
Weird things were saved like a mop and bucket (which sat completely undisturbed) on our upstairs porch, yet the side of the porch was ripped off. My Don’t Worry Be Happy house sign and driftwood front porch garland was untouched, but a hurricane/impact resistant door slightly blew open from the strength of the winds. Ah, how strange Mother Nature can be sometimes.

Hanging the optional screening
Since I can say this ceiling is a bit of a survivor, I would recommend it to anyone wanting to hide an ugly ceiling. It’d do best in an outdoor space, but it could work great as a basement ceiling too.
Read on to learn how to install a reed fencing ceiling.
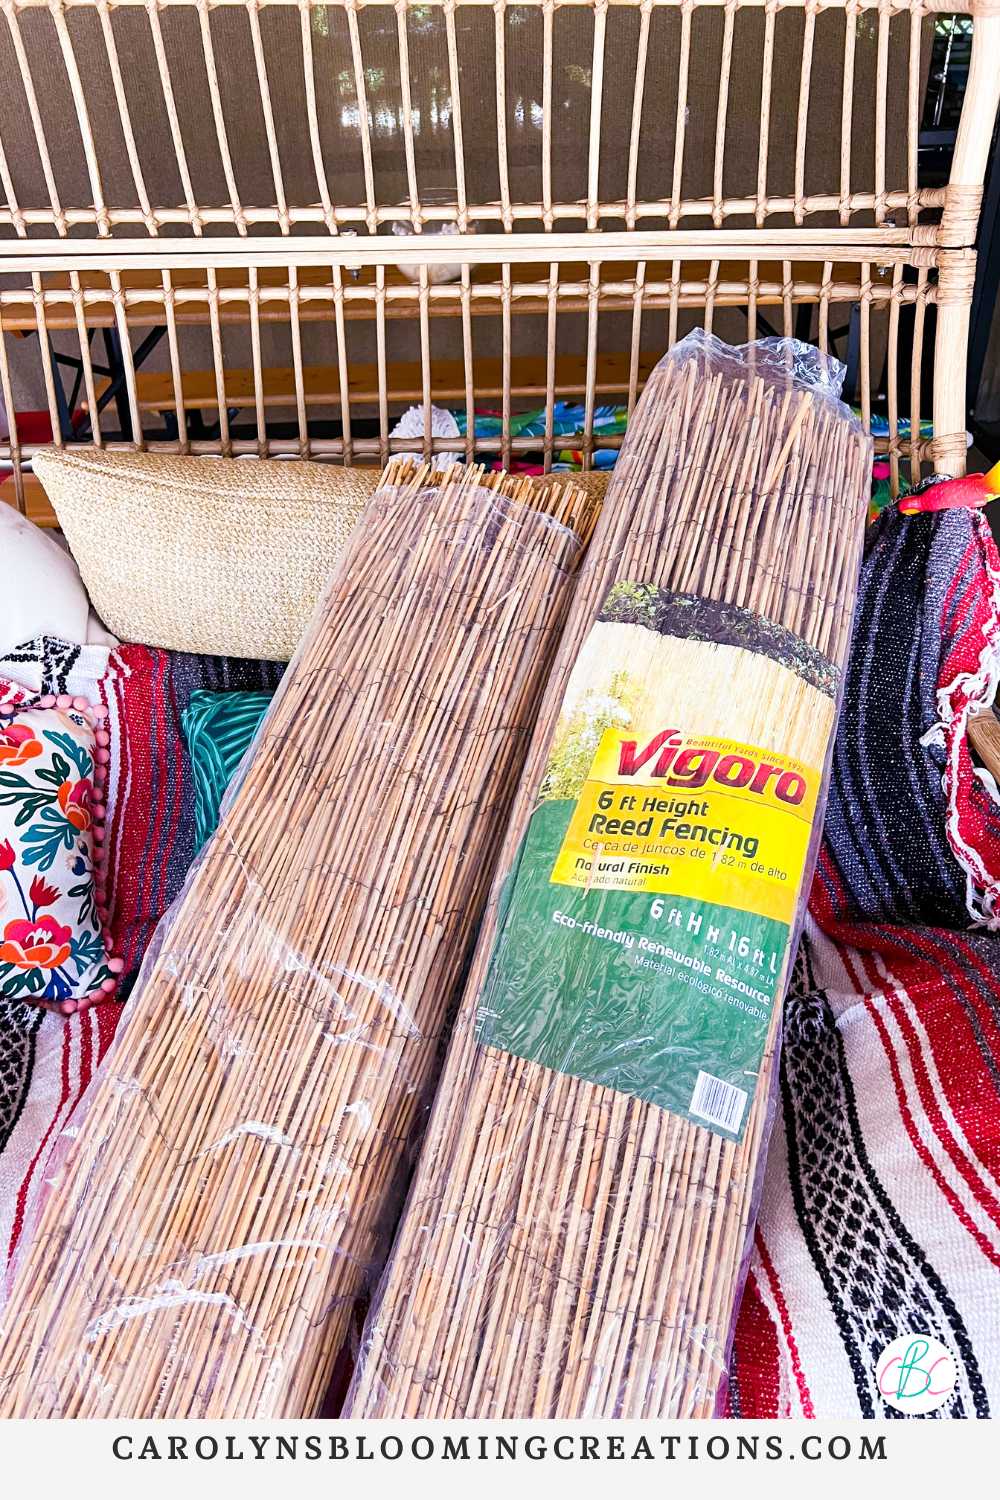
The reed fencing we used
What we did: We made our UGLY ceilings under our piling style Sanibel Island home gorgeous with inexpensive REED FENCING and wood trim, which lightened the area tremendously and made it have a finished design.

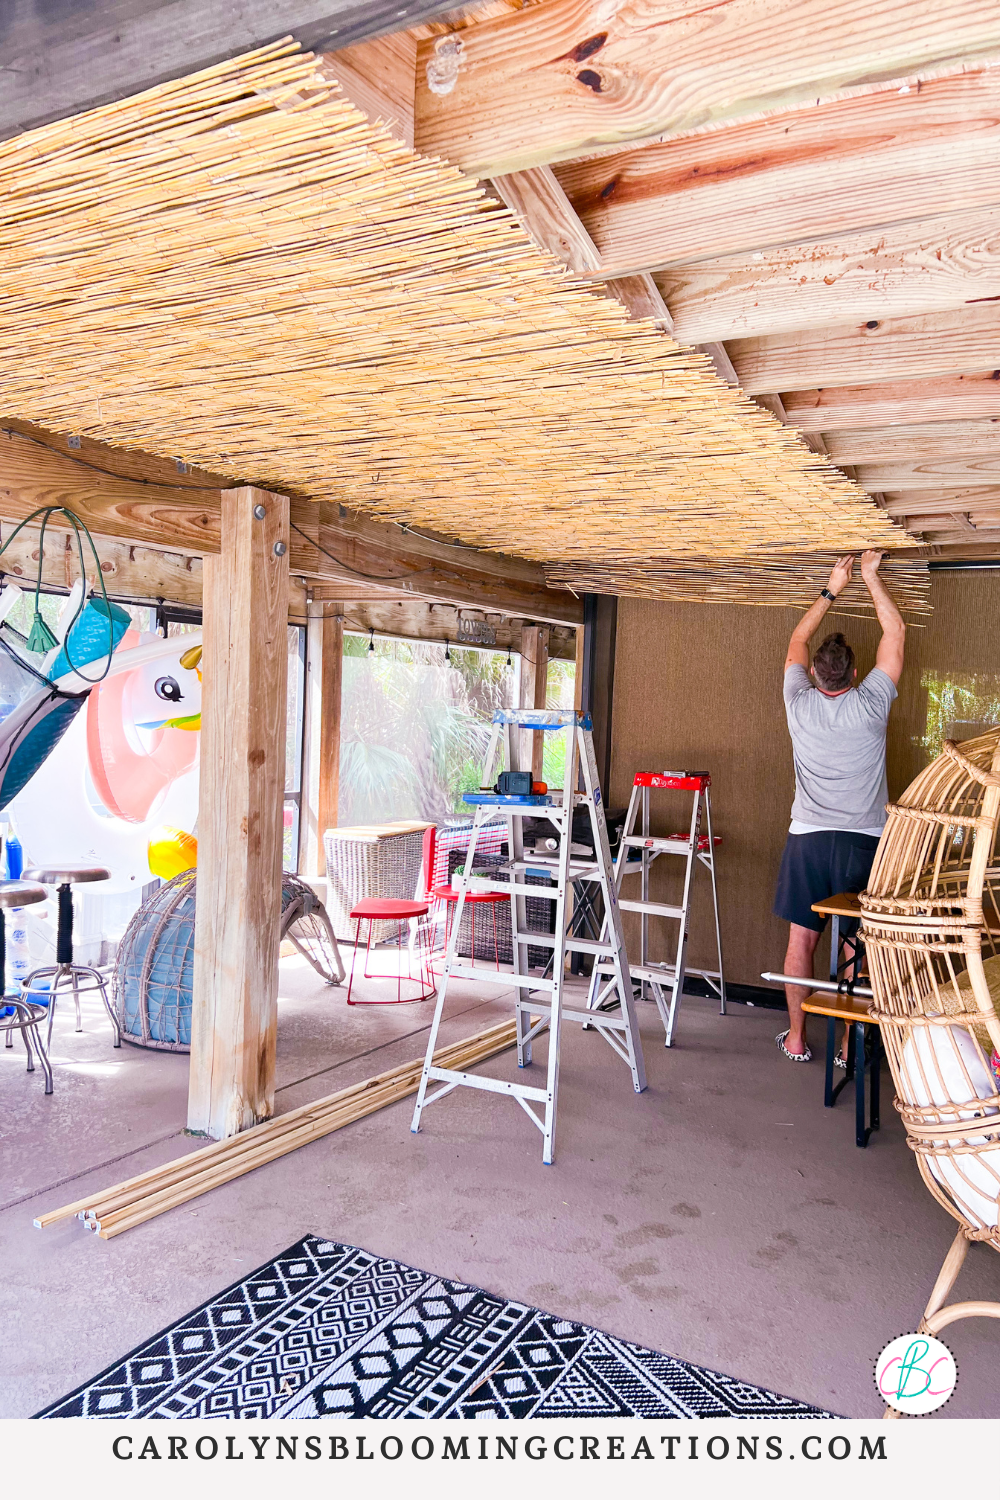
Starting to hang the reed fence ceiling
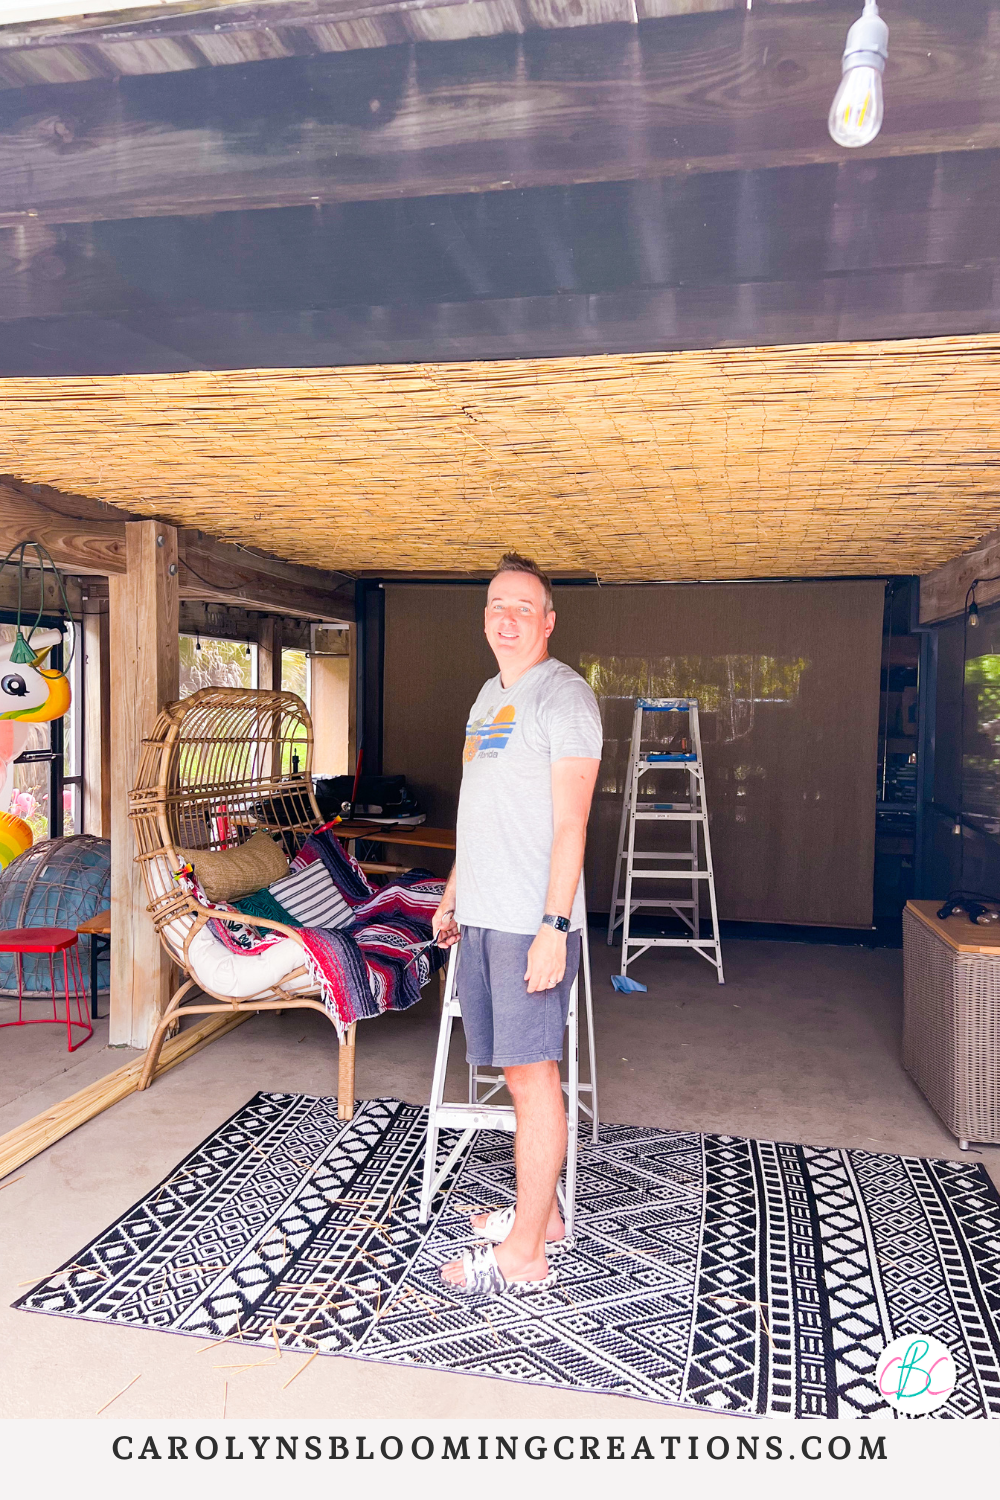
This project takes 2 people (my design assistant/husband helped) and cost us approximately $100 (we already had a drill, a staple gun, and a saw).

I held the reed ceiling while Tommy stapled it
Suggested supplies:
· 6’ foot X 16’ foot reed fencing (the amount you will need depends on how big your ceiling is, and reed fencing does come in smaller rolls if you need a smaller size)
· Stainless steel staples (+ staple gun)
· 1” x 2” pressure treated pine (we used about 8 pieces; you may need a saw to cut it to fit your space)
· Stainless screws (+ drill) or a brad nailer
· Optional: screening, heavy duty scissors, wire cutters, something to measure your space with with like a Kapro 313 Measure Mate
After measuring our space, we purchased 3 rolls of Vigoro 6-foot reed fencing to fence our approximately 12’ foot x 20’ foot pool patio ceiling. We purchased them at Home Depot for approximately $29.98 a roll.

Trimming the reed ceiling with scissors
We could have used 2 rolls, but one of them seemed to be slightly shorter than the other, so we had to get a third roll to fill in a small gap at one end of the patio.

One side of the reed ceiling complete
It’s always best to have more than you need for a project so you don’t have to go back to the store to get more. You can always take back what you don’t use.
Reed ceiling without trim
We first had to hang some screening under a deck portion. Since the pool patio is screened in, this helped us keep the entire area screened. You do not need to screen in your ceiling first, but it’s always an option if doing this in a screened-in space. We did not hang the fencing over the screened-in area.

Using a nail gun to hang the reed ceiling trim
We then began hanging the reed fence ceiling. We started at one end of the ceiling and used stainless staples to secure it to house beams. I held it while my husband stapled it.
Reed fence ceiling trimmed in wood
We slowly unrolled and stapled, unrolled and stapled and repeated this process until we had one side hung. We then used heavy duty scissors to trim the fencing exactly down the center of the ceiling. You may need wire cutters if needing to cut more of the wire that holds together the fencing.

The reed fence ceiling pre Hurricane Ian
We repeated the same “roll and staple” process on the other side with the second roll and cut a small piece from the third roll to fill in a small space that the two rolls didn’t quite cover. Then we started trimming it with the pressure treated pine.

Our pool patio swings pre Hurricane Ian
We trimmed along the edges and along the center seam to basically “frame it”. We used a brad nailer mostly, but some just weren’t holding the trim as well as we wanted it to, so we added some stainless screws. This is probably what kept it up during the hurricane and the trim just made the entire ceiling look finished.

Our table floated away during the hurricane but we found it again!
We’ve used this reed fencing in the past to hide an ugly chain link fence and do know that it will change color over time. Ours yellowed a bit post hurricane as the entire island flooded, including the pool and patio area.

Our pool float storage helped our floats stay put during the hurricane
The pool floats stayed put because I hung them with buckle packing straps and a mesh ball bag on my rope covered hooks. See how I made the hooks via my YouTube channel @carolynjbraden or below:
The humid environment of Florida plus the flood waters that remained for a few days after the hurricane sped up the natural color change of the fencing, but considering what it went through, it still looks pretty amazing. It lost a few reeds, but we can use the extra fencing we had (which didn’t float away!) to replace them.

The completed ceiling and pool cabana
When we used the fencing when we lived in Kentucky, which was much less humid than Florida, but was more exposed to rain, it changed to a darker brown color over time.

Our pool cabana area pre Hurricane Ian
Just note that any natural material you add to an outdoor space can change in color with sun, rain and humidity exposure. This project could also be done with bamboo, though the cost would be higher.
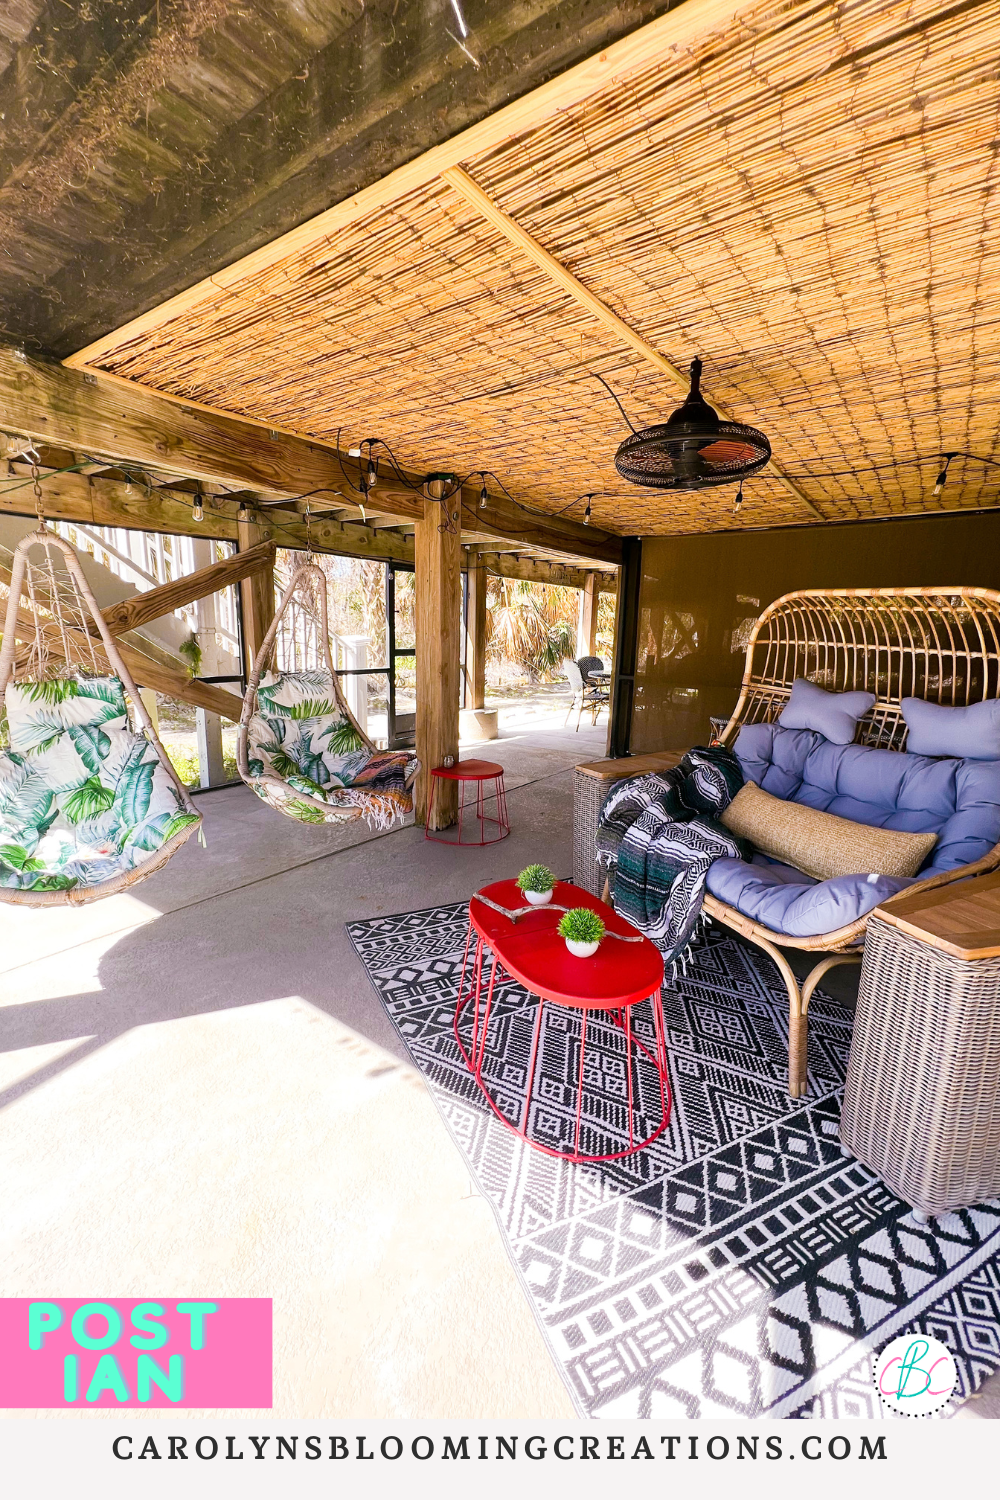
Our reed fence ceiling post Hurricane Ian
We added decor like an outdoor fan, lighting, egg loveseat, IKEA curtains (to give the area a “cabana” vibe), egg swings, picnic table and more. Post hurricane, everything still remained in the patio space, but we had to do some major cleaning of the furniture and the entire space. The furniture cushions were not able to be salvaged, but we found new swing pads and an egg chair pad on Amazon.

Our picnic table and benches floated down the street and into a neighbor’s yard, but were miraculously okay. My super cheap IKEA curtains stuck around, but were muddy and not salvageable (as the flood waters had chemicals and corrosive salt water in them), but I luckily purchased lots of extras.

Our egg chair swings post Hurricane Ian
I’ll replace them once our pond-like pool gets a good cleaning and we get some of the patio screens replaced. The area is also a “smart” patio as we added an Alexa device to turn the fan and lights on automatically.

The egg chair swings and reed fence ceiling survived Hurricane Ian
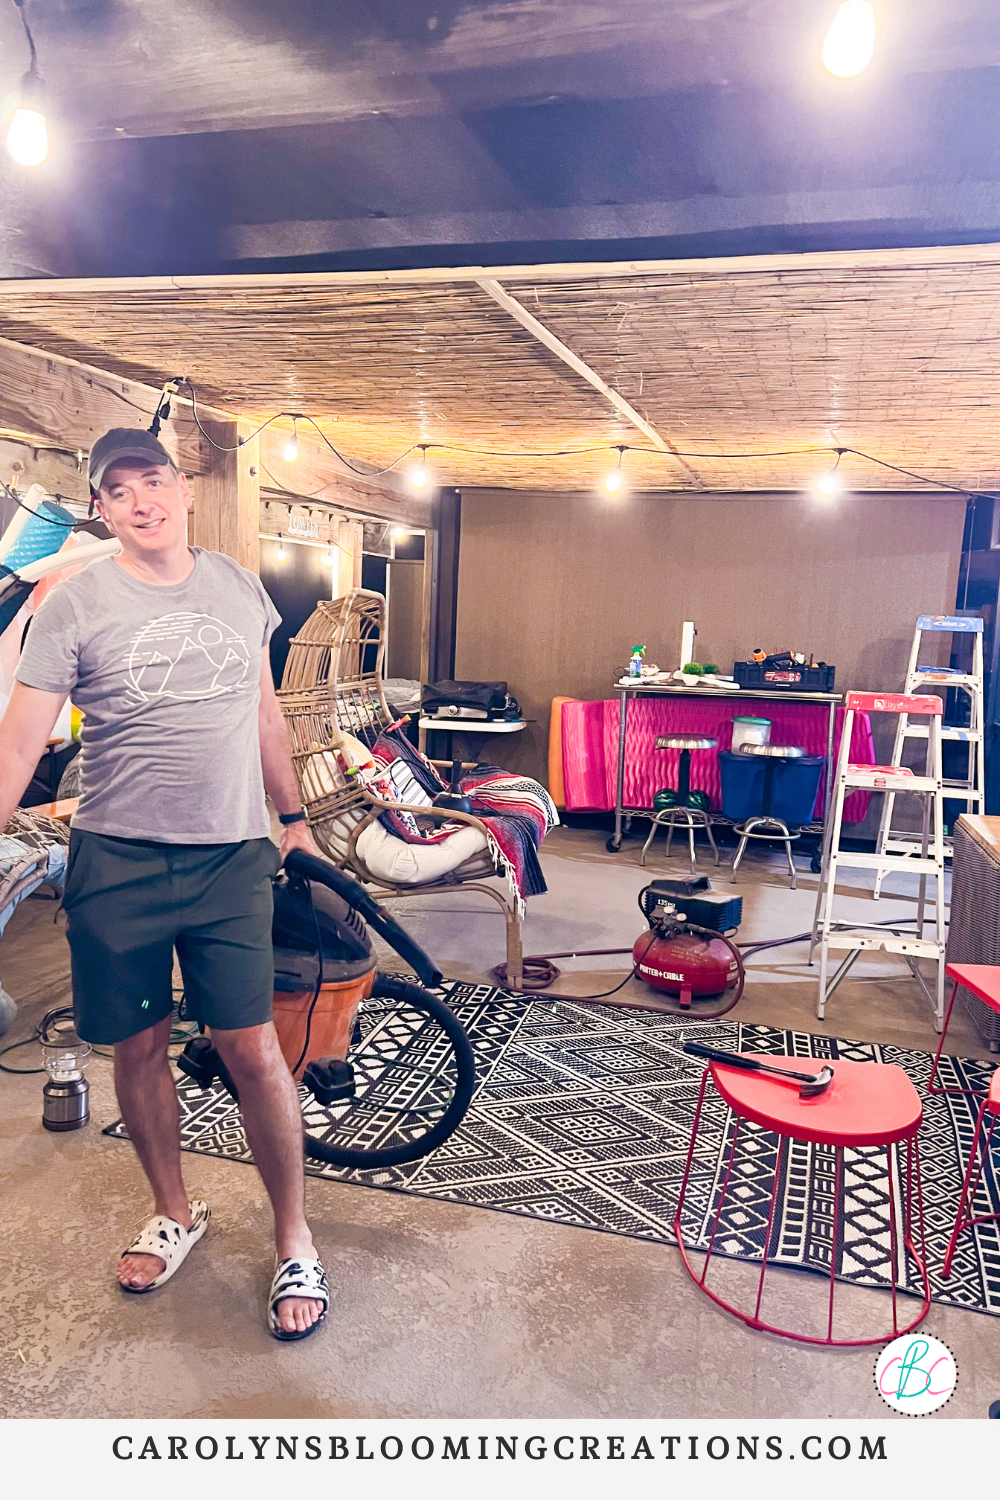
Overall it took us a few hours to complete and was one of our simpler DIY’s and really could be accomplished by any skill level. I loved how it turned out and would do it again and again in any home that we may ever live in. I would recommend it for anyone wanting to jazz up any ugly ceiling in their home, basement or their outdoor living area.
If you love this article, we know you’ll love this one too: How to Create a Multipurpose Room In Your Home
C.J. (Carolyn) Braden is a regular contributor and editor for Carolyn’s Blooming Creations. She has been featured in numerous media publications such as InStyle Magazine, on HGTV, on Bustle.com, and more. She is the author of the books Georgia McMasters in Amethyst Lake Cemetery, How To Be Yourself: 3 Ways To Help You Being You, and the illustrator for the children’s book Bridging Connections. She is a former classroom teacher that now dedicates her life to educating others on how to live their most healthy, creative and happy life. Learn more about her visiting our About Us page.