


C.J. Braden • 5 Minute Read

How To Make a Folding Pet Gate or Baby Gate
Original article published: 5/22/22
Article Updated: 8/4/23
When life give you lemons, you make lemonade, right? Well, the day Minnie Pearl tasted cat food made those lemons come hurling at us like we were in a batting cage without helmets or bats.
She loved cat food so much, yet it did not like her. It caused severe issues with her digestive track, causing us to have to be intentionally clever (make our “lemonade” out of the lemons) on figuring out how to prevent her from getting any in her system EVER.

Our DIY Pet Gate Inspiration
We used a traditional baby gate to prevent her from getting into the room where we feed the cats, but because our cats are aging, we had to put stools on either side of the gate so they didn’t have to jump. This made it very difficult for us to get in and out of the room. It was like an obstacle course.

Minnie Pearl and our DIY Pet Gate
We knew there were pet/baby gates with small doors for cats, but our cats are Maine Coons, which are extremely large cats. The cat door on the pet and baby gates we saw on the market just wouldn’t work for us and they were pretty ugly.

Mapping out the folding wood pet gate
So, we used the same baby gate and stool set up for years until I decided I was in need of a more simple and easier solution. I scoured Etsy and found some custom wood baby and pet gates, but they were expensive and none had a cat door.
Get the short one minute video tutorial to see the gate in action below via our YouTube channel or on our Pinterest page @carolynjbraden:
That’s when we decided to design and make our own. We made a DIY barn door for our attic space, so this had to be a creation we could add to our wheelhouse of DIY’s.

Using a circular saw to cut the pet gate wood
We designed the pet and baby gate by borrowing a collection of ideas from Etsy and other social media sites. We decided to make a farmhouse style wood pet gate that combined an idea of it folding in half (to prevent our return air vent in our hallway from being blocked AND to make it more compact) and the idea of adding a cat door big enough for our cats.

We added a way for our cat to get through the pet gate
We basically had to make two wood gate panels that fit together with hinges.
Here are the supplies we used for making our DIY Pet and Baby Gate:
Wood (We used the following pieces of select pine: 6 pieces of 1”x4”x8', 1 piece of 1”x6”x4’, 2 pieces of 1”x2”x4’)
Circular saw
Wood Glue (We used Titebond)
Nail Gun with 18 gauge brad nails (1 1/2 inch)
Spackle (to fill in the nail holes)
220 grit sandpaper
Zinsser 123 White primer
Behr Marquee white semi gloss paint (you could stain yours in lieu of painting, but we wanted ours to match the doors in our house for decor purposes)
1 1/2” inch black hinges (to attach the two wood panels together)
3” inch hinges (to attach it to the wall)
Bonus: This is the cat door we added to our door so the cats could still get in and out of the room, even if the door is closed. We got an XL size, as we have large cats.

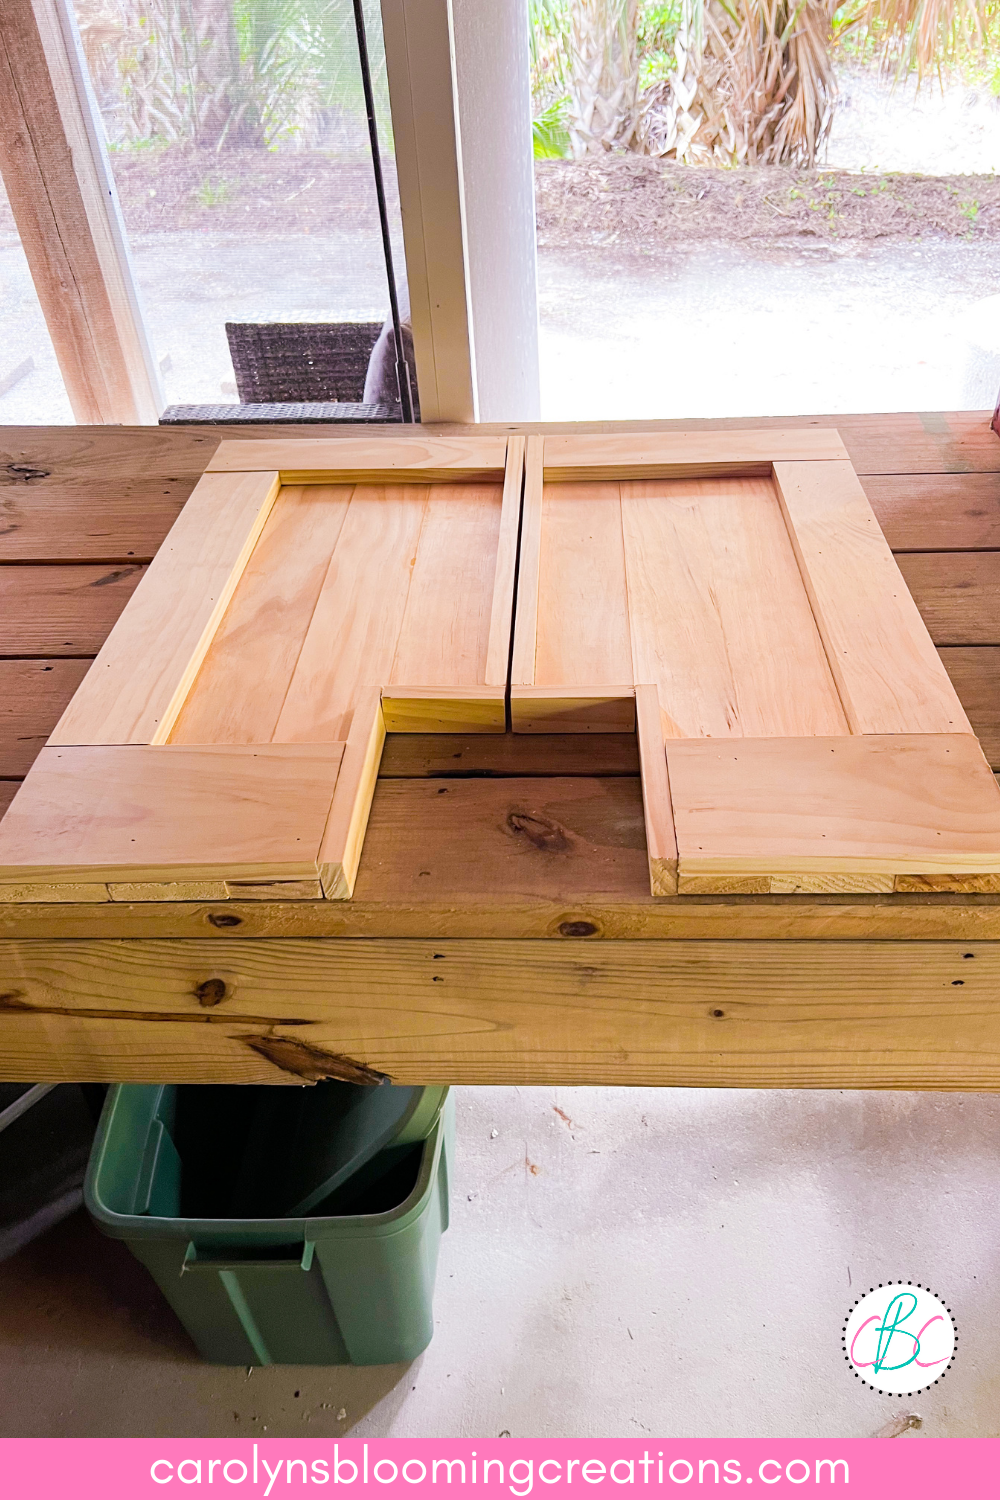
One of two wood panels for the folding pet gate
Each completed panel measures 30” inches in height and 15” inches in width (making the overall pet gate 30” inches in height and 30 inches in width). Laying it all out first helped us see the design, then we proceeded with gluing and nailing it all together.

The wood baby/pet gate before glue and paint
Each gate panel is made up of four 1”x4” pieces cut to 30” inches. We glued and clamped them to form the “base” of the gate. Then we glued the side pieces and front pieces that basically frame the gate.

Our measurements for our DIY pet gate
You can see in the photo above how the basic design fits together using our measurements. If you are making one for your home, keep in mind your measurements will more than likely be different than ours. We measured our doorway several times to ensure it fit.
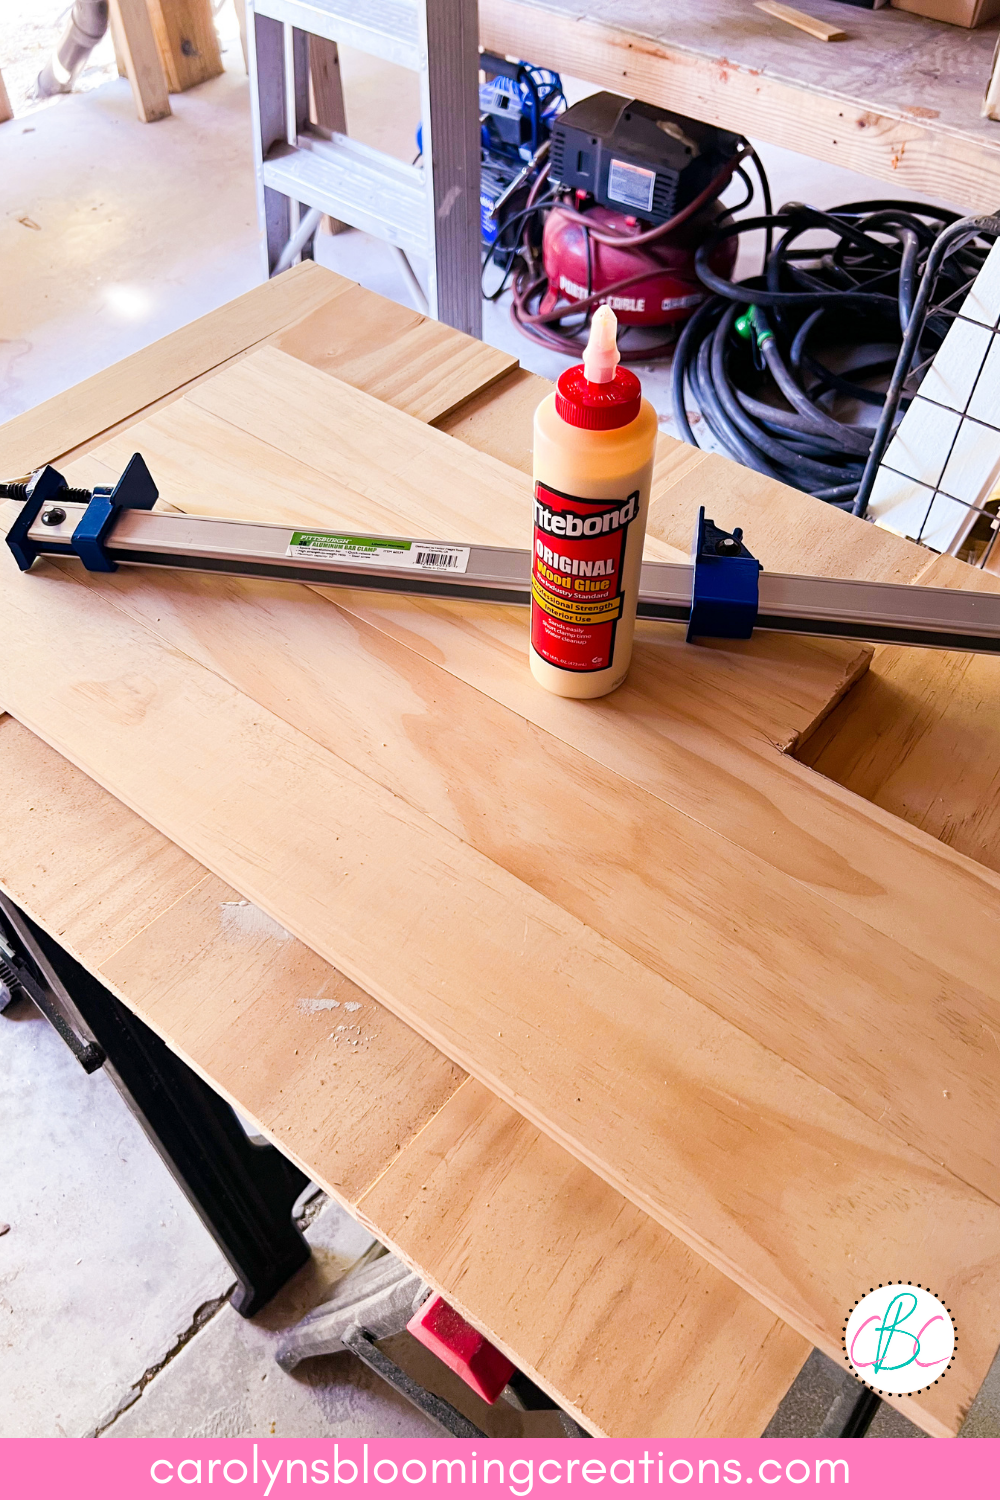
After gluing, we used clamps while the pet gate dried
We used the 220 grit sand paper to sand any rough edges on the pet gate. We purchased our clamps at Harbor Freight as they had the best prices.
If you love this article, we know you’ll love this one too: Cozy But Highly Functional Guest Bedroom

We used a 220 grain sandpaper to sand the DIY pet gate
Whenever we glued, we wiped away any excess with a rag for a clean overall aesthetic.

We used Titebond Wood Glue for the pet gate
After the glue dried, we used a nail gun to nail the pieces together for an extra securely put together pet gate.

We used 18 gauge brad nails (1 1/2 inch) after gluing the pet gate
As you can see in the photo below, the natural wood is a great design option. If you decide to leave yours unpainted, I would seal it with a sealer to help keep it looking nice for a long time.
The DIY pet gate prior to painting
We filled in nail holes with spackle prior to painting it.

We used spackle to fill in the nail holes on the DIY pet gate
We primed and painted each panel. We chose to paint it as our other doors in our home are white and we wanted it to sort of “blend in” with our decor.

We primed and painted our pet gate to match our doors
After the paint dried, we screwed a set of hinges to the back of the DIY pet gate to enable it to fold.

We attached the two pet gate panels with 1 1/2 inch hinges
Then we had to experiment with where to hang the gate. We first tried hanging it INSIDE the door frame. This did not work. The gate would not shut all the way, making it always look “bent”. We thought our measurements were off but that was not the case. It was the hinges that added just the slightest bit of extra measurement to the width of the pet gate, making it not fit perfectly.

We used a 3 inch hinge to attach the pet gate to the door way
So, we had to hang/hinge the gate on the outside of the door frame, which worked perfectly.

We had to attach the hinges on the outer edge of the door frame
We used a magnet closure, attaching one part to the door frame, and the other part to the gate. This makes the gate easily open and close. We could have used a latch, but we opted for the easier magnet idea so it’s easy to open from the front and the back.

We used a magnet closure on our pet gate
We are very happy with our DIY pet gate or baby gate. We did encounter another problem though….
This is the complete bi-fold pet / baby gate
It fit the space and looks nice, so that was not the problem.
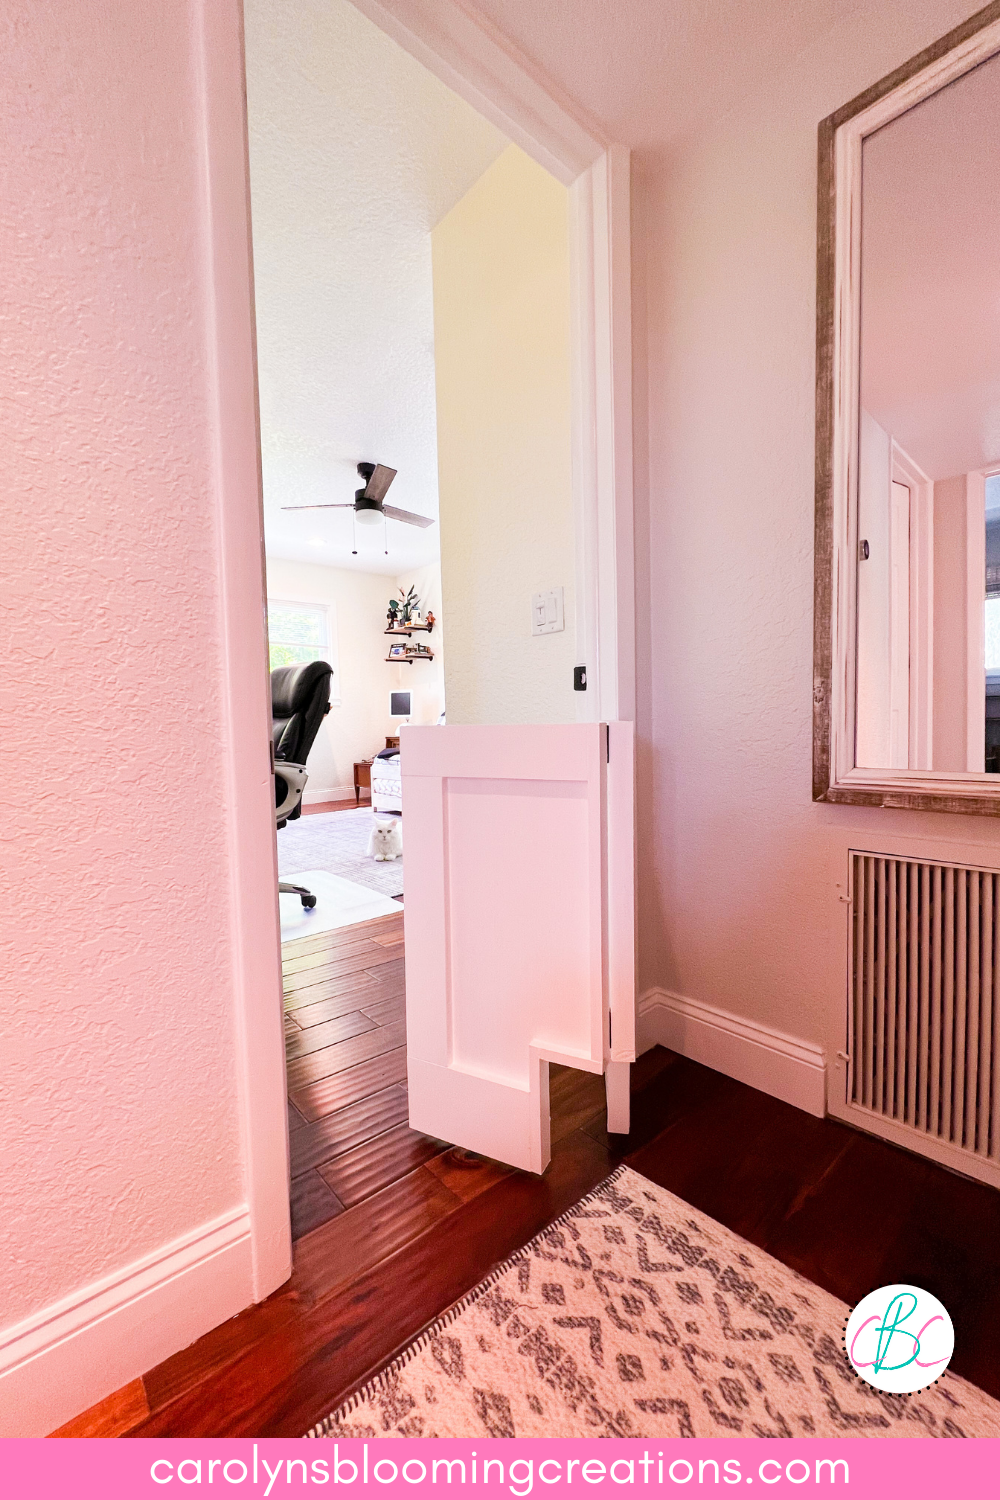
The pet gate easily opens and folds against the wall
The gate easily opens and closes and doesn’t block off our return air vent, so that was not the problem.

Our pet gate folds to keep our return air vent clear
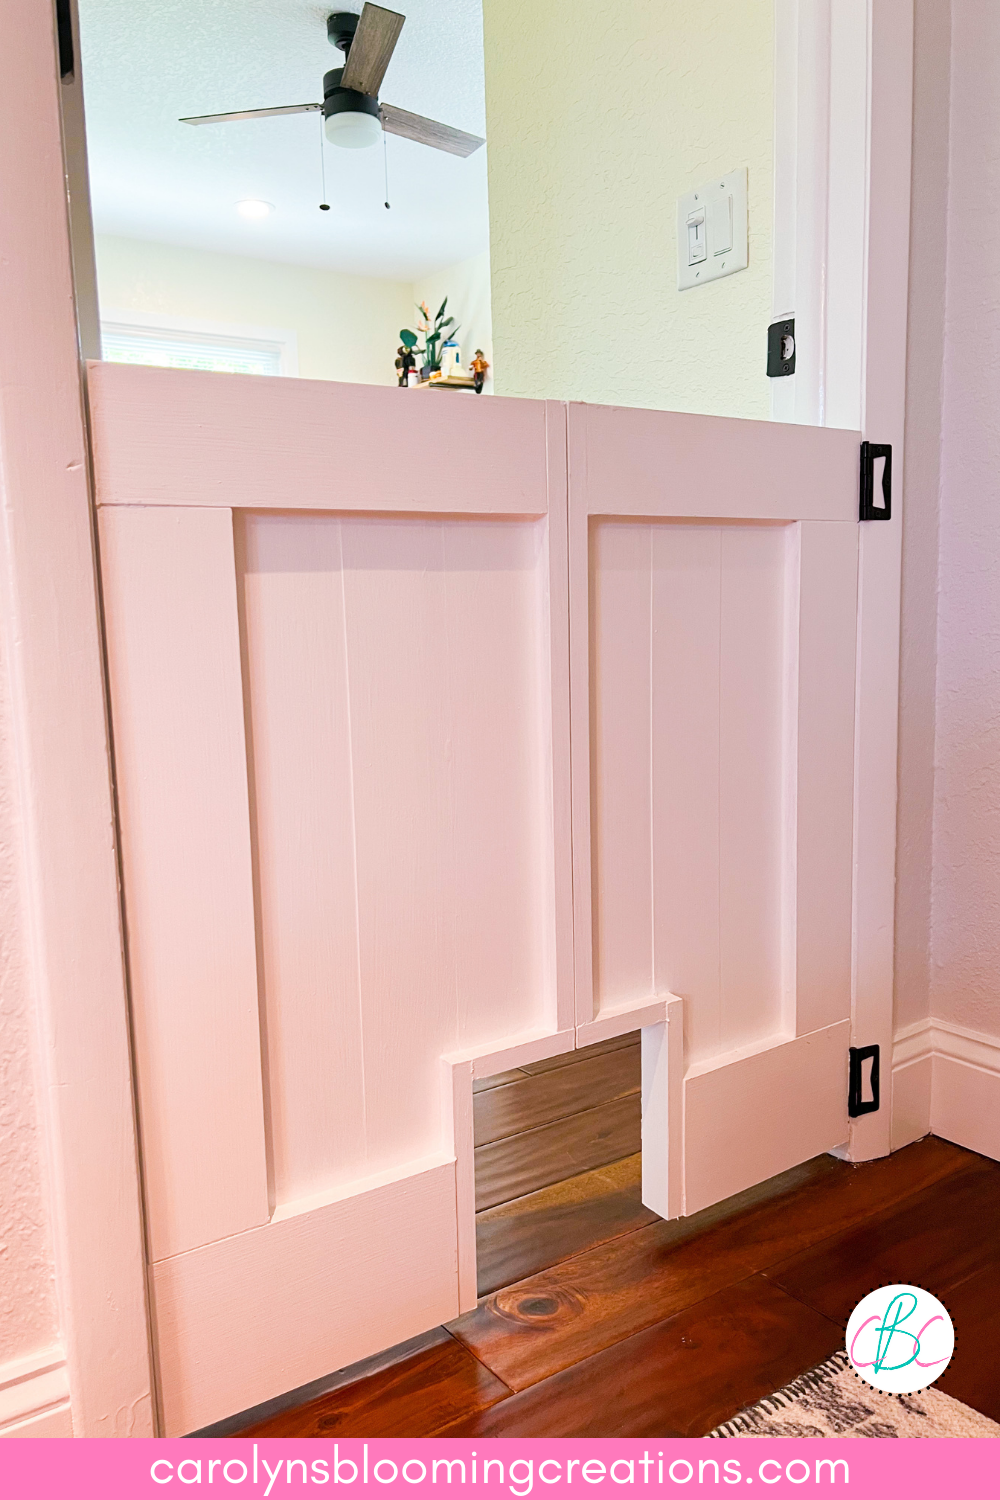
We added an extra large sized cat hole to the door itself so guests (it’s our office/guest room/cat room space) can easily shut the door and get in and out of the room easily, allowing our cats to keep the access they need to their litter box, so this wasn’t the problem.
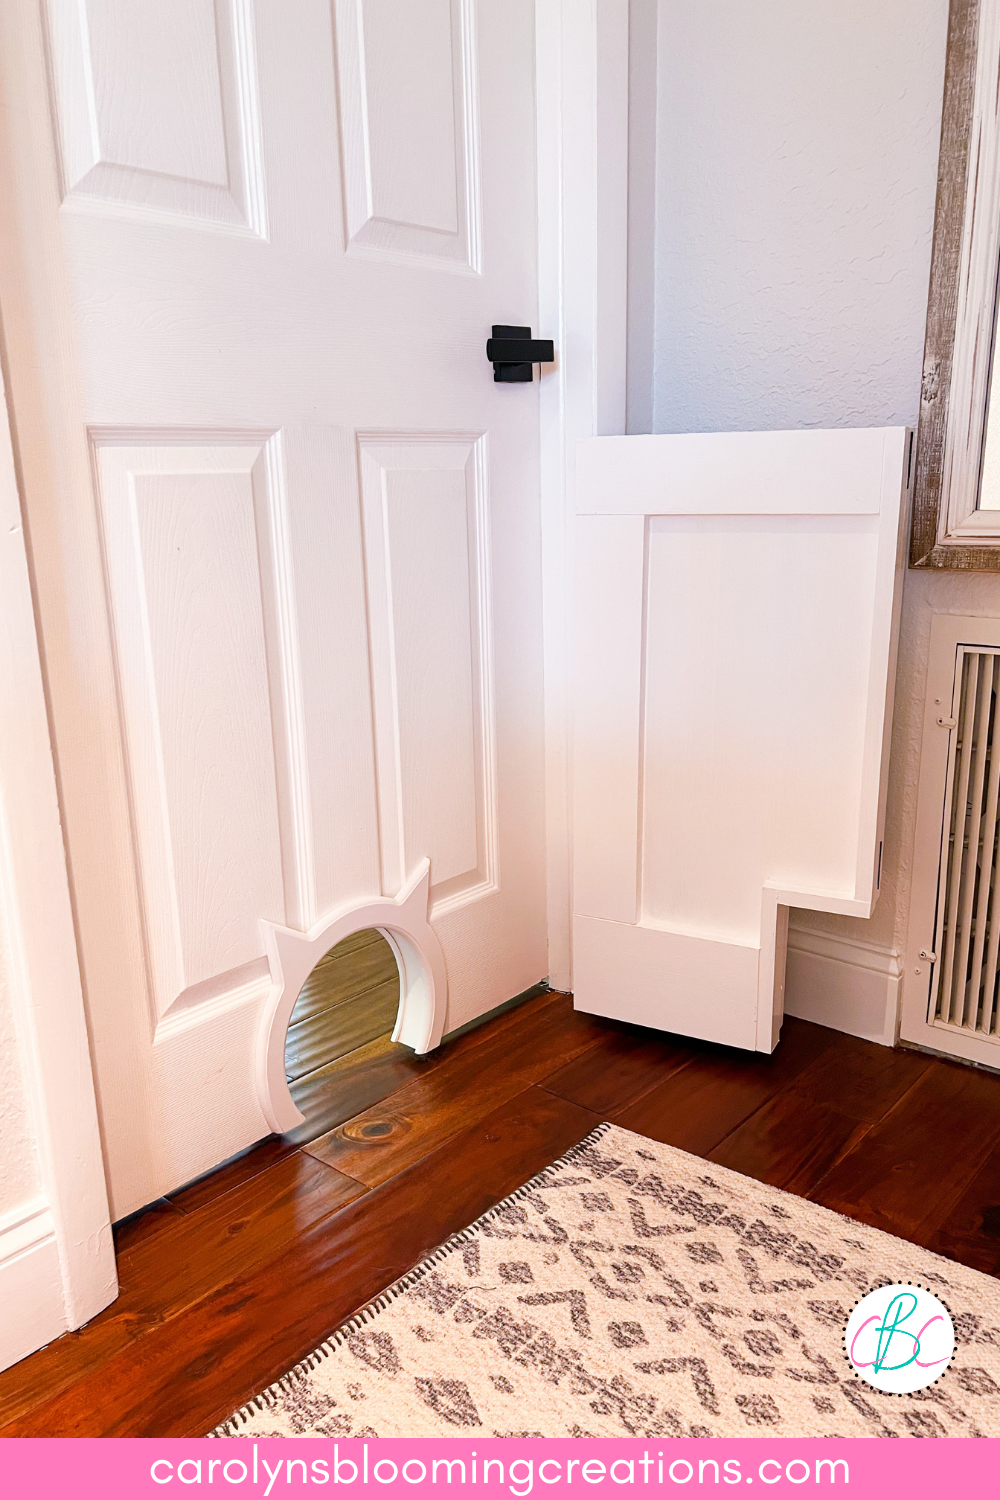
We added a cat door to our door as well
Our BIG cats fit easily in and out of each cat hole in our DIY pet gate and the door, so that’s not the problem.

Our cats using our DIY pet gate
The problem is the fact that our male Maine Coon, Ross, is BIGGER THAN OUR DOGS.

Our pet gate keeps our cats happy, mostly
Here is Ross (below) letting us know that while he’s happy the gate deters our dogs, he is dissatisfied that they can still enter the room and bother him….lol!

This is Ross, our Maine Coon, and his happy face
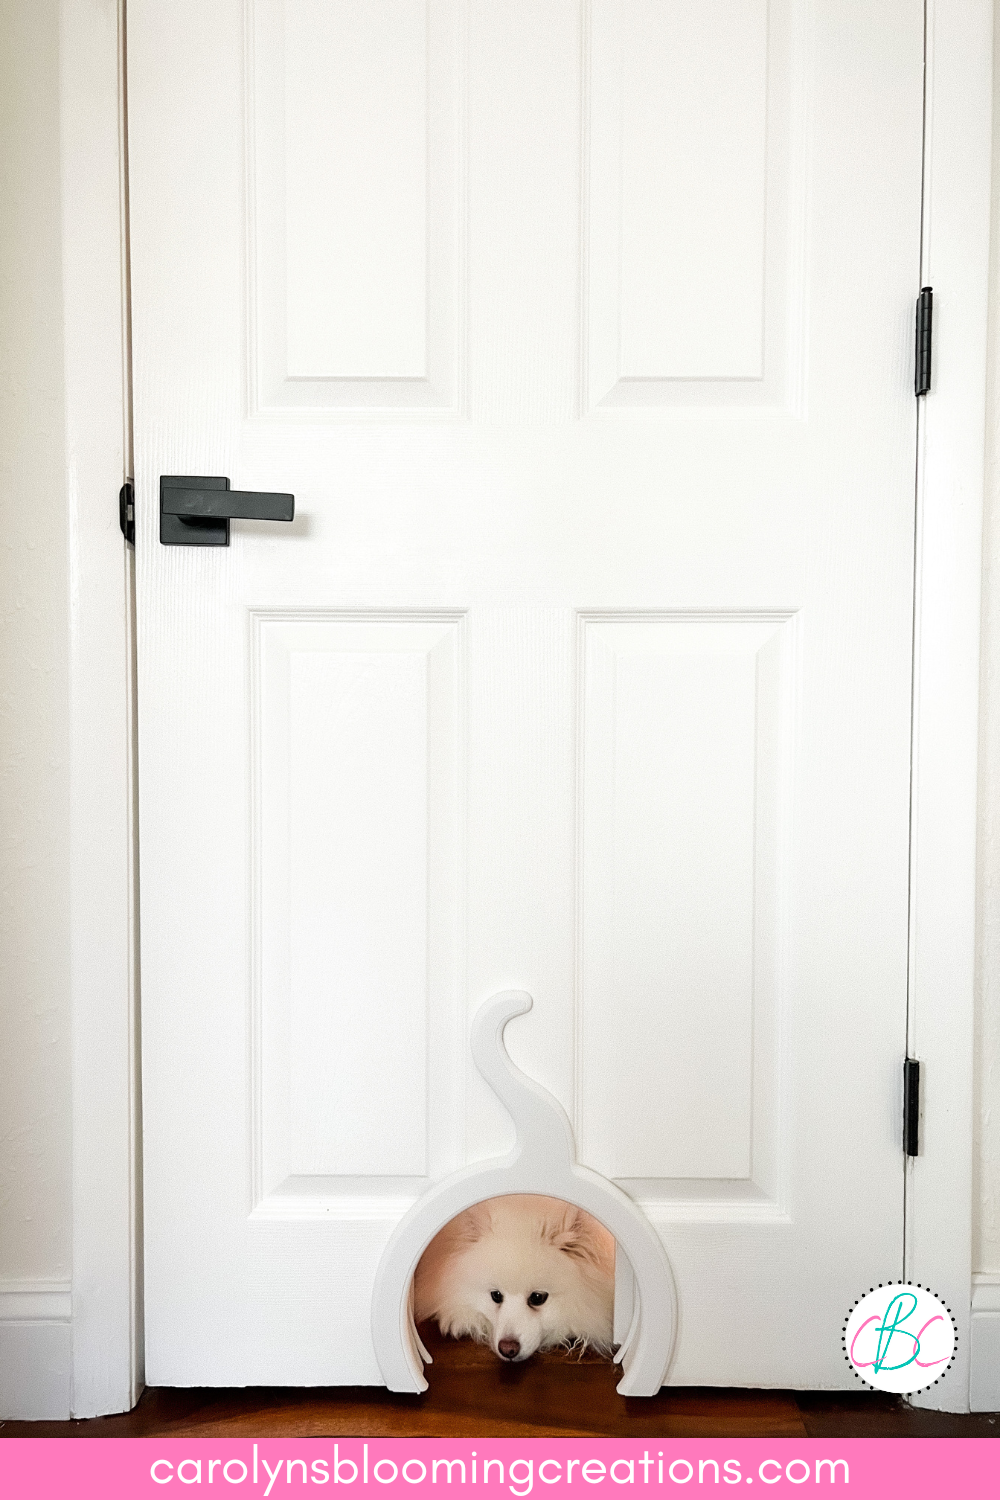
There’s really nothing we could do about this. We have big cats and small dogs that are all incredibly smart. Our dogs know they can squeeze through the cat door BUT they have been scolded enough times now that they know the room is off limits to them.

Johnny Cash, our Miniature American Eskimo and our DIY pet gate
We still just have to be careful with the cat food and Minnie Pearl. Luckily our cats eat on a schedule (they eat mostly wet food as it’s how Maine Coons get most of their moisture/water intake) and we never leave food out in between the scheduled eating times. And the gate really does deter her.

The Folding Pet and Baby Gate creators, Carolyn and Tommy Braden
Making the door may not have solved all our problems perfectly, but it definitely helped and hopefully can give others a new idea to try in their home.

Minnie Pearl peeps us from the cat door
When the door and the gate are both shut, it does deter them as the “mouse hole” is a bit smaller than the bi-fold gate, so that’s a plus!
The door and the gate closed does deter our dogs
If you made a DIY pet gate, let us know in the comments below!

DIY Folding Pet Gate or Baby Gate
C.J. (Carolyn) Braden is a regular contributor and editor for Carolyn’s Blooming Creations. She has been featured in numerous media publications such as InStyle Magazine, on HGTV, on Bustle.com, and more. She is the author of the books Georgia McMasters in Amethyst Lake Cemetery, How To Be Yourself: 3 Little Ways to Get Back To You Being You, and the illustrator for the children’s book Bridging Connections. She is a former classroom teacher that now dedicates her life to educating others on how to live their most healthy, creative and happy life. Learn more about her visiting our About Us page.