


I wrote up this easy weekend DIY project because we learned a lot from the process AND I thought someone else might like to use this idea to cover up garbage cans stored along the side of a house, an A/C unit or something else that needs hiding in your yard.
For all your DIY’ers out there, ENJOY!
Our Sanibel Island, Florida bungalow is giving us all kinds of challenges. Not in a bad way though. We are having to think about home and garden design like never before. We are both from Kentucky, where the grass is blue, the fields are wide and THERE. ARE. NO. PALM. TREES!
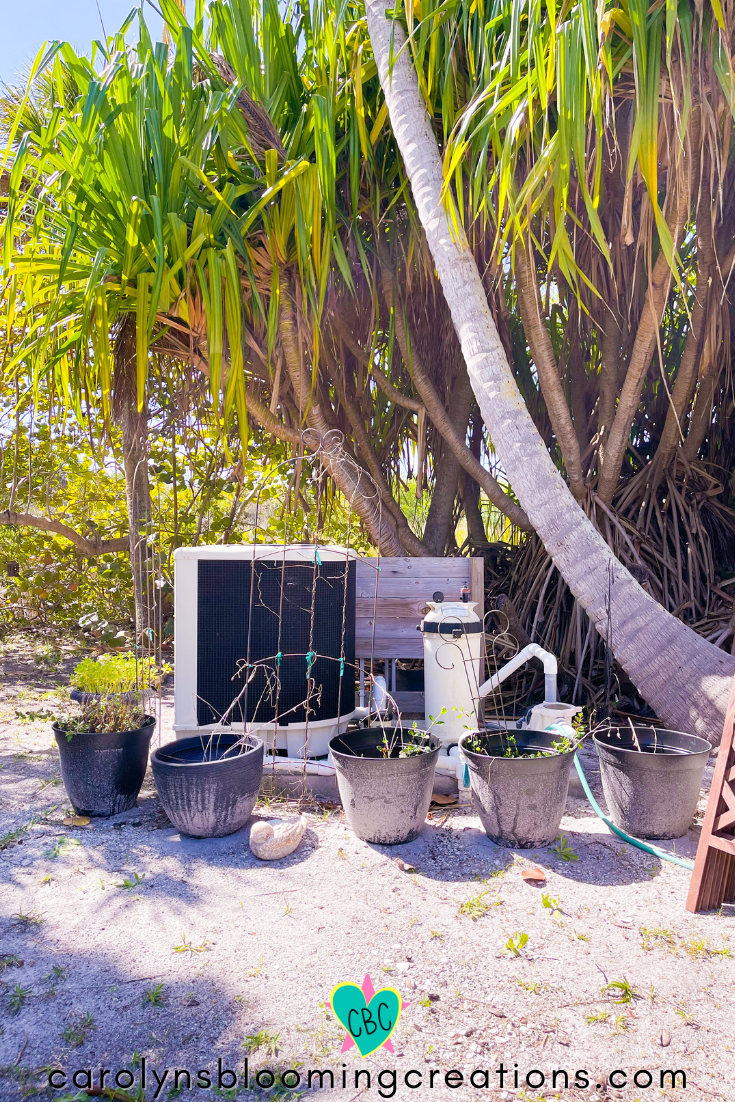
A big DIY challenge was brought to us two days after purchasing our home. The pool heater and pump is surrounded by coconut palm trees. Not the smartest place for an such an expensive functional electronic item. There was plenty of other areas this item could have be installed, but it is where it is and it’s very costly to have it moved. So, it stays.
Easy Weekend DIY: How To Conceal Pool Heaters, A/C Units, and Garbage Cans
Project Design and Photography by Carolyn J. Braden, Project Execution by Tommy and Carolyn Braden
Pin me! carolynsbloomingcreations.com
Two days after closing on our new house, we pulled into the driveway and noticed the pool looked low on water and heard a gurgling noise. After some quick investigation, we learned a palm frond fell onto one of the pool pump PVC pipes and cracked it. This caused a leak.
We turned off the pool pump, quickly drove to the local hardware store, and picked up some supplies and tools (as ours still had not arrived from the moving company) and replaced the cracked pipe.

This whole situation got us thinking. If that happened this one time, it could happen again and again. Especially during hurricane season. I quickly went into brainstorming mode and came up with something that could help keep our pool pump pipes and pool heater safer from the coconut palms AND conceal the entire area. It needed to be something that could catch the large palm fronds, as they fall off in one quick swoop and are a lot heavier than one would think.

Easy Weekend DIY: How To Conceal Pool Heaters, A/C Units, and Garbage Cans
Project Design and Photography by Carolyn J. Braden, Project Execution by Tommy and Carolyn Braden
Pin me! carolynsbloomingcreations.com
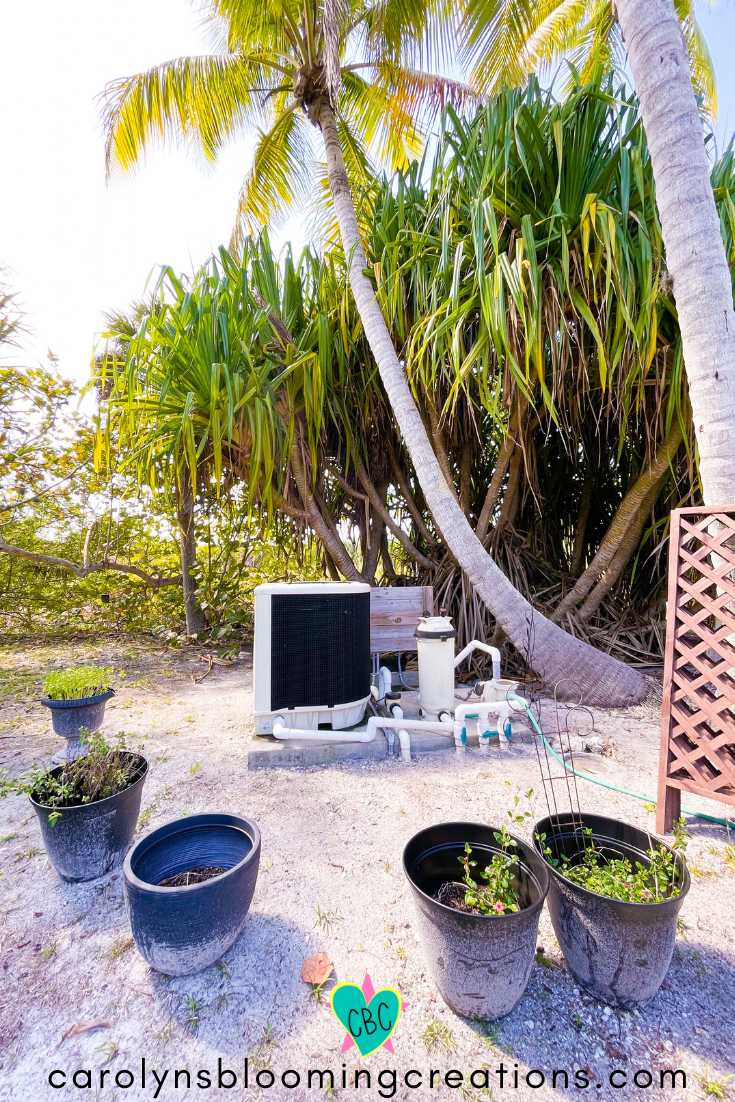
We especially wanted to keep the pool heater safe as we had a new one installed a month after moving in. The old one was OLD and was in need of very costly repairs, so it was time to replace it. For anyone interested, a pool heater is similar to an A/C unit. Instead of cooling, it heats. They cost about the same as a new A/C unit and last about as long. They are just as large and not very attractive.
Easy Weekend DIY: How To Conceal Pool Heaters, A/C Units, and Garbage Cans
Project Design and Photography by Carolyn J. Braden, Project Execution by Tommy and Carolyn Braden
Pin me! carolynsbloomingcreations.com
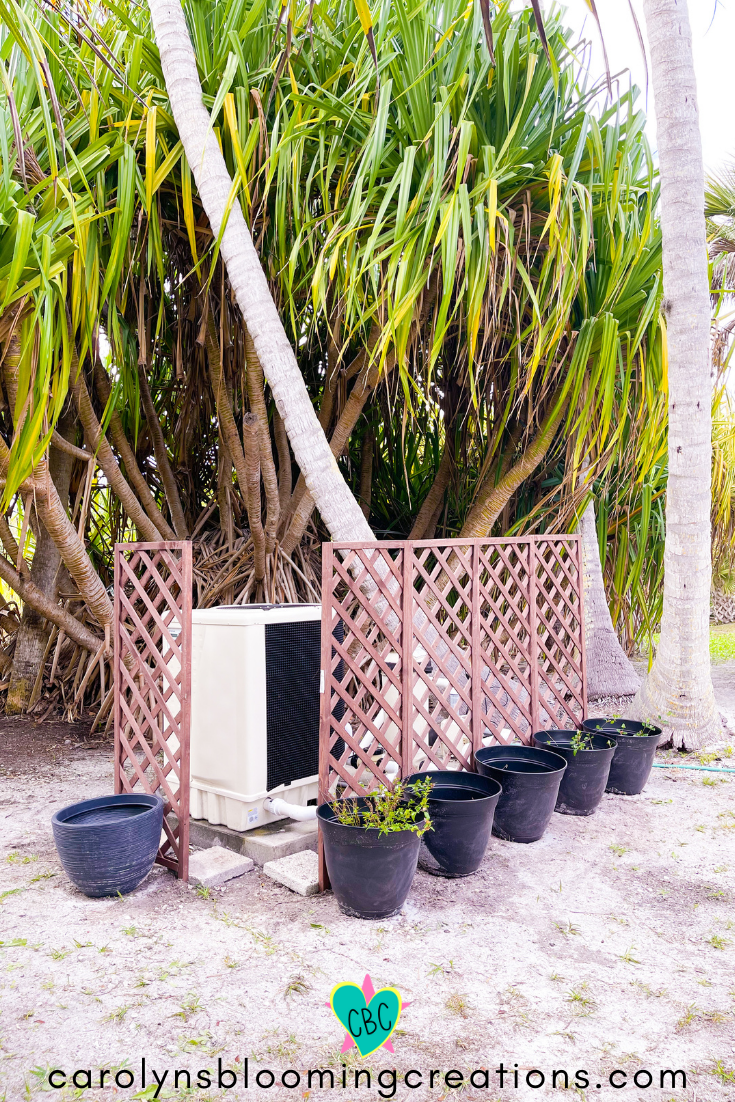
I decided on using tall trellis’. After doing some research on the right height and material, we purchased wood trellis’ from Home Depot. They are about 6 feet tall and quite sturdy. They were about $35 a piece. We measured out the space and figured we needed 4 across the front and one on the side.
While these trellis’ won’t last forever (wood doesn’t hold up great in the Florida humidity) they will be a great quick fix for at least a couple of years. Eventually I’d like to replace them with more ornate metal garden screens.

Easy Weekend DIY: How To Conceal Pool Heaters, A/C Units, and Garbage Cans
Project Design and Photography by Carolyn J. Braden, Project Execution by Tommy and Carolyn Braden
Pin me! carolynsbloomingcreations.com
Here’s how we did it:
First we raked the area to clear debris and then saturated it with water (to help loosen the sandy soil). Then we started digging. We lined up the first trellis at one end of the heater and measured out exactly where each needed to go for good alignment. We used a post hole digger to start the holes for each trellis.

Easy Weekend DIY: How To Conceal Pool Heaters, A/C Units, and Garbage Cans
Project Design and Photography by Carolyn J. Braden, Project Execution by Tommy and Carolyn Braden
Pin me! carolynsbloomingcreations.com
There were TONS of roots in the area so we then had to use a shovel to finish off the holes and break up the roots.

Easy Weekend DIY: How To Conceal Pool Heaters, A/C Units, and Garbage Cans
Project Design and Photography by Carolyn J. Braden, Project Execution by Tommy and Carolyn Braden
Pin me! carolynsbloomingcreations.com
We used a rubber mallet to pound each trellis into the holes. My husband was careful to only hit the corners so he wouldn’t break the top of each trellis.
I sometimes had to hold on to the trellis’ and help push them into the soil. You’d think sandy soil would be easy to drive things in to, but it’s really not!

Easy Weekend DIY: How To Conceal Pool Heaters, A/C Units, and Garbage Cans
Project Design and Photography by Carolyn J. Braden, Project Execution by Tommy and Carolyn Braden
Pin me! carolynsbloomingcreations.com
To help keep these from tipping over during very windy days (which we get a lot of these here), we placed square concrete stepping stones behind each trellis. This helped to reinforce them AND kept them at a good distance away from the heater in case any maintenance work needed to be done.

Easy Weekend DIY: How To Conceal Pool Heaters, A/C Units, and Garbage Cans
Project Design and Photography by Carolyn J. Braden, Project Execution by Tommy and Carolyn Braden
Pin me! carolynsbloomingcreations.com
The stepping stones were at the house already, not in use, so we made great use of them. A plain stone like this could be purchased at any home improvement store.

Easy Weekend DIY: How To Conceal Pool Heaters, A/C Units, and Garbage Cans
Project Design and Photography by Carolyn J. Braden, Project Execution by Tommy and Carolyn Braden
Pin me! carolynsbloomingcreations.com
I suggested we fill in the holes with concrete but my husband thought they would be best without concrete since the trellis’ are made out of wood. He said we could use concrete (if and when) we get metal garden screens, as they’d be a more permanent solution. So we filled in the holes with the sandy dirt and packed it tight.

Easy Weekend DIY: How To Conceal Pool Heaters, A/C Units, and Garbage Cans
Project Design and Photography by Carolyn J. Braden, Project Execution by Tommy and Carolyn Braden
Pin me! carolynsbloomingcreations.com
We drove each one into the ground, making them as even as we could. At the end of the project, we tied each one together with a small piece of rope to reinforce them even more.

In front of each trellis, we placed large planters, which were already at the house. Wedging the trellis’ in between the concrete stepping stones, planters and tying them together made them quite sturdy.

Because of the spacing from the pavers, you can see below that there is still plenty of room for the pipes. While we are confident this will prevent the palm fronds from breaking the pipes again (the fronds should, in theory, hit the trellis before it reaches the pipes) we aren’t sure if this will prevent the coconuts from hitting the pipes. Replacing an inexpensive wood trellis (if the palm frond breaks it) is a lot easier than replacing pool pipes and cheaper than replacing a heater!
I thought we could attach some chicken wire across the top of the trellis’ to catch the coconuts if they become an issue but after talking to a landscaper, we learned they can remove the coconuts from the trees, which is a common practice during hurricane season. He said coconuts can become “missile-like” during a bad storm, so we will have him remove them when the time comes to also keep our home and windows safe.
We completed this portion of the project in about 4 hours on a Sunday afternoon. Next, we are going to plant some flowering vines in the pots to make the whole area a little prettier AND to conceal the heater even more.

Below (see image) is what it looks like from the street. I’m super happy not to see the giant heater anymore AND I’m happy it’s better protected as well!
I hope this helps anyone interested in doing a similar project. Please leave us a comment below this post if you tried it or have any questions.

More of our DIY’s and other inspirations can be found on our YouTube channel, “Carolyn Braden”.
If you have any questions for us, visit our Contact Us page and send us a note! We love helping other DIYer’s out there!