


Carolyn J. Braden • 4 Minute Read
Beginner Needle Felting Pumpkin Craft Tutorial
Sometimes life throws you a curve ball you never saw coming. When that happens, one of the ways I cope is by creating.
After my husband was unexpectedly laid off from his job, I found myself wanting to do what I could to support him with love, care and encouragement—and I also needed a creative outlet for myself. Art has helped me through difficult seasons time and time again, and this little needle-felted pumpkin became my latest creative coping project.
I also believe in using more than one tool when life gets difficult. Therapy, talking with friends and family, taking care of yourself and finding healthy creative outlets can all be part of coping with challenging circumstances.
For me, there is something surprisingly therapeutic about repeatedly stabbing wool with a barbed felting needle and watching something begin to take shape. I'm really glad I discovered needle felting!
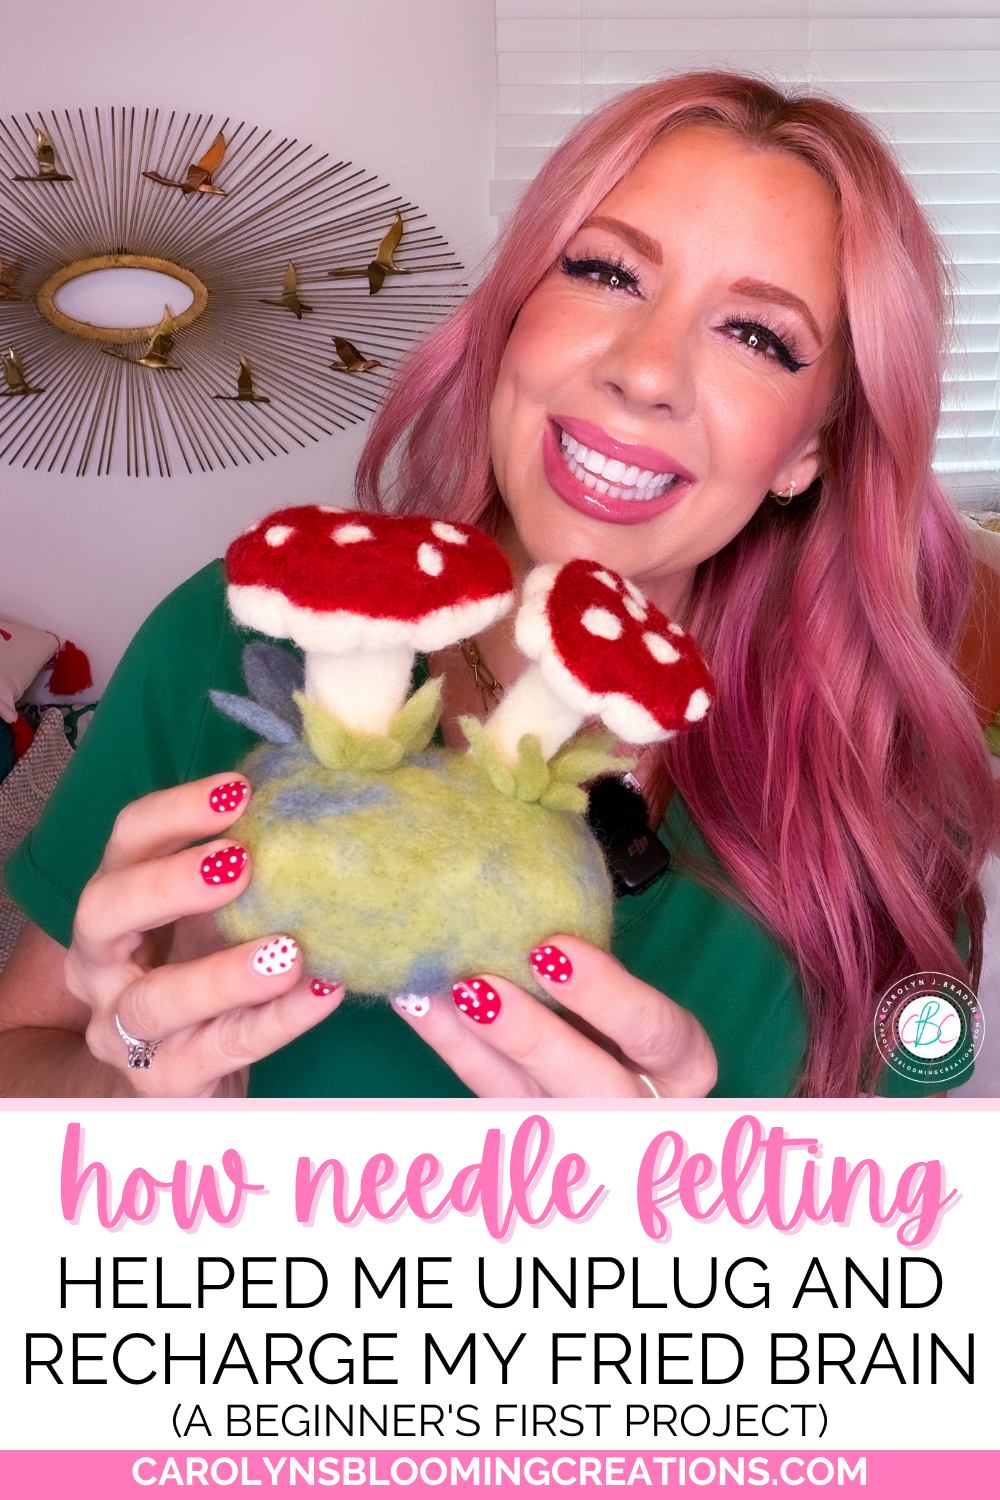
If you're new to needle felting, I recommend starting with my Beginner Needle Felting Mushroom Tutorial first. I share more about how I discovered needle felting, my experience with Felted Sky and the basics of working with wool roving and a felting needle.
See that tutorial in video format via my YouTube channel @carolynjbraden:
🛍️Shop the Post
Support me as a creator and shop my links with no extra cost to you! See my creations come together via my Amazon Shop plus get buying links at affordable prices!
We also love shopping CVS ❤️ (the ExtraCare card savings stack helping you to save!) and here are some of our CVS finds to stock up on (especially when you get that 40% off coupon!) and love Walmart (Walmart+ gets you free shipping and delivery on many items) and Sam’s Club for extra savings on beauty, fashion and we love their furniture too!
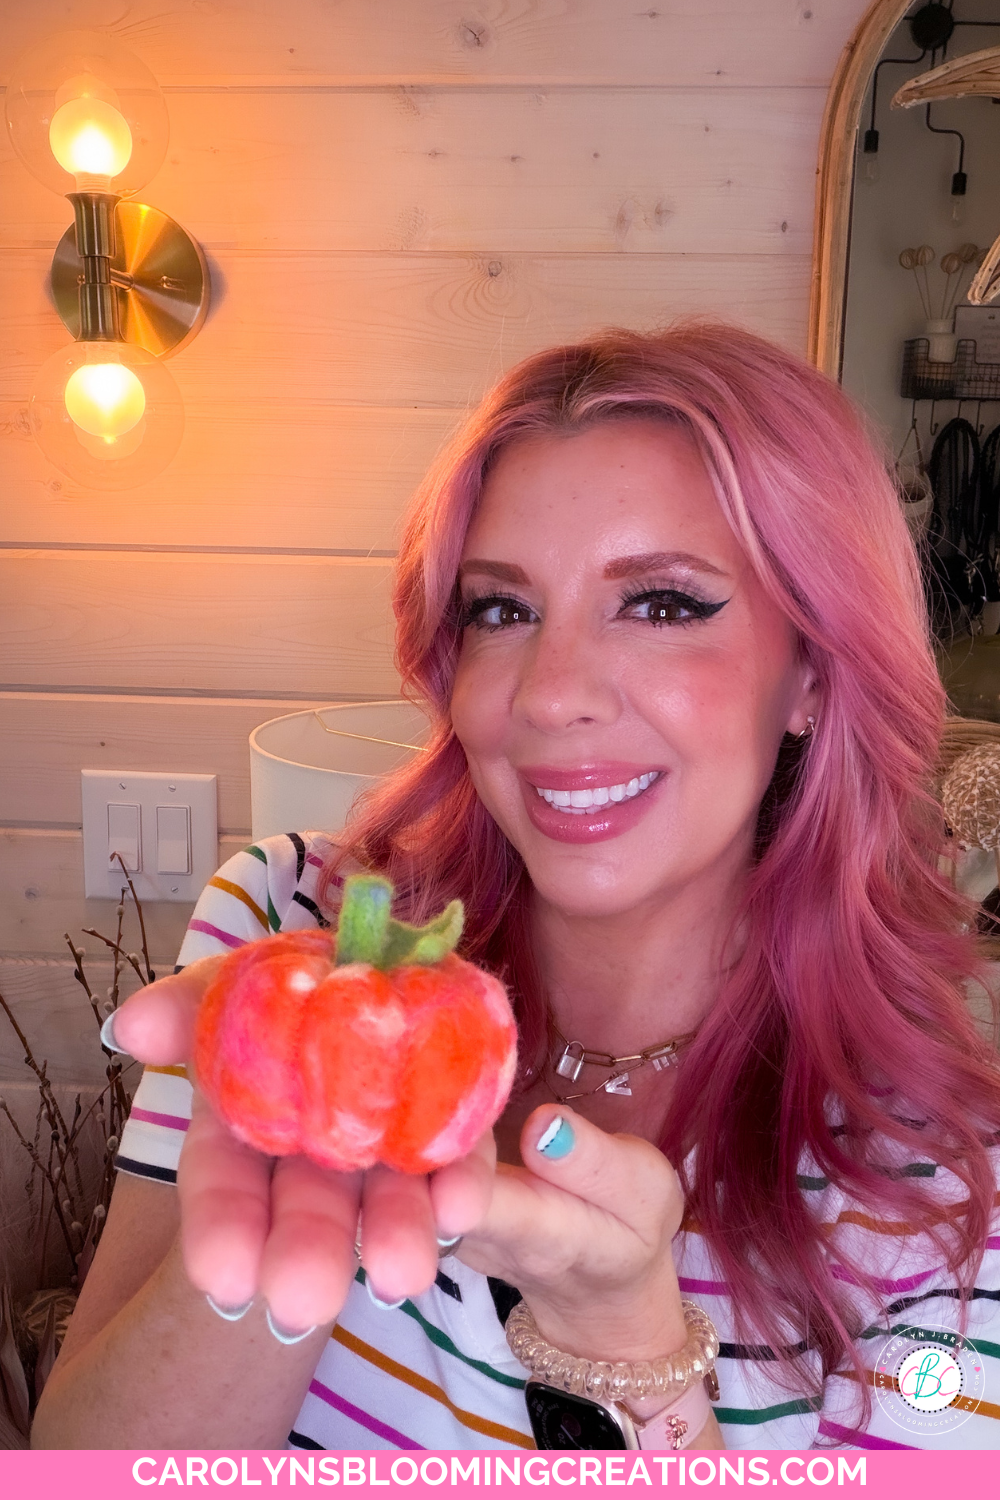
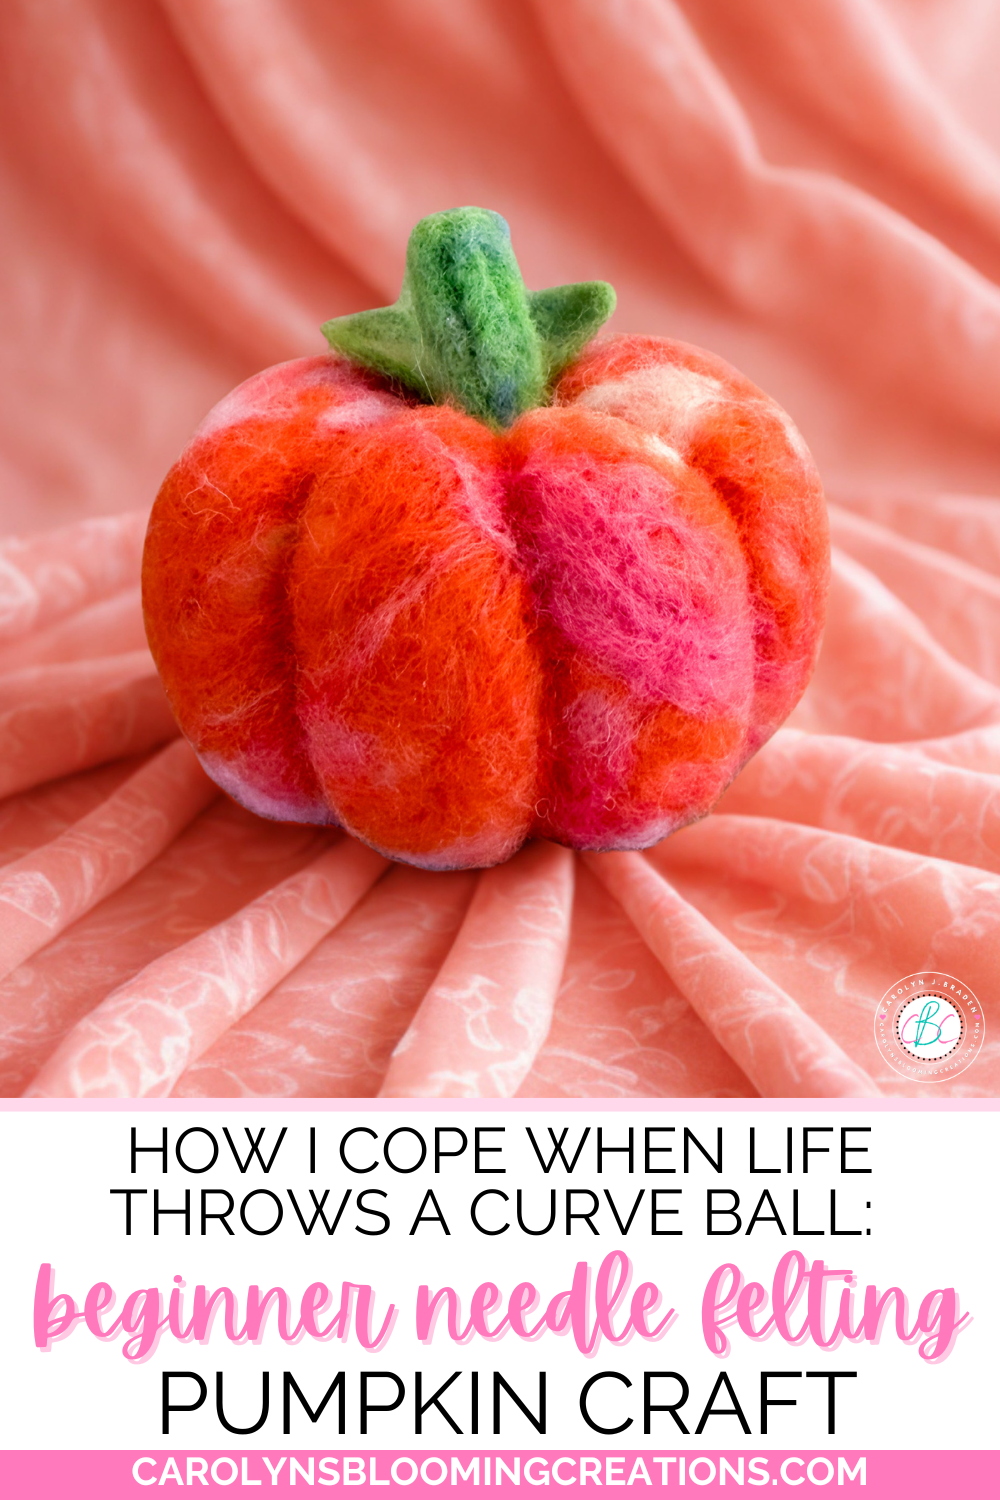
I love pink, so I had to swirl some in this little pumpkin!
🛠️We also love Lowe’s (see our Lowe’s storefront here) for all our home improvement projects and gardening loves (and animal lover loves too!).
📕Bookmark or pin this one by clicking the Pinterest SAVE button on the images in this article for creative magic in an instant.
👉More Product Loves❤️
You can also get the products I’ve featured and more of my product loves via my Target shop here or my CVS Store here (use your ExtraCare card to double up on savings!) or via my shop my store here or below:
🔗Links in this article go out to either the brand website, Amazon, CVS, Walmart, Sam’s Club, Target, or Lowe’s where we source our supplies based on discounts, budget and pricing.
👀Check out my 1-minute or less 📹 video tutorial for this project on my TikTok now or via my YouTube channel @carolynjbraden!
A Little Creative Coping
I didn't make this pumpkin because everything was going perfectly.
I made it because sometimes life doesn't go according to plan. I also made it due to fall being right around the corner and wanting to add some fall décor to our home too using the new needle felting skillset I didn’t know I had until recently.
When those unexpected curve balls come our way, I think it's important to give ourselves permission to feel what we're feeling while also looking for healthy ways to cope. For me, that can mean creating something with my hands, talking with people I love, spending time with family and friends and utilizing therapy when I need additional support.
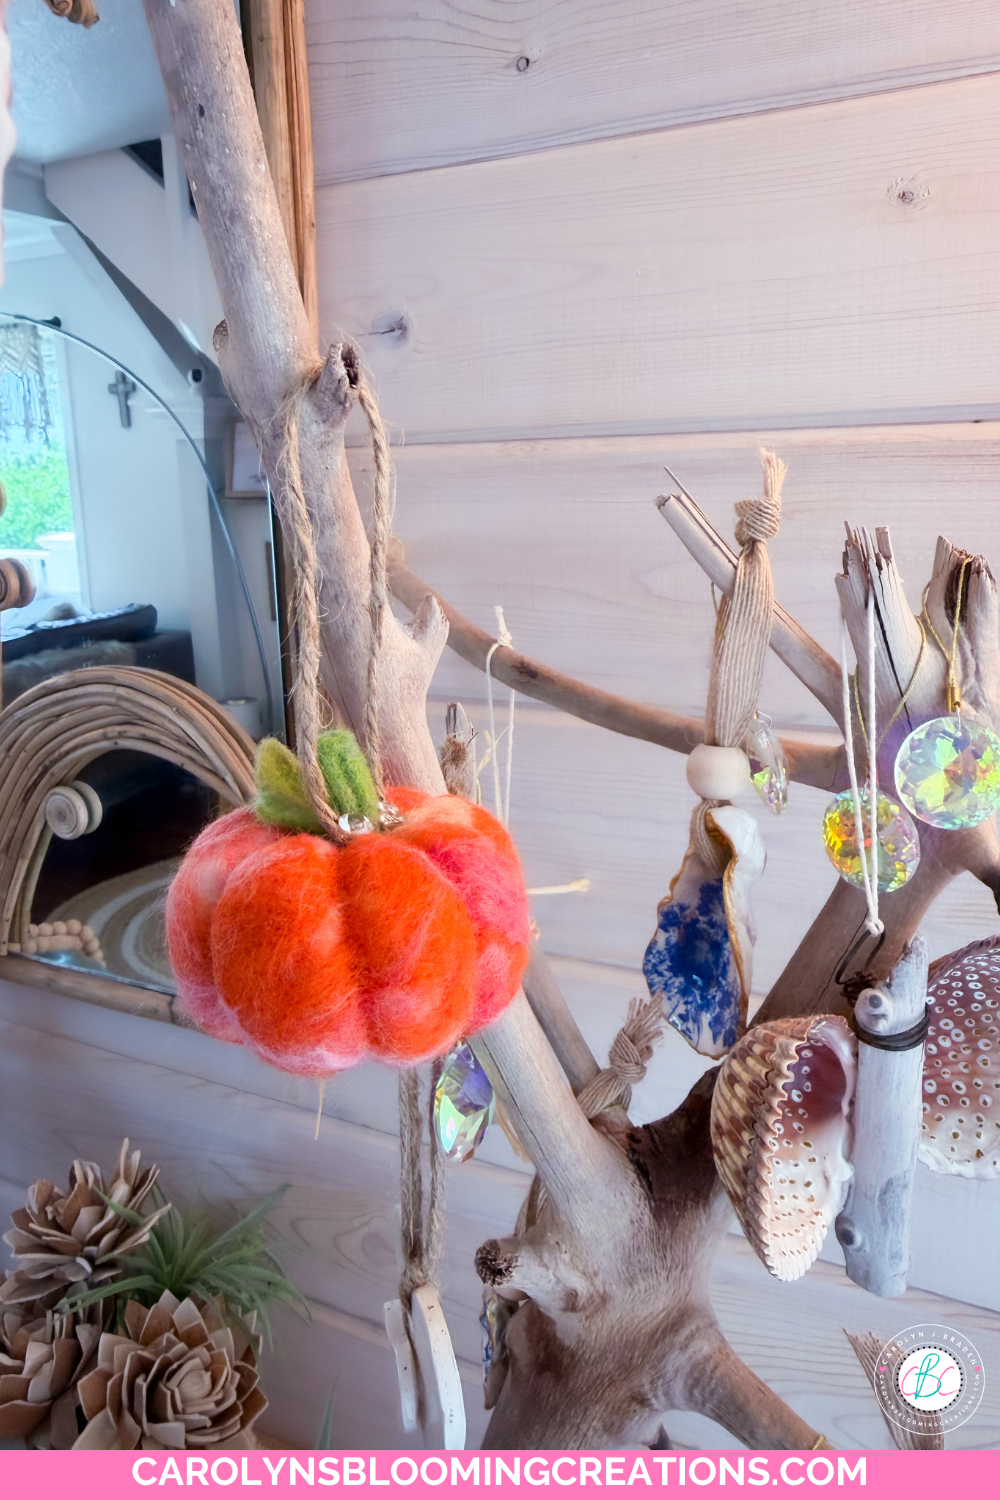
You can turn it into an ornament easily
Needle felting has become one of those creative outlets for me. There's something about taking a fluffy handful of wool, sitting down with a felting needle and slowly turning it into something completely new that feels incredibly satisfying.
So, if life has thrown you a curve ball lately, maybe you don't need to solve everything today.
Maybe you just need a little wool, a felting needle and some time to create.
And if you happen to make a tiny pumpkin along the way, even better. ❤️
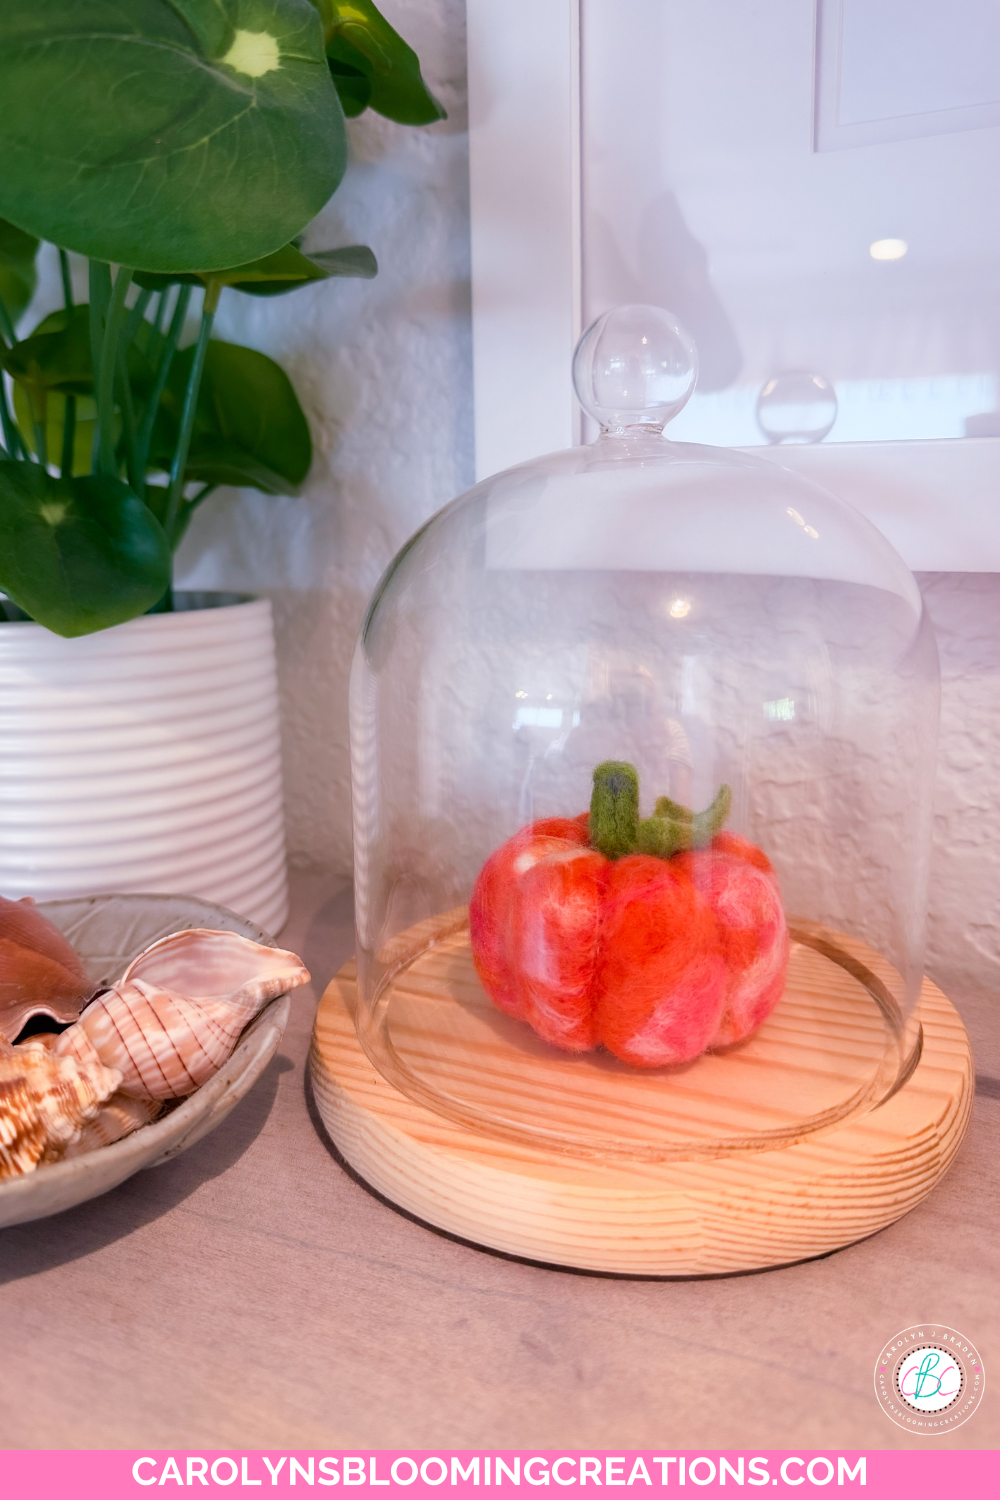
Make a Pink & Orange Needle Felted Pumpkin
Two Ways to Display Your Needle Felted Pumpkin
You can absolutely leave your pumpkin as-is and display it on a shelf, table or other seasonal vignette. Make a bunch and string them together as a fall garland.
Or, turn it into a hanging decoration by carefully adding quilting pins and jute string and hang it from an all-season decorative tree.
I love the idea of using it with my DIY All-Season Driftwood Tree, which I decorate throughout the year. For summer, mine features decoupaged oyster shells, and for fall, this colorful little pumpkin would make the cutest addition.
You can also check out my DIY Decoupaged Oyster Shell Tutorial if you'd like to see how I created the summer decorations for my tree.
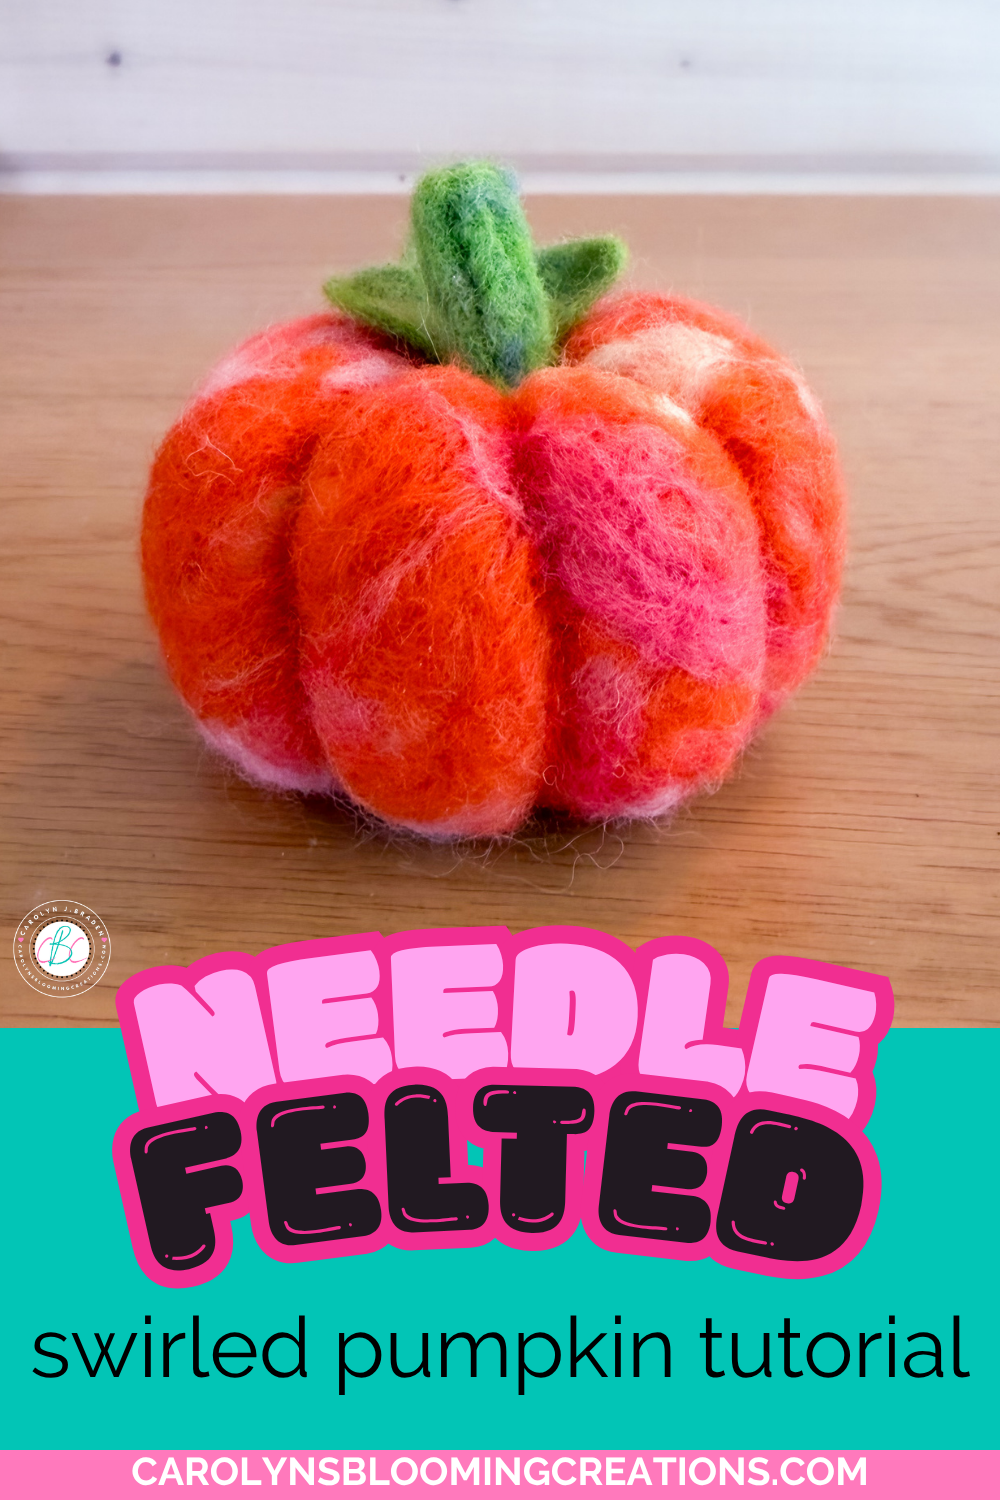
Easy Needle Felting Pumpkin Craft for Beginners
How to Make a Tiny Needle Felted Pumpkin
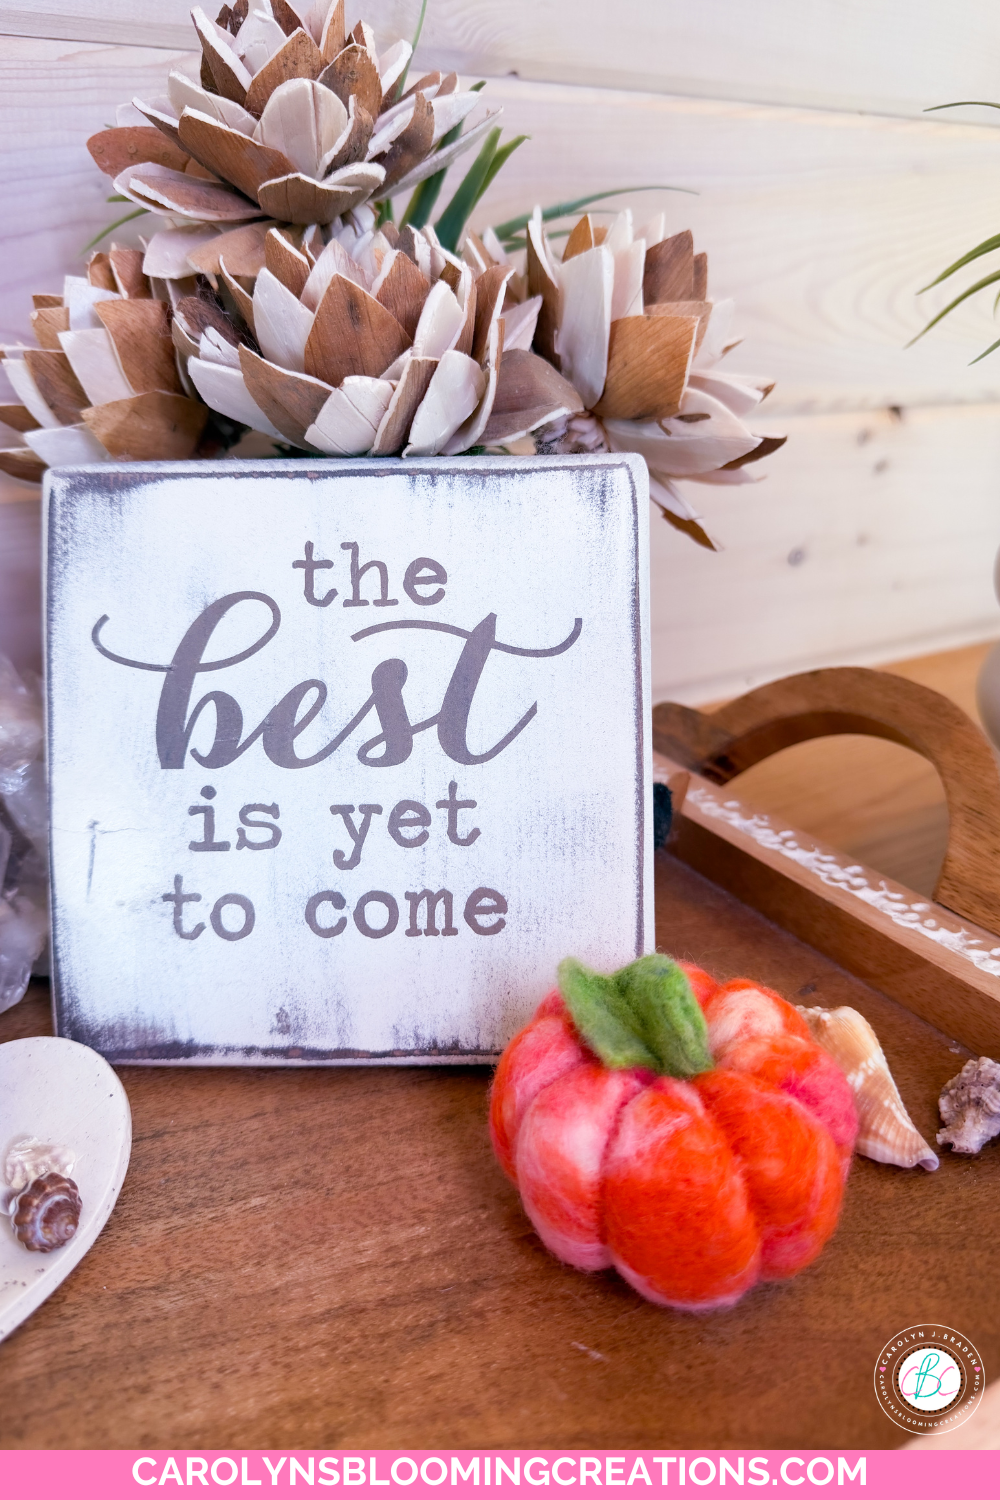
This little pumpkin is a great beginner needle felting project. Mine is approximately 5 inches and is made with a pretty combination of pink, orange and cream wool. You can display it as a small seasonal decoration or turn it into an ornament. Make it with colors you like best…no need for it to be orange!
How to Make a Pumpkin With Wool Roving & a Felting Needle
What You'll Need
Cream core wool roving for the pumpkin base
Orange wool roving
Light pink wool roving
Light orange wool roving (I like this needle felting kit as it has many colors and is great for beginners)
Cream wool roving for the pumpkin exterior (mixed with the pinks and oranges)
Three shades of green wool roving for the stem and leaf
Quilting or corsage pins, if you'd like to turn your pumpkin into an ornament
Jute string for hanging
Scissors, if needed
Your favorite needle felting tools and supplies if you already have them will work too!
👀Check out my 1-minute or less 📹 video tutorial for this project on my TikTok now or via my YouTube channel @carolynjbraden!
I use wool rovings from Felted Sky, along with additional needle felting supplies I've purchased through Amazon. I have affiliate links for the tools and supplies I use, so you can find everything you need to try this project yourself.
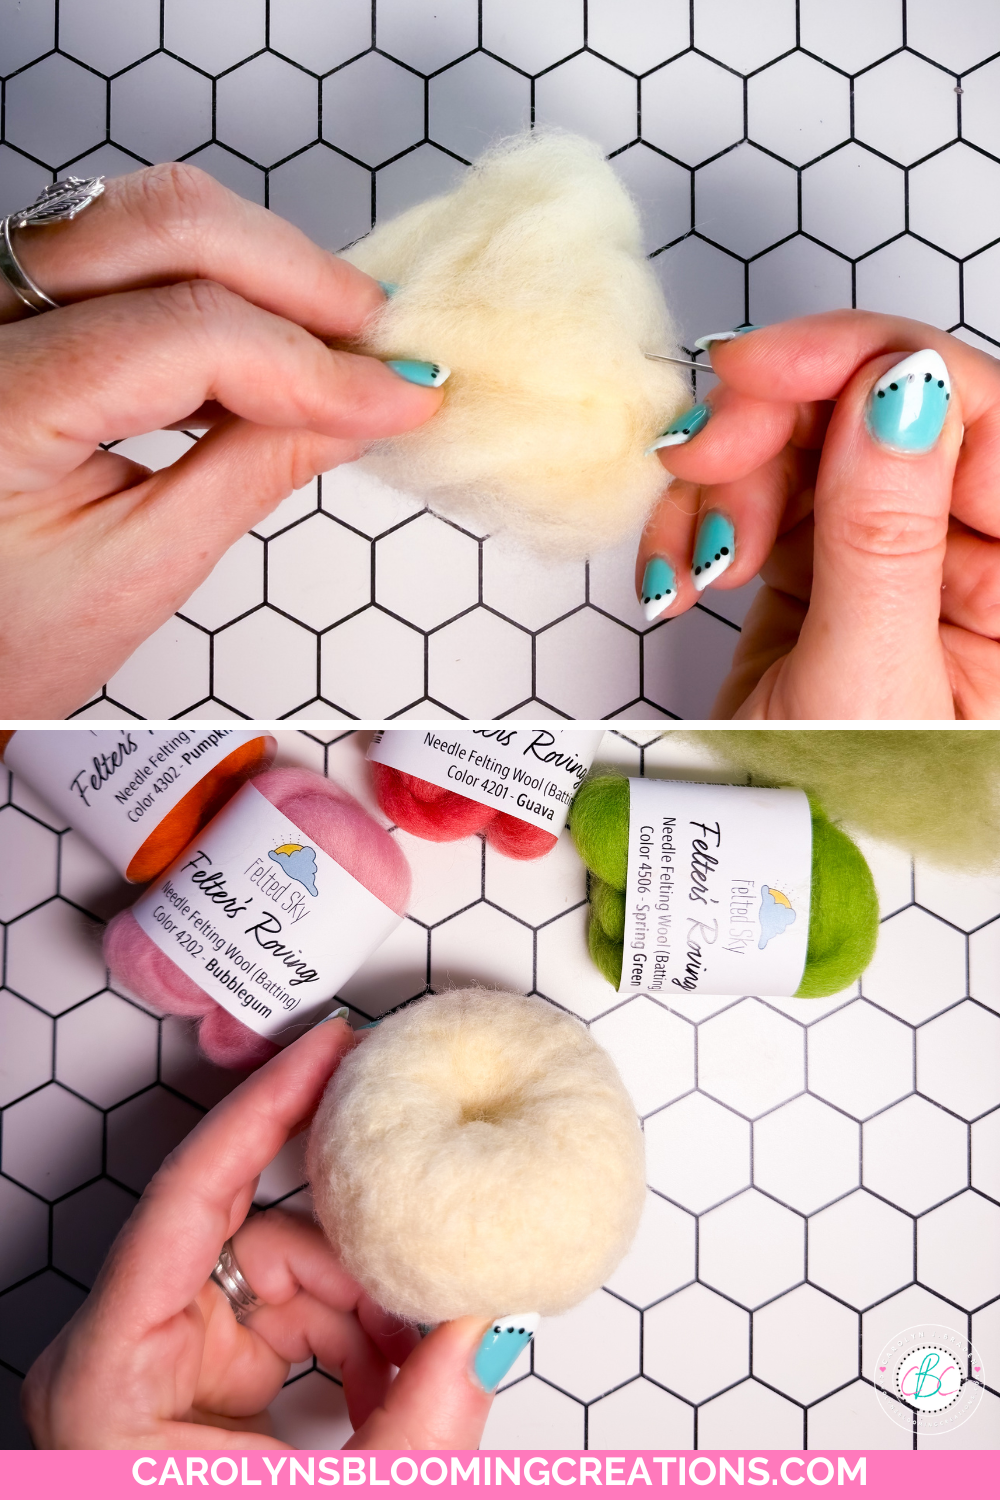
DIY Felted Wool Pumpkin Using Colorful Wool Roving..start with shaping the core wool
Step 1: Create the Pumpkin Base
Start with a handful of cream-colored wool roving.
Using your barbed felting needle, begin repeatedly stabbing the wool to felt and compact it. Work the wool with your hands as you go, continuing to stab and sculpt until you've transformed the loose handful of wool into a compact, rounded oval pumpkin shape.
Mine ended up being approximately 5 inches.
Once you have the basic pumpkin shape, use your needle to poke a small dent into the center of the top. This will give you a little spot for attaching the stem later.
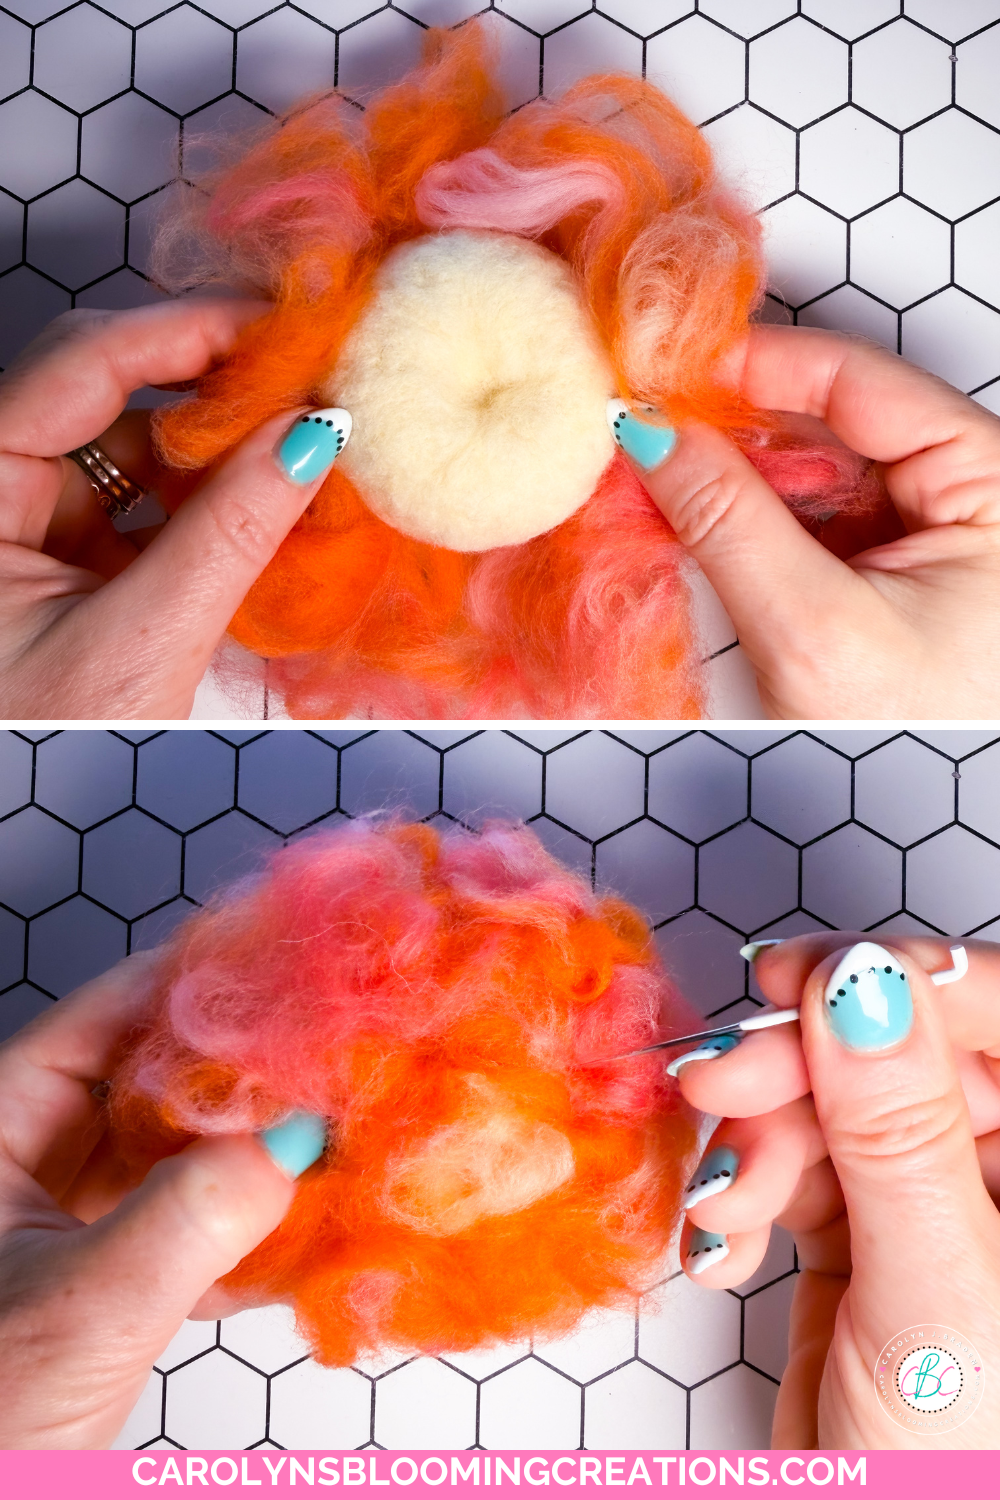
Add the colorful roving
Step 2: Add the Colorful Pumpkin Exterior
For my pumpkin, I wanted something a little more whimsical than traditional orange.
I swirled together orange, light pink, light orange and cream wool roving, using enough to cover the outside of my cream-colored pumpkin base.
Place the colorful wool over the pumpkin and use your felting needle to repeatedly stab through the roving and into the pumpkin underneath. Continue felting until the colorful wool is securely attached and the surface looks nicely covered.
Don't worry about making it perfectly smooth. Part of the charm of needle felting is seeing the texture develop!
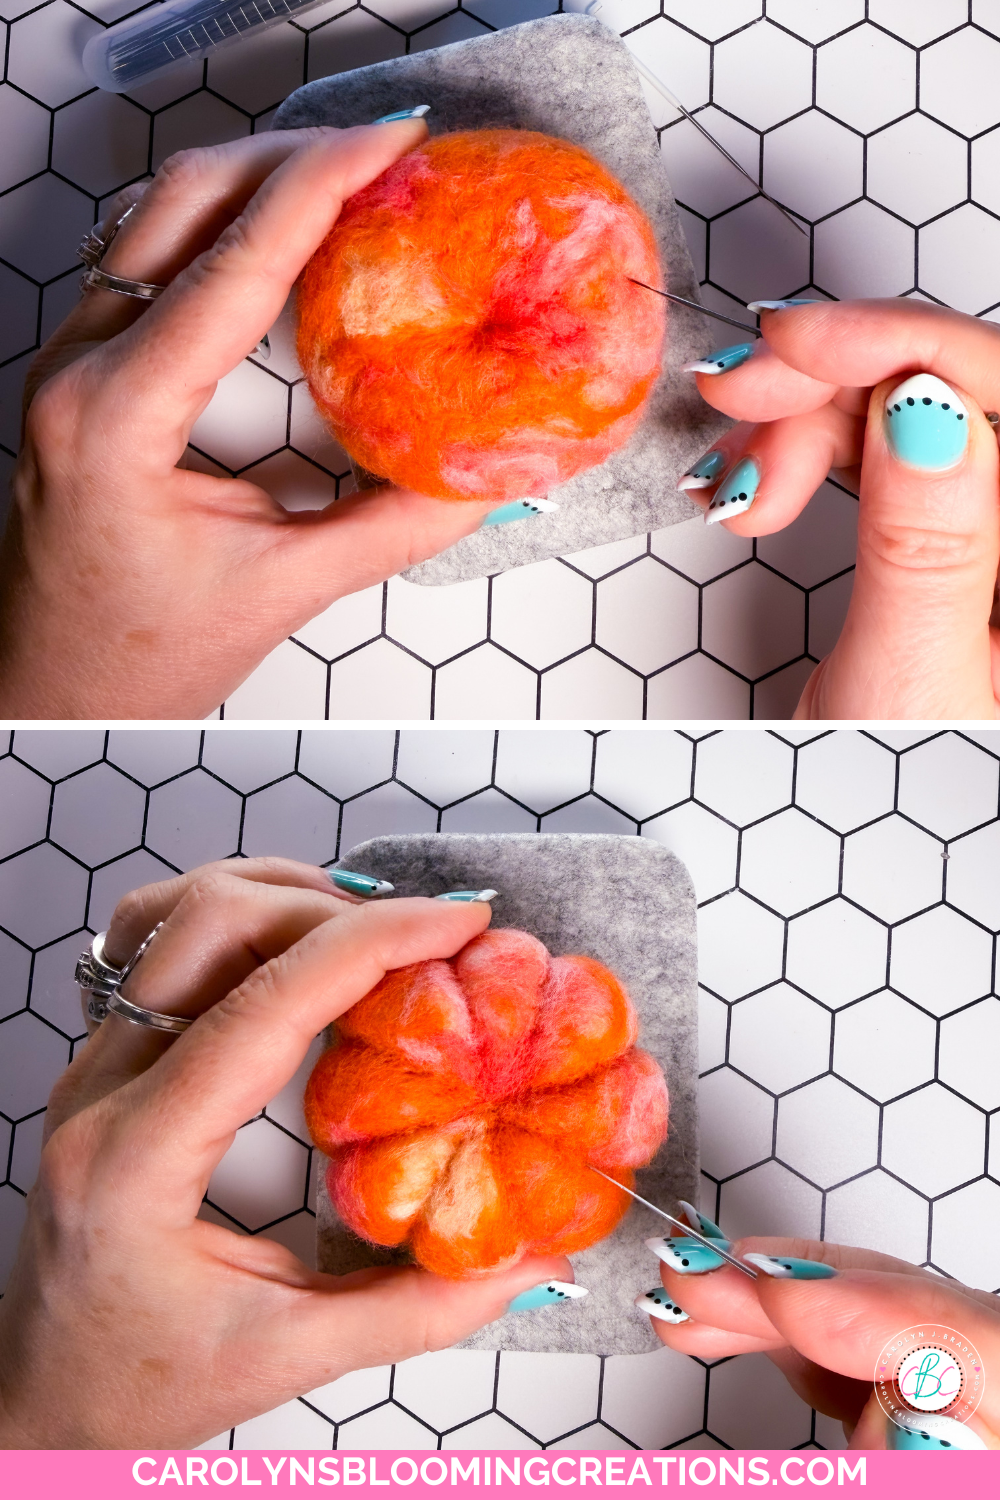
Adding the texture lines
Step 3: Give Your Pumpkin Texture
Now it's time to make your little pumpkin actually look like a pumpkin.
Using the tip of your felting needle, repeatedly stab lines into the pumpkin from top to bottom. These lines create the sections and ridges you see on a real pumpkin.
I also added a small circular detail to the bottom of mine to give it a little more realistic pumpkin texture.
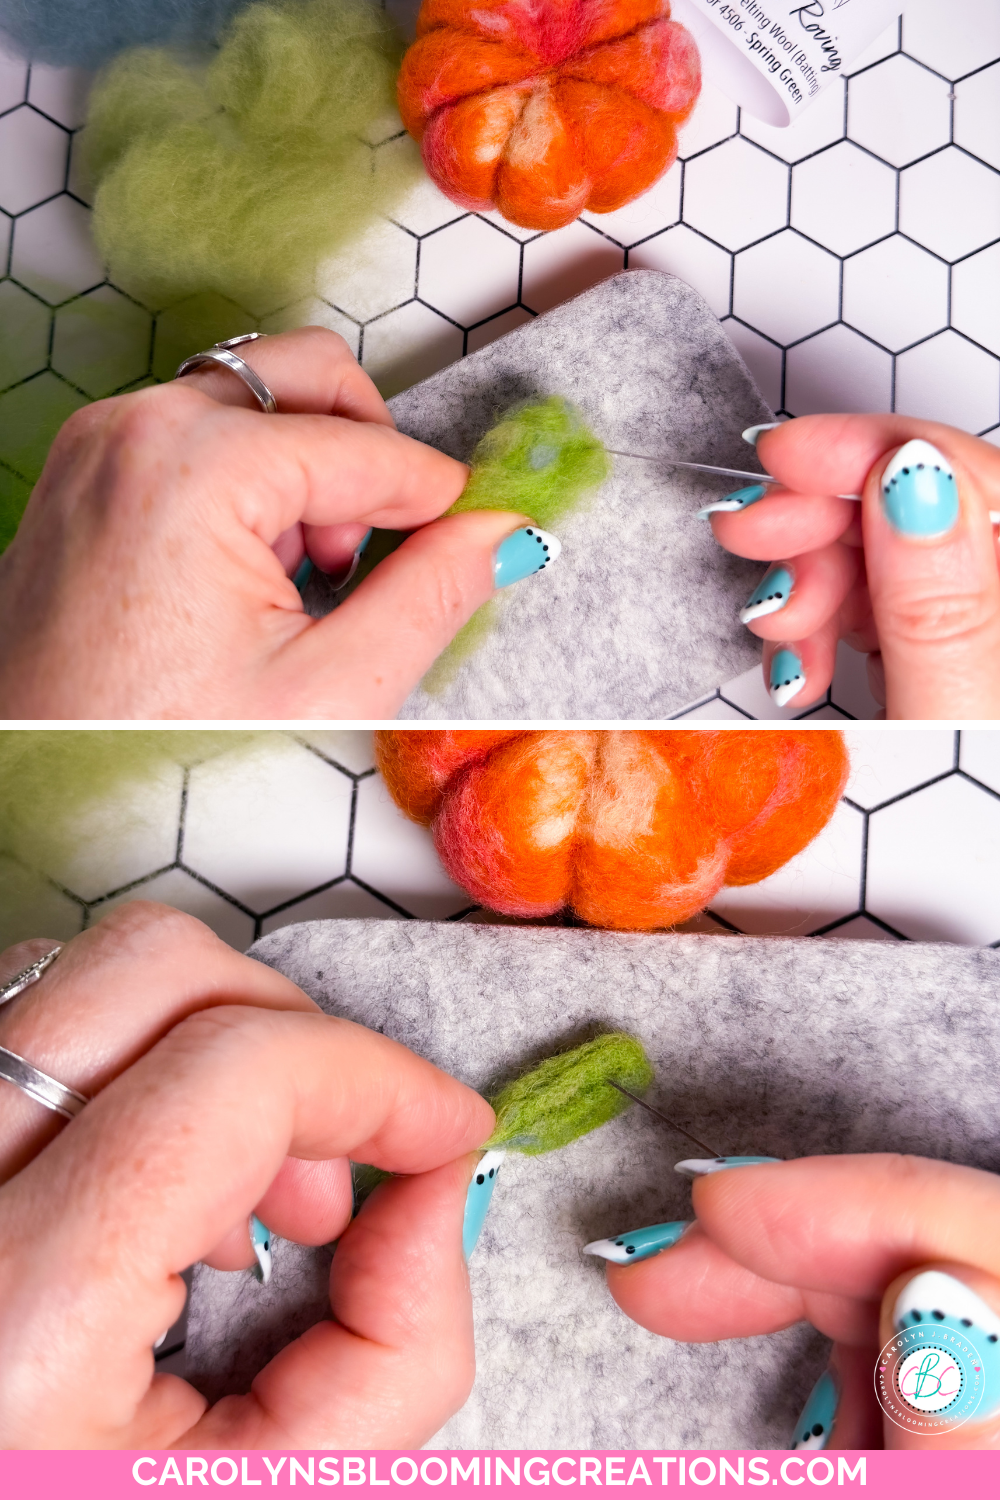
How to Needle Felt a Pumpkin Stem & Leaf
Step 4: Make the Stem
For the stem, I used three shades of green wool roving.
Take small amounts of the green wool and use your felting needle to sculpt and compact them into a stem shape. Add a little texture by using your needle to create lines along the stem.
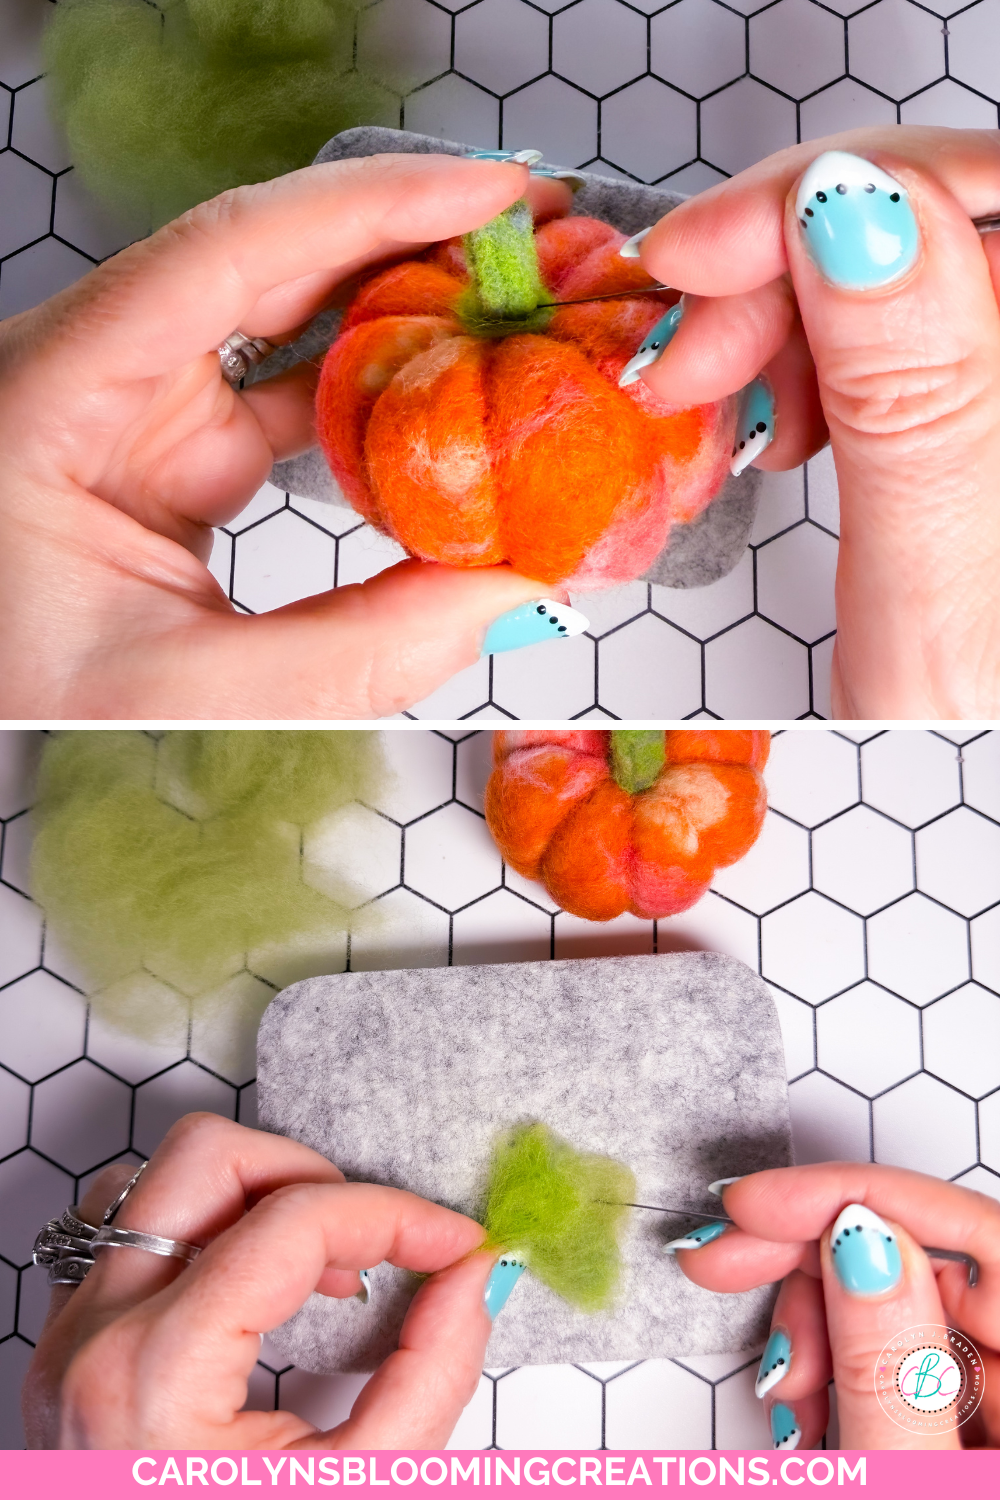
Shaping and sculpting the leaf
Leave one end of the stem fluffy rather than completely felted. That loose wool will help you attach the stem to the pumpkin.
When you're happy with the shape, place the fluffy end into the small dent you created at the top of the pumpkin and use your felting needle to felt the stem securely into place.
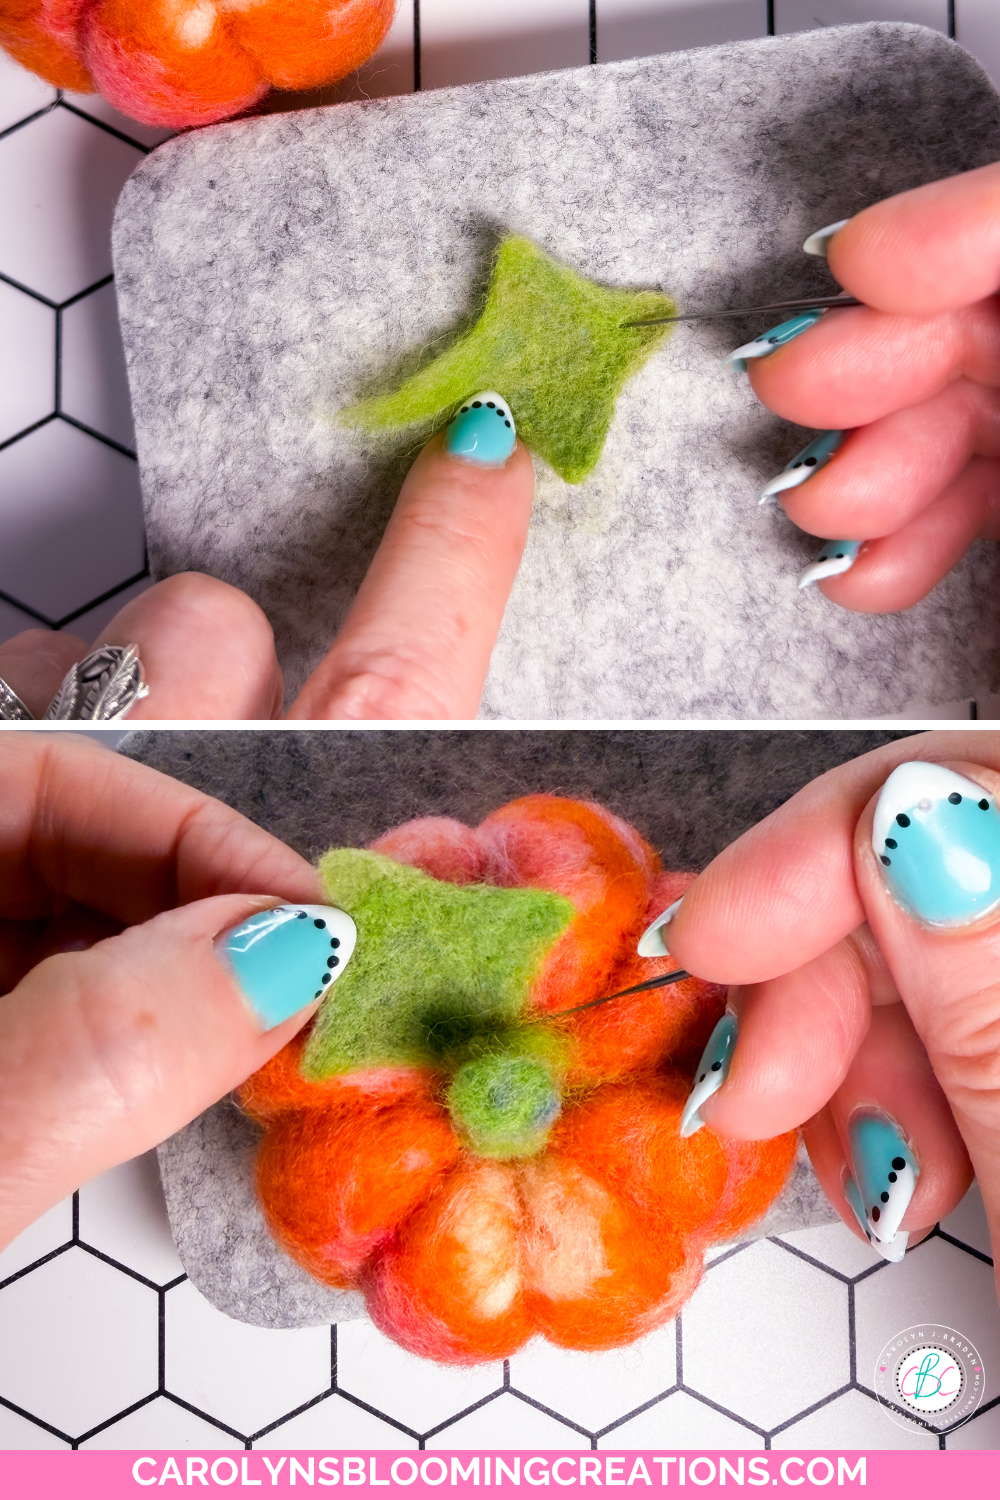
Attaching the felted pumpkin leaf
Step 5: Make a Tiny Pumpkin Leaf
Using the same shades of green wool roving, create a small pumpkin leaf.
For these smaller pieces, I recommend working over a needle felting pad. It gives you a safe surface to stab into while you're sculpting and helps prevent you from accidentally felting your project to your work surface.
Take a small amount of green wool, shape it with your fingers and repeatedly stab it with your felting needle. Continue sculpting until you have a little leaf shape you're happy with.
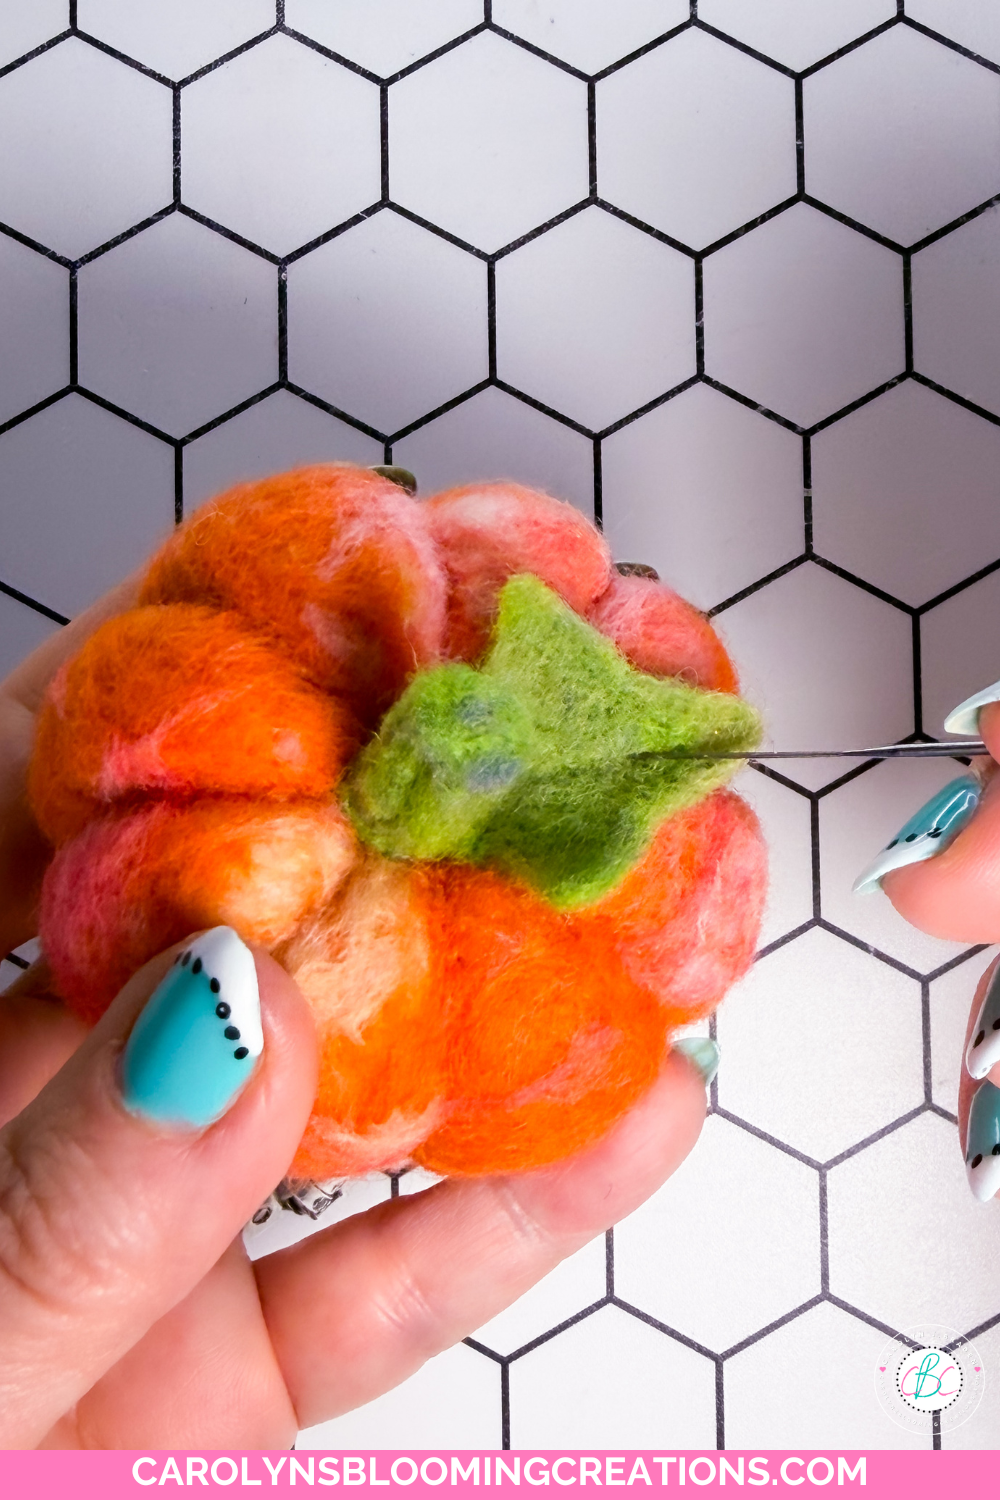
Adding the lines to the leaf
Attach it to the stem/pumpkin area using your felting needle. I continued to shape it a bit and added some lines to it with the needle for more texture.
And that's it! Pin a piece of jute string to the top if you want to hang it as an ornament. OR you could put the string under the stem before attaching it if you want the ornament string to be permanent.
You now have a tiny, colorful needle-felted pumpkin that you can use as fall decor—or turn into an ornament. The stabbing motion always calms me, and I think it will help you too if you like crafting and creating!
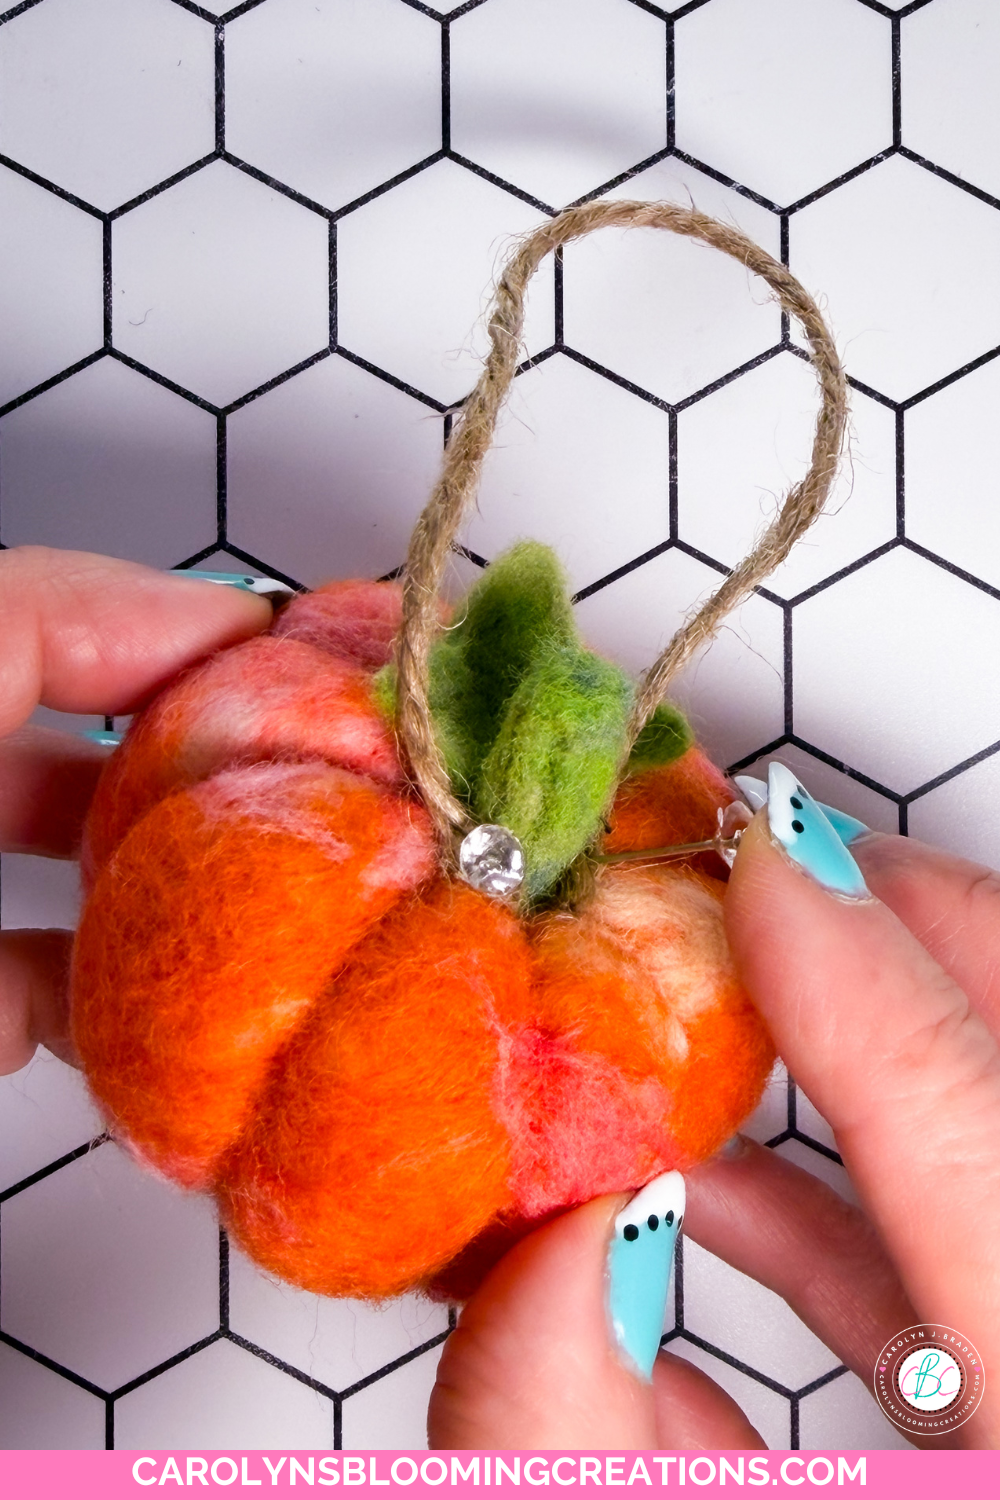
Turn it into an ornament if you wish
🎬Take Action
If you try any of my ideas, let me know how it turned out—or tag me when you try them because I LOVE seeing your posts💖 If you tag me using @carolynsbloomingcreations or @carolynjbraden, I’ll see it! Or tell me about it in the comments below.
If you loved this article, we know you’ll love this one too: Toilet Paper Origami Pumpkin: Easy Fall Bathroom Décor Craft
Carolyn J. Braden is the owner of Carolyn’s Blooming Creations is a regular contributor and editor for CBC. She has been featured in numerous media publications such as InStyle Magazine, on HGTV, on Bustle.com, and more. She is the author of the books Georgia McMasters in Amethyst Lake Cemetery, How To Be Yourself: 3 Ways To Help You Being You, and the illustrator for the children’s book Bridging Connections. She is a former classroom teacher that now dedicates her life to educating others on how to live their most healthy, creative and happy life. Learn more about her visiting our About Us page.