I recently had an itch to add a neon sign to my cupola office decor. The salon where I get my hair cut has the cutest pineapple neon sign hanging in their window, so I must assume that’s where my inspiration came from.
Watch the video tutorial for this project via my YouTube channel “Carolyn Braden” or see it below!
I turned, but of course, to Amazon and found the perfect small neon sign for my space. The only thing I didn’t like about it was the fact that it was attached to a plexiglass backing. I wanted the sign to look nice whether it was lit up or not, so after doing some brainstorming, I figured out how to do just that.
Read on to see exactly how I made my plain neon sign into a flora adorned neon sign wall hanging.
Slatted Palette Style Wood Wall Hanging
Photography by Carolyn J. Braden, Graphic by Carolyn J. Braden, Created in Canva
Pin me! carolynsbloomingcreations.com
Here are the items I used for this project:
17 x 8.2 inch neon sign (I found mine on Amazon)
18.7 x 9.84 inch slatted palette style wood wall hanging (I purchased mine at Hobby Lobby, but also found one in the exact same size on Amazon)
Four 1/4” screws (to attach the neon sign to the wood sign)
1 bag of green sheet moss (I purchased mine at Hobby Lobby but also have purchased it on Amazon too)
1 bunch of faux fern leaves (I purchased mine at Hobby Lobby)
1 bunch of mixed faux greenery (I purchased mine at Hobby Lobby)
drill or screwdriver (to help attach the screws)
high or low temp glue gun
scissors or wire cutters (to remove the greenery from their stems if needed)
My wood sign had a rope already attached for hanging, but if your sign base does not, you may need to staple on some rope to hang it with or add some picture hangers to the back of your completed project
18.7 inch by 9.84 inch Slatted Wood Panel Wall Sign
At first I wanted to use a wood round as a base for the sign. I used one to create my cute “Hi” door sign and thought it’d made a nice shape. Then, after a trip to Hobby Lobby, I found a palette style sign in the exact size I needed, so I went with that.
Mounting the neon sign to the wood palette wall hanging
The neon sign had two D-ring style hangers attached to the top. We used those and some small screws to attach the neon sign to the wood sign.
Attaching the neon sign to the wood panel using the D ring hangers
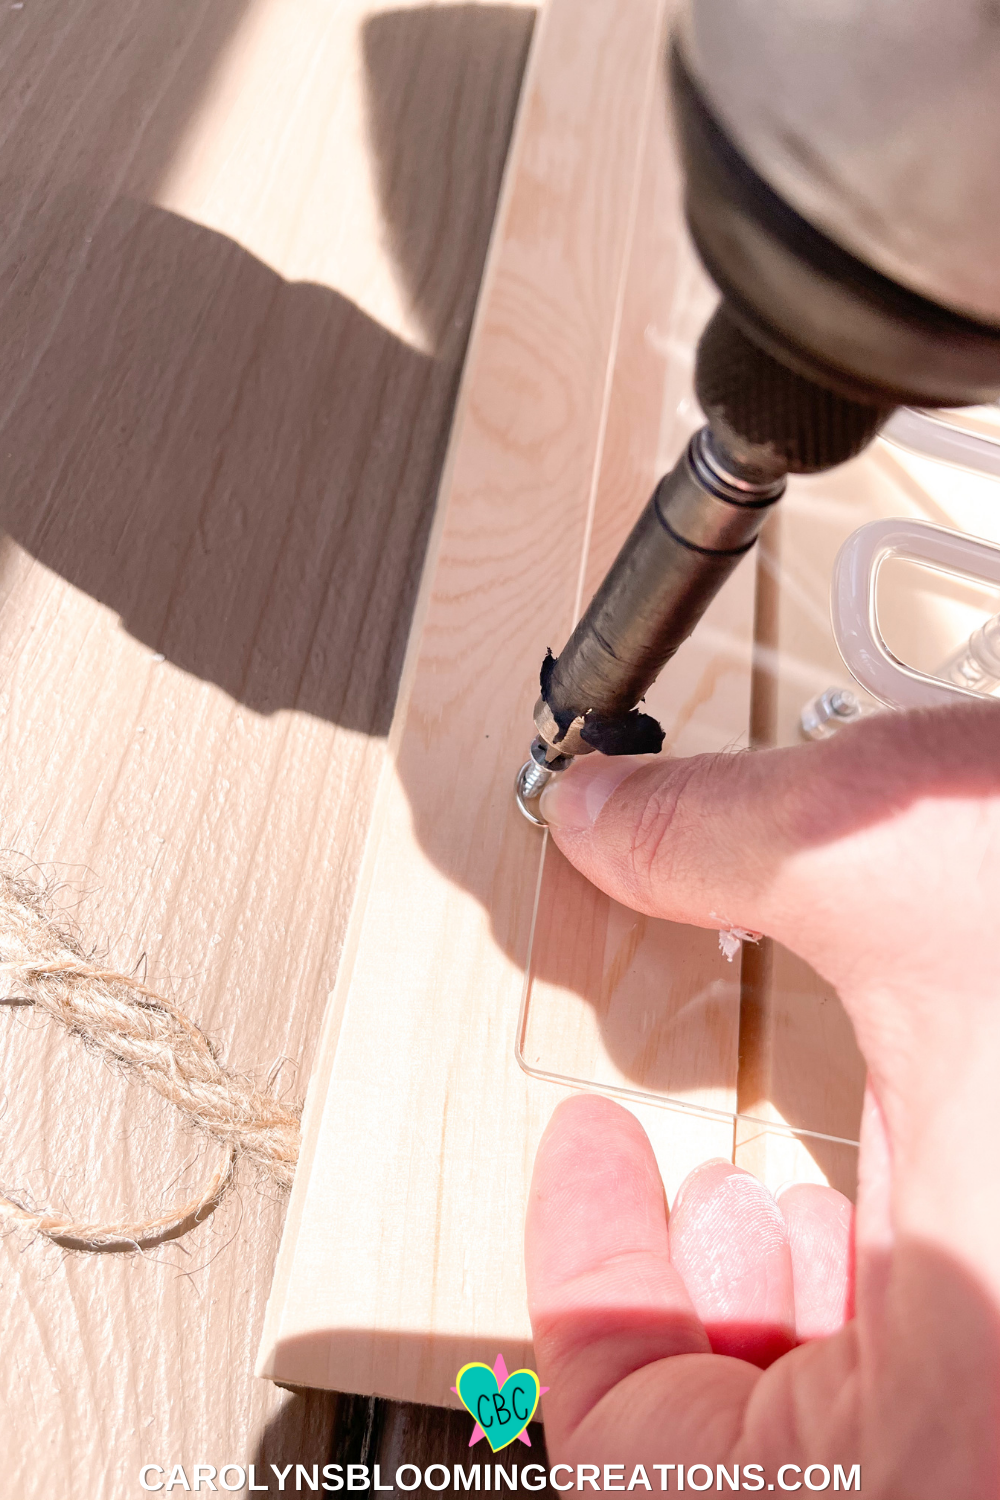
I didn’t want the sign to “flop” around and be unstable, so we added two screws to the bottom of the plexiglass portion of the neon sign to better secure it.
Securing the bottom of the neon sign to the wood panels
Attaching four screws to the neon sign helped secure it tightly to the wood sign base.
The neon sign fully attached to the wood sign
Next, I used a hot glue gun set on a high temperature (I’m sure a low temp would work too) to attach sheet moss over the plexiglass portion of the neon sign. I tore it apart to fit into the spaces. This part of the project was messy, so I covered my work area with a table cloth for easy clean up.
Using hot glue to attach a moss base to the neon sign
I worked incredibly slowly to ensure I didn’t get any glue on the wiring or the glass neon portion of the sign.
Using hot glue to attach a moss base to the neon sign
You could skip adding the moss but I felt it did a great job of hiding the plexiglass and would give the greenery a nice base to be glued upon.
The completed attached moss background
If you like the moss only look, you could just stop at this point BUT keep in mind the moss will probably not keep it’s super green appearance over time.
Mixed faux greenery to attach to the moss
Next I removed all the greenery from their stems using scissors and wire cutters .
Faux fern greenery to be attached to the moss
I started adding the faux greenery by laying it down on top of the moss to figure out positioning. I carefully wiggled it through the neon sign and around any wiring or electrical components.
Laying out the faux fern before gluing to the moss background
After laying it all out, I started gluing the pieces down. The neon sign portion (and weaving them around each other a bit) kept most of the greenery in place, so I didn’t have to use too much glue. I never glued any of the greenery to the wiring or the glass neon sign part.
Leaf faux greenery to add on top of the faux fern
After I added some faux ferns and leaves, I hung it on my wall to see what else I needed to add. This is where your own creative eye can come into play. You could add colorful flowers, more greenery, ivy or whatever else you want!
The look of the neon sign with the faux fern and leaves
I chose to only add a few grass-like faux greenery stems to complete the look. I wanted mine to look simple and compliment my office surroundings.
The completed flora neon sign wall hanging
The whole thing came together in about one hour. My total cost was around $70, which isn’t super inexpensive but it was still less expensive than most single neon signs.
Do What You Love Quote Flora Adorned Neon Sign Wall Hanging
Adding the greenery definitely hid the plexiglass background and fits my decor perfectly.
Do What You Love Quote Flora Adorned Neon Sign Wall Hanging
The greenery allows it to be a work of functional art for my wall whether it is on or off.
Flora Adorned Neon Wall Sign with the light turned on
I love how it turned out. It’s simple to create and super fun! It gave the room a whole lot of stylish impact without overwhelming my space.
Flora Adorned Neon Wall Sign with the light turned off


