


Carolyn J. Braden • 3 Minute Read

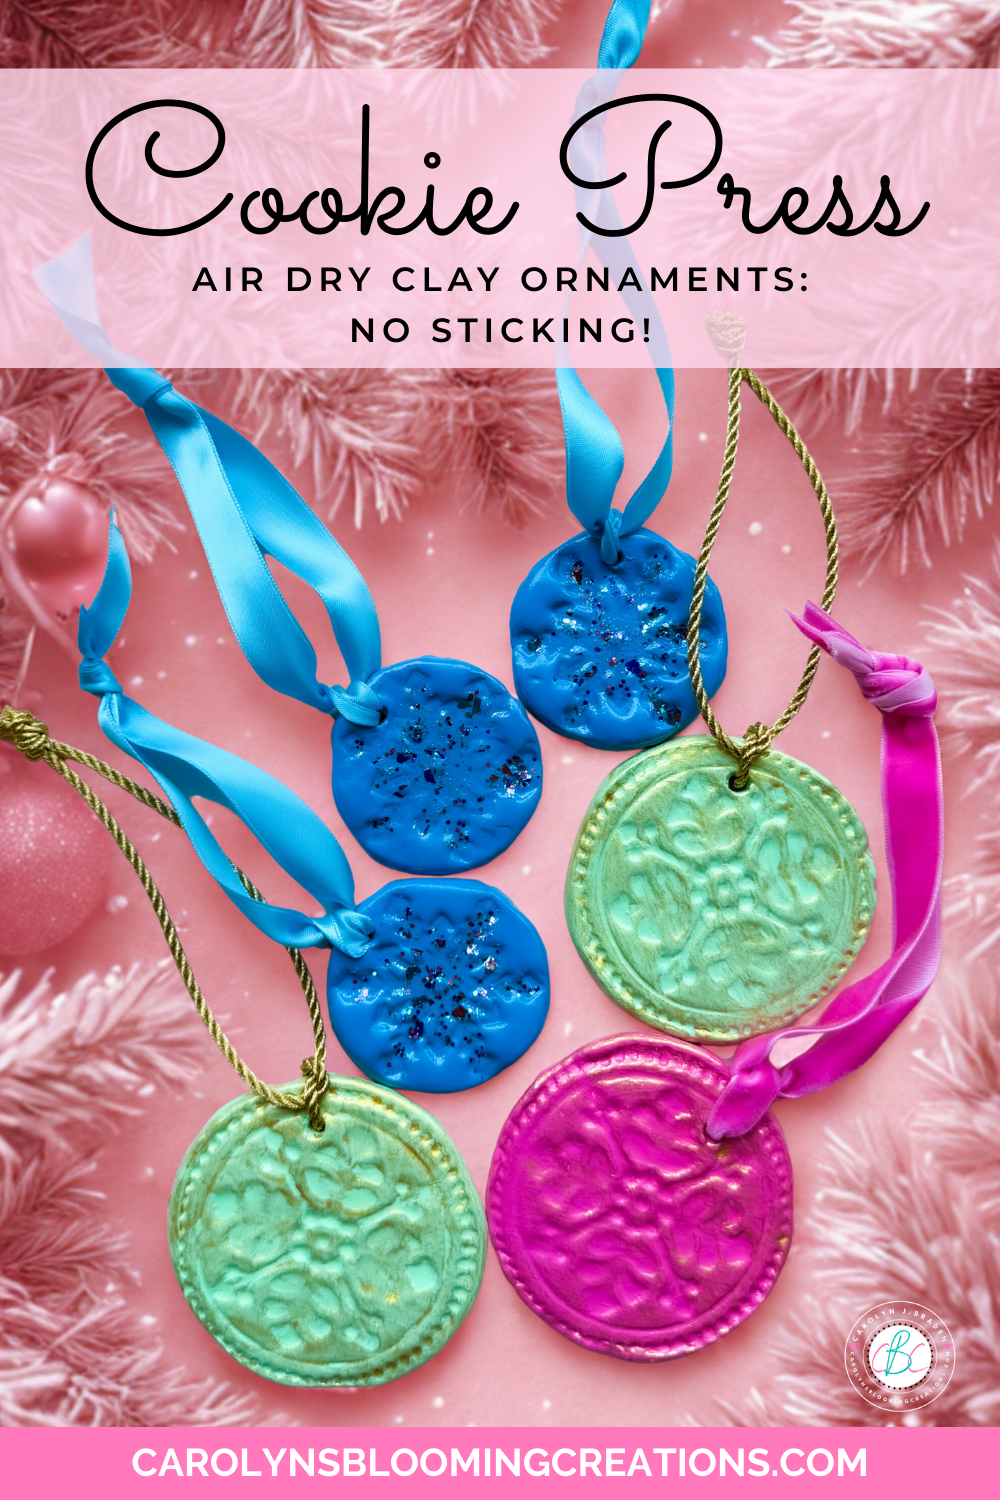
Stunning Air-Dry Clay Cookie Press Ornaments with No Sticking!
Learn how to make cookie press air dry clay ornaments with this easy, NO STICKING, beginner-friendly tutorial. These no-bake DIY ornaments are perfect for Christmas trees, gift toppers, and cozy holiday decor. Using simple supplies and a cookie press, you can create beautiful, high-end looking clay ornaments at home—perfect for handmade gifts, farmhouse Christmas style, and budget-friendly holiday crafting.
Shop the Post
Don’t feel like reading this article? That’s okay! See my craft come together via my Amazon Shop plus get buying links at affordable prices!
Bookmark or Pin this one by clicking the Pinterest SAVE button on the images in this article for crafting magic at your fingertips.

One of my designs
The Creative Inspiration
I set out to make salt dough ornaments, but every time I had a day set aside to make them (which takes a while), we got a house showing. For anyone trying to sell their house while still living in it, I feel your pain!
Salt dough ornaments do need to bake at a very low temperature for a long while and since I was not getting a full day opportunity to work on them, I opted for air dry clay and it worked in such a great way!
All Year Holiday Decor
If you don’t feel like making holiday decor year-round, The Vermont Country Store has gorgeous and unique holiday decor. See it here or get my picks in the carousel below:
More Ways to Use Cookie Presses and Cutters
The cookie presses I used for this tutorial were ones I found in my in-law’s basement years ago when staying with them. I asked to use them, but was able to keep them. I don’t make many cookies right now, but I have found more ways to use cookie presses and cookie cutters, like my snowflake glue stamp card idea in 2024. So, don’t throw out your cookie cutters and presses if you are a creative person! I also use the to make pipe cleaner crafts.
See my glue stamp tutorial in my 1-minute video below via my YouTube channel @carolynjbraden.
The Sticking Point
The only thing I had to figure out with switching from my salt dough ornament idea was how to get the air-dry clay to not stick to the cookie presses. I took clay classes in my Master’s degree program as well as did many clay and kiln projects when I was a classroom art teacher, so I turned to some tricks I learned. My tutorial will show you how to use plastic wrap to make these air-dry clay ornaments with NO STICKING! It’s a great art hack that works wonders.
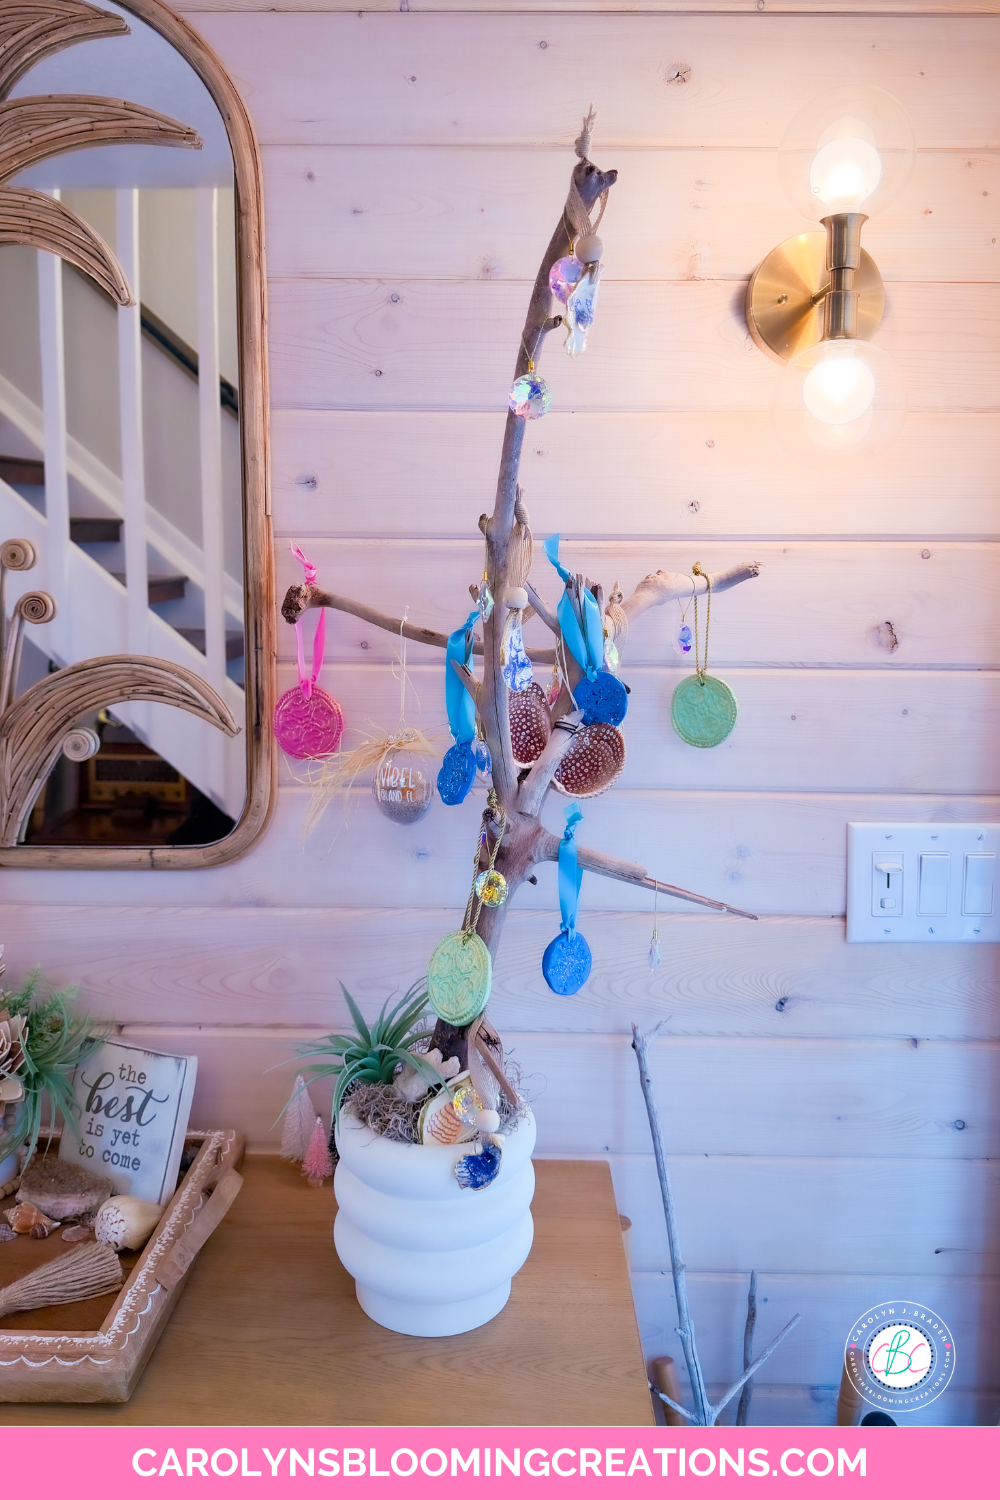
My Christmas version of my driftwood tree
Why You’ll Love These Cookie Press Clay Ornaments
If you love easy holiday crafts that look expensive, this one’s for you. Cookie press air dry clay ornaments are one of those DIYs that feel almost too simple—but the result is Pinterest-worthy holiday decor. No oven, no special tools, and totally beginner-friendly.
They’re perfect for:
Christmas tree ornaments
Gift toppers
Stocking stuffers
Handmade holiday gifts
Neutral, farmhouse, or minimalist Christmas decor
I hung mine on my all-season driftwood tree that I keep up in my home year-round and decorate it according to seasons and holidays.
Check out my 1-minute video tutorial for this project on my TikTok now or via my YouTube channel @carolynjbraden!
Supplies You’ll Need
Links go out to either Amazon, CVS, Walmart, Sam’s Club, Target, or Temu, where we source our supplies based on budget/pricing.
Air dry clay (white or natural, I LOVE Crayola)
Rolling pin (This measuring rolling pin would be perfect for beginners!)
Knife or Pallet Knife
Straw or skewer or a hex key (for hanging holes)
Ribbon or twine
Optional: acrylic paint, acrylic sealer (I love this spray), brush set
My Cookie Press Ornaments
Step-by-Step: How to Make Cookie Press Air Dry Clay Ornaments

Roll out a ball first
Step 1: Prep Your Clay
I pulled out enough clay to fit the size of my cookie presses. Play around with this amount. Form a ball with the air-dry clay by rolling some in your hands. Lay it onto a piece of plastic wrap for zero sticking!

The plastic wrap prevents sticking to the cookie press
Place plastic wrap over your ball and roll out your air-dry clay on a non-stick surface until it’s about ¼ inch thick. Press and roll in different directions until you have it in the size and shape you’ll need for the cookie press.

Pressing out the design
Step 2: Press Your Designs
Press your cookie press firmly into the clay. I even rolled the flat cookie press a bit with the rolling pin to get a full print.

The flat cookie press design was my favorite
Slowly lift to reveal the design.
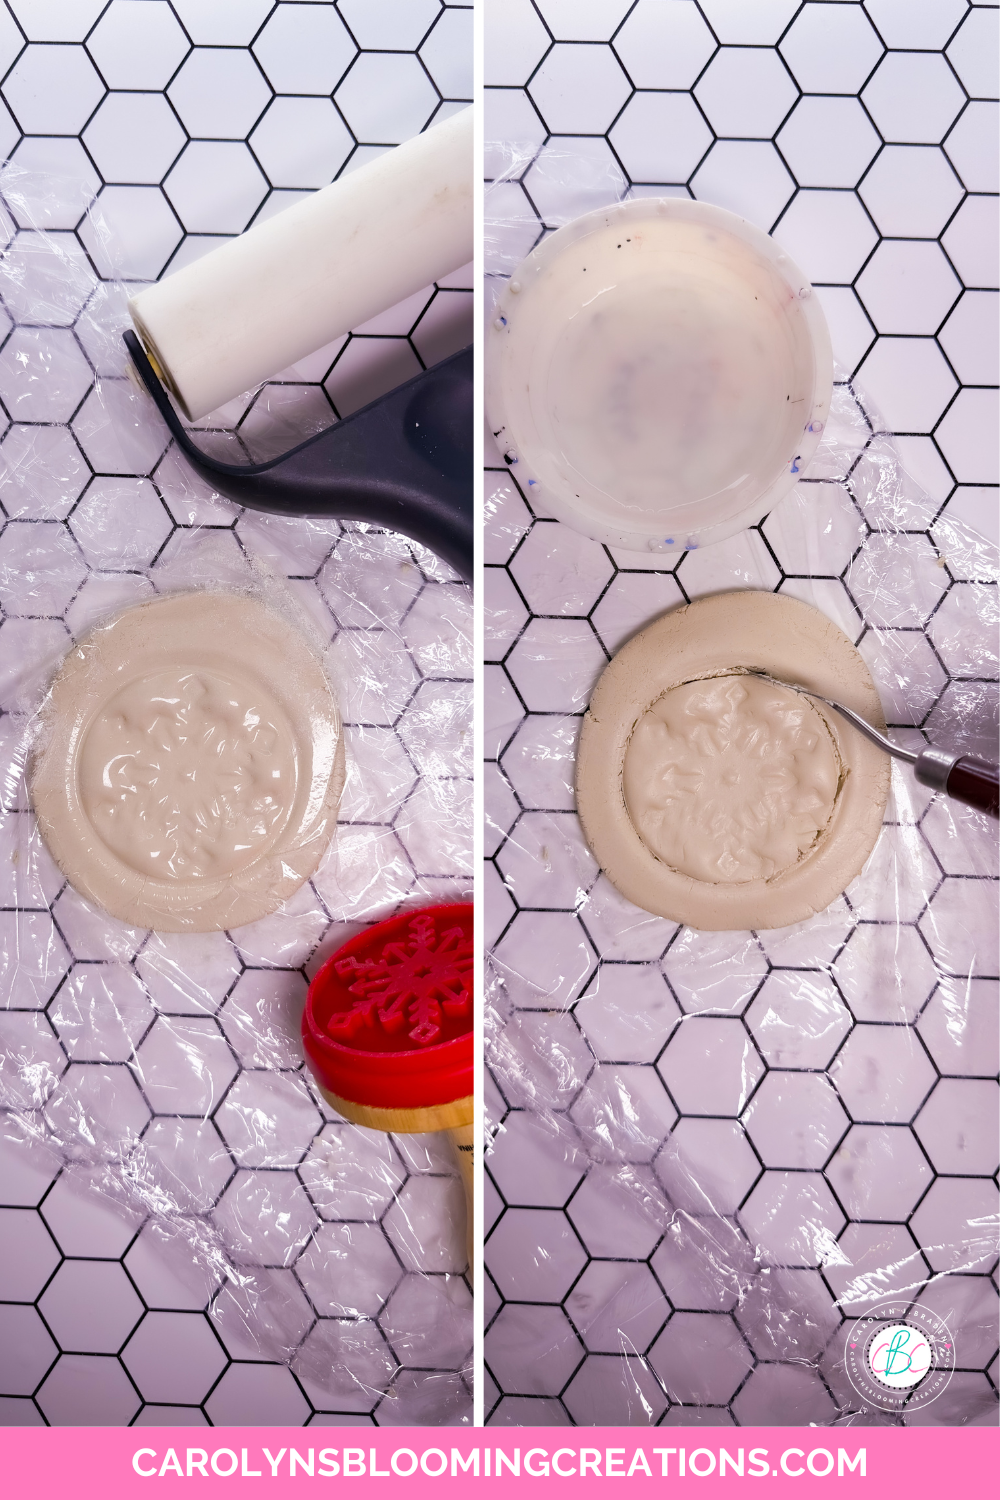
Cutting out the designs
Step 3: Cut & Shape
Use a round cutter or knife to trim each ornament into your desired shape.

Smoothing the edges with water
Use water on your fingers to smooth out the edges as needed.

Adding a hole to the ornament for hanging
Step 4: Add Hanging Holes
Use a straw or skewer or a hex key like I used to make a small hole near the top of each ornament.
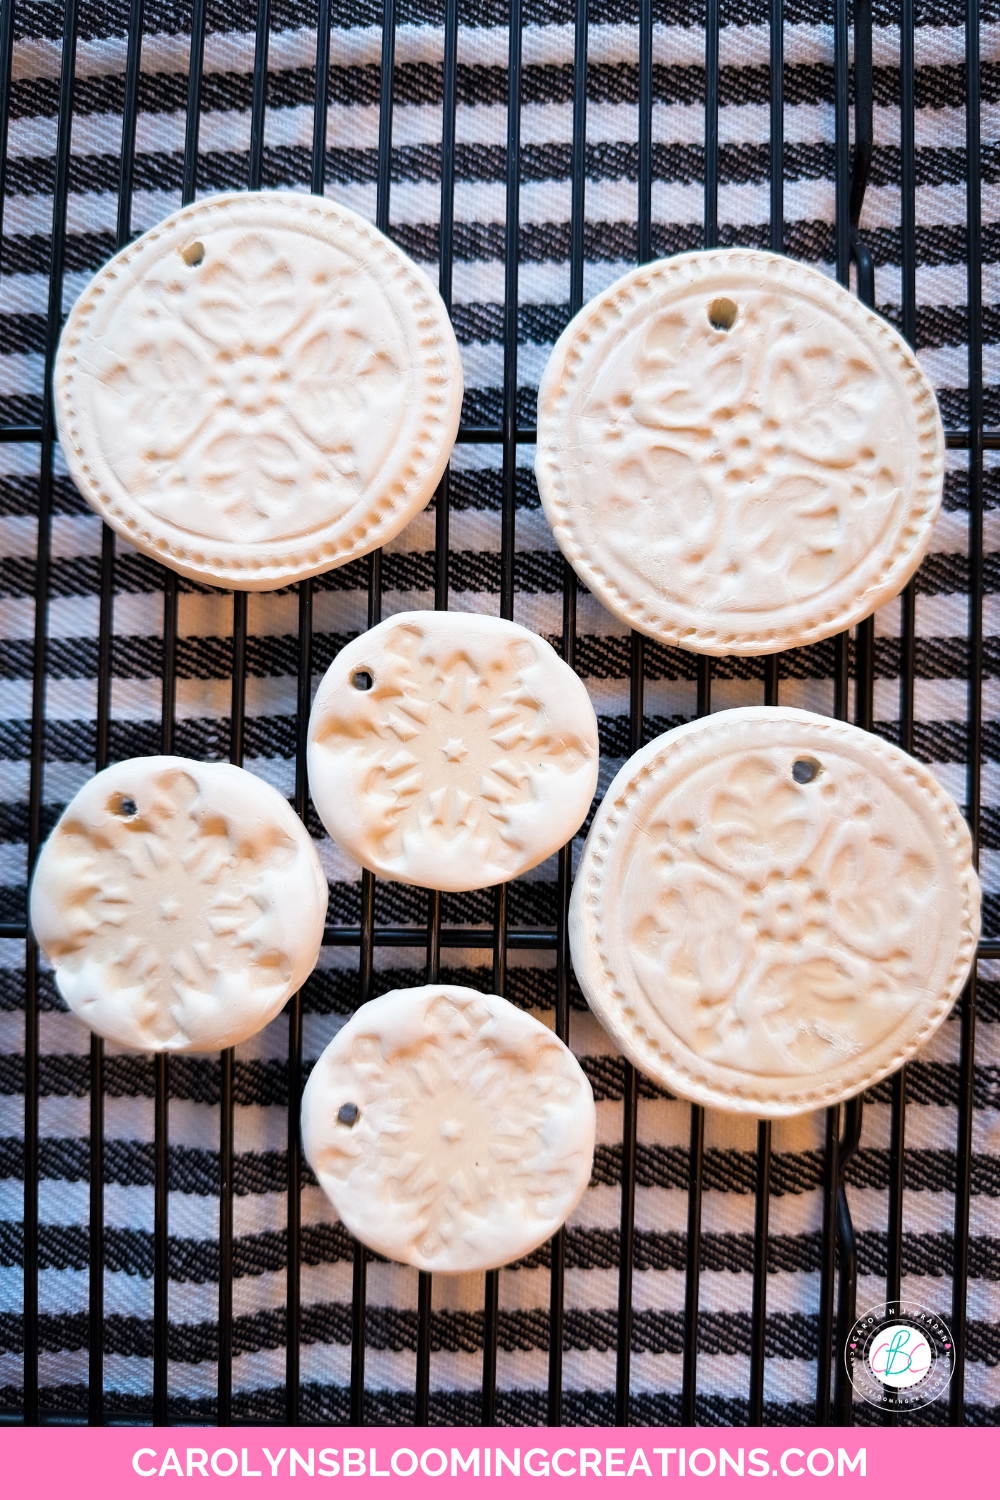
Drying the ornaments
Step 5: Let Dry
Allow ornaments to air dry flat for 24–48 hours (the humidity in your environment affects dry time), flipping halfway through. I dried them partially on wax paper, then transferred them to a baking rack for full drying.

Painting the ornaments
Step 6: Decorate (Optional)
I painted a layer of white paint as a primer on both sides.
You can Leave them natural or add colorful paint, gold accents, and seal for a finished look.

Adding some gold paint to make the design pop
I painted mine in various colors on both sides (2 coats of paint), swiped on a layer of gold paint to accent the details on some or added glitter paint.
I sprayed on some acrylic sealing spray (outdoors) to both sides and allowed it to dry for a couple of hours.
I added ribbon to match the paint colors. I always use a lighter to seal the end of a ribbon (most types, but not all!) for a non-fraying edge.

Use sealants outdoors
Styling & Display Ideas
Tie with velvet ribbon for a luxe look
Use twine for farmhouse style
Add gold paint or leafing details for an elevated finish
Write names using a paint pen or dates for personalized keepsakes
Tips for Best Results
Don’t roll clay too thin—it can crack while drying
Flip ornaments while drying to prevent curling, waiting until the design side is mostly dry
Dry on wax paper for while, then fully dry on a slatted cooling rack for quicker full drying
Seal with the spray or you could use Mod Podge (though it’s a bit sticky) if using outdoors or for longevity
Take Action
I encourage you to try the project with your own creative twists and share your creations on your social accounts! If you tag me using @carolynsbloomingcreations or @carolynjbraden, I’ll see it! Or tell me about it in the comments below.
If you loved this article, then we know you’ll love this one too: How to Make Bread Dough: An Air Dry Clay for Crafting
Carolyn J. Braden is the owner of Carolyn’s Blooming Creations is a regular contributor and editor for CBC. She has been featured in numerous media publications such as InStyle Magazine, on HGTV, on Bustle.com, and more. She is the author of the books Georgia McMasters in Amethyst Lake Cemetery, How To Be Yourself: 3 Ways To Help You Being You, and the illustrator for the children’s book Bridging Connections. She is a former classroom teacher that now dedicates her life to educating others on how to live their most healthy, creative and happy life. Learn more about her visiting our About Us page.