


Carolyn J. Braden • 4 Minute Read
DIY UV Color-Changing Pony Bead Initial Bag Charm
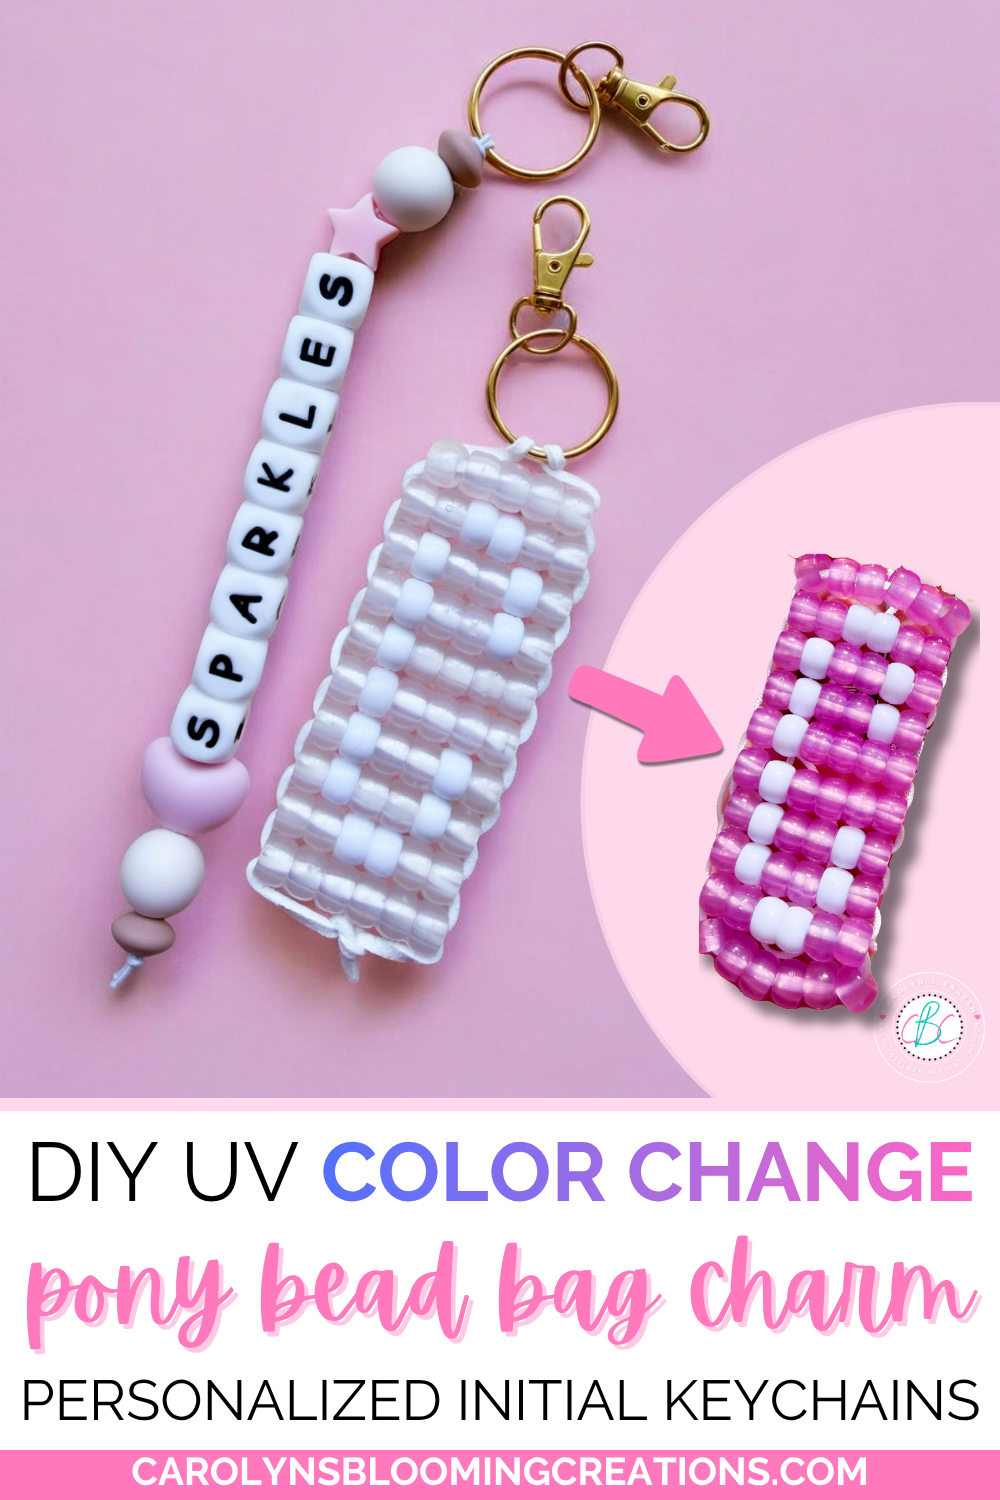
Need a quick way to personalize your purse or tote bag? These DIY UV color-changing pony bead bag charms and personalized initial keychains are an easy, fun solution! They take very little time to make, add a pop of personality to any bag, and one even changes color in the sun. How fun is that?
As your Problem Solution Girl, I'm always looking for creative solutions to everyday problems. This time, I wanted a little creative distraction, something easy and cheerful that could help me focus on something positive.
We're getting ready to move 1,000 miles to a new state, and I'll admit my anxiety is growing as the big move gets closer. When life feels overwhelming, I find that creating something with my hands helps clear my mind and gives me a much-needed mental break.
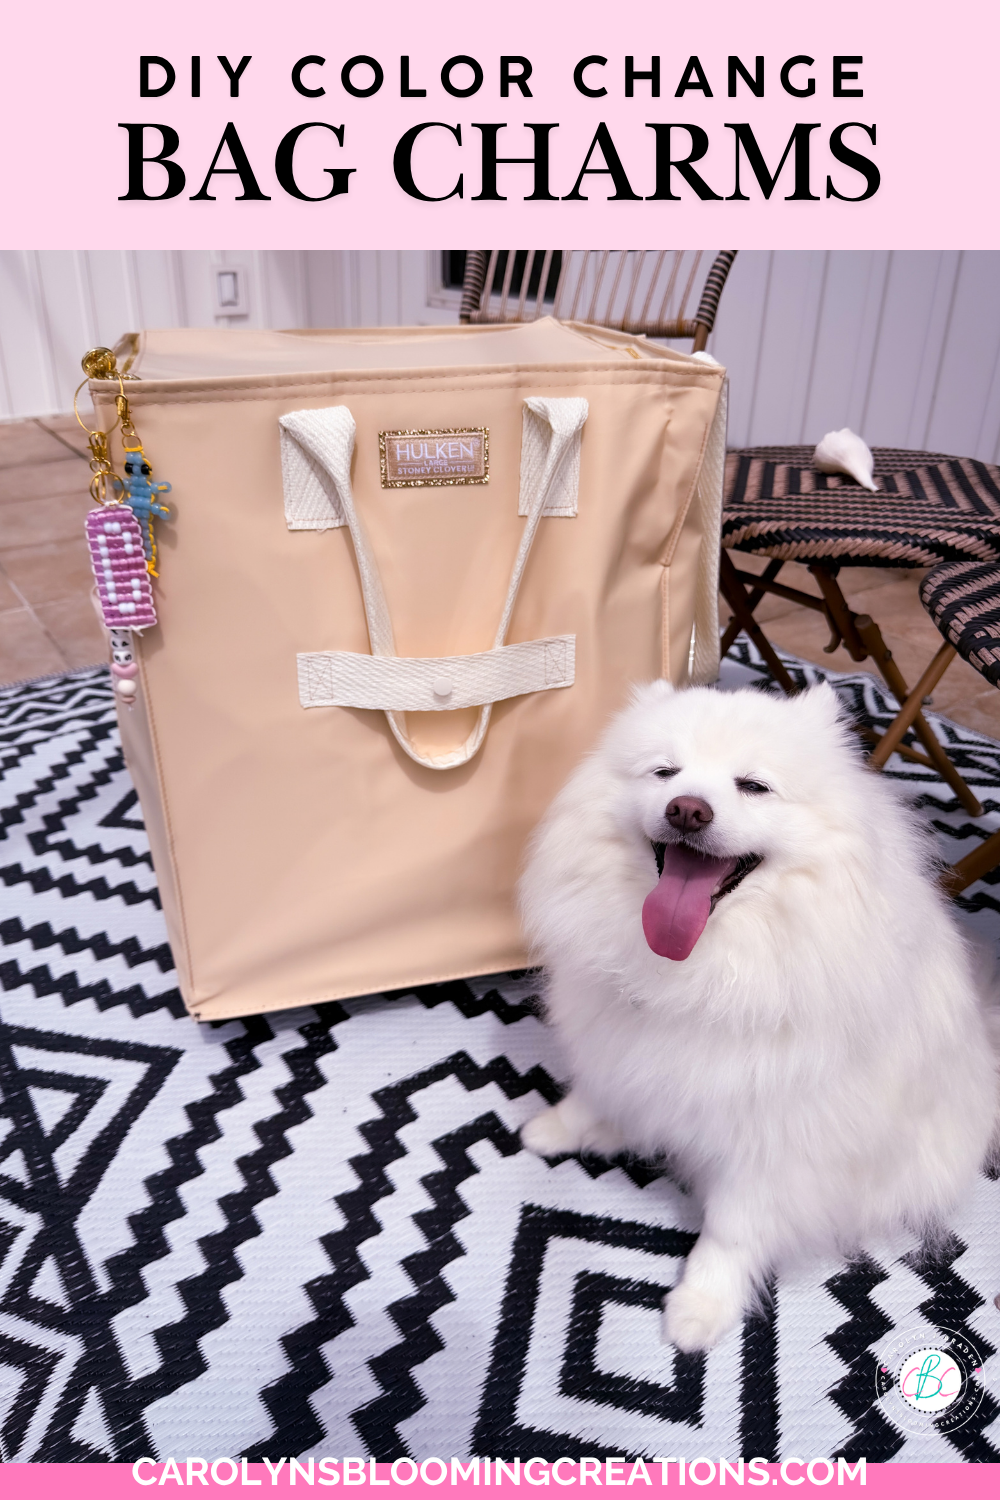
My pup, Johnny Cash, loves modeling my crafts
After my UV color-changing pony bead lizard tutorial was such a hit on social media, I decided to make another fun project using those same magical beads. This time, I made a pony bead initial bag charm featuring the letter C for Carolyn, along with a second charm spelling out SPARKLE.
And now I have two adorable bag accessories that look just as cute on my HULKEN rolling tote as they do on my borrowed Louis Vuitton bag from Vivrelle.
Let's make them!
See my UV lizard pony bead being made in my video below via my YouTube channel @carolynjbraden:
🛍️Shop the Post
Support me as a creator and shop my links with no extra cost to you! See my creations come together via my Amazon Shop plus get buying links at affordable prices!
We also love shopping CVS ❤️ (the ExtraCare card savings stack helping you to save!) and here are some of our CVS finds to stock up on (especially when you get that 40% off coupon!) and love Walmart (Walmart+ gets you free shipping and delivery on many items) and Sam’s Club for extra savings on beauty, fashion and we love their furniture too!
🛠️We also love Lowe’s (see our Lowe’s storefront here) for all our home improvement, home organization, DIY projects and gardening loves (and animal lover loves too!).
📕Bookmark or pin this one by clicking the Pinterest SAVE button on the images in this article for creative magic in an instant.
👉More Product Loves❤️
You can also get the products I’ve featured and more of my product loves via my Target shop here or my CVS Store here (use your ExtraCare card to double up on savings!) or via my shop my store here or below:
🔗Links in this article go out to either the brand website, Amazon, CVS, Walmart, Sam’s Club, Target, or Lowe’s where we source our supplies based on discounts, budget and pricing.
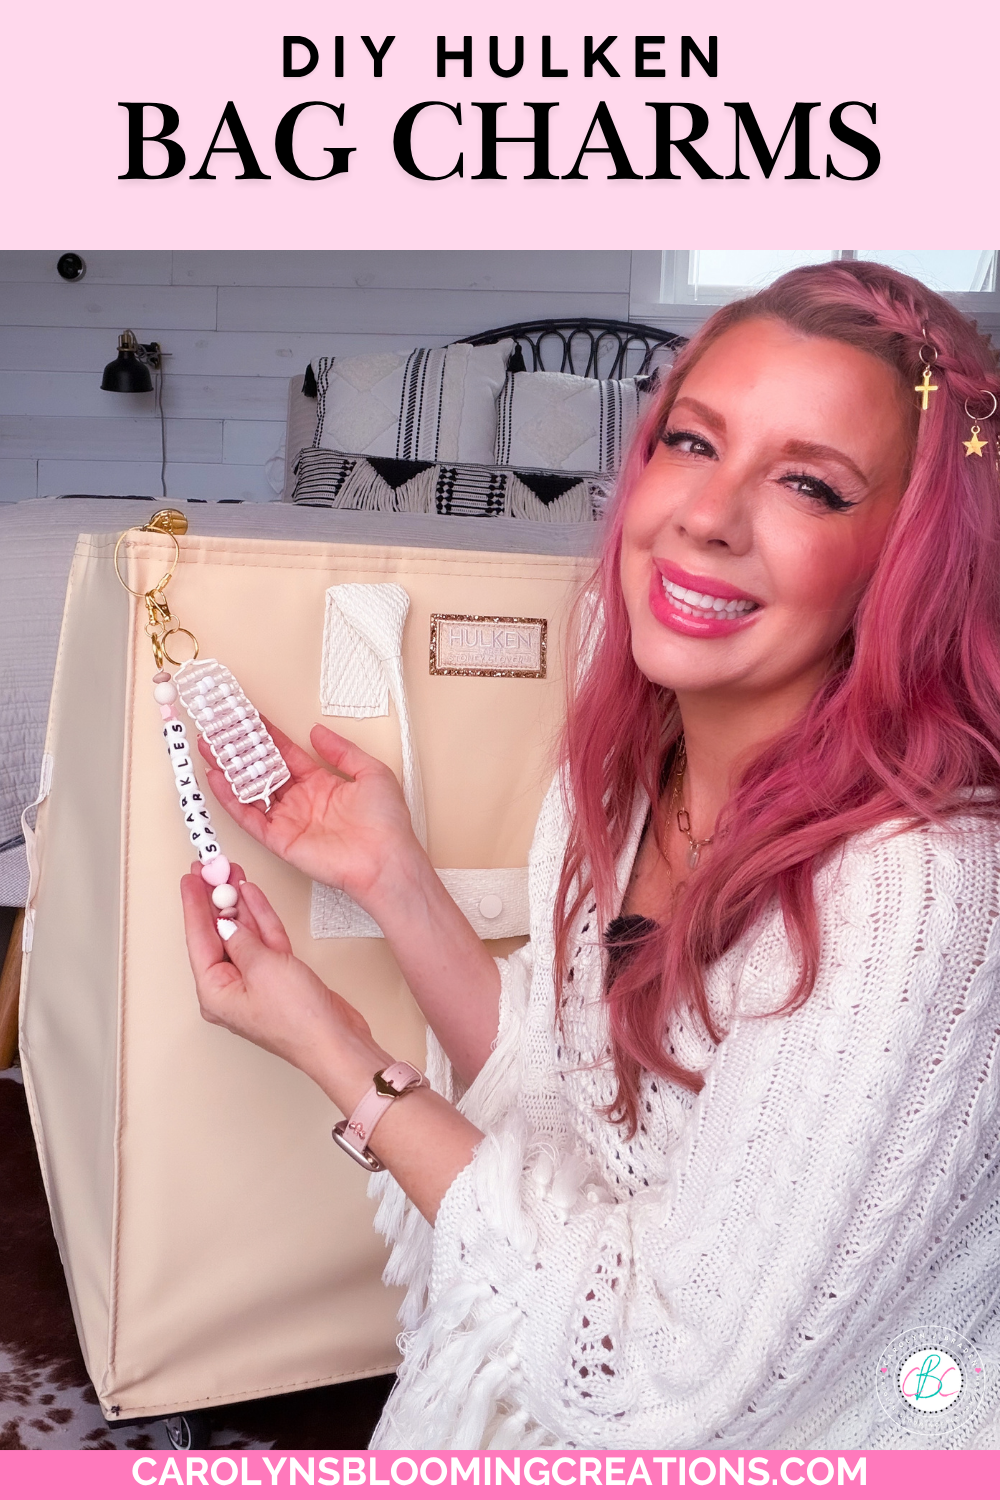
Love my DIY bag charms and hair charms too!
How to Attach Your DIY Bag Charms to a HULKEN or Purse
One of my favorite parts of making bag charms is seeing how they instantly personalize an otherwise ordinary bag.
I used gold cable wire to attach both charms to my HULKEN rolling tote and my borrowed Louis Vuitton bag from Vivrelle.
The gold cable wire makes it easy to attach and remove the charms, and the gold hardware adds a little extra polish.
You can use this same technique to decorate:
HULKEN rolling totes
Purses and handbags
Backpacks
Beach bags (I love my Case Mate Jelly Tote…my link gets you a discount!)
Travel totes
Zipper pulls
The charms are also cute as traditional keychains, so you can easily switch them between your keys and your favorite bags.
If you're interested in the products I'm using, check out my HULKEN review and my Vivrelle review for more details. I also have discount codes available for both, which is in the posts with the links/discount codes.
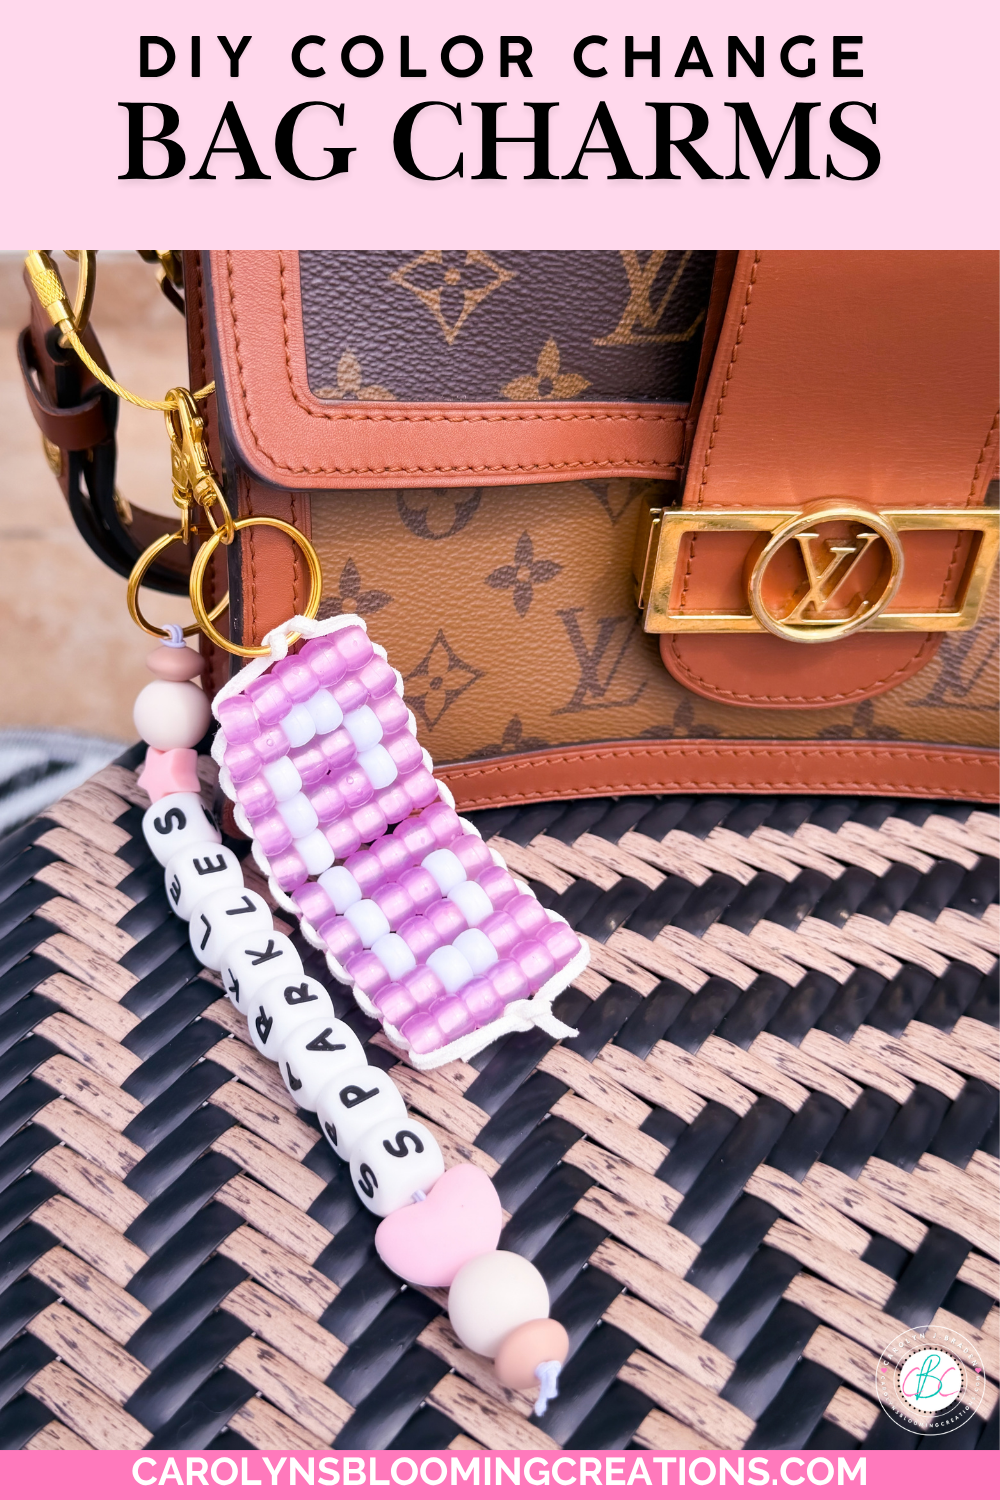
Easy DIY Bag Charms to Elevate Your Favorite Handbag
Why I Love These Quick and Easy DIY Bag Charms
Sometimes the simplest projects are the ones we need most.
With so much happening in my life right now, I wanted a creative project that didn't require hours of planning, complicated tools or a huge investment in supplies. These pony bead charms were the perfect solution.
They were quick, easy, inexpensive to make and gave me something positive to focus on while preparing for a big move.
And the best part? I ended up with two fun accessories that make my bags feel a little more like me.
Whether you're making a color-changing charm for yourself, a personalized initial keychain as a gift, or a whole collection of playful bag accessories, these projects are a great way to add a little creativity to your day.
👀Check out my 1-minute or less 📹 video tutorial for this project on my TikTok now or via my YouTube channel @carolynjbraden or above!
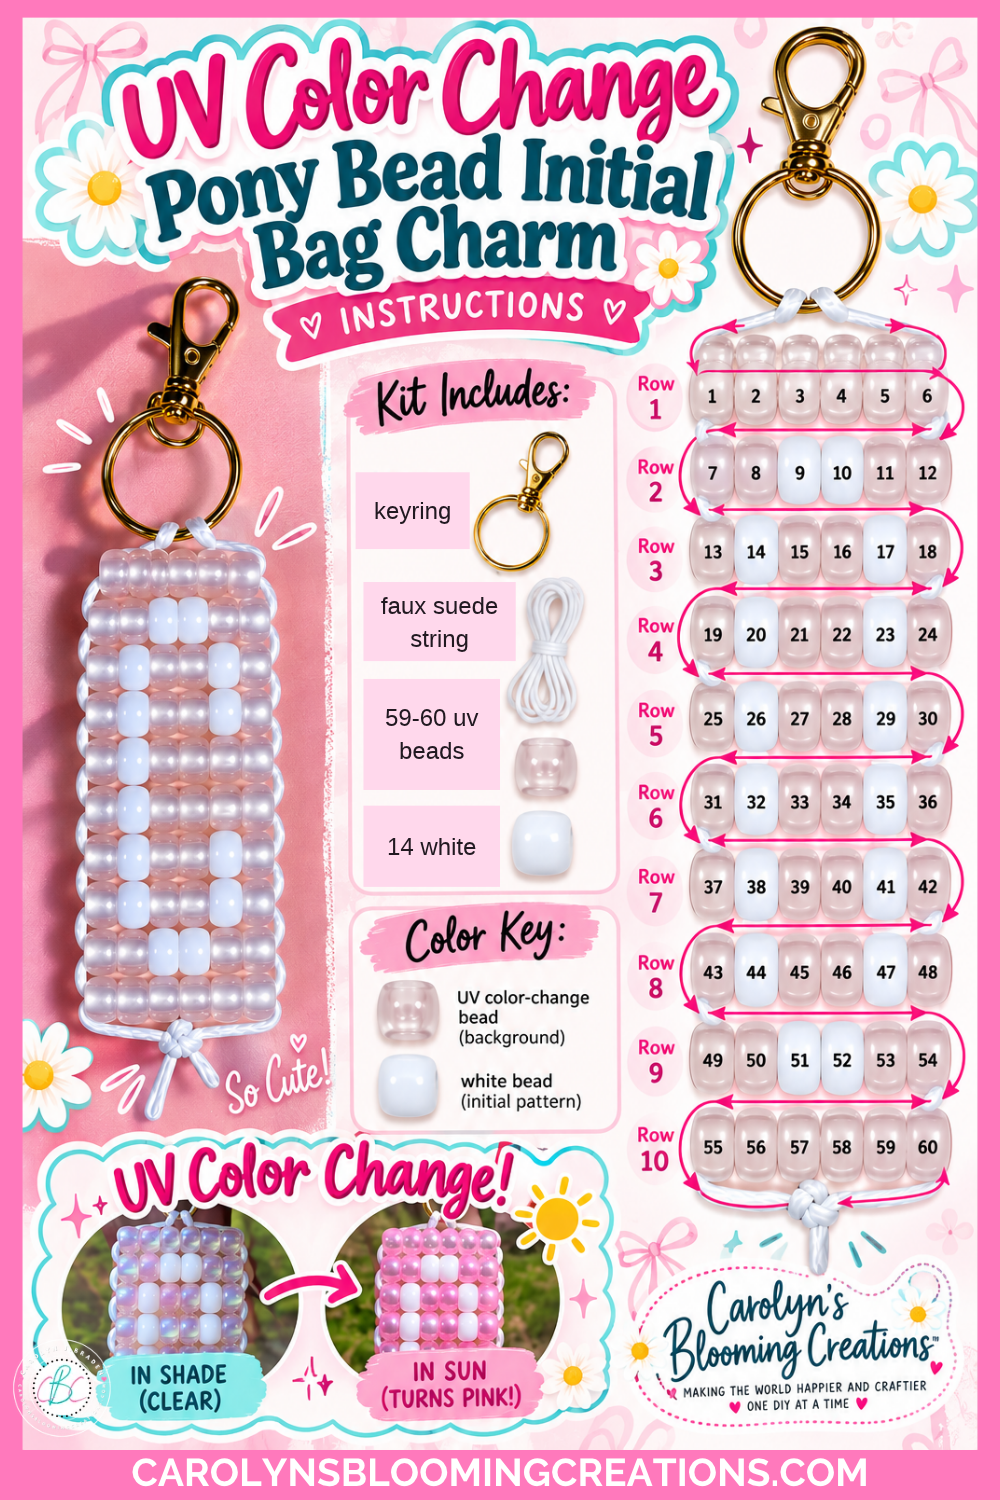
My Pony Bead Project Tutorial Worksheet
Supplies for DIY Pony Bead Bag Charms
Here are the supplies I used to make both bag charms. I've included affiliate links so you can easily find the materials.
UV color-changing pony beads (clear in the shade and pink in sunlight, you can also get them with glow in the dark pony beads in a kit via Walmart)
White pony beads for the initial design (I love this pony bead kit via Amazon)
Microfiber flat faux suede cord (my favorite for the pony bead charm and it fits easily through the bead holes)
Large silicone letter bead kit (I purchased mine on Amazon but Walmart has one too)
Gold cable wire for attaching the charms to your bags
Key ring or bag charm ring, if needed (mine came in the silicone letter bead kit, but you can get them here via Amazon)
Scissors
Why I chose microfiber flat faux suede cord
After experimenting with different stringing materials, I found that microfiber flat faux suede cord worked best for my UV initial charm. It was easy to handle, flexible enough to thread through the pony beads, and helped me create a neat, sturdy design. It also has a little stretch and looks nice.
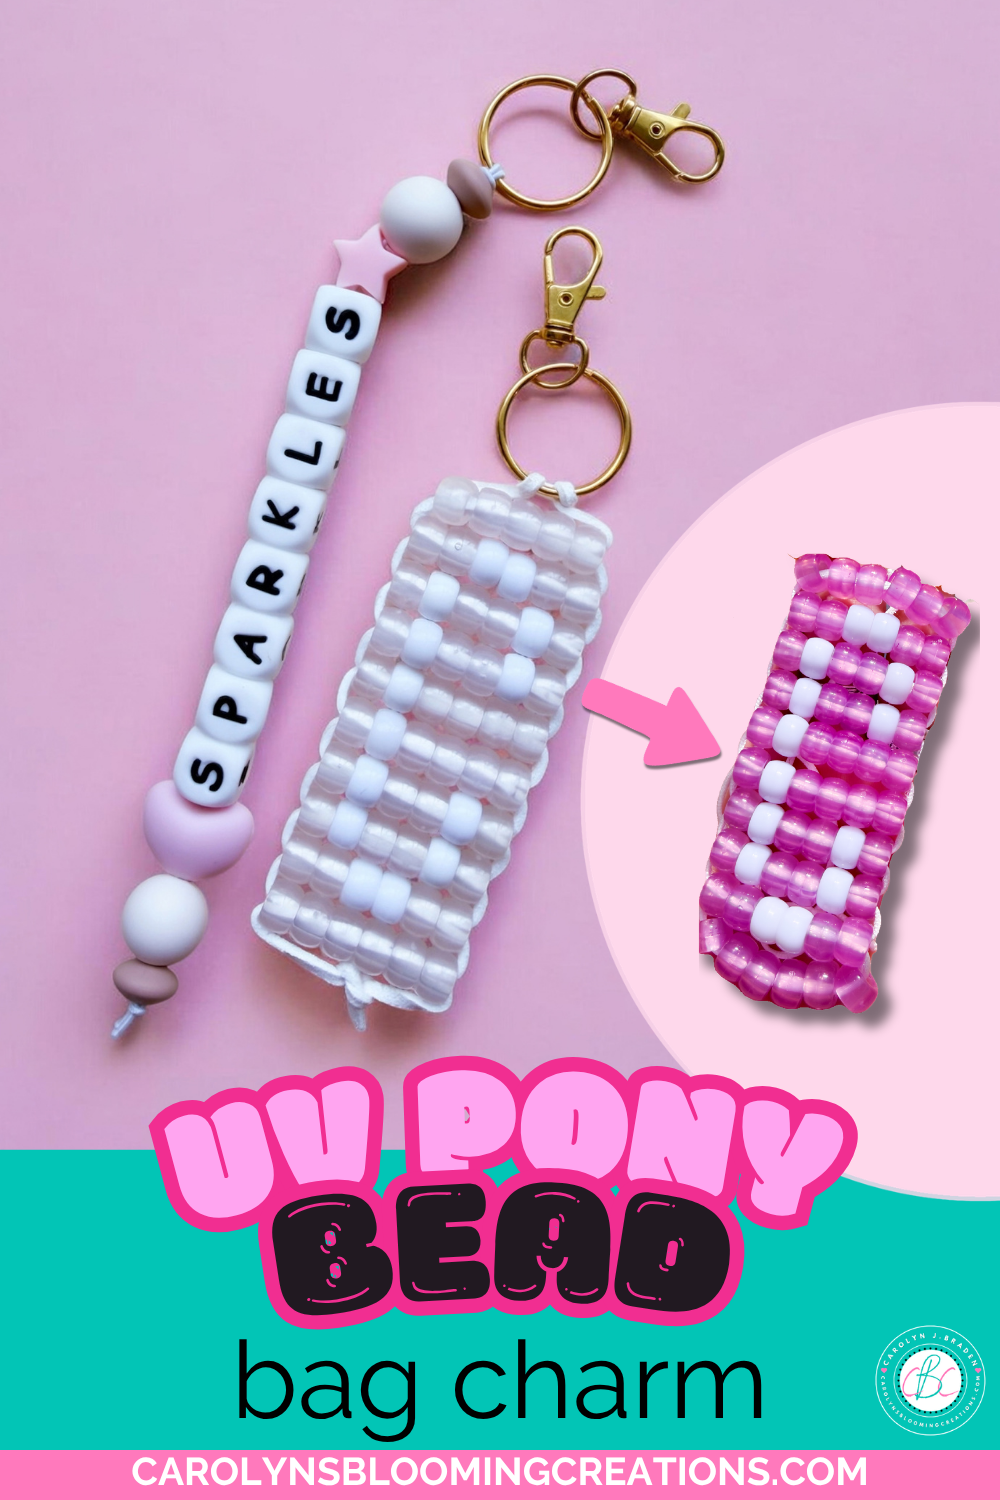
DIY Letter C Pony Bead Initial Bag Charm
How to Make a UV Color-Changing Pony Bead Initial Bag Charm
The fun part about this project is that you can create any initial you like. I chose the letter C for Carolyn, but you can easily customize the pattern for your own name or someone else's.
My finished C charm uses 14 white pony beads and 45 UV color-changing beads, for a total of 59 beads. I used nine rows of six beads and one row of five beads. I intentionally used only five beads across the top row in my final version to make the charm hang more easily from the key ring.
You can absolutely use 60 beads instead if you prefer six beads in every row.
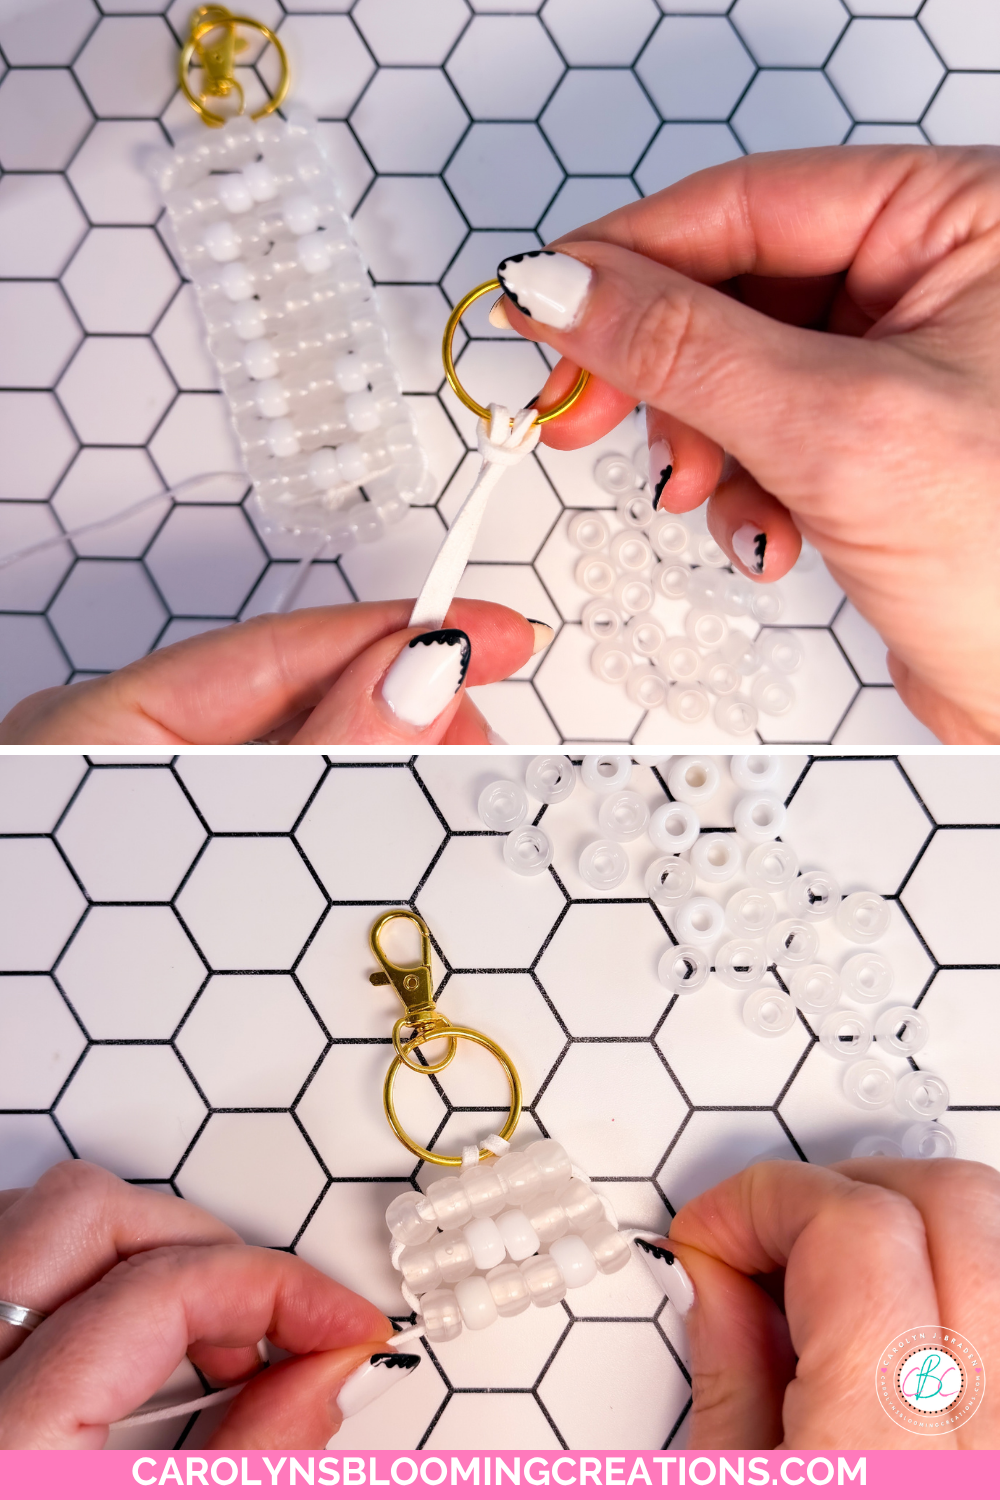
Beginning to string the beads on
Step 1: Attach your cord to the key ring
Cut a length of microfiber flat faux suede cord and double it over. Loop the folded cord around your key ring to create two working ends.
Make sure both ends are long enough to pass through your beads and complete the entire design.
Step 2: Start stringing your pony beads
Thread one end of the doubled cord through the beads in your first row (I started with the right side). Then take the other cord end and thread it through the same row of beads from the opposite direction.
Pull both ends gently to bring the beads together and secure the row in place.
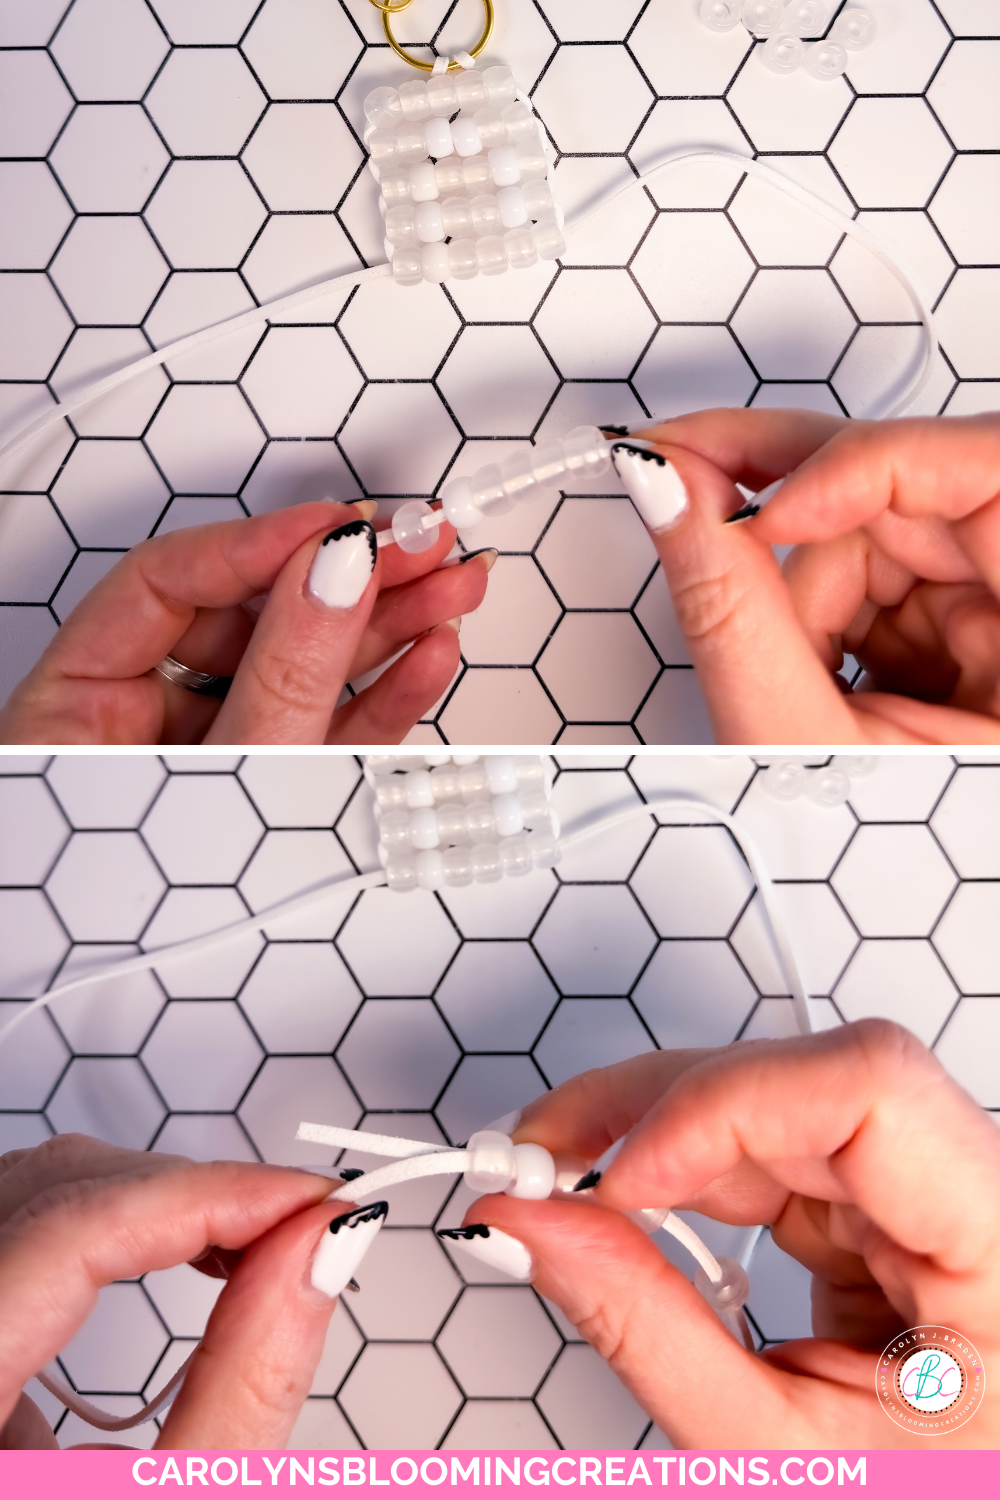
Stringing on the pony beads is simple and quick
Step 3: Create the letter C
Continue adding rows of UV color-changing beads and white pony beads to form the letter C.
Follow the bead pattern in my printable stringing diagram to create the initial. The white beads form the letter, while the UV beads create the background.
Repeat the process of threading both cord ends through each row from opposite directions, pulling gently after each row to keep the design neat and aligned.
I'll also include my step-by-step video tutorial in this post so you can watch exactly how I thread the cord and position each bead. Sometimes seeing the process makes all the difference!
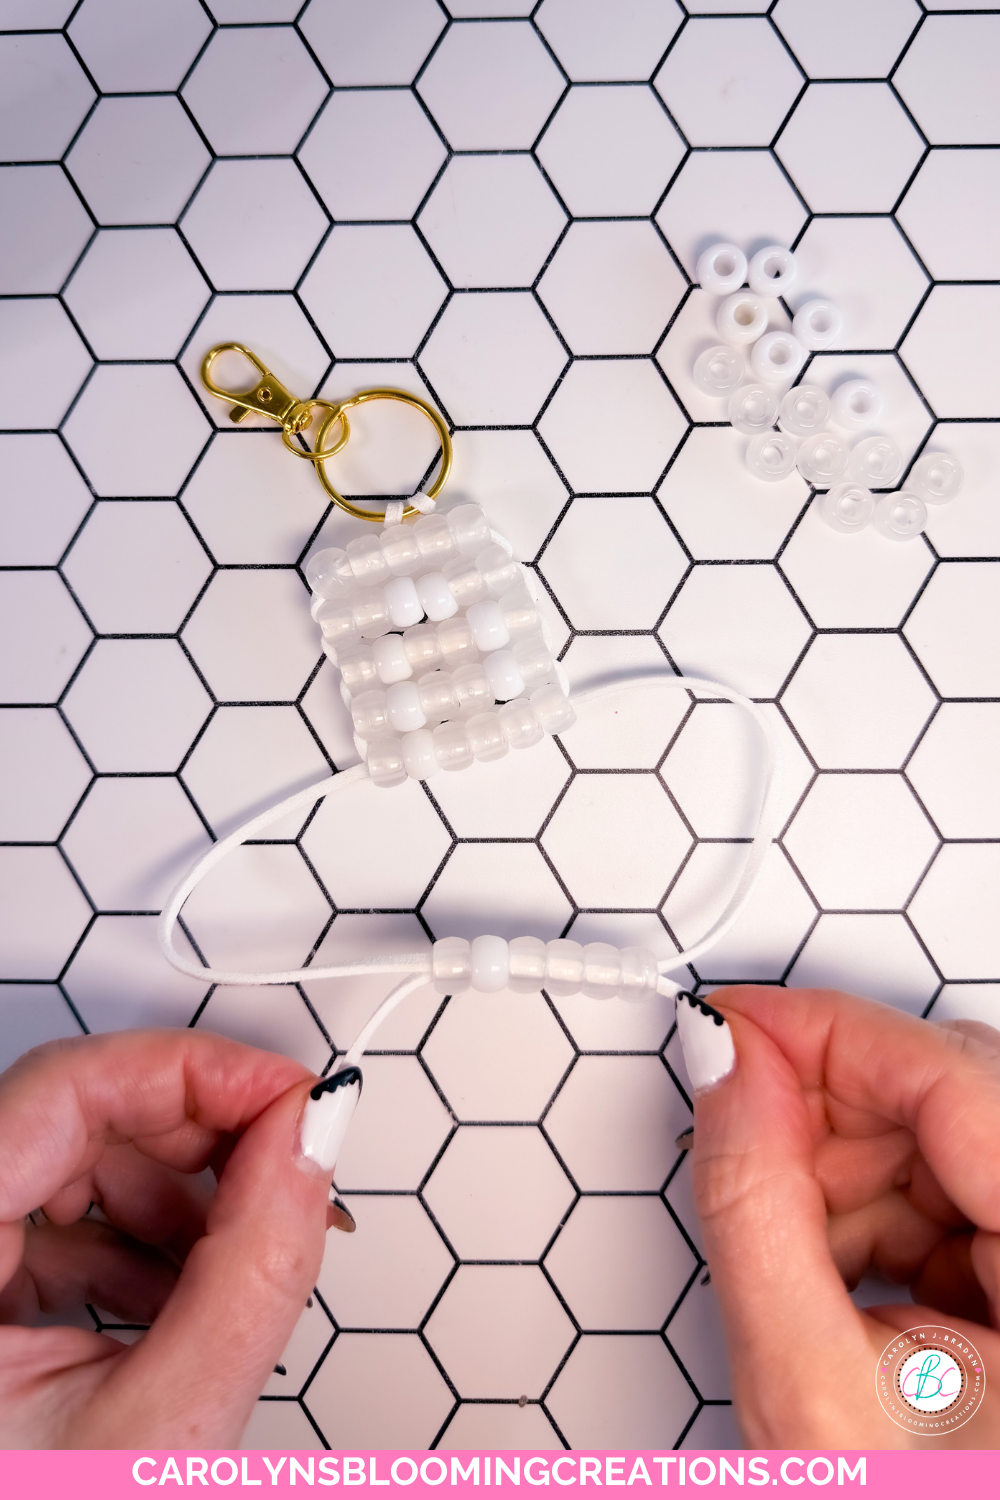
Gently pull the string to slide the beads up
Step 4: Tie off your cord
Once all the rows are complete, pull the cord snugly and tie it off in a knot securely. Trim any excess cord, leaving a neat finish.
And that's it! Your UV color-changing pony bead initial bag charm is ready to go.
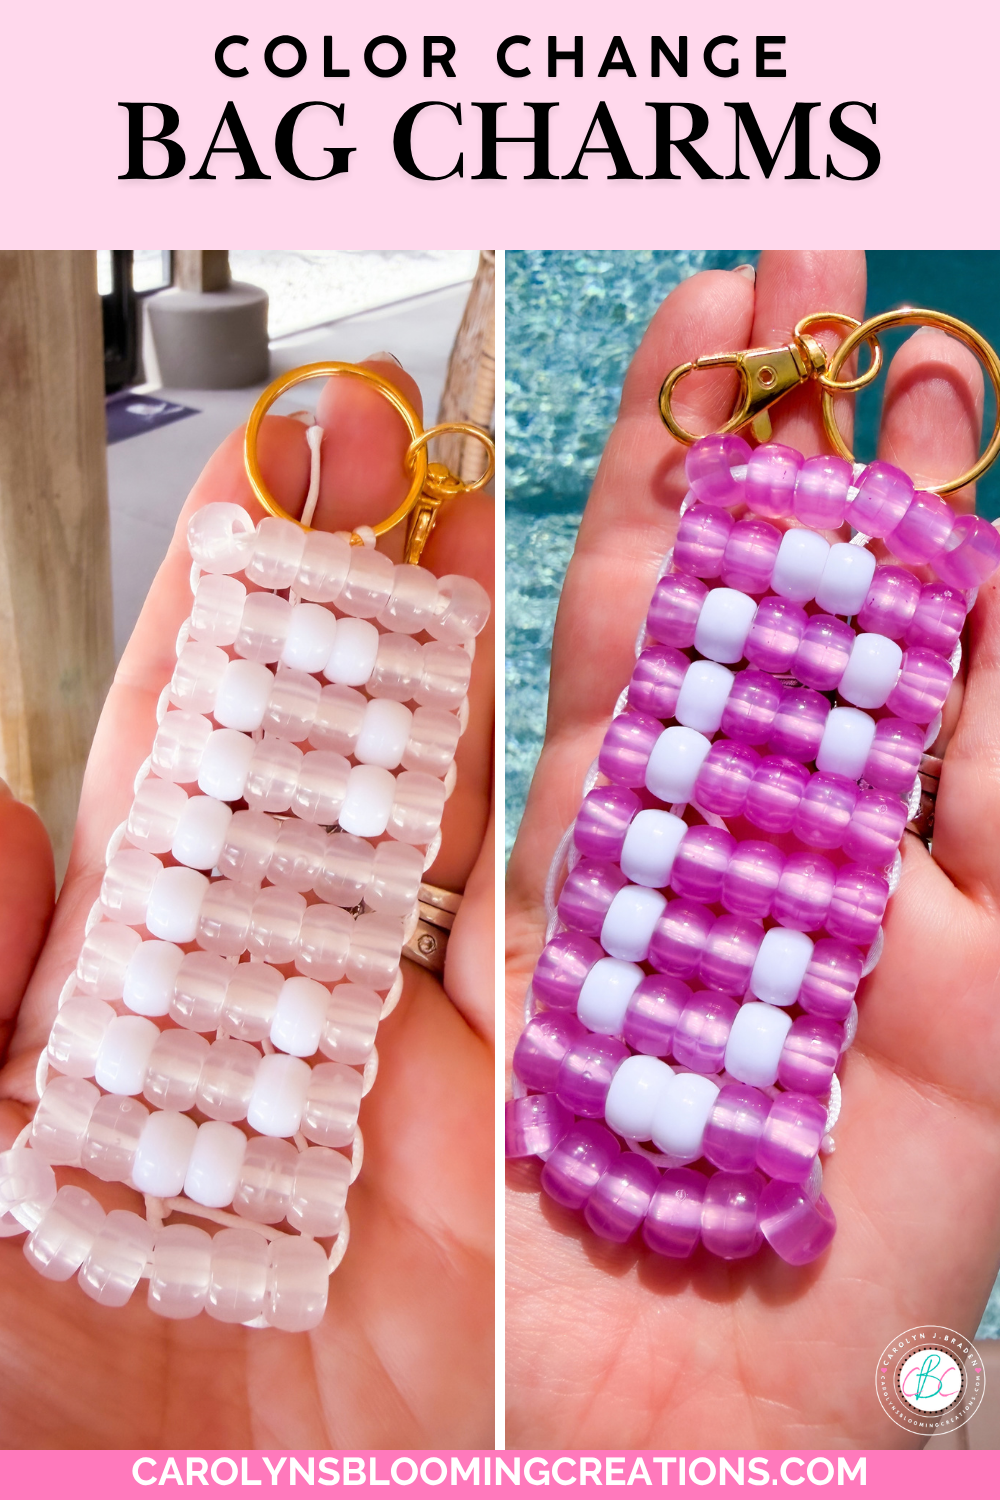
The brighter the sun, the brighter the color
Step 5: Watch your beads change color!
Here's where the magic happens. The UV color-changing pony beads look clear or translucent in the shade, but when exposed to UV light, such as direct sunlight, they turn pink.
It's such a fun surprise and makes this little charm even more special. The brighter the UV light or sun, the more vivid the color. It’s a great visual tool for letting you know you are in UV light and need to apply sunscreen like my lizard pony bead bag charm told my audience.
How to Make a Personalized Letter Bead Bag Charm
Of course, one charm wasn't enough!
I also made a second bag charm using a large rubbery letter bead kit I found on Amazon. I spelled out SPARKLE, because that's what I call my audience.
My favorite saying is: You can sparkle alone, but you become glitter when you're among other sparkles.
I thought it was the perfect message to pair with my colorful UV initial charm. This second project is incredibly easy and requires very little time.
Simply arrange your letter beads to spell your favorite word, name or initials, then string them together using the cord or attachment method suited to your bead kit. I used a thin stretchy cord, which was perfect for this! I doubled my cord, looped it on the keyring and strung on the beads. Secure the ends and you're ready to accessorize.
You could spell your name, your favorite word, a fun nickname or even create a personalized gift for a friend.
If you enjoyed my UV color-changing pony bead lizard tutorial, I think you'll love making these, too!
Happy crafting, my sparkles!
🎬Take Action
If you try any of my ideas, let me know how it turned out—or tag me when you try them because I LOVE seeing your posts💖 If you tag me using @carolynsbloomingcreations or @carolynjbraden, I’ll see it! Or tell me about it in the comments below.
If you loved this article, we know you’ll love this one too: How to Bling Up Your Camp Snap Camera + Discount!
Carolyn J. Braden is the owner of Carolyn’s Blooming Creations is a regular contributor and editor for CBC. She has been featured in numerous media publications such as InStyle Magazine, on HGTV, on Bustle.com, and more. She is the author of the books Georgia McMasters in Amethyst Lake Cemetery, How To Be Yourself: 3 Ways To Help You Being You, and the illustrator for the children’s book Bridging Connections. She is a former classroom teacher that now dedicates her life to educating others on how to live their most healthy, creative and happy life. Learn more about her visiting our About Us page.