


Another fun DIY from the brains of Tommy and Carolyn Braden!
We just had new doors and windows installed. We love all the light they provide and love the protection they will give us if there were to be a hurricane in our area (as we had to have impact resistant windows installed due to living in a hurricane zone…click here to learn more about our unique and heavily researched window buying process).
We live on a rather quiet street on the beautiful island of Sanibel. We don’t get much traffic but still wanted a little privacy in our foyer area. Well, we also needed a way to not have our dogs, Minnie Pearl and Johnny Cash, blatantly see the Amazon (and UPS and USPS) delivery people all the time. Like many protective dogs, they don’t quite like strangers at our door.
See the short video tutorial for the curtain project via my Pinterest page @carolynjbraden or below:
Since our front doors are new, we didn’t want to drill into them. We also weren’t sure that drilling into them would affect their hurricane rating, so we wanted to play it safe. After researching curtain and rod options, we couldn’t find any we loved that would work without drilling or putting nails into the door. Our doors are also made out of aluminum so magnets won’t stick to them.
Here’s how we were able to hang curtains without drilling or using magnets:

How to Hang Curtains with No Drilling and No Magnets + Buying Guide!
Graphic and Images by Carolyn J. Braden
Project Design and Execution by Tommy and Carolyn Braden
Pin me! carolynsbloomingcreations.com
Our Doors: Before
We ordered the following products from Amazon:


How to Hang Curtains with No Drilling and No Magnets + Buying Guide!
Graphic and Images by Carolyn J. Braden
Project Design and Execution by Tommy and Carolyn Braden
Pin me! carolynsbloomingcreations.com
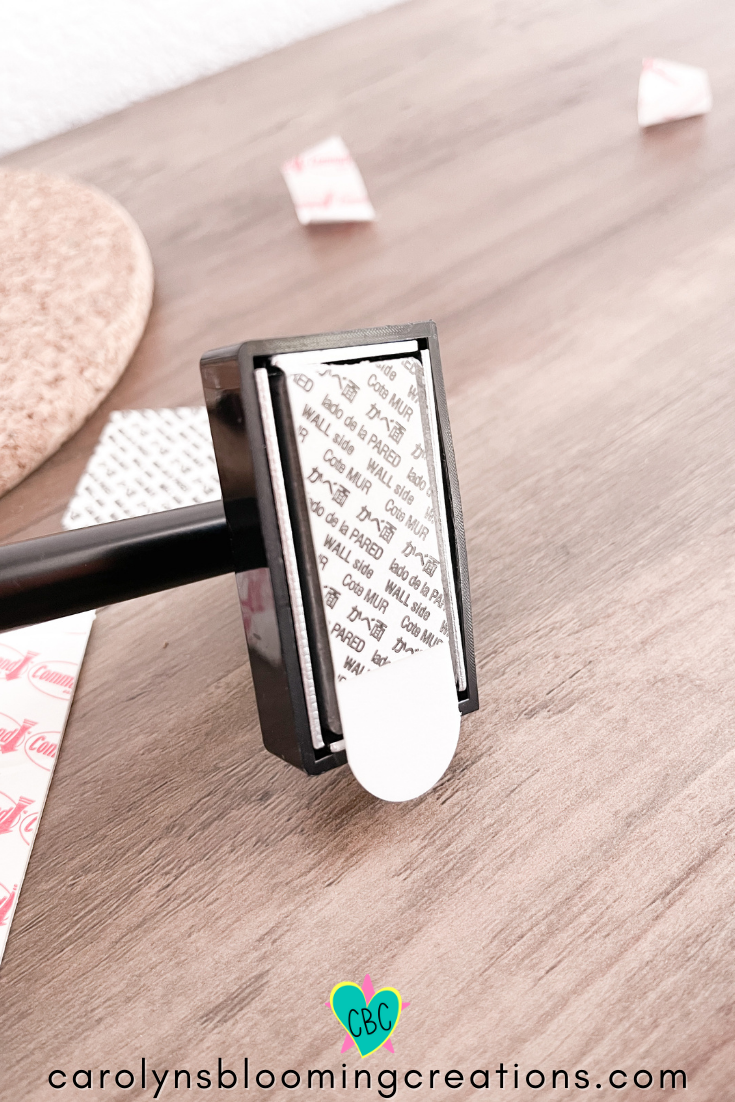
The magnets on our rods each had a protective sticker on them. We peeled this protective backing off of each magnet and stuck on a Command Strip.
This is very important to do as we hung one curtain without peeling this backing off (after sticking a Command Strip to it) and the curtain rod fell off the door. You’ll know if your magnet has backing as it looks like a piece of black tape.
How to Hang Curtains with No Drilling and No Magnets + Buying Guide!
Graphic and Images by Carolyn J. Braden
Project Design and Execution by Tommy and Carolyn Braden
Pin me! carolynsbloomingcreations.com
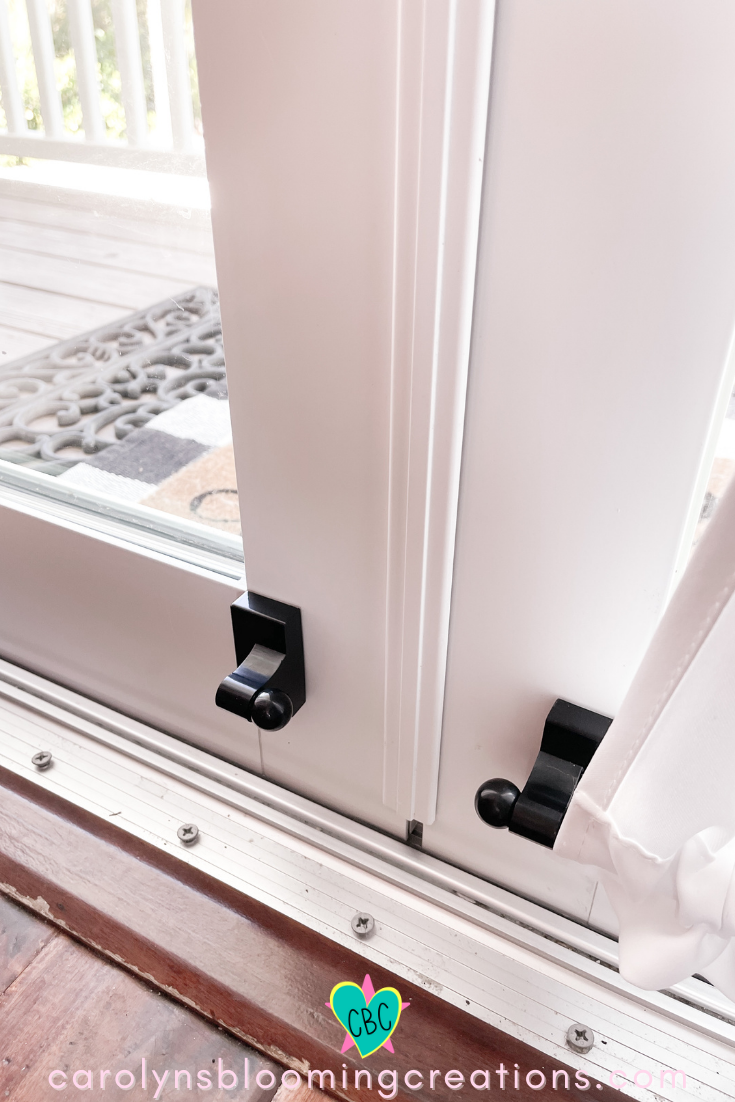
We measured where we wanted to put each rod. Then we peeled the other side of the Command Strip off and stuck each curtain rod end piece in it’s place.
Please excuse our door stickers…we have to leave them on until all our doors and windows are inspected.

How to Hang Curtains with No Drilling and No Magnets + Buying Guide!
Graphic and Images by Carolyn J. Braden
Project Design and Execution by Tommy and Carolyn Braden
Pin me! carolynsbloomingcreations.com
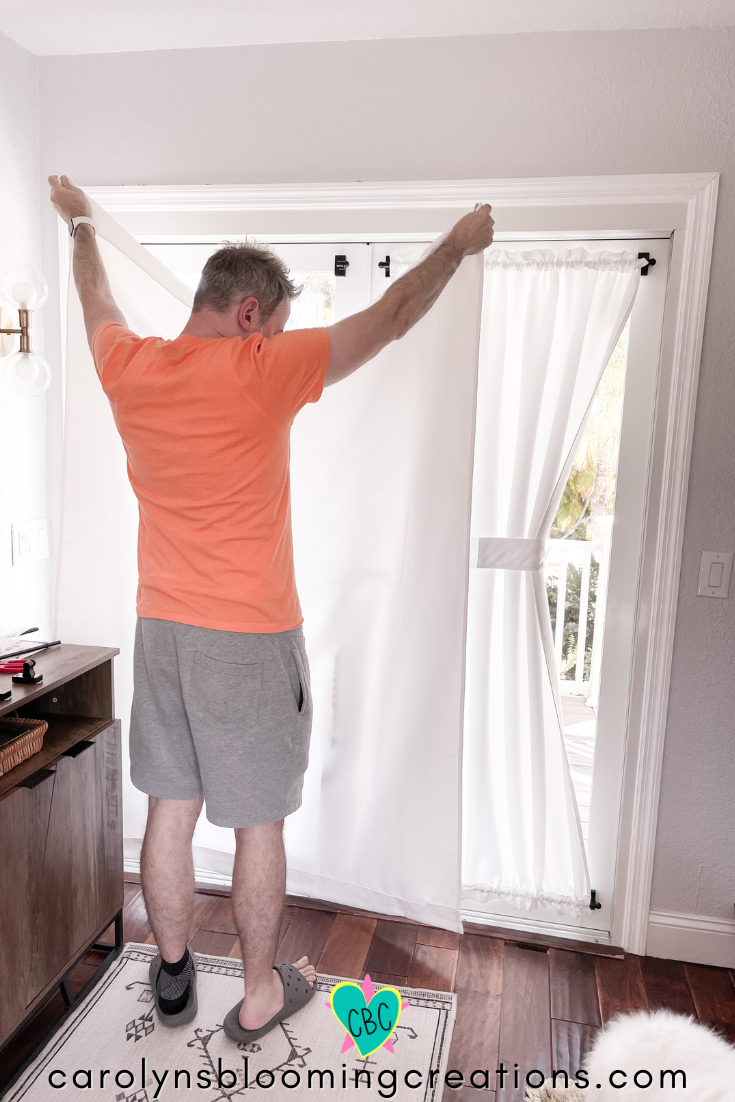
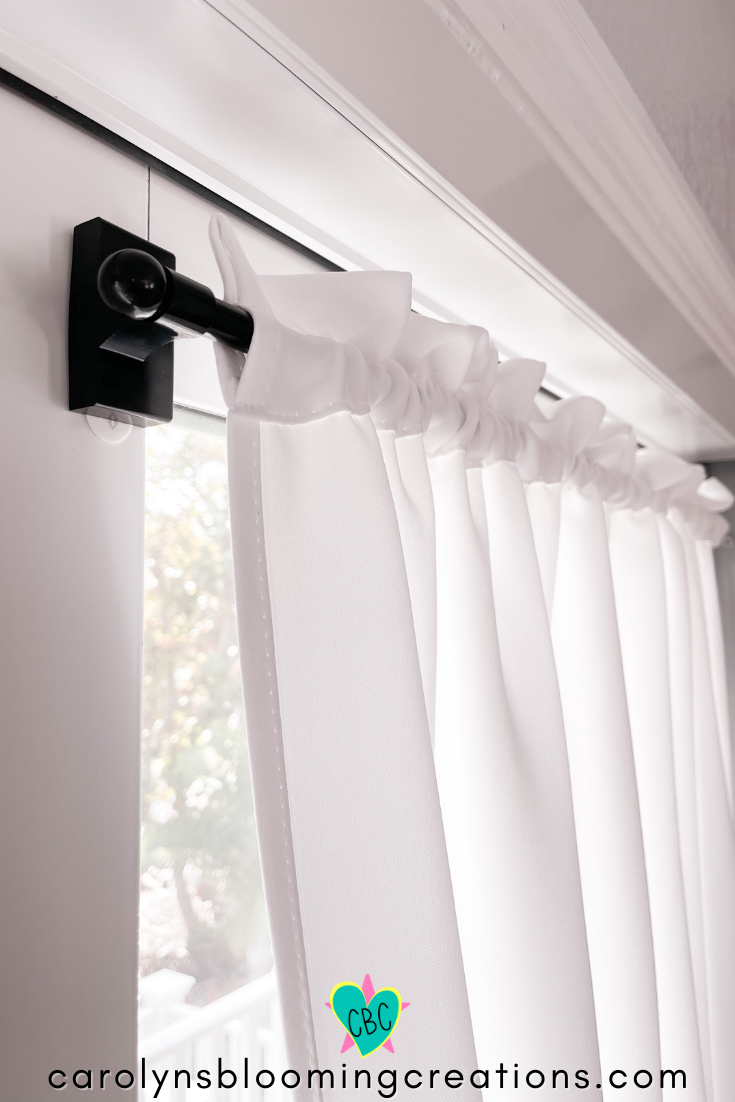
Next, we slid the rods through one of the curtains and locked it into the end piece.
How to Hang Curtains with No Drilling and No Magnets + Buying Guide!
Graphic and Images by Carolyn J. Braden
Project Design and Execution by Tommy and Carolyn Braden
Pin me! carolynsbloomingcreations.com
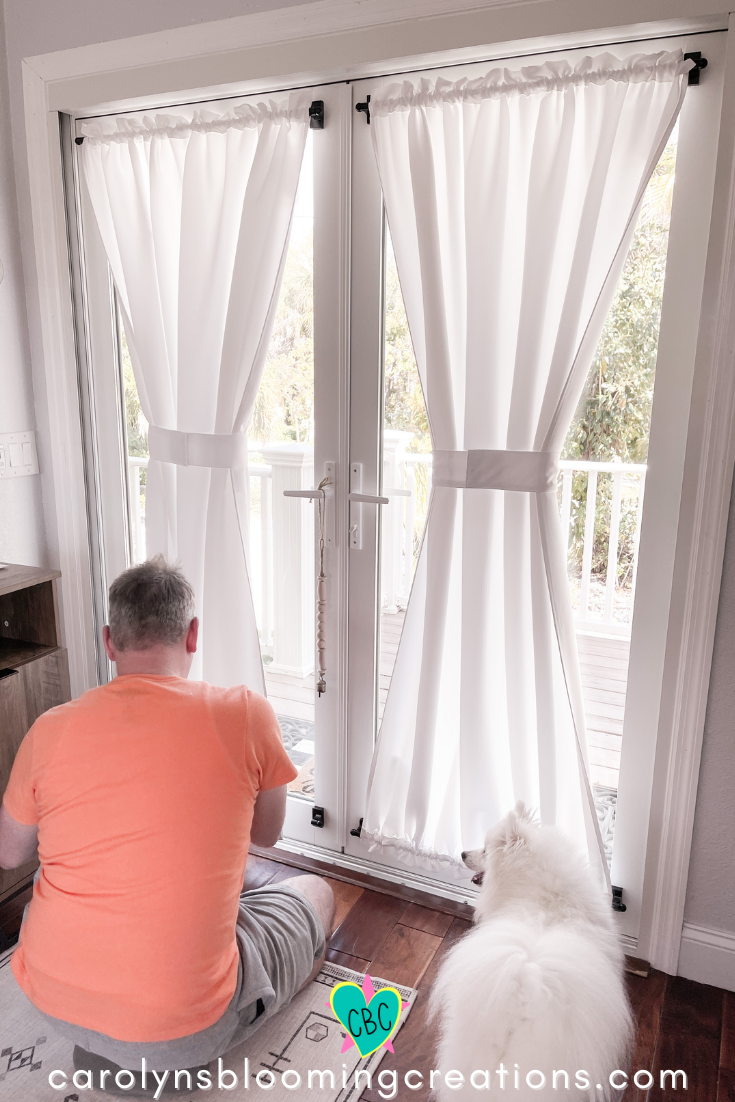
We repeated this process for each rod and curtain panel. Here’s Johnny Cash (below) inspecting our work.

How to Hang Curtains with No Drilling and No Magnets + Buying Guide!
Graphic and Images by Carolyn J. Braden
Project Design and Execution by Tommy and Carolyn Braden
Pin me! carolynsbloomingcreations.com
I steamed each curtain panel prior to hanging them to remove some of the wrinkles.
How to Hang Curtains with No Drilling and No Magnets + Buying Guide!
Graphic and Images by Carolyn J. Braden
Project Design and Execution by Tommy and Carolyn Braden
Pin me! carolynsbloomingcreations.com
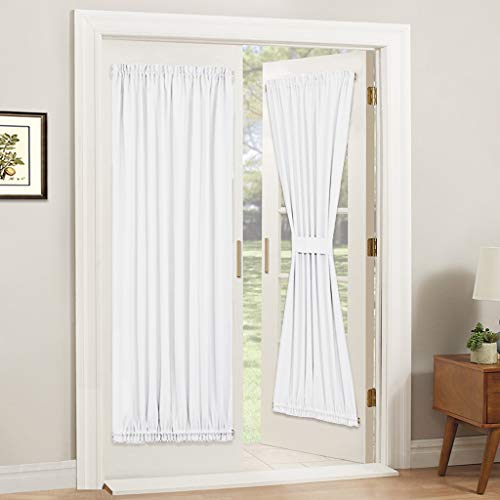
I used this exact curtain panel on our door at our previous home without the middle piece. The doors at this house just needed to be dressed up a little more, so the middle gathering works well. It’s a velcro-ended fabric piece so I can remove it at anytime.
How to Hang Curtains with No Drilling and No Magnets + Buying Guide!
Graphic and Images by Carolyn J. Braden
Project Design and Execution by Tommy and Carolyn Braden
Pin me! carolynsbloomingcreations.com
The Command Strip is designed to stick out at the bottom just a little so you can easily remove it (these come off very cleanly) if needed in the future. We’ve used Command Strips before because they hold really well and don’t peel paint off when you remove them.
How to Hang Curtains with No Drilling and No Magnets + Buying Guide!
Graphic and Images by Carolyn J. Braden
Project Design and Execution by Tommy and Carolyn Braden
Pin me! carolynsbloomingcreations.com
Here’s three of our four fur babies checking our work (and checking to make sure they can still see out the door if they need to).

How to Hang Curtains with No Drilling and No Magnets + Buying Guide!
Graphic and Images by Carolyn J. Braden
Project Design and Execution by Tommy and Carolyn Braden
Pin me! carolynsbloomingcreations.com
The finished project!

How to Hang Curtains with No Drilling and No Magnets + Buying Guide!
Graphic and Images by Carolyn J. Braden
Project Design and Execution by Tommy and Carolyn Braden
Pin me! carolynsbloomingcreations.com
With the steaming of each curtain panel, this took about one hour to complete.

How to Hang Curtains with No Drilling and No Magnets + Buying Guide!
Graphic and Images by Carolyn J. Braden
Project Design and Execution by Tommy and Carolyn Braden
Pin me! carolynsbloomingcreations.com
I took a photo of Johnny Cash peeping at me from the outside of the door. We have trained our dogs not to jump on the front doors, so if you have a problem with this, you may want to work on this with your dogs so they don’t mess up your beautiful DIY curtain project!

How to Hang Curtains with No Drilling and No Magnets + Buying Guide!
Graphic and Images by Carolyn J. Braden
Project Design and Execution by Tommy and Carolyn Braden
Pin me! carolynsbloomingcreations.com
I believe these will last quite a while. It gets humid where we live (Florida, USA) so we assume the Command Strips won’t hold up forever BUT we bought extra so we can re-do them if needed. There are numerous types of Command Strips, including a plastic velcro-type, which are for picture hanging. The Command Strip I linked to above worked for us, but another type may work better for you. We made sure the door was CLEAN and oil-free. Use a washcloth with some Dawn liquid soap and water to remove all oils that may be on the door from your fingers.
So far, we recognize the fact that the magnets aren’t held into their rod ends as tightly as we would like (this is a product issue) so we may end up needing to use Gorilla Glue or E6000 Glue to glue the magnet back on the rod end. I’ve been able to pull the magnet out of the rod end myself, so that is why I say this.
As a bonus, I put this cute wire basket in a corner next to the door to hold our Crocs. We always seem to have multiple pairs laying around the door area, and I thought this was a cute storage solution.

How to Hang Curtains with No Drilling and No Magnets + Buying Guide!
Graphic and Images by Carolyn J. Braden
Project Design and Execution by Tommy and Carolyn Braden
Pin me! carolynsbloomingcreations.com
I purchased this basket via Target for about $18.

How to Hang Curtains with No Drilling and No Magnets + Buying Guide!
Graphic and Images by Carolyn J. Braden
Project Design and Execution by Tommy and Carolyn Braden
Pin me! carolynsbloomingcreations.com
Want to see another cool curtain DIY? Watch our video (below) of a wood and leather DIY easy curtain rod. We created this rod because we needed a rod to fit in a very tight space.
More of our DIY’s and other inspirations can be found on our YouTube channel, “Carolyn Braden”.
If you have any questions for us, visit our Contact Us page and send us a note! We love helping other DIYer’s out there!