


C.J. Braden • 3 Minute Read
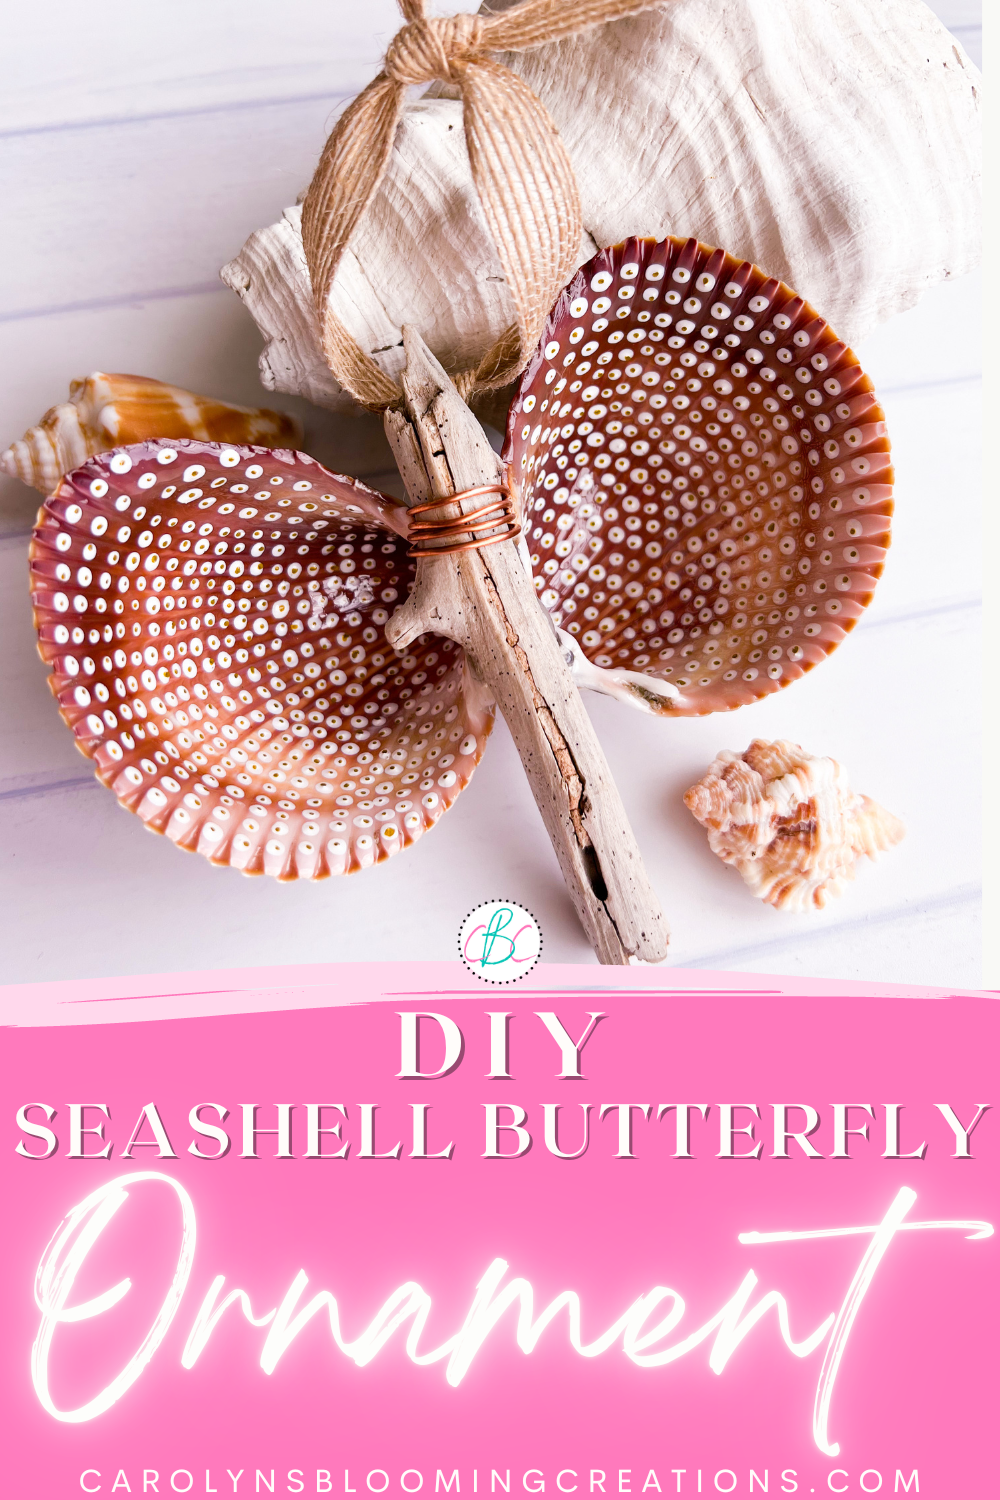
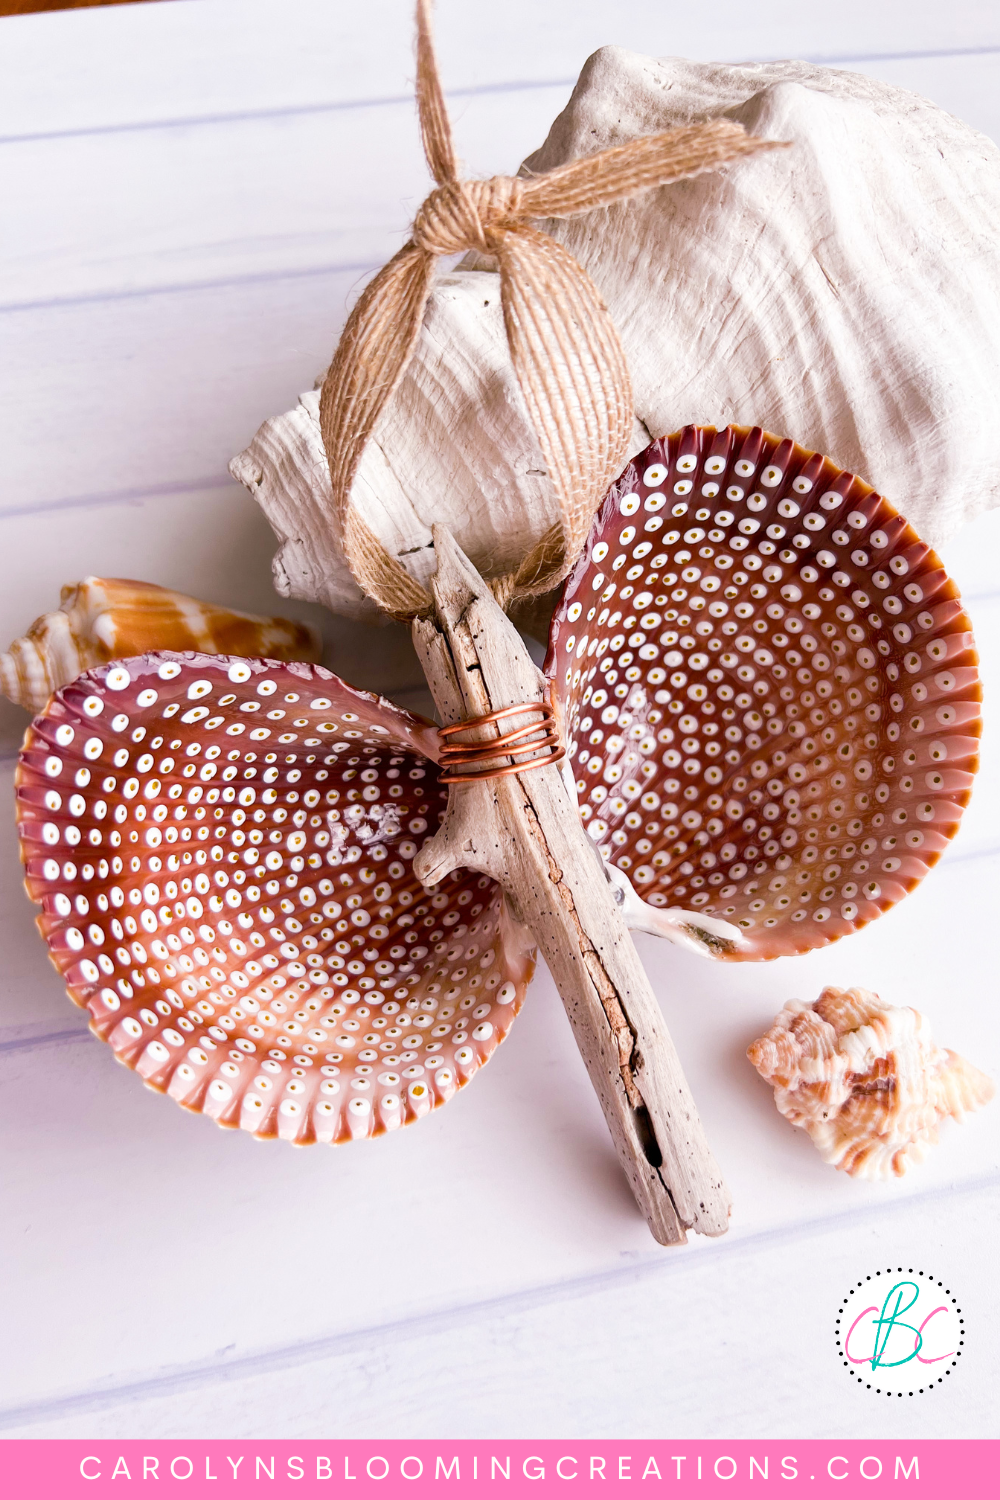
How to Make Butterfly Seashell Ornaments
When you live on a well-known shelling destination island, Sanibel Island, you find a lot of shells. As an artist, I am always collecting them, knowing I’ll eventually figure out some way to create something using the shells. In this case, I found beached, but still connected, giant cockle shells and instantly saw them as butterfly wings.
Read on to learn how to make my every day butterfly window ornaments or Christmas tree seashell ornaments.
DIY Seashell Ornament
As a lover of all living creatures, I must first and foremost tell you if you are thinking of making seashell ornaments, please make sure you find shells without animals still living inside of them. It is illegal in many states and countries, including Florida (USA) if you take a shell from the beach that is living (this means the animal is still alive inside the shell which also includes the ever popular sand dollar).
If you don’t live by a beach and plan to purchase seashells to make any art project, make sure the company you buy them from has harvested them sustainably, meaning they didn’t scavenge them live solely for monetary purposes.

Brown cockle shell ornament
If I don’t think I am going to use a shell, I don’t pick it up. This prevents overharvesting. Birds use seashells to make nests, and other animals use them as well, so I just take what I need so others can enjoy finding and using what I don’t need.
If you want to learn more about seashells, I recommend the Bailey-Matthews National Shell Museum. I currently live minutes away from it and it’s a fascinating place to learn everything you ever wanted to know about shells. They currently even have a live cam on their educational octopus.

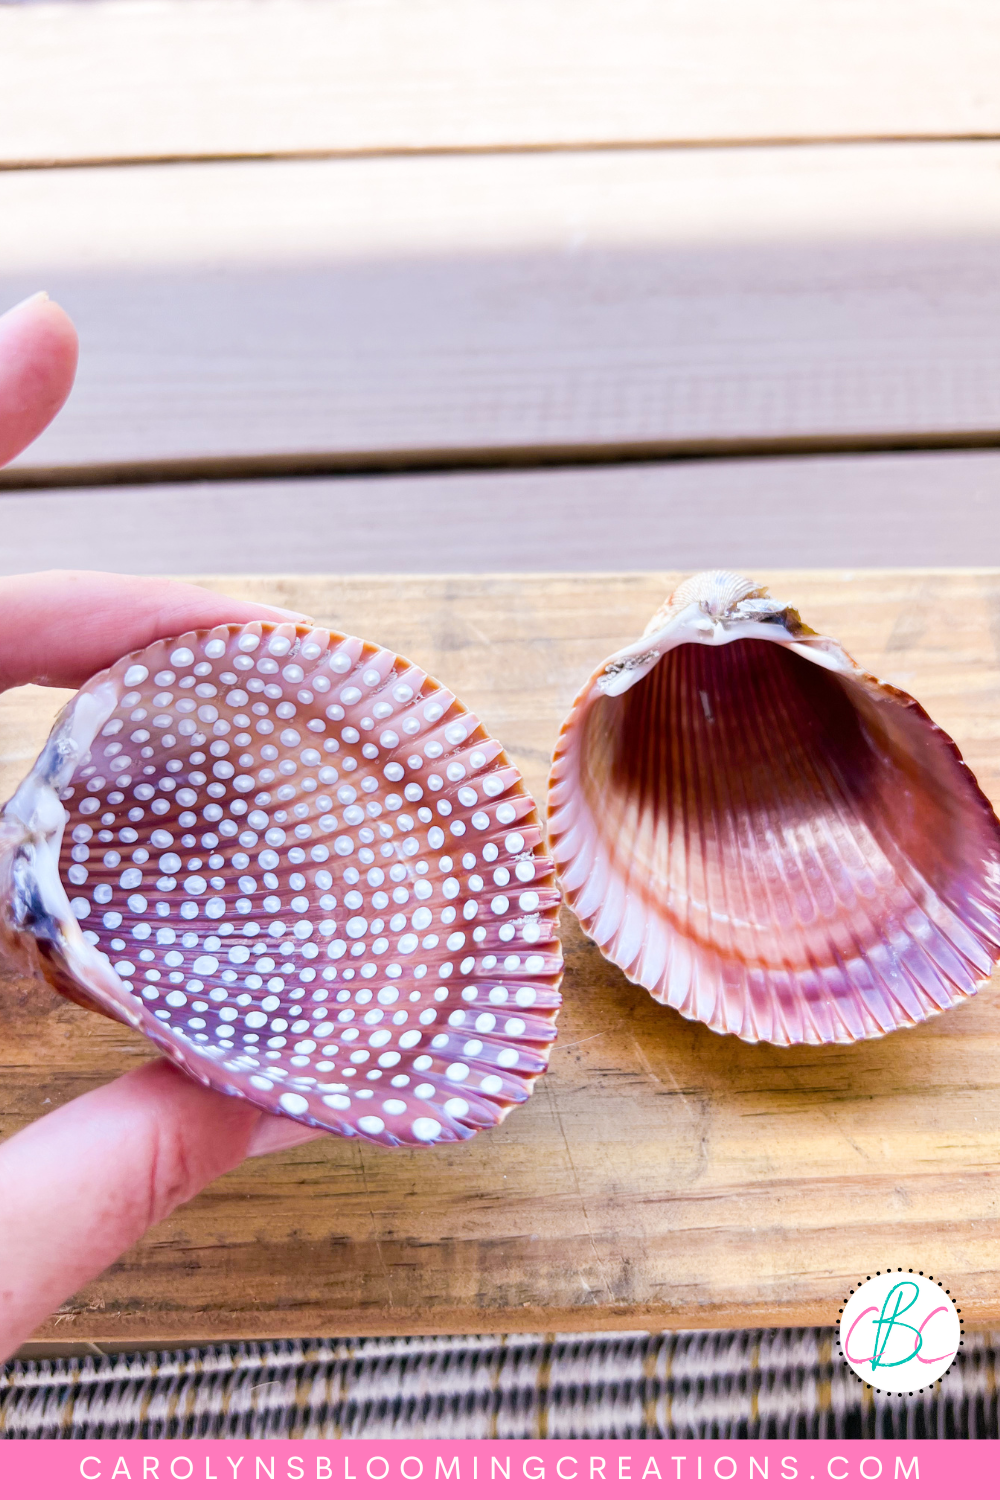
Gorgeous inside of cockle shell
Now that you know more about shells, here’s how I made my seashell ornaments:
I started off by washing and drying the shells, then I used a nail dotting tool to apply white acrylic paint dots to the inside of both shells.

Dot Painting Tutorial
I placed the paint inside plastic paint trays, and dotted away. This process does need a steady hand. I was inspired to paint the dots by an Aboriginal dot painted cloth my friend’s mom brought back from Australia for me many years ago.
I did many dot paintings with my students when I was an art teacher. If you are doing this seashell craft with a child, try using q-tips to paint the dots. They won’t be as small, but they’ll still look great.
Dot painted giant cockle shell
After the white painted dots dried, I used a gold acrylic paint pen to apply smaller dots inside the larger white dots.
Check out the 1 minute video tutorial for this shell project below or on my Pinterest @carolynjbraden!
DIY Butterfly Seashell Ornament Tutorial

Tooli art pen tutorial
After the paint fully dried, I laid my painted shells on wax paper and applied a thin layer of clear resin to coat the dots on the inside of the shell.
If you love this article, we know you’ll love this one too: Seashell Christmas Ornaments and Coastal Decor Ideas

Using Resin to Seal Seashells
I then laid the shell in the sun for about 10 minutes to fully cure. If you want to see my full resin curing tips and tricks, check out my resin coated shells tutorial.

Curing resin in sunlight
I then applied a thin layer of resin to the front side of the shell. Keep in mind that you don’t HAVE to coat these in resin. I use it because I like how shiny it makes the shells and how it seals the painted art, making it last.

Painting resin on back of shell
I cured that side in the sun for about 10 minutes. I quickly learned that placing wax paper onto cardboard and curing the shells is much better than placing them on a plastic tray covered in wax paper. Why? Because the sun is quite strong and it made my plastic trays very soft and “bend-y”….basically almost melted the trays! That’s the summer sun in SW Florida for you!

Curing resin on cardboard and wax paper
Next, I cut a piece of driftwood (I found it on the beach, but you could use a stick from a tree) to a small size of about 5-7 inches. The size I cut was based on the size of the shells. You can cut your wood smaller or larger, depending on how large your shells are. I used a small saw to cut the driftwood and used a fine grit sandpaper to sand the rough edges.
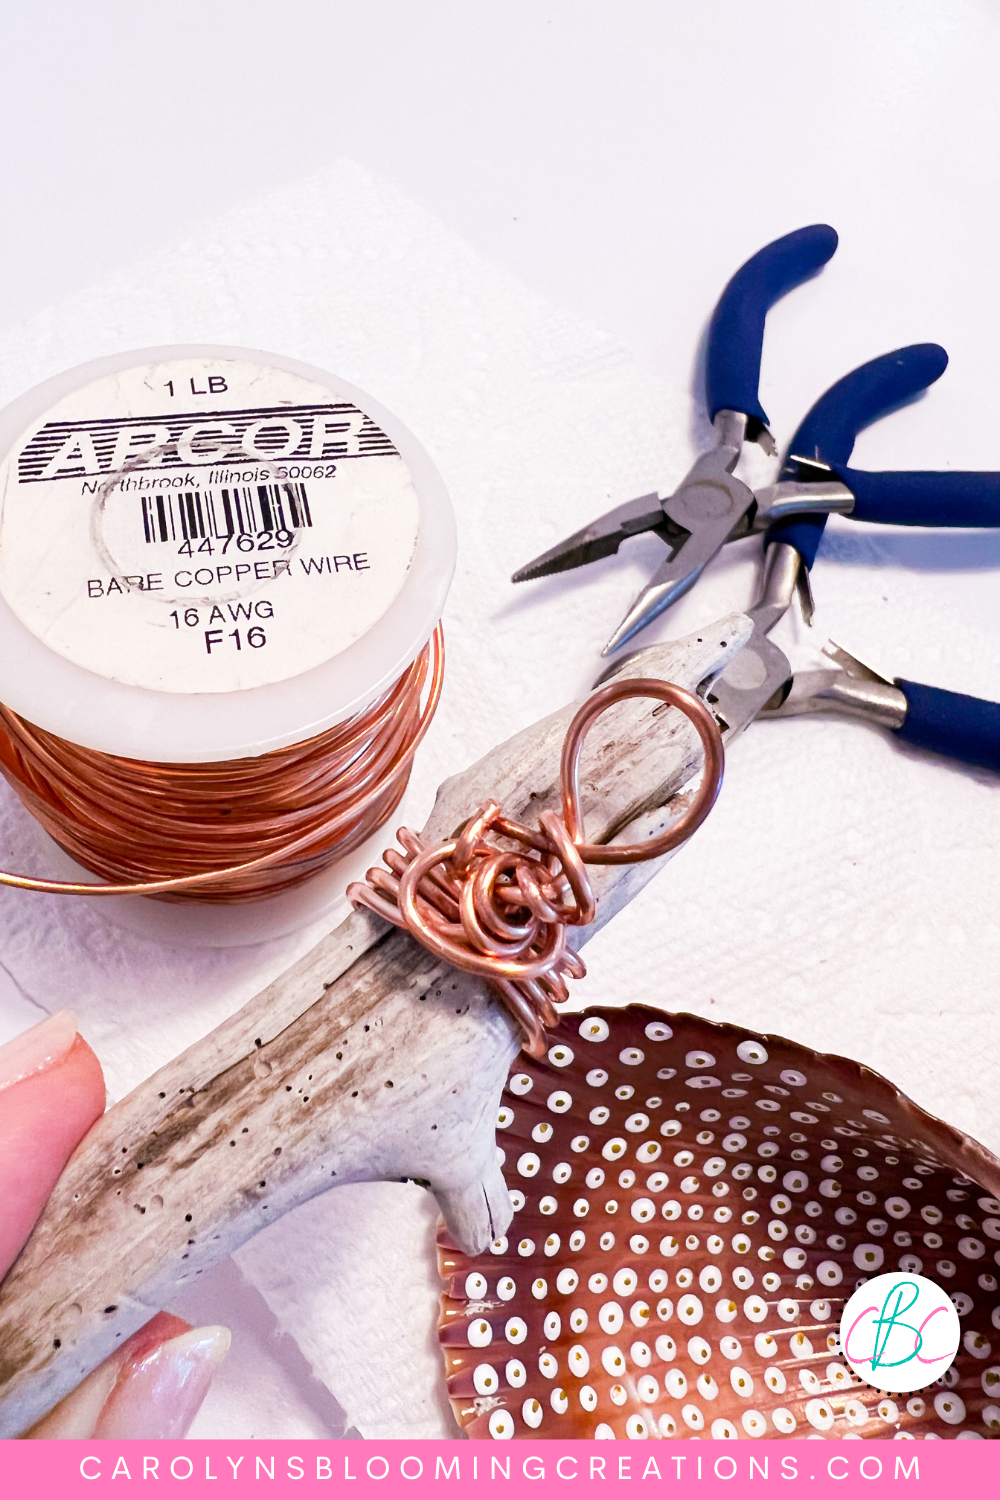
Copper wire on driftwood
I then used some 16 gauge copper wire to form a hanging loop for the ornament. I used some jewelry tools to help me wrap it around the driftwood “body” of the butterfly several times, then I formed a loop. I don’t work with wire very often, so I did the best I could given my experience. You could use a 20 gauge wire as well. Jewelry wire is soft and wraps easily.

Using hot glue to attach seashell ornaments
I used a hot glue gun on a low temperature setting to glue the shells to the back of the driftwood butterfly “body”.

Giant cockle shell ornament
After the seashell Christmas ornament was fully dry and complete, I added some burlap ribbon to the copper loop so it could be hung up. You could either hang it on a Christmas tree OR hang it in a window using a window suction cup hook. I used the acrylic paint pen to sign and date the back of the ornaments.
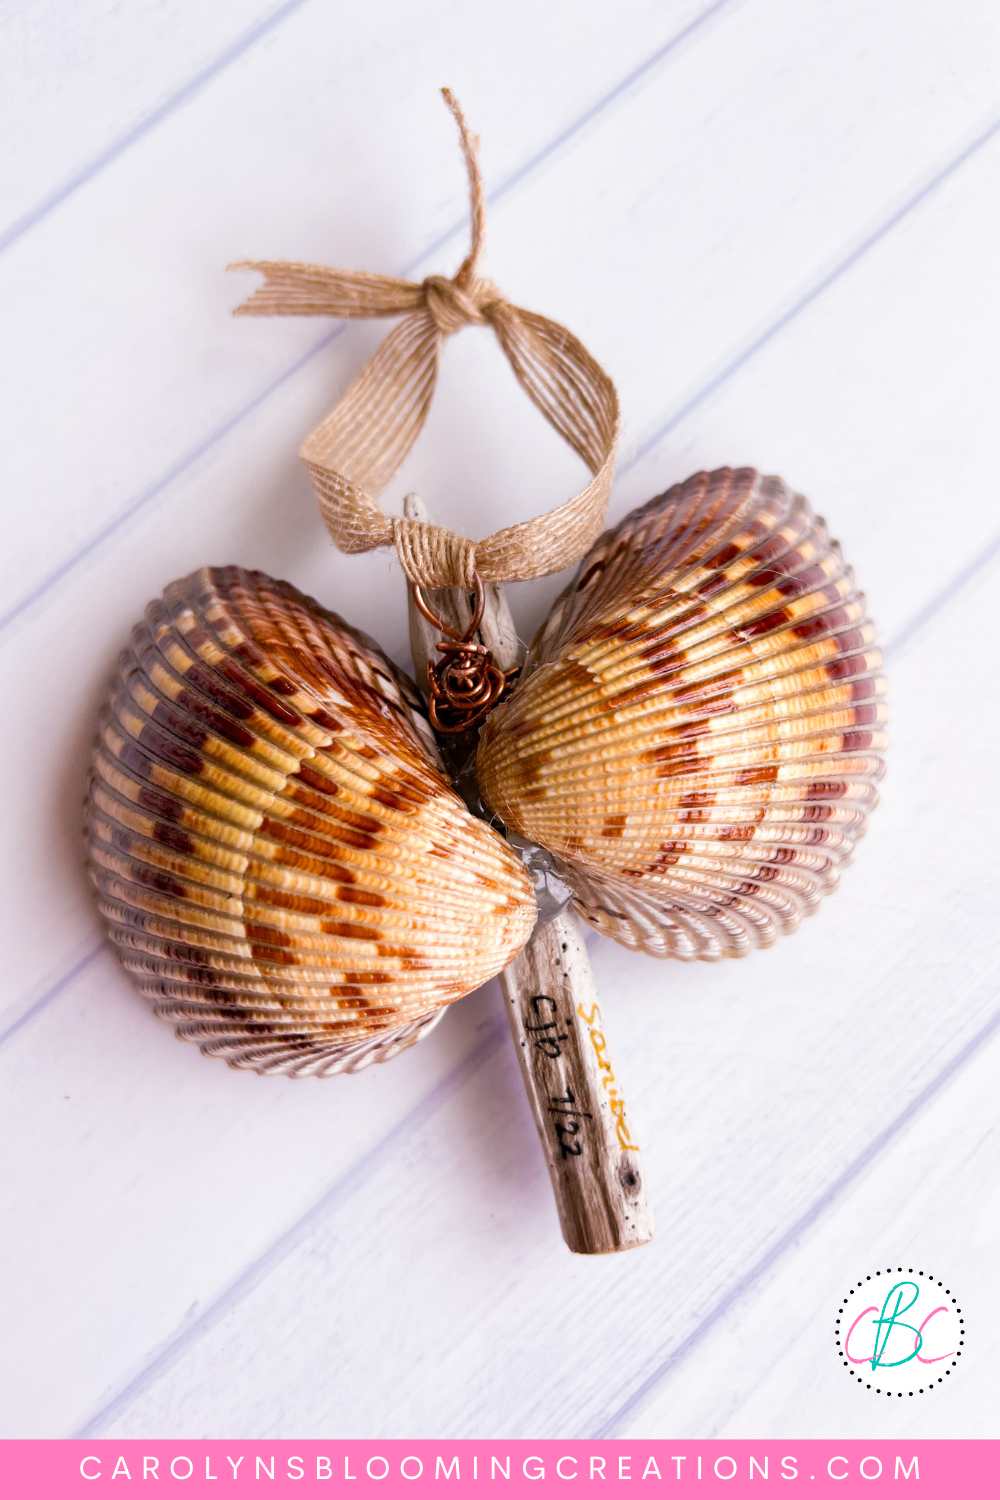
Back of DIY seashell ornament
I’ve made several of these butterfly seashell ornaments and have given them to close friends. The recipients LOVED them. One decided to hang it on his Christmas tree and the other decided to hang it in her kitchen window.

Butterfly shell ornament tutorial
Did you make this craft or have you made a seashell ornament too? If so, tell us about it by leaving a comment in the comment section below!
C.J. (Carolyn) Braden is a regular contributor and editor for Carolyn’s Blooming Creations. She has been featured in numerous media publications such as InStyle Magazine, on HGTV, on Bustle.com, and more. She is the author of the books Georgia McMasters in Amethyst Lake Cemetery, How To Be Yourself: 3 Ways To Help You Being You, and the illustrator for the children’s book Bridging Connections. She is a former classroom teacher that now dedicates her life to educating others on how to live their most healthy, creative and happy life. Learn more about her visiting our About Us page.