


We completed the bathroom renovations while ago, but this is their "before and after" debut on It's a Bradenful Life!
Read on to see the renovations we completed in each room and some how-to tips and tricks!
First Floor Bathroom Renovation by Tommy and Carolyn Braden
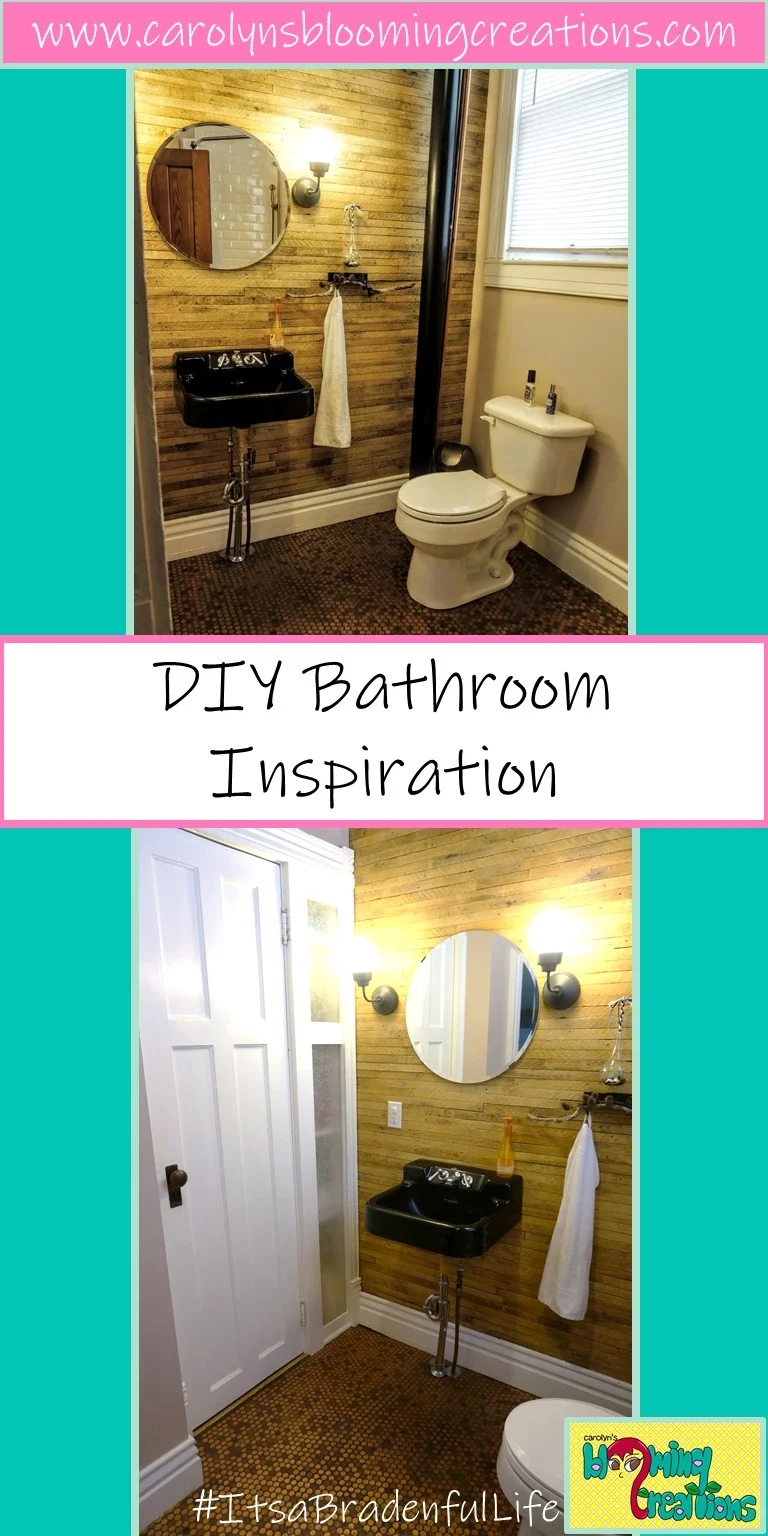
This is the first floor bathroom and one of my favorite renovation designs we've created.
We removed the drop ceilings and put in wooden planks instead.
We replaced the sink and toilet. All lights and decor are from IKEA. The sink is a salvage piece from Architectural Salvage in Louisville, KY.
Tommy nailed wooden lathes (lathes we pulled from other rooms of the house as we tore down walls and ceilings) one at a time. He then waterproofed them using a sealant.
We tore down a wall that separated the shower from the toilet area, moved the pipes, and put the shower on the other wall. (Yes, Tommy did the plumbing and electrical work himself because, as I've said before, he truly is like Bob Vila).
Tommy installed an exhaust fan.
Tommy built in a frosted glass sidelight to add detail next to the linen closet.
Together, we hand laid a copper penny floor. No, we didn't count the pennies, and no, it's not as quick of a project as Pinterest makes it seem. How-to: We put down concrete board, then hand glued each penny one at a time using E6000 Glue. We did this freehand style because we didn't want it to look too perfect. Tommy grouted using a grayish-black grout, then he put polyurethane on top of the entire floor.

Photography by Carolyn J. Braden

First Floor Bathroom Renovation by Tommy and Carolyn Braden
This is our second floor bathroom and I love it's simplicity. It has a very clean feel.
We removed the drop ceilings and Tommy drywalled the ceiling and walls.
We put in beadboard wall paneling to add some simple detail.
We tore down the wall that separated the tub from the toilet, ripped out the old tub and installed a claw foot (what was probably in the house years ago).
We installed a new toilet and lighting. Tommy also installed an exhaust fan.
We removed all the cabinets (there were tons!) and replaced them with a simple slim sink/cabinet combo to open up the space.
Tommy made a sliding mirror above the sink that hides a medicine cabinet. All you have to do is slide the mirror to the left and you have access to tons of shelving storage!
The floor is a very simple roll-out sheet vinyl flooring that looks like planks of wood. We have had lots of compliments on this floor because it's textured and actually looks like wood. We purchased it at Menards. It's easy to do: Buy the amount you need, cut it to fit the room, lay it down (use adhesive if you want) and then top it off with wooden trim. The floor just kind of "floats" there, but it's heavy so it never moves. It's soft and I love it!
