


Carolyn J. Braden • 3 Minute Read

How to Make Bread Dough for Crafting: An Air-Dry Clay Recipe
My Great Aunt Sophia was quite a creative person. She made me so many crafty and delicious things, including purses, strawberry freezer jam (oh, how I could eat it by the jarful!), a stuffed bunny (which I still have) and she even lined one of my baby photos in bread dough roses.
I have some of her craft recipes and thought to write up her bread dough recipe, which is an air-dry clay that is easy to make. Read on to learn how to make my Great Aunt Sophia’s bread dough for crafting.

The air dry clay in it’s finished form
What is Bread Dough?
Bread dough is an air-dry clay that has been around for many, many generations. I can’t seem to find the history of exactly when and why it was created, but in knowing that clay in some form has been around since at least 28,000 BCE (Before Common Era), it’s a common form of art media. Clay served as a tool for making numerous objects in history. You can read more about the “deep history” of ceramics from The American Ceramic Society’s website here.

The tiny bread clay roses my aunt made for my baby photo
My art history and clay classes from earning my Master’s degree in Art Education also remind me of clay that was often sculpted into pottery, which was a form of functional art that was needed for water storage, food storage, décor and more. Various forms of clay recipes have developed over the years, often times due to what was available naturally to humans.

The bread clay recipe ingredients
The most common form of clay that I’ve used is a natural earth clay (I also adore bee’s wax clay which smells a bit like honey), but when I found my baby photo lined in bread dough clay, I had to try my aunt’s recipe. If you are interested in some other forms of air-dry clay, check out this article on Better Homes & Garden’s website.
See my recipe for making beeswax clay in my YouTube video below (when I was an art teacher, my students loved sculpting with it) or via my channel @carolynjbraden:

Bread Dough for Crafting: An Air-Dry Clay Recipe
Here’s Great Aunt Sophia’s Bread Dough for Crafting Recipe!
Discount Code Alert!
I get many of my craft items via Temu. If you use my discount code afe55197 at checkout or shop via my link, you’ll receive 30% off!
Things You Need:
White Bread (1 slice, mine was a bit stale, so it crumbled easily, which is a good thing)
Aleene’s Original Tacky Glue (Get it at Walmart here or via Amazon here)
Cold Cream (I used Noxema, get it at Walmart here or via Amazon here)
Acrylic paint (I used a matte white, but other colors and finishes can be used if you want your clay to be a certain color, buy white acrylic paint here on Amazon or here at Walmart)
Measuring spoons (Buy it on Amazon here or via Walmart here)
Mixing bowl with tight fitting lid (lid is only needed if you plan to store this for later use)
Something to stir it with (small spatula, spoon….I LOVE these mini spatulas via Amazon)
Plastic wrap (if you plan to store this for later use)
Yield: This recipe will create one small adult hand-sized ball of air dry clay that made me 1 quarter-sized rose and 6 tiny roses and 5 small mushrooms. Depending on what you make and how large the design is, you may need more than one batch.
As far as molding, my aunt framed my baby photo in bread dough roses and they have never molded (and she made that craft over 40 years ago). If you are worried about mold, you can paint your bread dough crafts or simply seal it with Mod Podge or some other sealant made for crafting.
How To:
Remove the crust from your bread crumble it into tiny pieces into a bowl. Mine was a bit stale, so it crumbled easily. If you use fresh bread and want it to crumble easily, leave a slice out on a plate for about an hour before you do the craft. It should dry up a bit, leaving it “stale” enough for crumbling.

Crumble the bread first
Measure out 1 tablespoon of the Aleene’s Tacky Glue and add it to the crumbled bread.

Adding the tacky glue to the crumbled bread
Add 15-20 drops of acrylic paint. I used white, so all my clay would be white (then I could paint it later). If you want to use colorful acrylic paint, you can (but your clay will all be that one color).

Adding the acrylic paint to the bread
Add a ½ teaspoon of cold cream to the mixture.

Adding cold cream to the bread clay mixture
Mix with the spoon or spatula until it starts to all come together.

Kneading the bread dough
Spread a little cold cream on your hands and pick up the dough and knead it (basically “squish” it in your hands) until the ingredients combine and forms the dough.

Cold cream helps the bread dough not stick to your hands
If your dough is extremely sticky and cannot be molded, you can add a bit more crumbled bread OR let it sit out for a bit. Mine was a tiny bit sticky, so I just added a bit more cold cream to my hands so it wouldn’t stick.
I used some of my bread dough immediately to create a rose, but stored the rest wrapped in plastic wrap and in a sealed bowl. I used it 2 weeks later and it was fine.
It should last about 2-3 weeks if kept in the fridge. You could freeze it, wrapped in the plastic wrap, but it must be thawed for an hour or so before using again.

Starting the bread clay rose
For the rose, I pinched off a tiny piece of clay (pea-sized or smaller) and rolled it into a ball.

The air dry clay rose petal
Then I used my fingers to flatten it into a circle and rolled the circle into the “center” of the rose.

Almost done with the bread clay rose
I rolled several more balls and flattened them into “petals” and wrapped them around the center. I added 7 petals to the center and formed a rose the size of a quarter or slightly larger.
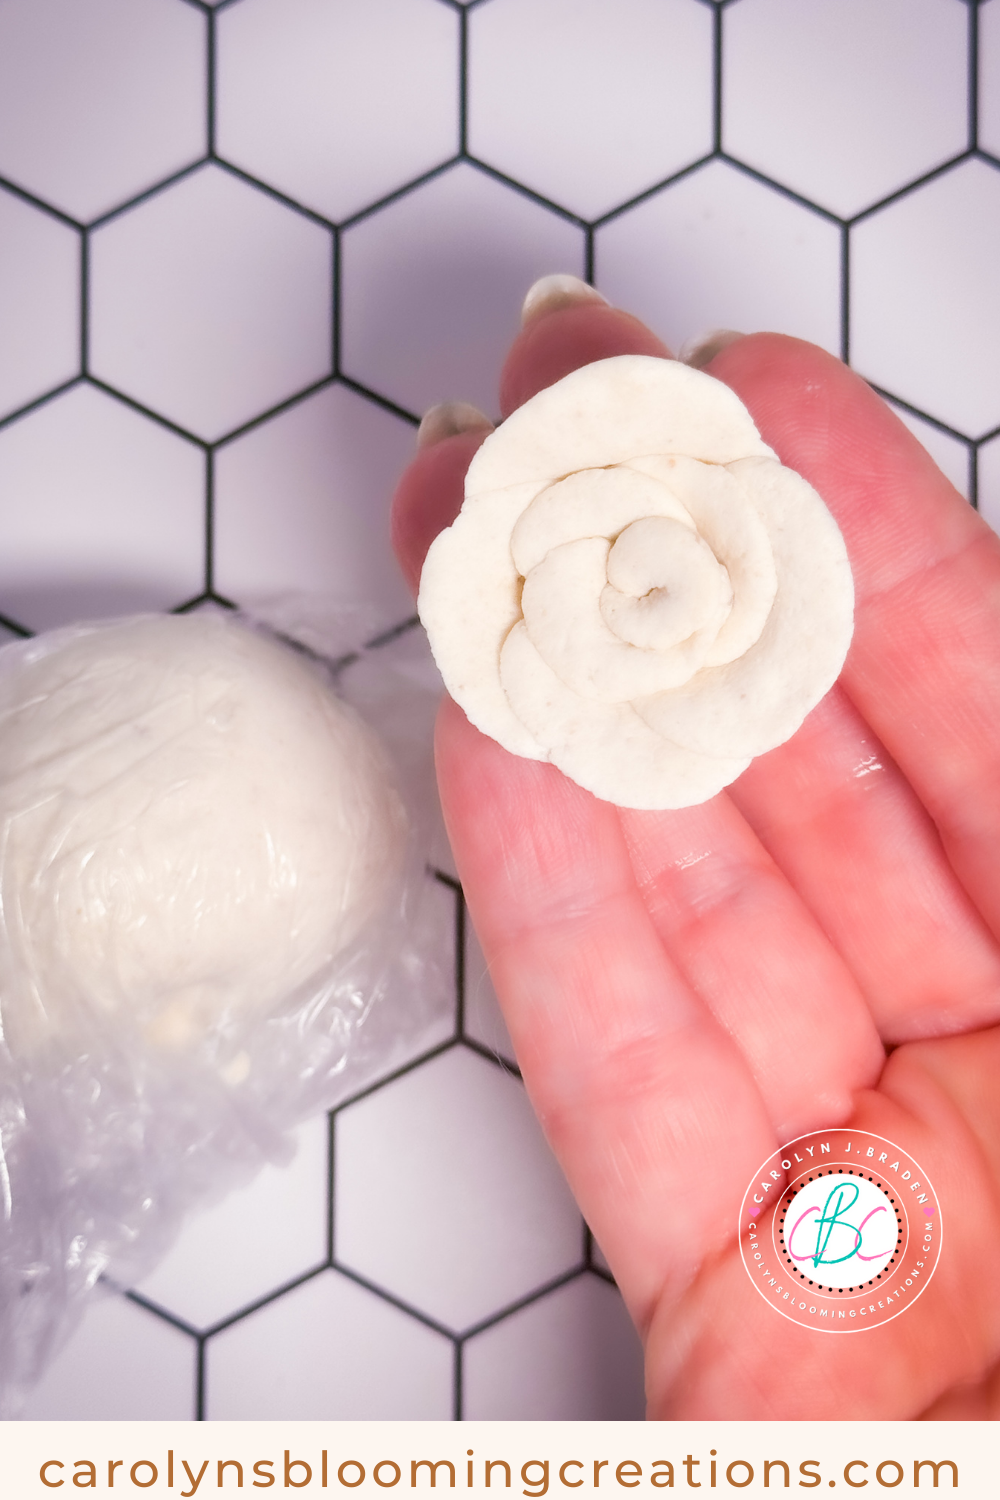
The completed air dry bread clay rose
Making them as tiny as my aunt did for my baby photo is hard and mine was definitely bigger, but you can make them as large or as small as you need them.
If you loved this article, we think you’ll love this one too: How to Make Faux Jadeite Pumpkins for Cute Fall Decor
Carolyn J. (C.J.) Braden is the owner of Carolyn’s Blooming Creations is a regular contributor and editor for CBC. She has been featured in numerous media publications such as InStyle Magazine, on HGTV, on Bustle.com, and more. She is the author of the books Georgia McMasters in Amethyst Lake Cemetery, How To Be Yourself: 3 Ways To Help You Being You, and the illustrator for the children’s book Bridging Connections. She is a former classroom teacher that now dedicates her life to educating others on how to live their most healthy, creative and happy life. Learn more about her visiting our About Us page.