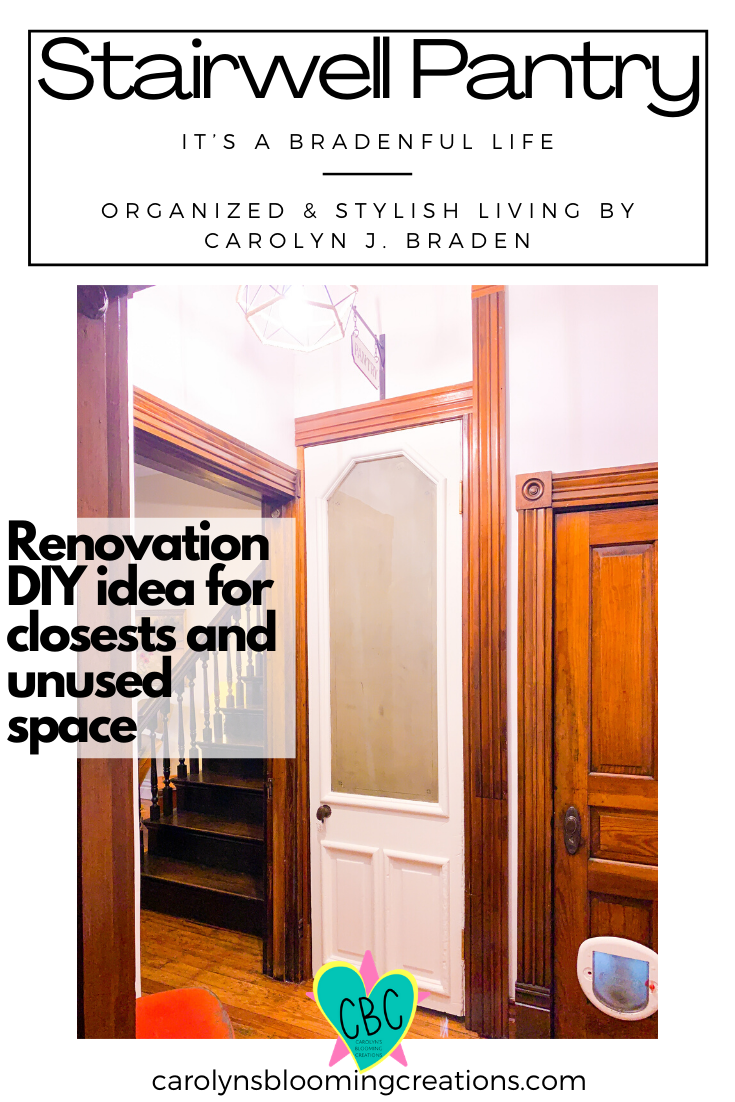
Make great use of every square inch in your home!
Renovations are never easy. They seem almost impossible BUT something I’ve learned in the last 12 years of my life: NOTHING IS IMPOSSIBLE.
As we prepare to move out of our urban 1800’s home (and into a new home in a new state), I started looking at many of our “before” photos and realized that we did A LOT over the last 12 years. It was simply terrible before. It wasn’t clean, it wasn’t loved. It was a sad foreclosure in desperate need of some love. And we gave it just that.
There wasn’t a room we didn’t completely rip out and start over on. My husband loves This Old House (the magazine and show), so he studied everything carefully before making decisions on what to rip out and what to keep. Anything that was salvageable was either reused somewhere in the home or donated to local charity organizations. Very little was deemed “junk” as we try to live by the phrase “reduce, reuse and recycle”.
Here is how we created our STAIRWELL PANTRY
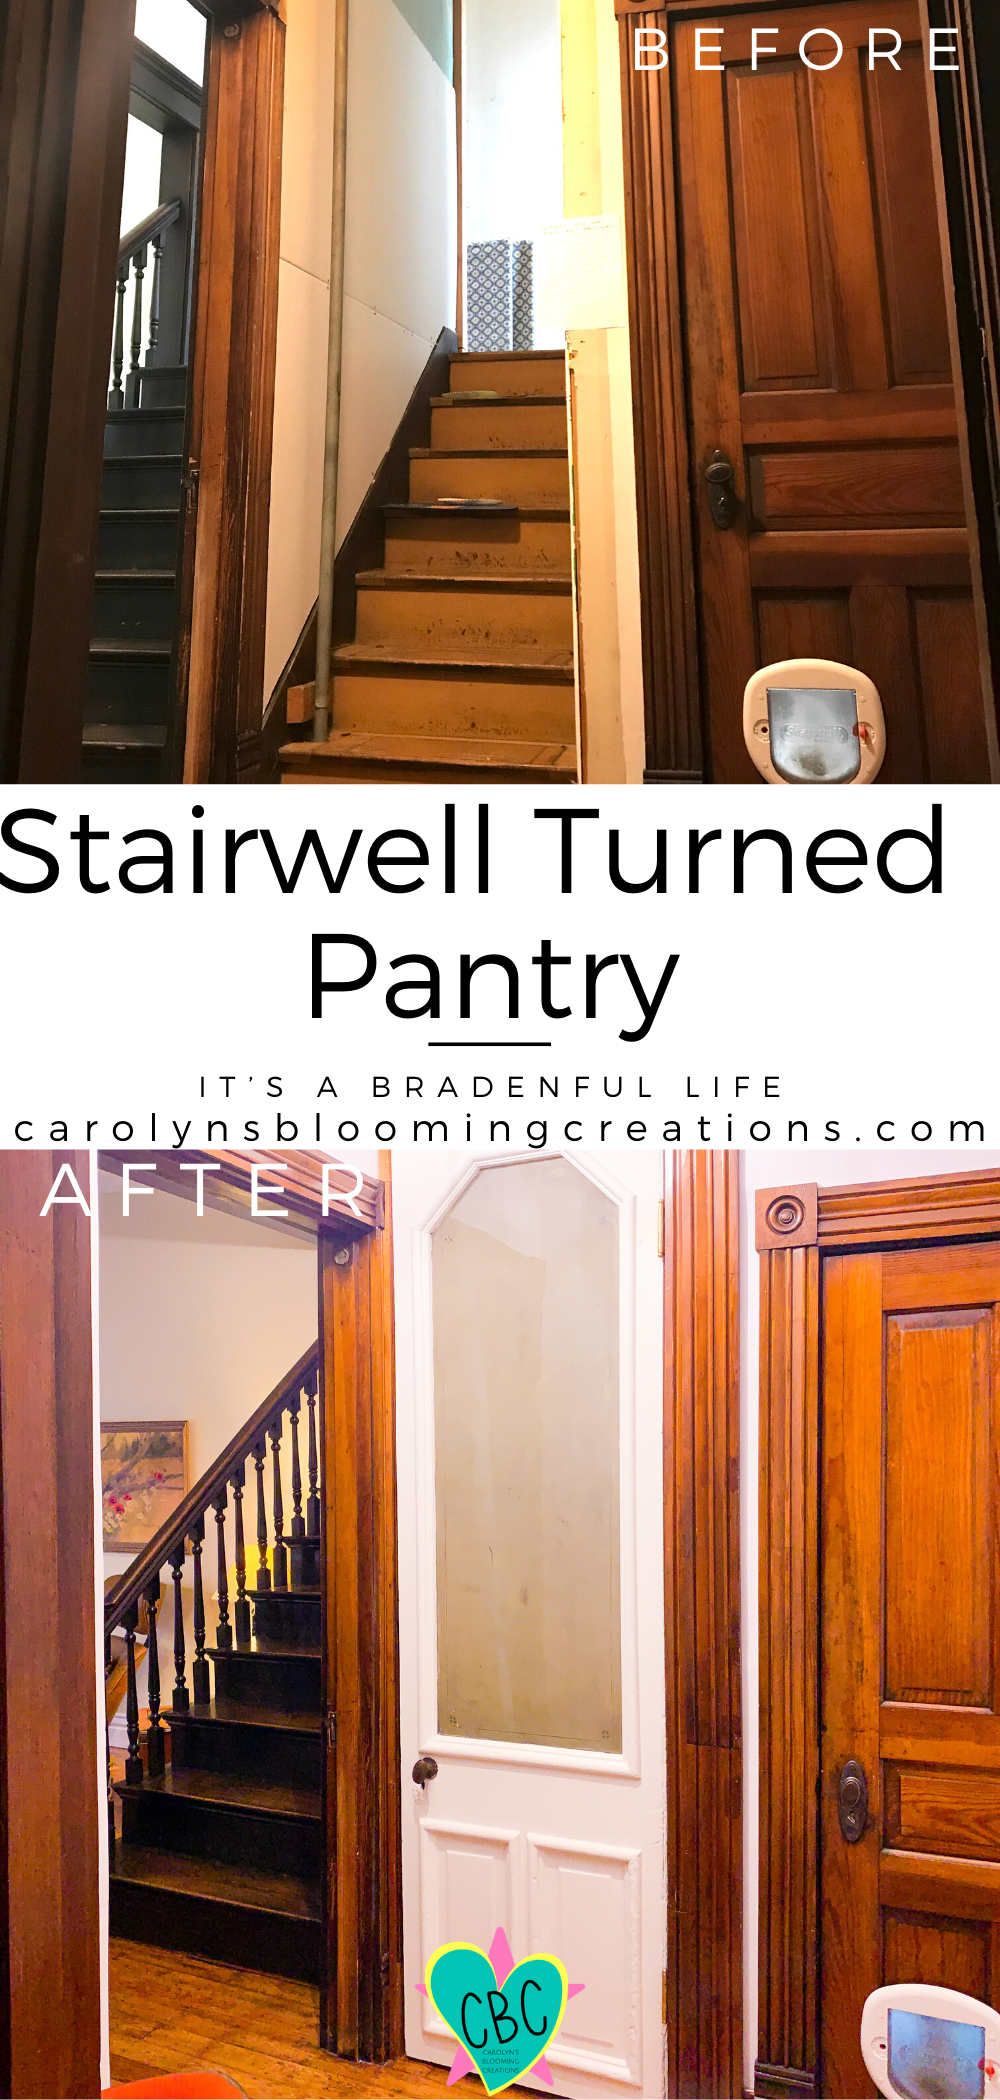
The “extra” stairwell was a “servant stairwell” once upon a time. It was a plain staircase strangely located right next to the grand foyer staircase, with a wall in between the two. Most homes in our area had the second stairwell in the back of their home or branching off the kitchen. Ours was not like that.
Many people that toured our home over the years always seemed to think you could plow down the wall between the two stairwells and make it into one big one, but it wasn’t as easy as that, as the stairs didn’t match up. Doing that would have required having a structural engineer come in and see if it was even possible, among many other people actually complete the work for us (as that was out of our DIY range). We didn’t see the point of that, as it wasn’t financially wasn’t a good idea when it came to resell value, etc.
So, I had an idea to turn it into a pantry.
With our kitchen not having a lot of cabinets for bulk food (I designed it with a more “open shelving” restaurant style in mind), a pantry just made sense. We didn’t need a second staircase for any reason at all.
After lots of coaxing, my husband agreed it was a good idea. He had done soooooo many things to this house, and he was simply exhausted and I got that. BUT…..with knowing we were going to sell the house, I thought about a family buying it. I thought it would be nice to have a large area to store food (and more) that didn’t require a trip to the cellar-like basement, where we used to store our bulk food items. After a couple of weeks of rest, my husband became excited to see what cool thing he could once again create in the house.
Here’s how we did it:
The stairwell had irreparable crumbling plaster walls in some of the rooms when we first purchased it. A while ago, my husband hung new drywall in the stairwell and finished out the entire area himself. He painted it a shade of white to match the hallways that surrounded it.
I painted the stairs with two colors of paint. I used a Behr paint specifically formulated for floors.
A couple of years after finishing off the stairwell area, my husband started the pantry transformation. He cut and secured shiplap (which we purchased at Home Depot) to the top (the backside) of the stairwell. We were lucky there was a bit of space on the trim to fit the thin shiplap right into without it looking out of place. It also matched the wall behind it, so it looked great, design wise. He then painted it a shade of white on both sides to match the surrounding walls.
We then found a tall, antique door (one that had glass in it, as I preferred it as a pantry door) via Facebook Marketplace. My husband figured out what measurements we needed, found someone that happened to sell antique doors from their farm in Indiana, and messaged them. My husband liked one they had for sale and it’s measurements were perfect, so he drove to their farm with his dad and bought it. It was PERFECT.
Once we had the door, my husband had to create a door frame. He researched how to do it via the This Old House website. He has learned so much from that site! It took a little while to get it perfect, as there is some slight natural sloping to the old house. But, when he got it, HE GOT IT! Once the frame was secure, he hung the door. Since it didn’t have a good latch still existing, we installed a strong door magnet latch (which we purchased via Amazon) by the handle to keep the door closed, and it worked perfectly.
I lined the glass with painters tape, took the knob off, cleaned it all with a wet rag, and painted the door with three coats of Annie Sloan “Old White” chalk paint on both sides. This paint does not require stripping or sanding of the old paint, so it was a fairly quick process. If you want to learn more about my use of chalk paint (and how to use it) check out my other post about it by clicking here. After painting it, I waxed it with Annie Sloan chalk paint wax in Clear.
Next, we installed slim pantry shelves which we ordered from Amazon. They were ClosetMaid Adjustable 8-Tier Door and Wall Racks and we were able to fit 3 in the space on one of the walls. There was plenty of space to be able to put can goods, drink bottles, chip bags, garbage bags and anything that you could think of to put in a pantry. We used drywall anchors to ensure the shelves would be super secure.
I could reach almost all shelves (at being 5’1”) BUT some were just a bit out of reach. I ordered 32 inch grabber/reachers from Amazon to help me reach anything that was a little too high up.
On the opposite wall of the shelves, there was plenty of room for me to put some of the kitchen items I do not use on a daily basis like my Kitchenaid Mixer, food processor, etc.
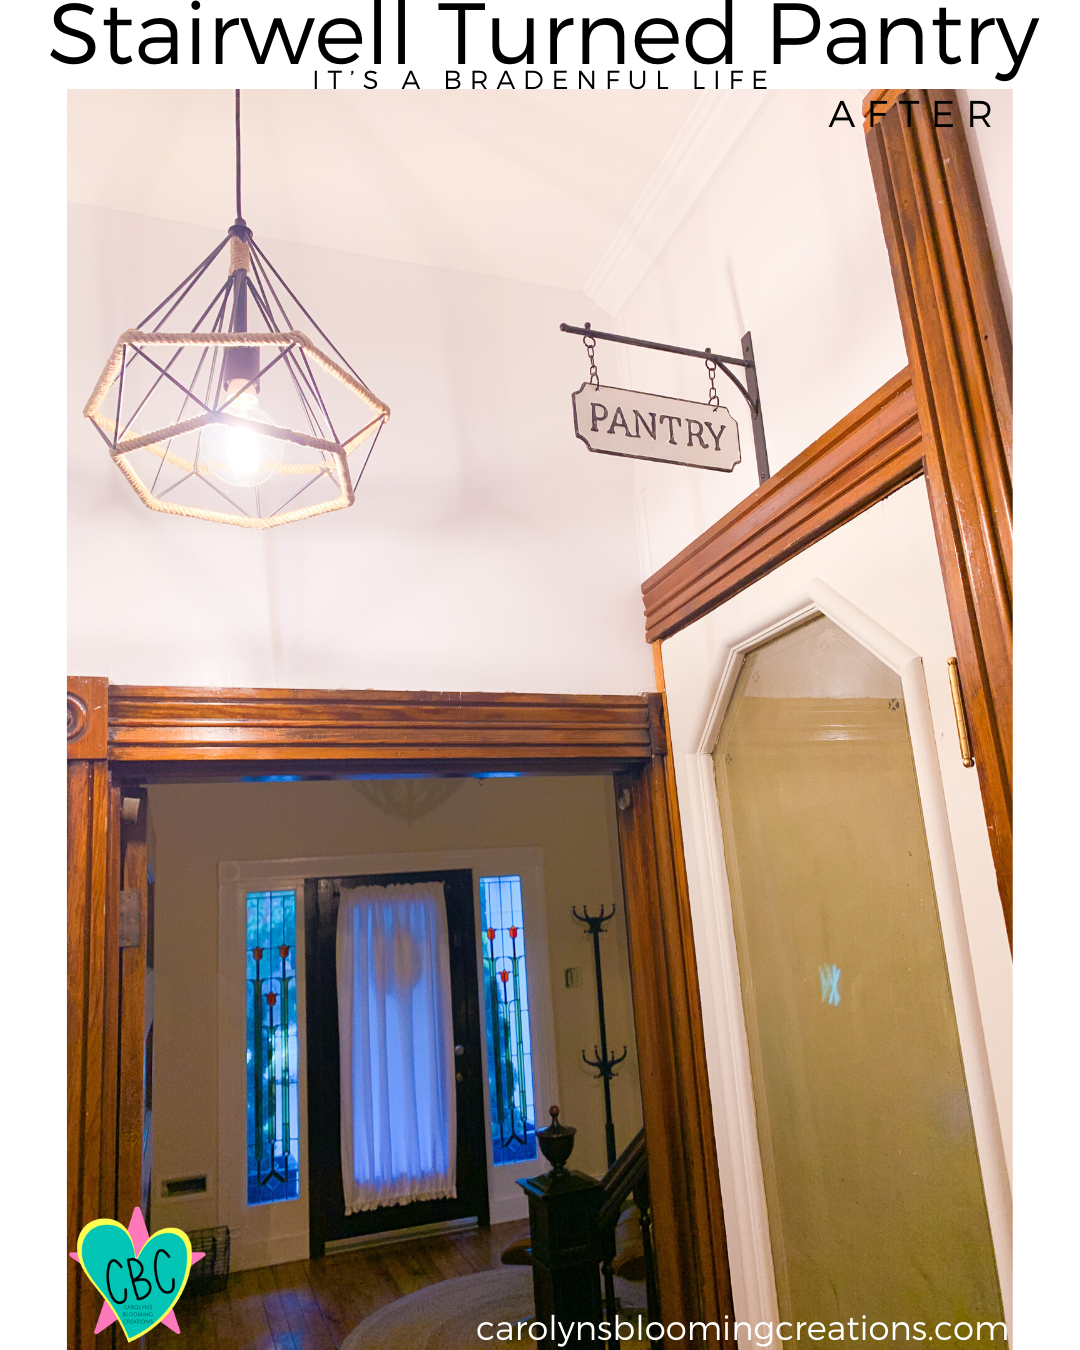
The space did not have a light but with having a hanging light right outside the door, it helped you easily be able to see inside the pantry. To make the space even brighter, we hung two very bright battery operated spotlights on the wall opposite the shelves. They operate on a remote switch, which we attached to a pole inside the pantry. We ordered them off of Amazon and we were really impressed with them!
To finish the pantry look, we hung a “rustic” looking hanging pantry sign outside the door (above it) which we purchased from Amazon.com
I truly love this space now! It’s highly functional and makes use of all the square footage in the home in a smart way. I’m sure the new family that purchased our home will love it as much as I do!
See all the before and after photos below!
More of our DIY’s can be found on our YouTube channel, “Carolyn Braden”.
If you have any questions for us, visit our Contact Us page and send us a note! We love helping other DIYer’s out there!
All designs and creations by Tommy and Carolyn Braden
Pin me! carolynsbloomingcreations.com
All designs and creations by Tommy and Carolyn Braden
Pin me! carolynsbloomingcreations.com
All designs and creations by Tommy and Carolyn Braden
Pin me! carolynsbloomingcreations.com
All designs and creations by Tommy and Carolyn Braden
Pin me! carolynsbloomingcreations.com
All designs and creations by Tommy and Carolyn Braden
Pin me! carolynsbloomingcreations.com
All designs and creations by Tommy and Carolyn Braden
Pin me! carolynsbloomingcreations.com
All designs and creations by Tommy and Carolyn Braden
Pin me! carolynsbloomingcreations.com
All designs and creations by Tommy and Carolyn Braden
Pin me! carolynsbloomingcreations.com
All designs and creations by Tommy and Carolyn Braden
Pin me! carolynsbloomingcreations.com
All designs and creations by Tommy and Carolyn Braden
Pin me! carolynsbloomingcreations.com
All designs and creations by Tommy and Carolyn Braden
Pin me! carolynsbloomingcreations.com


